Every time it involves performing a DDOS attack or making a Ransomware, one other query raises with it. How to create own botnet army for DDOS? Here in this detailed article we are going to discuss that how we can create own botnet army and use them for Cryptojacking, DDOS attack etc. But Before that,
Warning:- Using bots or botnet or DDOS on other’s device/network without permission is illegal. This article is written for educational and awareness purpose only. Learn the things and stay safe, learning things are not illegal but using the knowledge against law is illegal. We have demonstrate things on the devices/networks that we own.
What is Botnet?
A botnet is a group of internet-connected gadgets that an attacker has compromised. Botnets act as a drive multiplier for particular person attackers, cyber-criminal teams and nation-states trying to disrupt or break into their targets methods. Generally utilized in distributed denial of service (DDoS) attacks, botnets can even make the most of their collective computing energy to ship giant volumes of spam, steal credentials at scale, or spy on individuals and organizations.
Making a steady Botnet shouldn’t be straightforward. Many so called specialists promote botnet on the Darkweb. Most of them don’t work, they just fake it. In the event you purchase Botnet from others your cash or crypto could waste.
We never recommend you infect other’s units, however we’re going to show how we will create our personal Botnet using a python based tool called BYOB. This demonstration will assist us to stop yourself from most of these assaults.
How to Create Botnet on Kali Linux
Installing and Initial Setup
First of all we need to download BYOB on our system. We open our terminal and use following command to clone BYOB from GitHub.
git clone https://github.com/malwaredllc/byob
After applying the above command BYOB will be downloaded on our working directory. It is little bit bigger (38 MB for current version), so the download time will depend on our internet connection speed.
This tool has classic terminal based botnet generator along with modern web-based GUI for creating botnet. Web based interface will be easier for everyone so need to navigate to byob/web-gui directory (for terminal based interface we need to go inside the byob/byob directory), We use following command to do so:
cd byob/web-gui
The following screenshot shows the files under the directory:
Now we need to install the requirements to run BYOB by using following command:
sudo pip install -r requirements.txt
For web-based interface installing requirements might take long, we can take a Coffee Break  .
.
After the requirements process is complete we will run the startup.sh script for first time installation to setting up everything.
sudo ./startup.sh
This will download and setup some dependencies and it also may consume our time depending on our system performance and internet speed. We need to finish it. Collecting requirements and stating up these are required for first time installation only. Once we did everything perfect we don’t need to repeat previous steps every time we are going to run this tool.
Running the Botnet
Then we need to give permission to run.py file and make it executable by using following command:
sudo chmod +x run.py
Then we can run the web interface by using following command:
python run.py
After running the above command we can see that our Flask based web server is running on our localhost (http://0.0.0.0:5000), as we can see in the following screenshot.
Now we can open the localhost link on our browser and see that our BYOB web based interface.
We can see here already have a beautiful “Getting Started” guide, but we will do the things. First of all we need to create an admin account to use this tool. We need to navigate to the “Register” option on top right corner.
Here we need to choose a Username and Password (8 character) for our this localhost web server. We can choose anything we want then we click on “Sign Up” button.
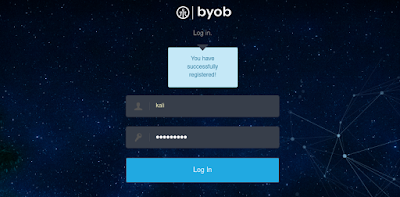
After we register we got the login page. We need to provide our registered username and password hare to login.
After that we can see the botnet control panel in front of us, as we can see in the following screenshot.
This is our control panel, we can control our payloads directly from here. On the top menu bar we can see the “Payload” options, from there we can create our botnets let’s go there.
Here we got some options to choose. It can produce two types of payloads (botnets):
- Python – Obfuscated Python script. The file size is quite small, however, it requires Python be installed on the target system to run.
- Executable – Compile a binary executable for a target operating system (exe for Windows sh for Linux) and architecture. This will run on systems which do not have Python installed, however, the file size is larger.
Here for an example we choose our Windows machine as a target, and suppose we don’t have Python installed on our target machine. So we need to create an executable payload for Windows system. We choose Format: Executable, Operating System: Windows, Architecture: x32 then click on “Generate” button.
Then the process will be started (This can take a few minutes, please be patient).
Source: Read More


