

Ollama has been a game-changer for running large language models (LLMs) locally, and I’ve covered quite a few tutorials on setting it up on different devices, including my Raspberry Pi.
But as I kept experimenting, I realized there was still another fantastic way to run Ollama: inside a Docker container.
Now, this isn’t exactly breaking news. The first Ollama Docker image was released back in 2023. But until recently, I always used it with a native install.
It wasn’t until I was working on an Immich tutorial that I stumbled upon NVIDIA Container Toolkit, which allows you to add GPU support to Docker containers.
That was when I got hooked on the idea of setting up Ollama inside Docker and leveraging GPU acceleration.
In this guide, I’ll walk you through two ways to run Ollama in Docker with GPU support:
- Using a one liner
docker runcommand. - With Docker compose
Now, let’s dive in.
Prerequisite: Installing Nvidia Container toolkit
The NVIDIA Container Toolkit includes the NVIDIA Container Runtime and the NVIDIA Container Toolkit plugin for Docker, which enable GPU support inside Docker containers.
Before installation, make sure that you have already installed the GPU drivers on your specific distro.
Now, to install the NVIDIA Container Toolkit, follow these steps:
- Enable the NVIDIA CUDA repository on your system by running the following commands in a terminal window:
distribution=$(. /etc/os-release;echo $ID$VERSION_ID)
curl -s -L https://nvidia.github.io/nvidia-docker/gpgkey | sudo apt-key add -
curl -s -L https://nvidia.github.io/nvidia-docker/$distribution/nvidia-docker.list | sudo tee /etc/apt/sources.list.d/nvidia-docker.list
sudo apt update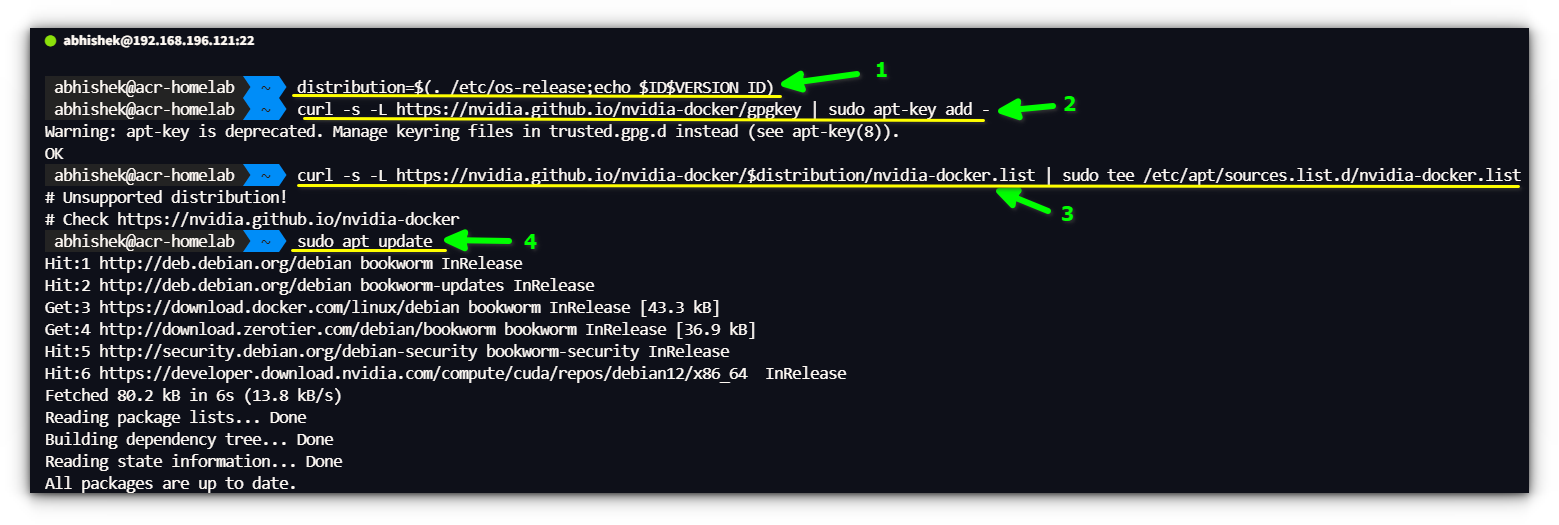
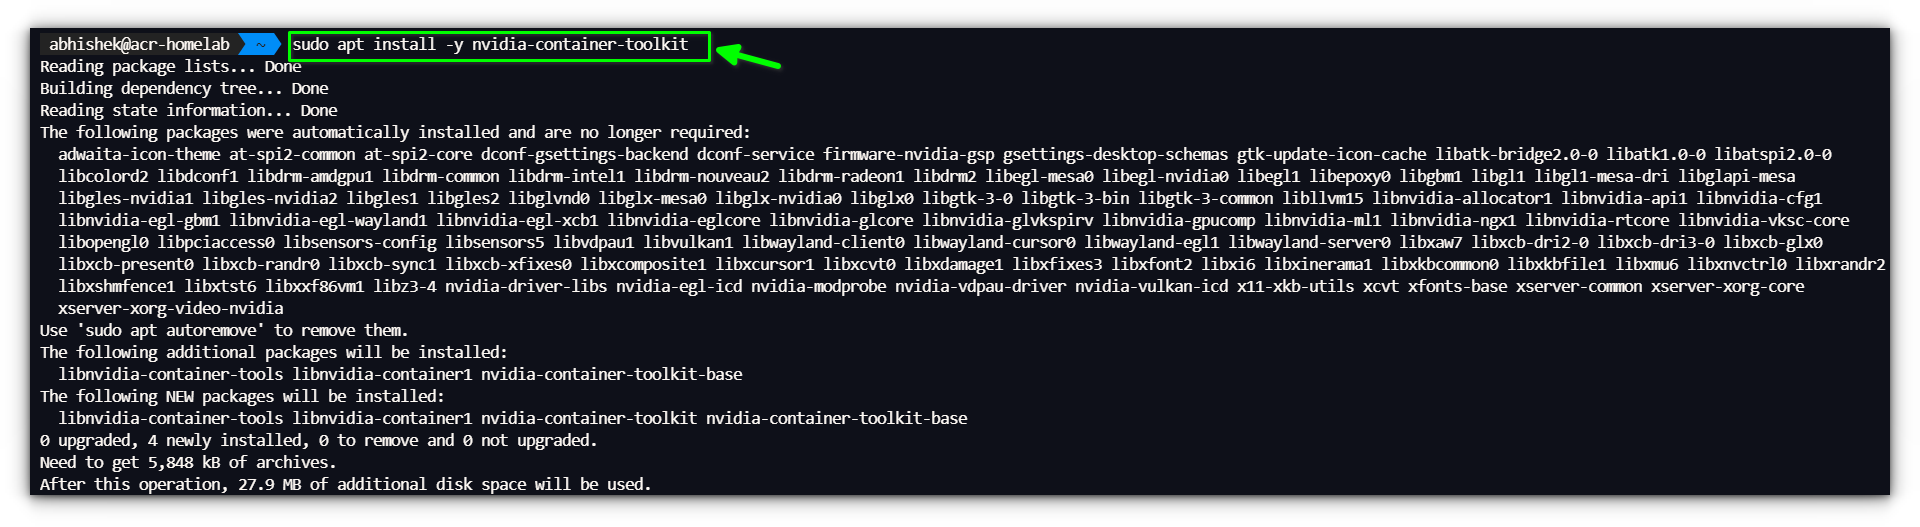
- Install the NVIDIA Container Toolkit by running the following command in a terminal window:
sudo apt install -y nvidia-container-toolkit
- Restart the Docker service to apply the changes:
sudo systemctl restart docker
Method 1: Running Ollama with Docker run (Quick Method)
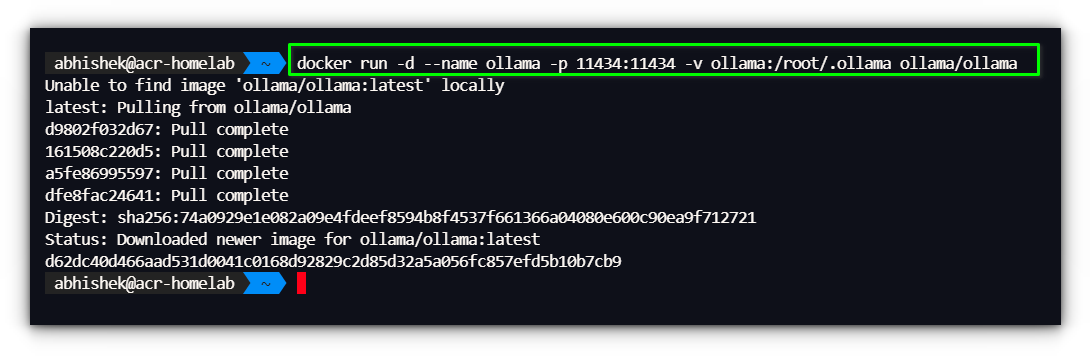
If you just want to spin up Ollama in a container without much hassle, this one-liner will do the trick:
docker run -d --name ollama -p 11434:11434 -v ollama:/root/.ollama ollama/ollama
Or, if you want the GPU support:
docker run -d --gpus=all -v ollama:/root/.ollama -p 11434:11434 --name ollama ollama/ollamaHere’s a breakdown of what’s going on with this command:
docker run -d: Runs the container in detached mode.--name ollama: Names the container “ollama.”-p 11434:11434: Maps port 11434 from the container to the host.-v ollama:/root/.ollama: Creates a persistent volume for storing models.ollama/ollama: Uses the official Ollama Docker image.
Once the container is running, you can check its status with:
docker psMethod 2: Running Ollama with Docker compose
I personally find that docker compose is a more structured approach when setting up a service inside a container, as it’s much easier to manage.
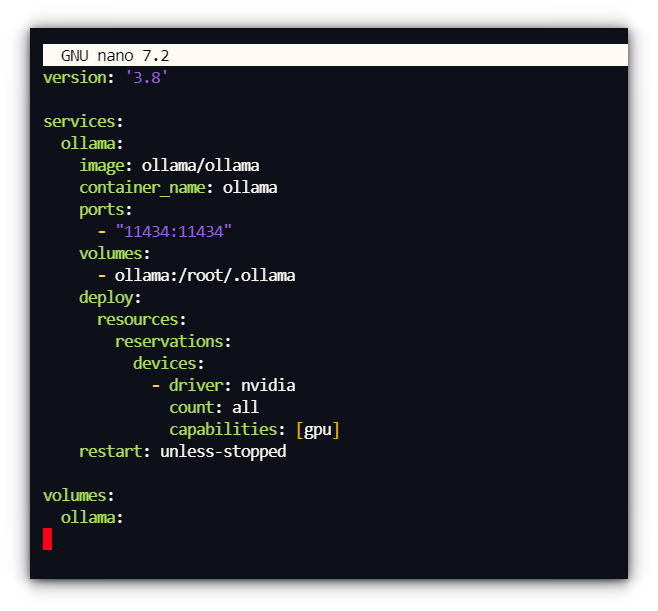
docker volumes instead of bind mounts for a less frustrating experience.We’ll start with creating a docker-compose.yml file, to manage the Ollama container:
version: '3.8'

services:
  ollama:
    image: ollama/ollama
    container_name: ollama
    ports:
      - "11434:11434"
    volumes:
      - ollama:/root/.ollama
    deploy:
      resources:
        reservations:
          devices:
            - driver: nvidia
              count: all
              capabilities: [gpu]
    restart: unless-stopped

volumes:
  ollama:
With the docker-compose.yml file in place, start the container using:
docker-compose up -d

This will spin up Ollama with GPU acceleration enabled.
Accessing Ollama in Docker
Now that we have Ollama running inside a Docker container, how do we interact with it efficiently?
There are two main ways:
1. Using the Docker shell
This is really easy, you can access Ollama container shell by typing:
docker exec -it ollama <commands>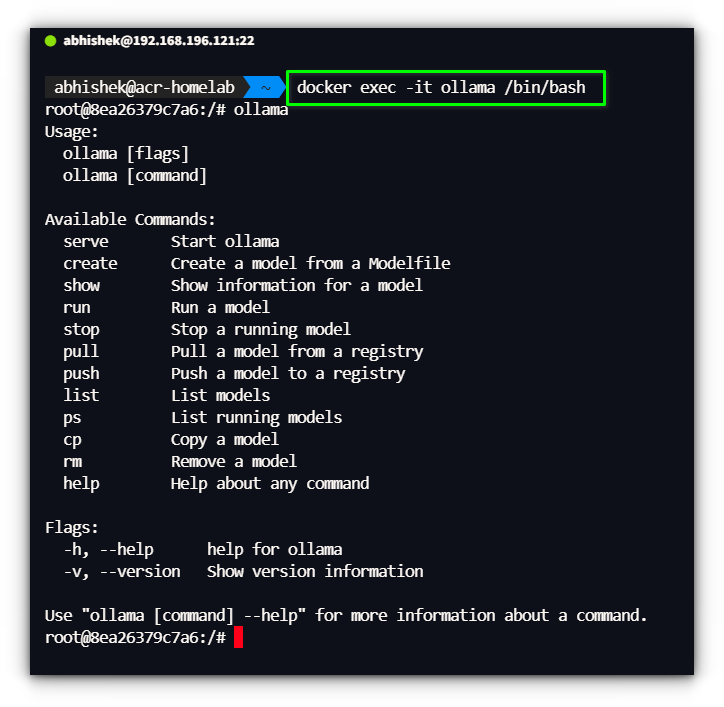
but typing this same command overtime can be tiring. We can create an alias to make it shorter.
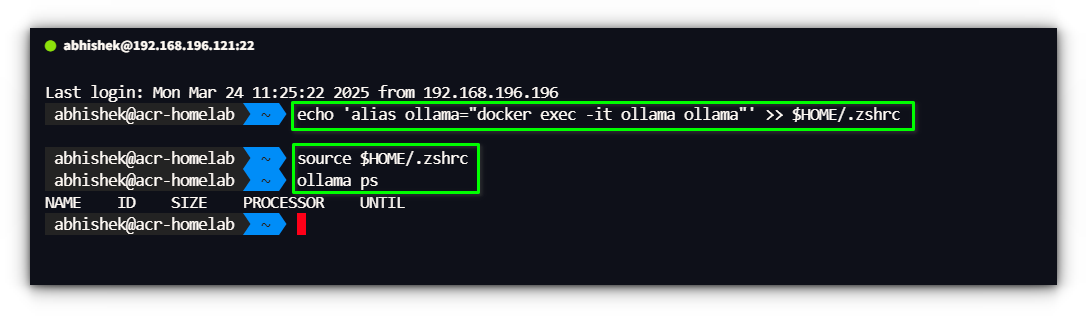
Add this to your .bashrc file:
echo 'alias ollama="docker exec -it ollama ollama"' >> $HOME/.bashrc
source $HOME/.bashrc
and since I’m using zsh shell, I’ll be using this command:
echo 'alias ollama="docker exec -it ollama ollama"' >> $HOME/.zshrc
Now, instead of typing the full docker exec command, you can just run:
ollama ps
ollama pull llama3
ollama run llama3
This makes interacting with Ollama inside Docker feel just like using a native install.
2. Using Ollama’s API with Web UI Clients
Ollama exposes an API on http://localhost:11434, allowing other tools to connect and interact with it.
If you prefer a graphical user interface (GUI) instead of the command line, you can use several Web UI clients.
Some popular tools that work with Ollama include:
- Open WebUI – A simple and beautiful frontend for local LLMs.
- LibreChat – A powerful ChatGPT-like interface supporting multiple backends.
We’ve actually covered 12 different tools that provide a Web UI for Ollama.
Whether you want something lightweight or a full-featured alternative to ChatGPT, there’s a UI that fits your needs.
Conclusion
Running Ollama in Docker provides a flexible and efficient way to interact with local AI models, especially when combined with a UI for easy access over a network.
I’m still tweaking my setup to ensure smooth performance across multiple devices, but so far, it’s working well.
On another note, diving deeper into NVIDIA Container Toolkit has sparked some interesting ideas. The ability to pass GPU acceleration to Docker containers opens up possibilities beyond just Ollama.
I’m considering testing it with Jellyfin for hardware-accelerated transcoding, which would be a huge boost for my media server setup.
Other projects, like Stable Diffusion or AI-powered upscaling, could also benefit from proper GPU passthrough.
That said, I’d love to hear about your setup! Are you running Ollama in Docker, or do you prefer a native install? Have you tried any Web UI clients, or are you sticking with the command line?
Drop your thoughts in the comments below.
Source: Read More
