Hyprland is a highly customizable Wayland tiling compositor known for its eye-catching aesthetics and impressive performance. With such a high degree of customization, one important feature that many users seek is the ability to take screenshots.
Whether for sharing on social media or saving essential screen details for future reference, capturing your screen is an essential task.
In this article, we will explore various methods to set up screenshot functionality on your Hyprland installation.
First Option: Grimblast
Grimblast is an official Hyprland screenshot utility offering various options.
It is a shell script, that uses tools like grim and slurp to take screenshots.
Installing Grimblast
Before installing Grimblast, we need to get the required dependencies. On Arch Linux, use the following command:
sudo pacman -Syu jq grim slurp wl-clipboard libnotitfy hyprpicker
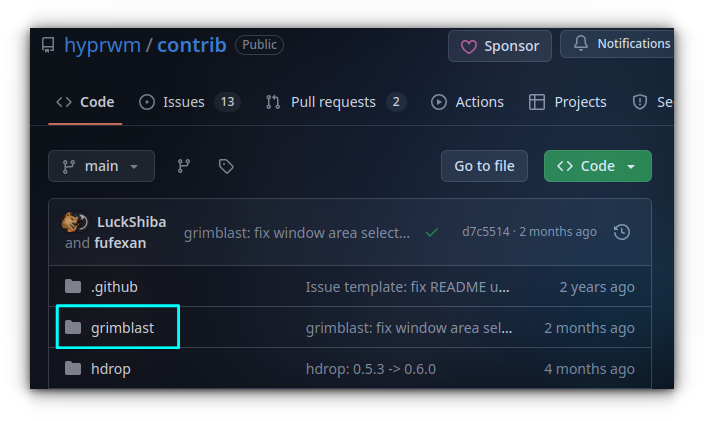
Grimblast is not available in the package manager of applications. To install, first go to the official repo of the project and go to the grimblast folder.
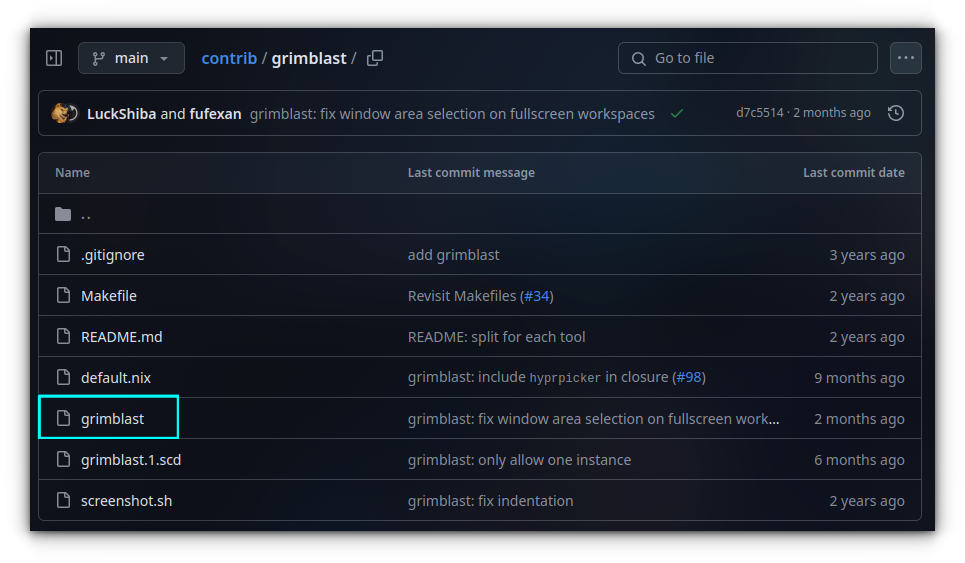
Here, go to the script file ‘grimblast’ and click on it to access.
Here, click on the download icon on the top-right corner of the code page to start downloading it.
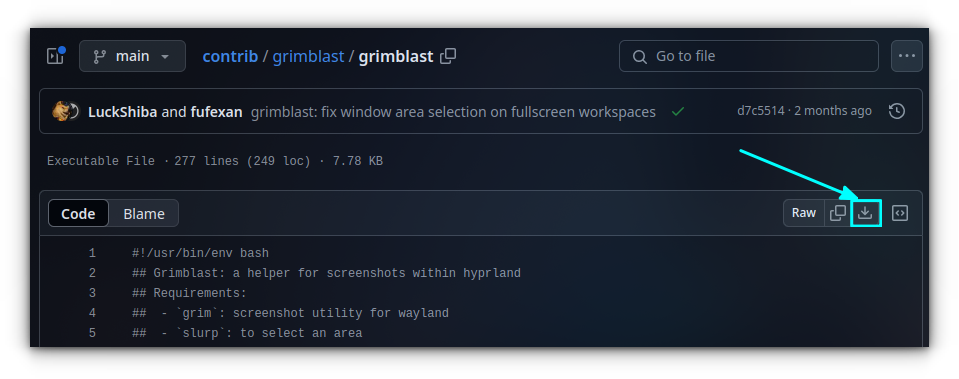
Once downloaded, go to the download location and give it execution permission.
chmod +x ./grimblast
Now, copy the file to a directory that is in your PATH.
sudo cp ./grimblast /usr/local/bin/
Using Grimblast
Grimblast has several useful options. We will be taking a look at some items in the table below:
| Command | Description |
|---|---|
| grimblast save active | Save the screenshot of active window |
| grimblast save area | Save the screenshot of a rectangular area selectable with mouse. |
| grimblast –notify copy active|area|output|screen | Take the screenshot of respective area and copy it to clipboard and notify the user. |
| grimblast –cursor copysave area | Copy the screenshot of the selected window area along with cursor to the clipboard. Also save the image to Pictures directory. |
Grimblast supports the following area of screenshots:
active: Current active window.screen: All visible outputs.output: Currently active output/monitor.area: Manually selected rectangular area/window.
1. Open the image in an editor
Grimblast supports opening the screenshot in a selected image editing application. By default, this is set as GIMP.
So, if you have GIMP installed, you can use the command:
grimblast edit area
The above command will take a screenshot of an area and open it in GIMP.
If you are using another image editor like Photoflare, you can use that program by configuring the GRIMBLAST_EDITOR environment variable.
On your ~/.config/hypr/hyprland.conf file, use the following line:
env = GRIMBLAST_EDITOR,photoflareThat’s it. Now, when a screenshot is taken, it is opened in the selected editor.
2. Move the screenshot area
While taking region screenshots, you can move the screenshot view port. For this, when the screenshot key is pressed, and a region is selected, hold down the Space key without releasing the mouse click.
Now, without releasing the mouse click, drag the mouse to move around the screenshot area.
You can release the space key, and continue the resizing of the screenshot as well.
3. Add Grimblast Keybindings
You should be using Grimblast only through keybindings.
On Hyprland configuration file, add the line:
bind = , PRINT, exec, grimblast copysave area
bind = $mainMod_SHIFT, PRINT, exec, grimblast copysave output
The above command will save a screenshot of the selected area or window to ~/Pictures directory when you hit the PrtScr key. It will also be copied to your clipboard. The Super + SHIFT + PrtScr key will save a screenshot of currently active output, with the same will be copied to clipboard as well.
Second Option: Hyprshot
Hyprshot is an exclusive screenshot utility designed specifically for Hyprland.
It is a straightforward tool that does exactly what it’s meant for: taking screenshots.
If you have read through the GitHub page of this tool, you will realize that it is primarily a shell script that serves as a wrapper around tools like grim, slurp, and others to take screenshots in Wayland environment. Furthermore, it is specially tailored to work with Hyprland, which is the most important thing here.
Installing Hyprshot
Before installing Hyprshot, first we need to get the dependencies. On Arch Linux, use the following command:
sudo pacman -Syu jq grim slurp wl-clipboard libnotitfy hyprpicker
Once the dependencies are installed, let’s install Hyprshot:
yay -S hyprshot
If you are using any other distribution, go to the official GitHub page of Hyprshot and download the release file.
Once done, extract the archive file, and you will get a shell script file called hyprshot. Go inside the extracted location and make this script file executable:
chmod +x ./hyprshot>
Now, copy this file to a directory in your PATH to make it available everywhere.
sudo cp ./hyprshot /usr/local/bin/
That’s it!
Setting Hyprshot
Once installed, it’s time to configure. Open your hyprland.conf file using any of your favorite text editor.
nano ~/.config/hypr/hyprland.conf
Inside this file, go to the end and add a key binding for Hyprshot. To make everything look neat, we will create a section using comment called Hyprshot Screenshots.
# Hyprshot Screenshots
bind = , PRINT, exec, hyprshot -m region
bind = $mainMod_SHIFT, PRINT, exec, hyprshot -m window
Here, we have set two keybindings with the values. To take a screenshot of a rectangular region:
hyprshot -m region
And to take the screenshot of an open window, you type in:
hyprshot -m window
There are other options available with Hyprshot, let’s take a brief look:
| Option | Description |
|---|---|
| hyprshot -m window | Take the screenshot of open window. |
| hyprshot -m region | Take the screenshot of a rectangular region. |
| hyprshot -m output | Take the screenshot of a selected display/monitor. |
| hyprshot -m active | Take the screenshot of an active window. |
| –clipboard-only | Use this option with other options to not save the image, but only copy to clipboard. |
Did you know you can also freeze the screen?
An interesting use-case that you can pull off is to freeze the screen while taking a screenshot. For this to work, you should have hyprpicker installed.
Once you have Hyprshot and Hyprpicker, you can use the -z option to freeze the screen.
For example, to take the screenshot of a rectangular region with screen frozen, use the command:
hyprshot -zm region
To add this to the Hyprland config, use the keybinding command:
bind = , PRINT, exec, hyprshot -zm region
For those who only need to add it to the clipboard without saving, use:
bind = , PRINT, exec, hyprshot -zm region --clipboard-only
dunst is running, Hyprshot will notify you about the screenshot.Third Option: Flameshot
Flameshot is a great screenshot taking utility for Linux. But the default package available in the repos of distribution works mainly on Xorg-based distributions.
But, you can use the git version of Flameshot in Wayland-based systems like Hyprland. Let me tell you how.
Install Flameshot
First, remove any other Flameshot instance installed on your system (this is applicable for Arch users):
sudo pacman -Rs flameshot
Next, install the git version of Flameshot from the AUR. We will recommend using an AUR helper like yay to install the package.
yay -S flameshot-git
Wait for some time to compile the program and installation process to complete.
Once completed, you can open Flameshot from your app menu:
Flameshot offers better screenshot options compared to other items mentioned here. But, you should keep in mind that Flameshot is developed mainly for Xorg sessions, and the packaged versions may not work properly in Hyprland.
So, try out Flameshot as an experiment if you do not like the first two options.
Wrapping Up
While starting with Hyprland can be challenging for new users, you can do a great deal of things with ease, as mentioned above.
💬 How do you take screenshots on Hyprland? Let me know your thoughts in the comments below!
Source: Read More


