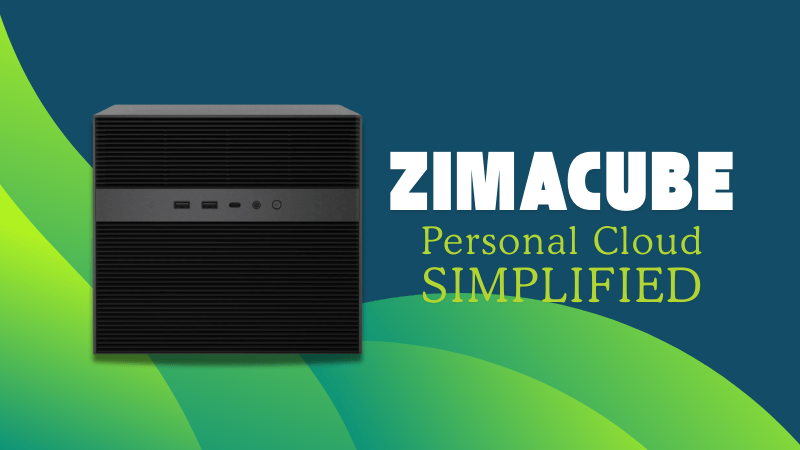
I normally would not have got excited for ZimaCube this much. But I have used their ZimaBoard and I liked it so much that it runs 24×7 in my home.
While ZimaBoard is a tiny device suitable for running a media server and a few other services like Immich, apt for a small starter homelab, ZimaCube takes that experience to the next level.
ZimaCube has better hardware specifications which makes it suitable for running a greater number of software. It also has NAS features provided by a combination of hardware and software. Add a small form factor GPU like Ada a2000 and you have a capable machine to run local AI.
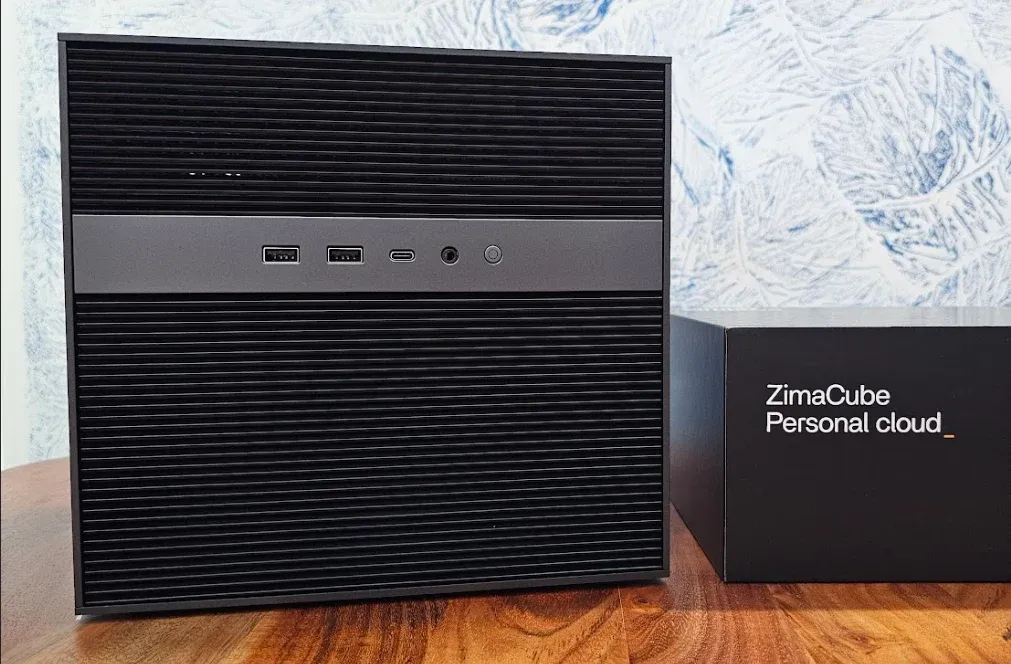
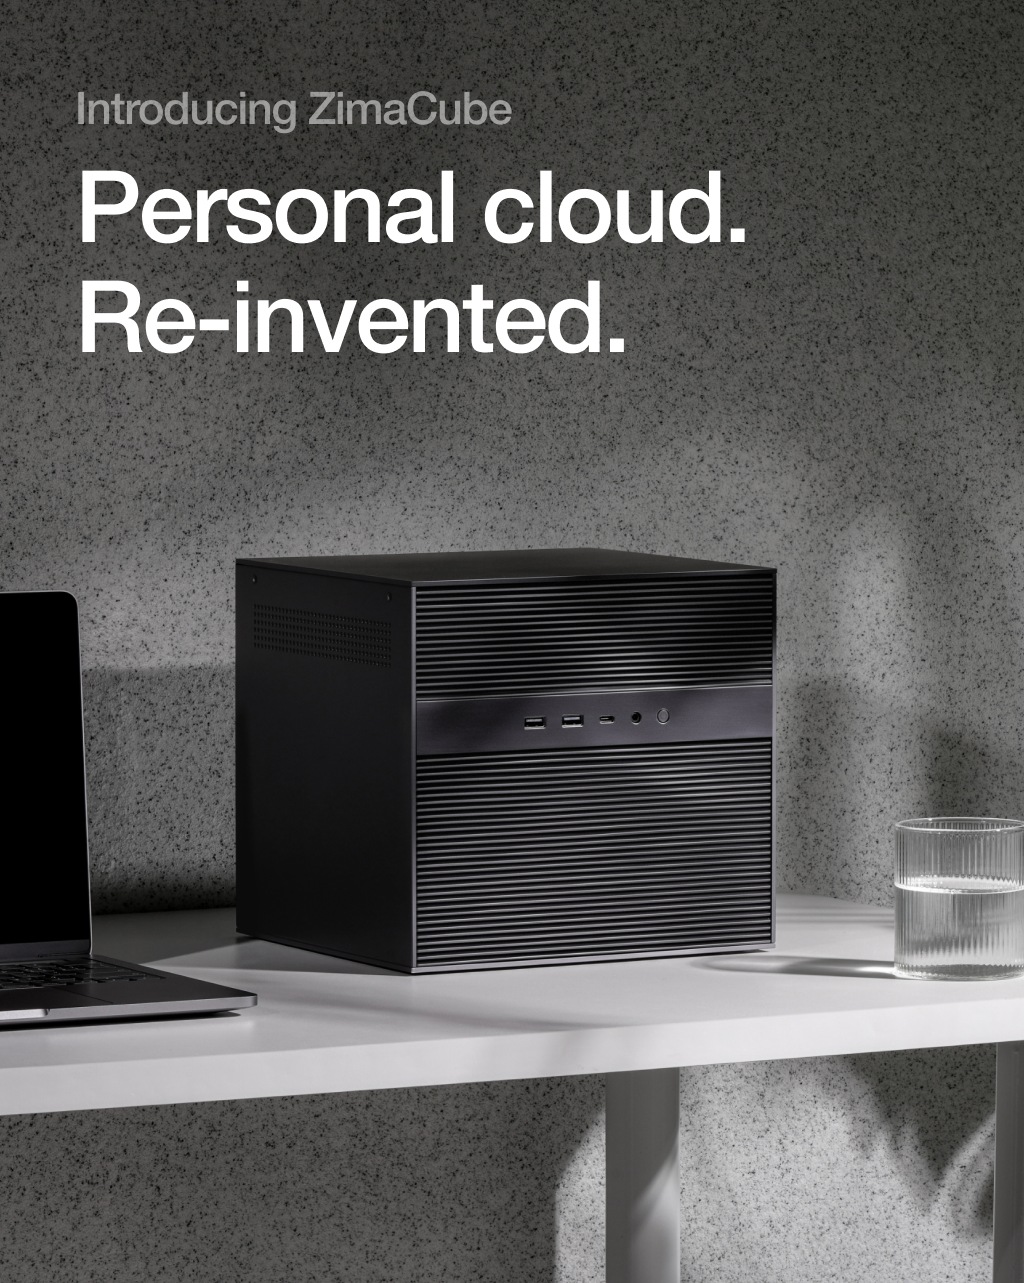
I like to see ZimaCube as a device that has two roles; a NAS and a local cloud/homelab. And it is quite evident from its physical appearance.
The device has two parts. The bottom part is a disk bay so that you can have 6 SATA HDDs/SSDs and 4 NVMe SSDs. The upper part has the motherboard, system storage, RAM etc and a PCIe slot for GPU and other components.
Interesting, right? Let me share more on ZimaCube and my experience with it.
ZimaCube Pro Specifications
ZimaCube is available in three models:
- ZimaCube Basic: Intel N100, 4-cores processor, 8 GB RAM (max 32 GB with 2 slots), 256 GB system storage
- ZimaCube Pro: Intel core i5 10-cores processor, 16 GB RAM (max 64 GB with 2 slots), 256 GB system storage
- ZimaCube Creator: Everything in Pro plus NVIDIA RTX 2000 and 64 GB RAM and 1 TB system storage
The device I have is ZimaCube Pro and it doesn’t have the GPU, although there is a PCIe slot for that.
10 Giga Ethernet, multiple Ethernet ports, Thunderbolt 4 ports, USB Type A and C ports, display and HDMI port, headphone jack. Except SD card (which is not needed for such a device).
- CPU:Â 12th generation Intel i5 processor (specifically, the Intel Core i5-1235U)
- GPU:Â Quadro RTX A2000 12 GB graphics card (only in the Creator Pack version)
- RAM:Â 16 GB of RAM (expandable to 64 GB in the Creator Pack version)
- Storage:Â 256 GB of system storage (expandable to 1 TB in the Creator Pack version)
- Expansion:Â 6x 3.5 or 2.5-inch SATA bays, 4x M.2 NVMe drive slot
- Ports:Â 4x USB 3.2 Gen 1 Type-A, 1x USB 3.2 Gen 1 Type-C, 2x USB 2.0, 1x PCIe Gen 3 x 4, 2x Display Port 1.4, 1x universal audio jack
- Networking:Â 2x 2.5GbE LAN, WiFi 6, Bluetooth 5.2
- OS:Â ZimaOS by default but Windows, Linux, OpenWrt, pfSense, Android, LibreELEC, TrueNAS, Unraid, PVE, OpenMediaVault and XCP-NG can also be installed
- Power:Â 19V 11.58A 200W external power supply (no internal PSU)
- Dimensions:Â 240 x 221 x 220 mm
- Weight:Â 8.3 kg
Hardware experience
The device is 240x221x220 mm in size. It’s not a cube in a strict mathematical sense but to the normal human eye, it does look like a cube.
ZimaCube Pro has Intel core i5, 10-core processor, which is modest at best.
There is a 6 SATA bay and a slot for 4 NVMe SSDs in the front.
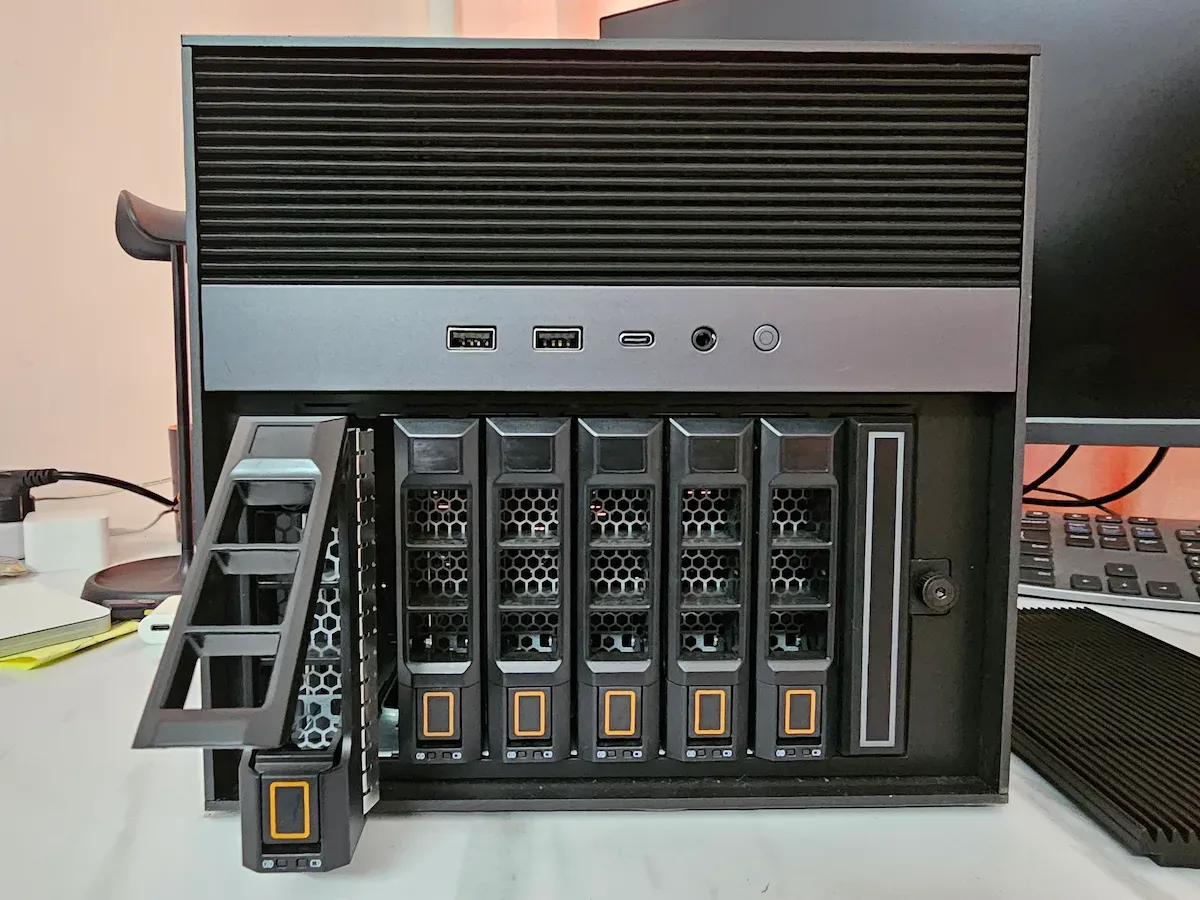
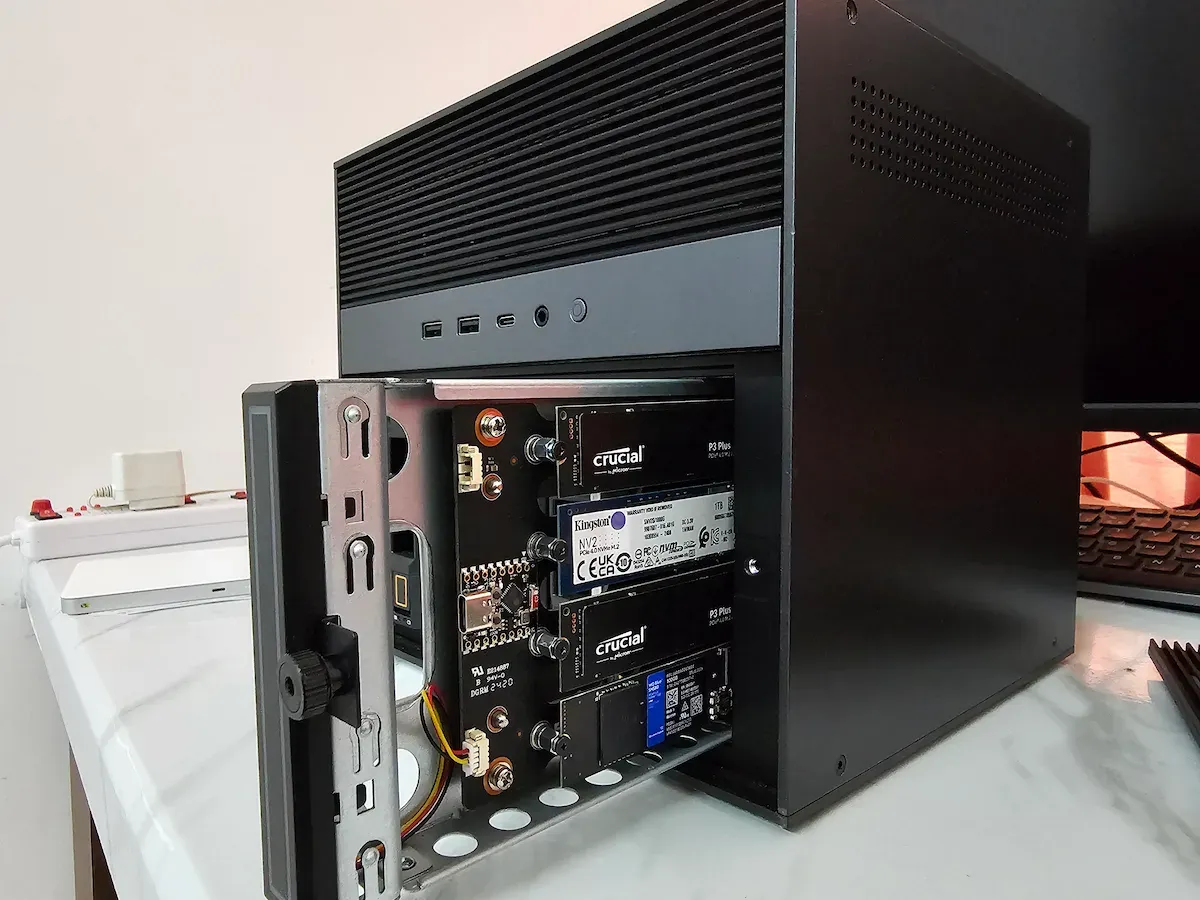
ZimaCube disk bay
Disk bay has a dual fan system at the back and the motherboard segment has a tower cooler.
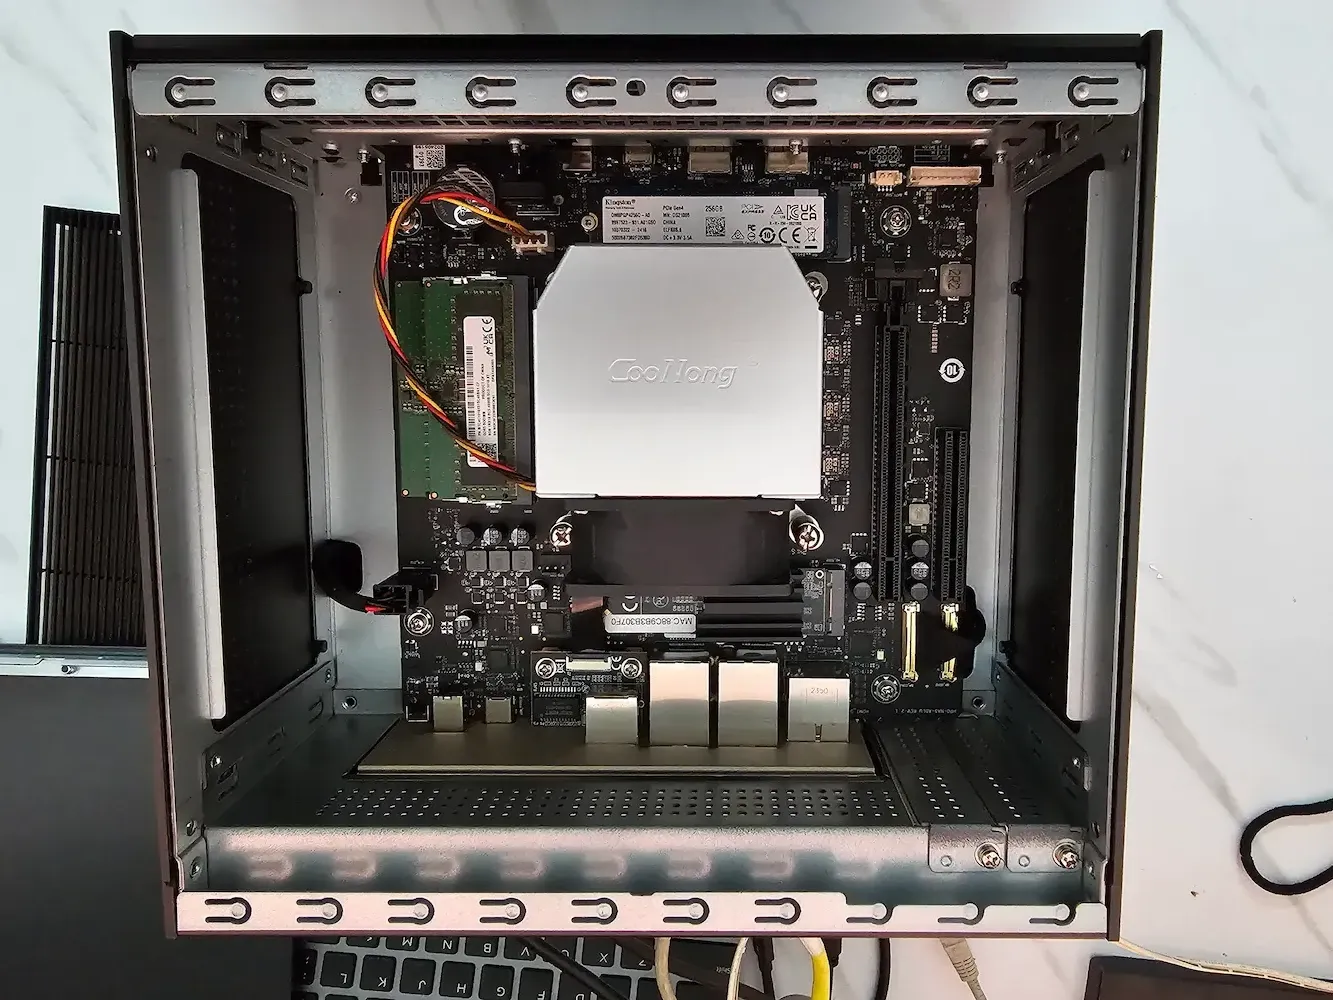
There is a noticeable sound when ZimaCube runs, even with the tower cooler. It’s like having a refrigerator in the room that has a continuous humming sound. This could be annoying for some people. Thankfully, my Bose QuietComfort headphones save me the discomfort.
Do note there is PCIe switching involved. So, even if you have gen 4 you may not always get 4th gen speed for everything. This is not noticeable performance wise unless you are too much into it.
Other than that, I didn’t have any unpleasant hardware experiences with ZimaCube. The device looks good in the dark grill and the ports in the front are well-placed for attaching external SSD, USB and headphone jack.
Part NAS, Part Local Cloud, Part Homelab: The ZimaOS Experience
This is an import distinction. ZimaCube is more than ‘just a NAS’. It’s ZimaOS offers a quick and easy way of deploying a range of open source software. Underlying, it uses Docker containers but on the surface, all you have to do is to click install from its app store.
Application specific configuration remains to be sorted but the installation process is simplified greatly. Like ZimaBoard, this is a great way to get started with homelab kind of setup.
ZimaOS vs CasaOS
ZimaOS, is like a premium version of its open source counterpart, CasaOS, which is also developed by the Zima team.
Now, CasaOS is not an operating system in the usual sense. It provides web interface running on Debian to manage your homelab by deploying open source software in a single click. CasaOS can be installed on Raspberry Pi and PC easily.
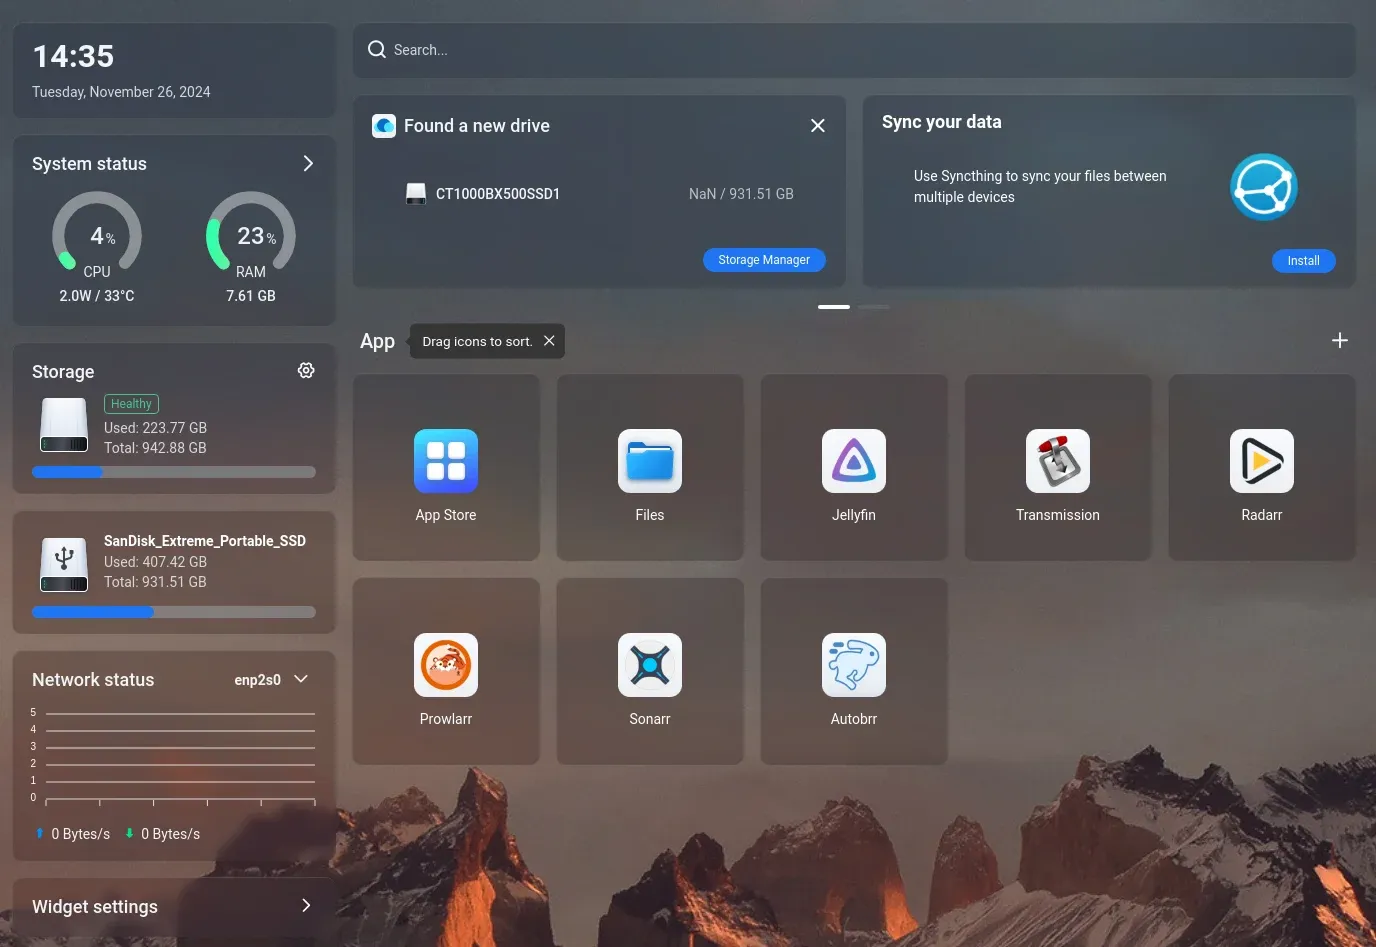
But ZimaOS is an operating system that uses Debian underneath. The web interface is similar for both CasaOS and ZimaOS. You can guess that by looking at ZimaOS interface screenshot below:
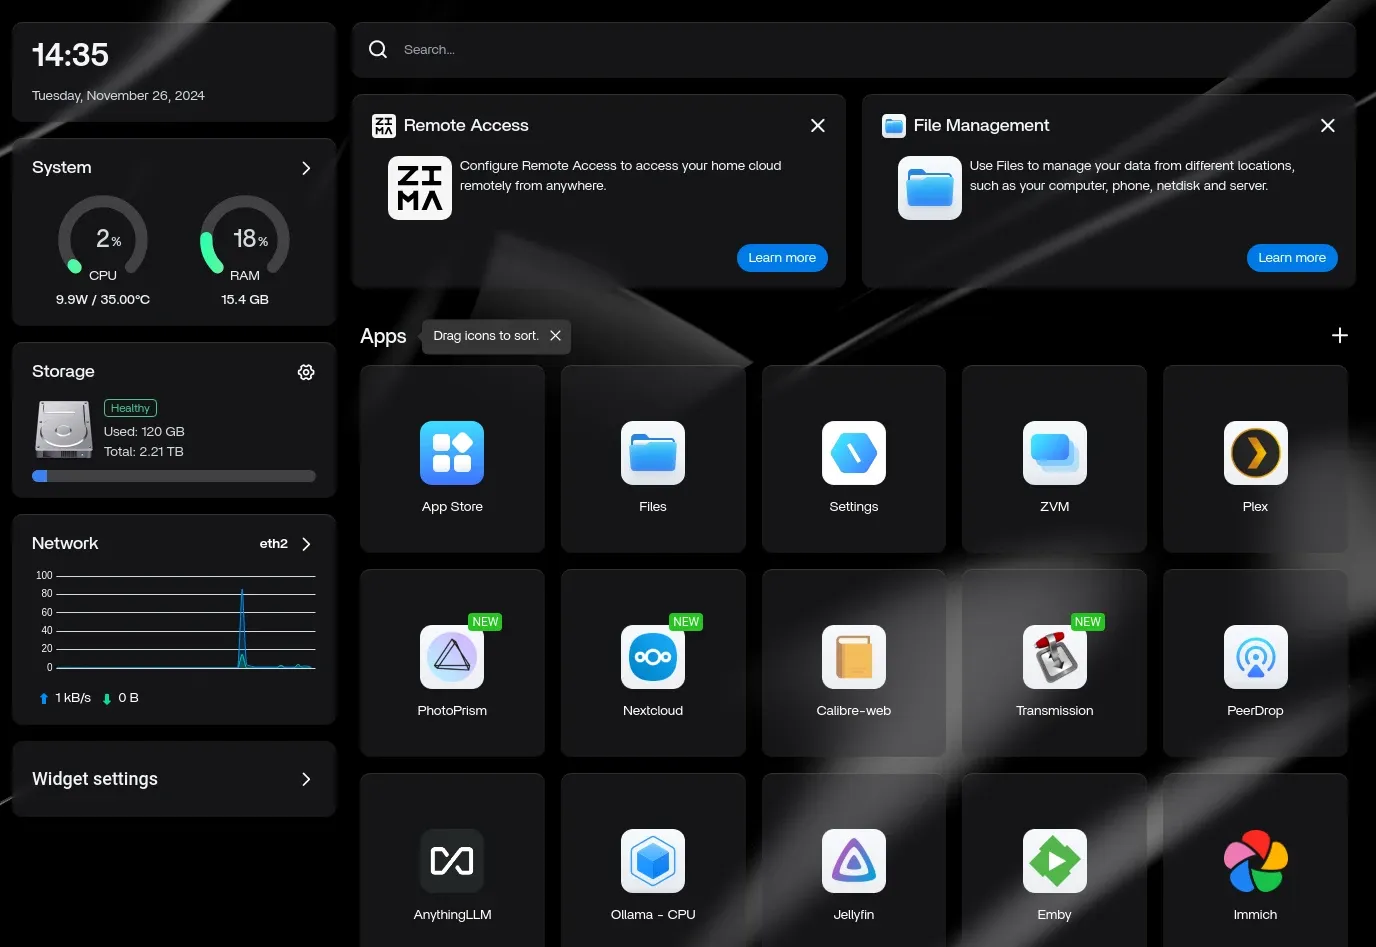
As you can see in the screenshot above, the system resource usage, installed software and storage are visible on the interface. You can also browse the files through the built-in file explorer which can also mount Dropbox, OneDrive and other cloud services.
One-click app deployment
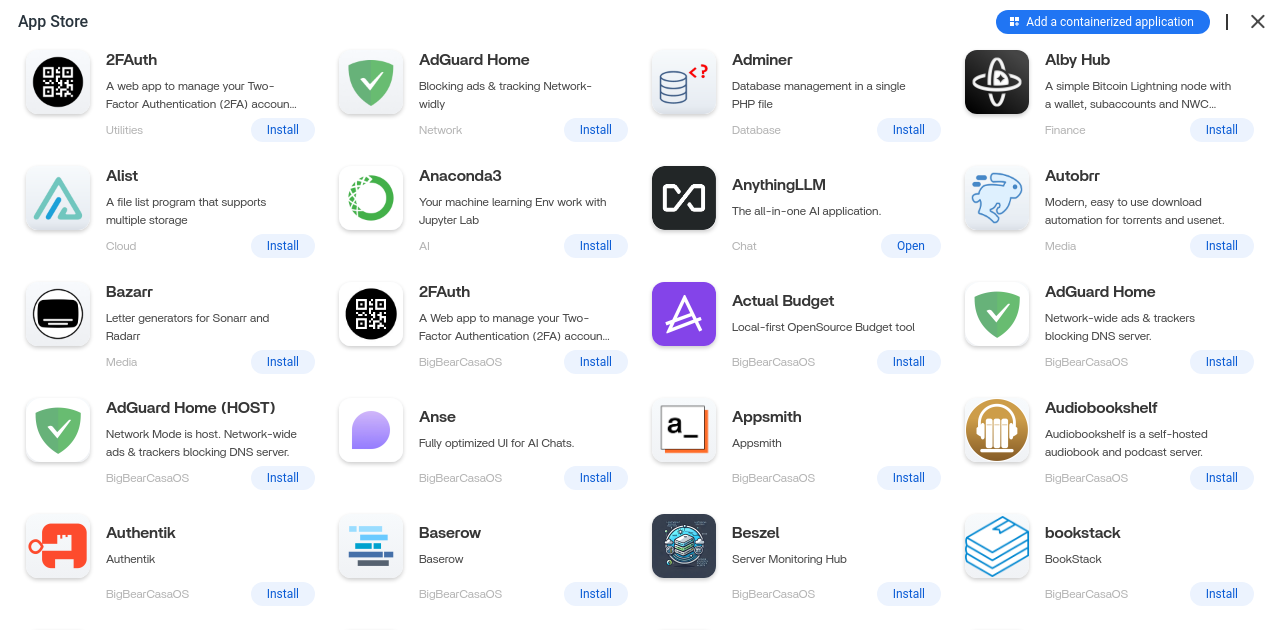
Like CasaOS, ZimaOS has an app store that allows you to quickly deploy open source software in a single click. The applications run in Docker containers but you don’t need to know Docker to install or run them.
When updates are available, you can also update installed applications to newer versions in just one click.
Storage Manager is handy
However, ZimaOS does a few things better than CasaOS. Its Settings menu is more refined, storage manager is more intuitive.
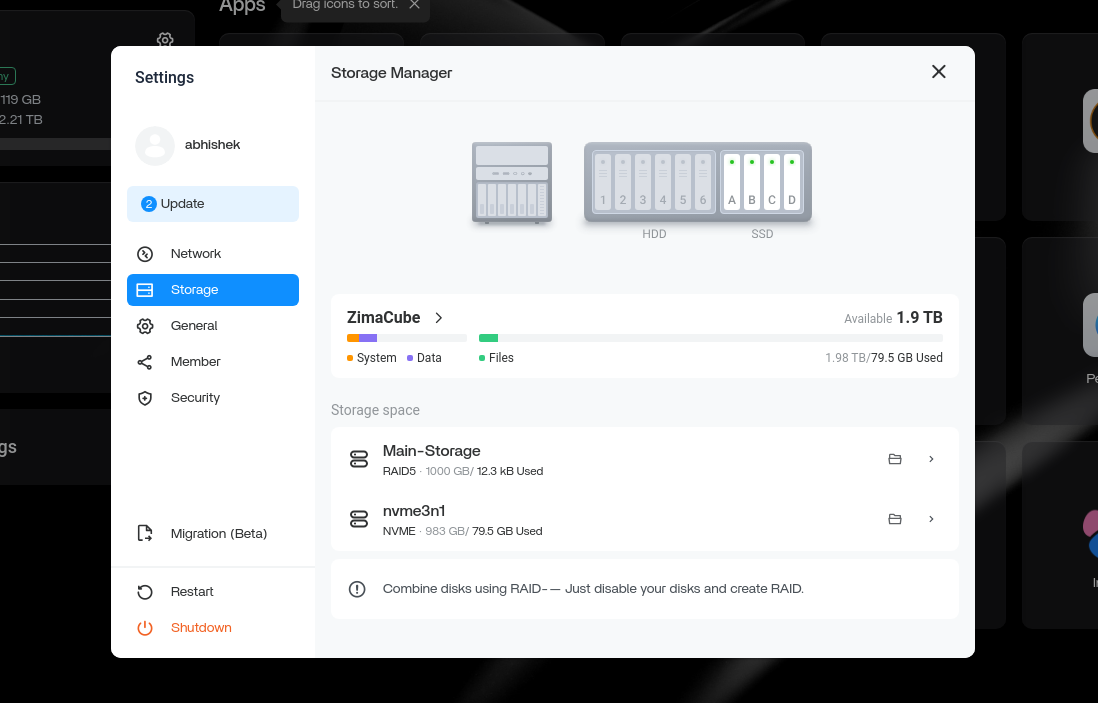
They have a ‘migration’ feature in beta and I found it very useful. The on-board system storage is 256 GB. If you start using applications like Jellyfin, Immich and others, you’ll start running out of space quickly. You have to manually specify storage volume in each application’s settings.
Migration feature solves this by allowing you to move the application specific data to a bigger disk.
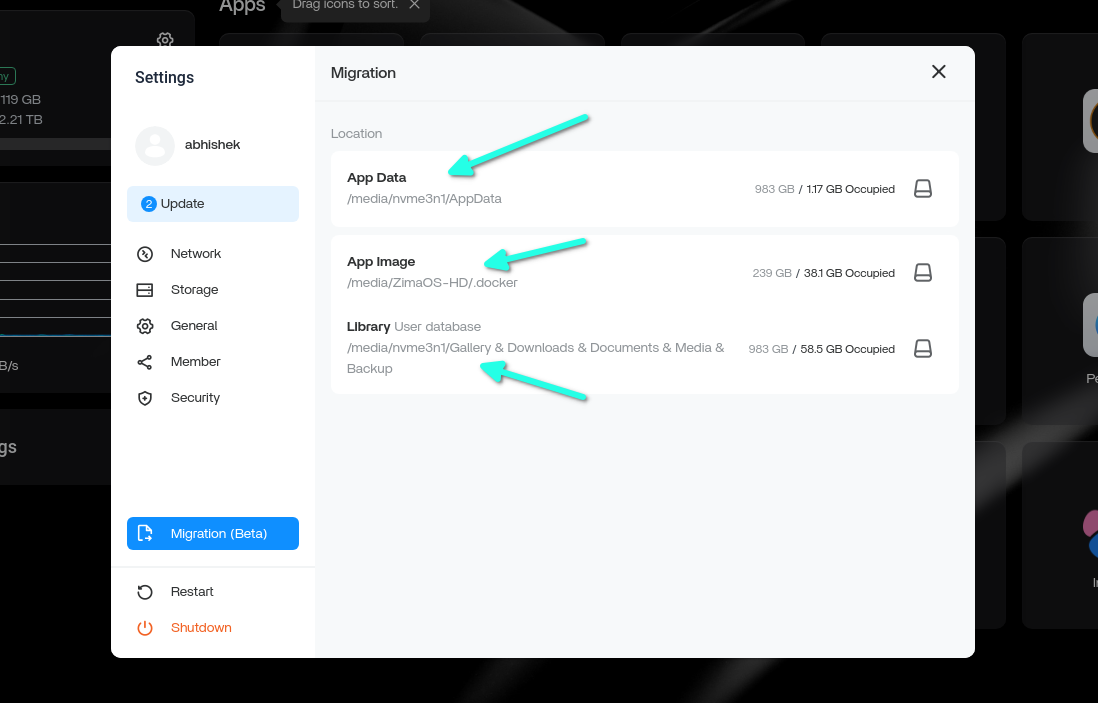
As you can see in the image below, my 1 TB NVMe SSD is used for app data and library. This way, I can store over 150 GB of photos on the NVMe from where software like Immich and PhotoPrism can use them easily.
Creating a RAID setup takes a few clicks, not bunch of config files
The graphical way of setting a RAID set up with the ZimaOS is such a breeze. Since I didn’t have any HDDs, I created a RAID 5 set up with 3 SSDs. No, I am not rich, SSDs cost pretty much the same at least for smaller storage capacity.
Here’s a quick video that shows how effortless it is to create a RAID array of disks with ZimaOS.
0:00
User interface has pretty animations
Not only that, the ZimaOS shows the connected disks and Ethernet ports in a nice looking animation.
0:00
ZimaOS has nice animation for the storage and other interface
Accessing ZimaCube outside the local network is easy with the right tools
It can also be accessed from outside the network using ZimaID mechanism, which is built on top of ZeroTier, I think.
Virtual machines with ZVM
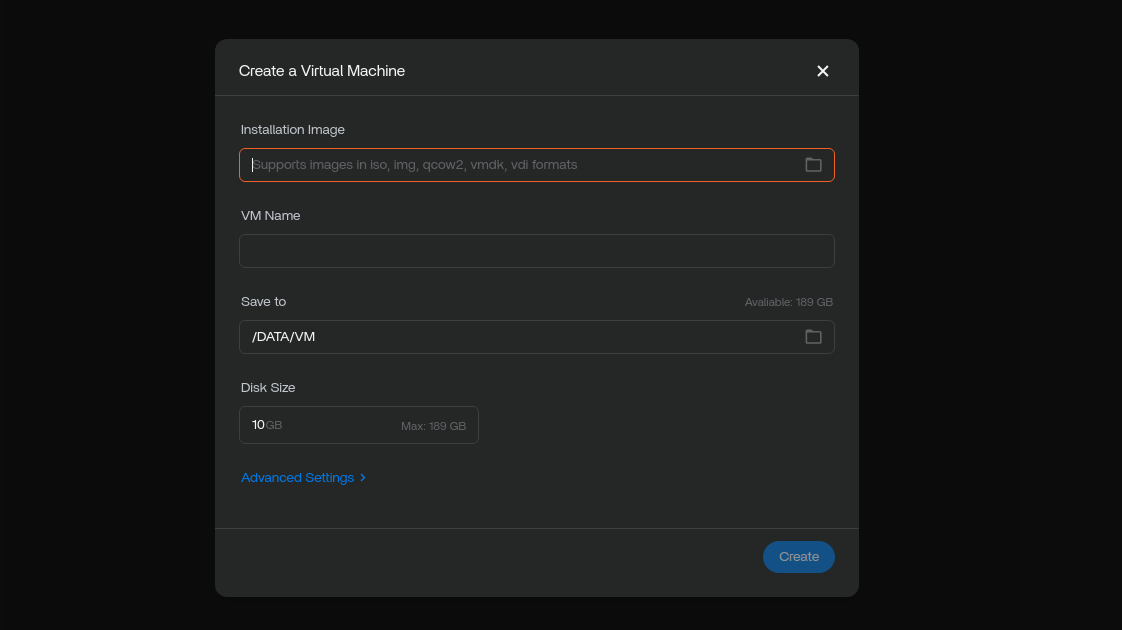
ZimaOS also allows you to run other operating systems with ZVM (Zima Virtual Machines). The running VMs can be used from the web browser. That’s another feature that adds value to the overall ZimaOS offering.
By default, it comes with a trial version of Windows installed in VM.
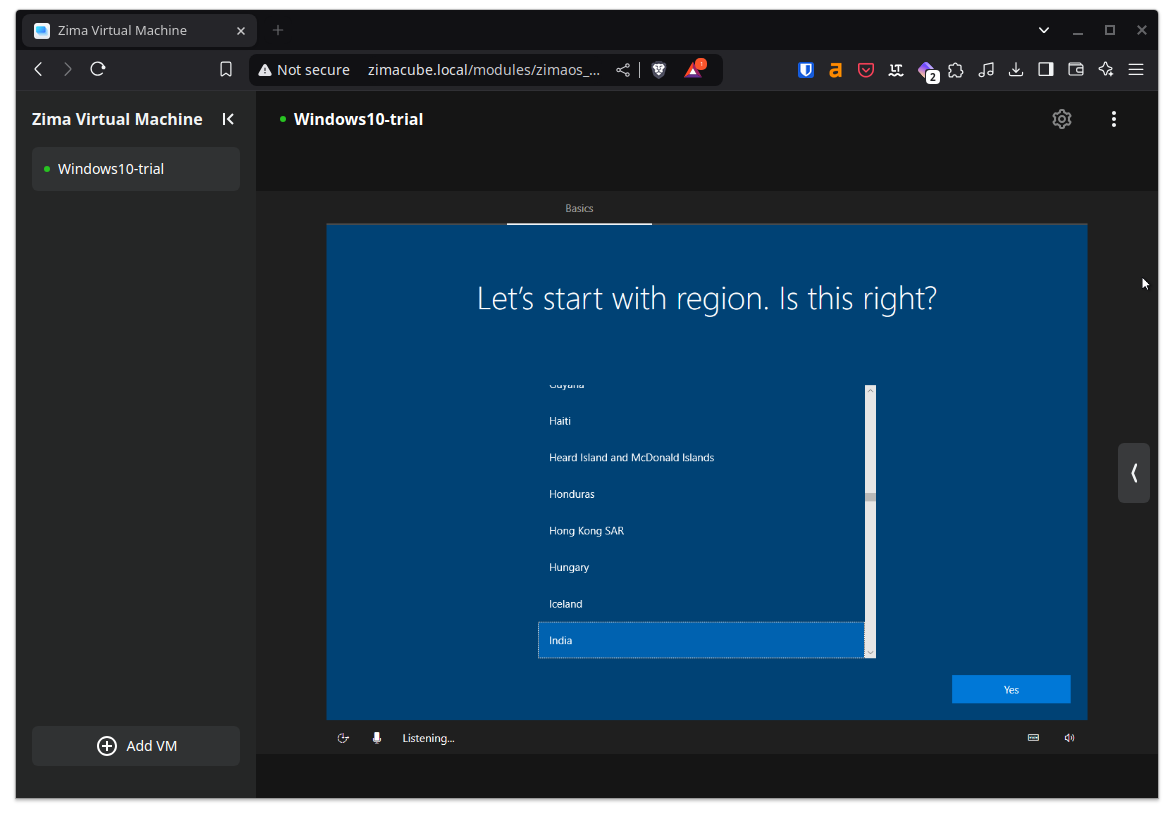
I don’t use Windows so I didn’t go any further than just completing the installation.
There is always room for improvement
ZimaOS is surely not perfect, no piece of software is.
For example, I noticed that any user accessing the Samba share can access all the files on ZimaOS HD. After my feedback, Zima team is slotted to fix this in ZimaOS version 1.3.
I would also love to see some sort of backup or versioning system for installed applications. This way, if I am making setting changes to an application, I would have the option to go back to the previous settings if things gets messed up.
Documentation, community and support
The official documentation has improved greatly since I first received the device. It is evident that Zima team listened to the user feedback. Some of the additions to the documentation were made based on my suggestion.
If you are starting with ZimaCube, look no further than the official docs website. It also covers tutorials on common use cases of ZimaCube such as setting up RAID, NVR server, media server etc.
Zima’s parent company IceWhale has an official Discourse forum, too. It is for all products from IceWhale.
I found that Zima has a lot more thriving and responsive community on its Discord server.
I would have loved if the forum had more activity. Considering that I am more of a lurker, I don’t always ask questions or participate in the discussions, but I do read them. It is easier for me to get answers. I can search the web and get answers from the forum. Discord discussions do not appear in the web search results.
What am I using ZimaCube for?
It’s been more than a month since I have been using ZimaCube. I am using it for creating photo backup and management using Immich.
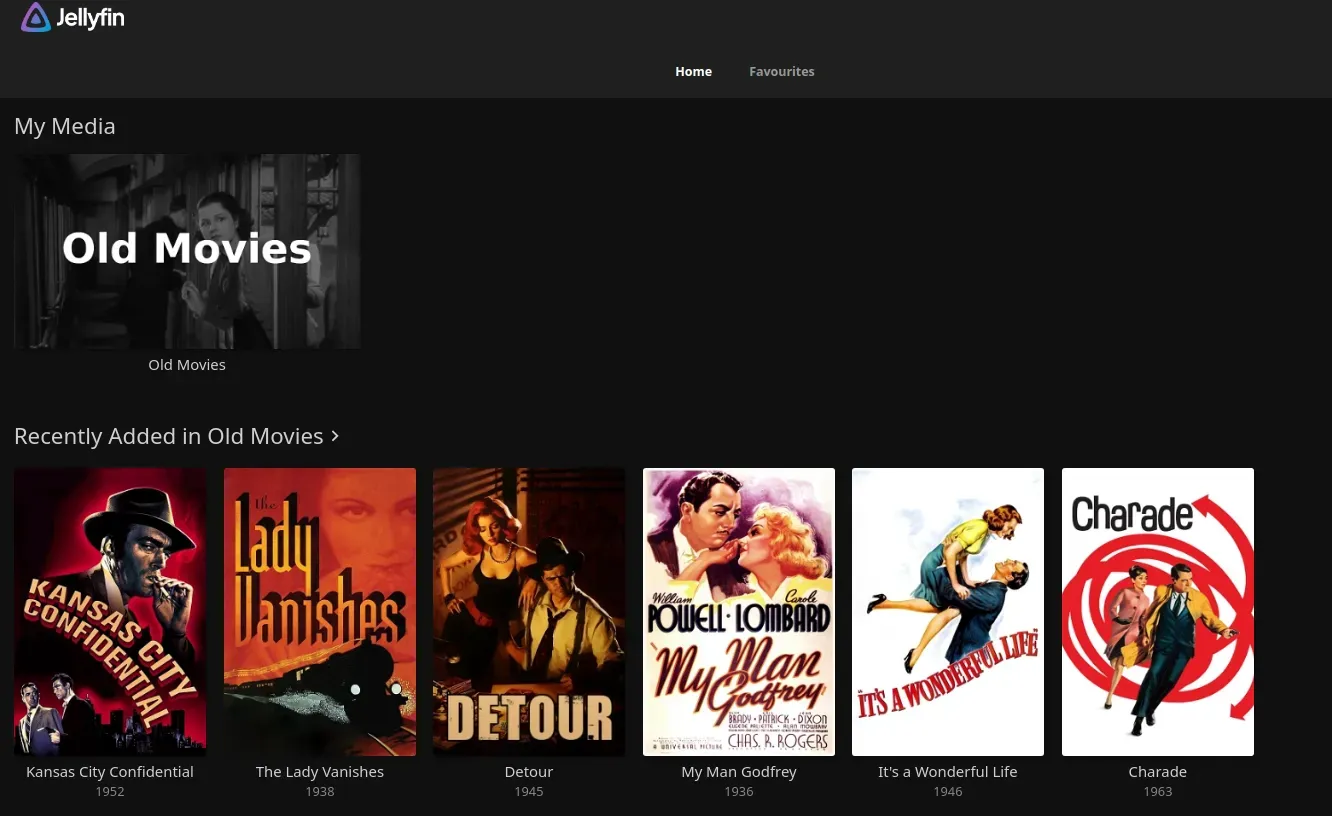
I also have a media server installed on it, although my ZimaBoard is more handy for that purpose.
Since NAS is one of the main advertised features, I am using it for storing files, too. I keep important data backed up at multiple places. ZimaCube is one of them now.
I want to use it for local AI, too. Installing Ollama, StableDiffusion, AnythingLLM and other LLMs is easy but running LLMs on CPU is not a good idea.
Since my device doesn’t have the GPU, I’ll have to get one that fits in the ZimaCube. Let me save for this additional expense and when I get one, I’ll update this article with my experience.
For 2025, I also plan to work on smart, connected home. As I add such devices, I can utilize Home Assistant in ZimaCube.
I’ll share my experience with some of these software on YouTube. Stay tuned for that.
What I like about ZimaCube and What I don’t
Let’s start with the positives first.
👠It’s design: The dark, cube shaped device looks good. The grill design adds to its appearance.
👠Abundance of ports: From 10 Giga Ethernet to Thunderbolt 4 ports, you get all kinds of ports in the front and back of the device.
👠ZimaOS: Creating RAID set up, merging disks, installing self hostable, open source software, ZimaOS makes it all easy with a neat GUI.
👠ZimaID: The ability to access the device sitting behind your router from outside your network without additional configuration is definitely a plus.
👠No vendor lock in: You are not forced to use ZimaOS. You can format it and use Proxmox, Unraid or other such operating systems.
👠Documentation: The documentation is good enough for the starters. The community support via Discord is fine, too.
👠Virtual Machines: The ability to run VMs is definitely a plus point and increases the usability of ZimaCube.
Now, let’s see things that I found lacking here.
👎 ZimaID is not available on Linux: As a Linux user, nothing disappoints me more
👎 Noticeable noise: Even on less intensive CPU usage, ZimaCube has noticeable noise. Of course, you cannot expect a device such as this to be noiseless but this is something that should be improved.
👎 Power management: Sure, it’s a more powerful device but I wouldn’t want it running 24×7 like my ZimaBoard. Wishful thinking but a better power mechanism to consume less when idle would be great here.
Is it worth getting a ZimaCube?
That depends on you.
ZimaCube Pro costs $1,099. You can probably build a more powerful NAS/local cloud system with a custom chassis from Jonsbo.
But not everyone likes to build stuff from scratch. Not everyone can build on their own.
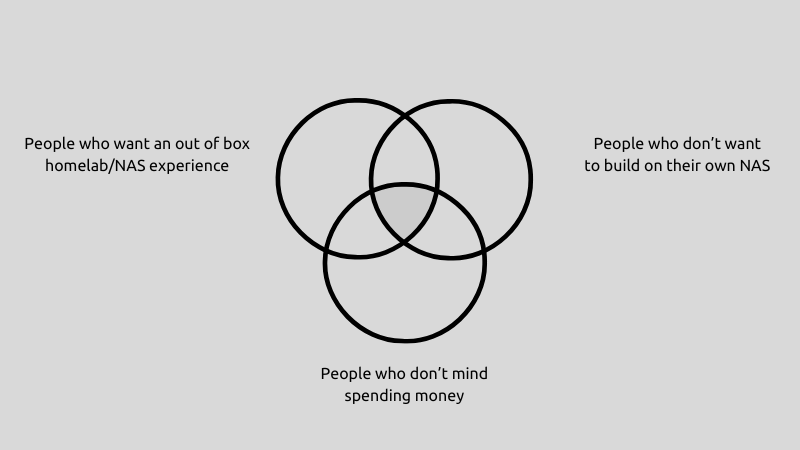
It’s for people who want to have a capable homelab system but do not have the time or the technical abilities to build one but they don’t mind spending for it.
And in fact, if you try to put in all the stuff that ZimaCube provides, 10 Gig Ethernet, multiple thunderbolt, PCIe slots, SSD slots etc, you may reach in the same price range, unless you get refurbished components.
Take advantage of ongoing Black Friday offer
Coincidently, there is a Black Friday sale running on Zima products. ZimaCube Pro is discounted by 20% and thus reducing the price from $1099 to $879. You may also win some surprise gifts. Offer ends on 2nd December.
There are offers on ZimaBoard and other Zima devices as well. More details on the offer here.

Please note that extra custom duty may be levied on the devices in your country.
Conclusion
I love my Zima devices, both ZimaBoard and ZimaCube Pro. To be honest, I have started liking the Zima ecosystem.
I liked the approach of CasaOS and I like what they are trying to achieve with ZimaOS.
Their idea is to have devices that give out of the box homelab experience for beginners and to people who don’t want to spend too much time on the operating system or software deployment part.
If you fit in the center of the Venn diagram I showed above, go for it. If not, you may consider other Zima products. They are also a great way to get started with a beginner level homelab and own your data.
For me, Zima is now an integral part of my computing arsenal.
Source: Read More


![Why developers needn’t fear CSS – with the King of CSS himself Kevin Powell [Podcast #154]](https://devstacktips.com/wp-content/uploads/2024/12/15498ad9-15f9-4dc3-98cc-8d7f07cec348-fXprvk-450x253.png)