Keeping your Ubuntu system clean and efficient is crucial for maintaining optimal performance and prolonging its lifespan. Over time, clutter such as unnecessary files, outdated packages, and residual configurations can accumulate, potentially slowing down your system and causing issues. Regular maintenance ensures that your system runs smoothly and stays secure.
In this guide, we will walk you through 10 simple yet effective steps to clean your Ubuntu system. These steps are designed to help you free up space, improve system responsiveness, and enhance overall stability. Whether you’re a professional Ubuntu user or a beginner, these practical tips will empower you to keep your system in top shape with minimal effort.
Step 1: Clean Apt Cache
The APT cache stores copies of all downloaded packages. Over time, this cache can grow significantly, taking up valuable disk space. Cleaning the APT cache is an easy way to free up space without affecting your installed software. To clean the APT cache, open the terminal and run:
sudo apt clean
This command will remove the cached package files that are no longer needed.
Step 2: Remove Old Kernels
Old kernels can accumulate and take up space on your system. Each time you update your system, a new kernel version is installed, but the old versions remain. Removing these old kernels will free up space. To remove them, use:
sudo apt-get –purge autoremove
This command will remove old, unused kernel versions while keeping the current one.
Step 3: Remove Orphaned Packages
Orphaned packages are those that were once required by an application you have since removed. These packages are no longer needed and can be safely removed. To do this, run:
sudo apt-get autoremove
This command will automatically detect and remove packages that are no longer needed.
Step 4: Clean Unused Snaps
Snaps can leave behind unused versions that take up space. Cleaning these can help free up disk space. First, list all snaps:
sudo snap list –all
Then, remove unused versions by specifying the snap name and revision number:
sudo snap remove <snap_name> –revision <revision_number>
Replace <snap_name> and <revision_number> with the actual names and numbers from the list.
Step 5: Uninstall Unused Applications
Unused applications take up space and resources. Uninstall them via the Software Center or by using the terminal:
sudo apt-get remove –purge <application_name>
Replace <application_name> with the name of the application you want to remove. This command removes the application and its configuration files.
Step 6: Clean Up Log Files
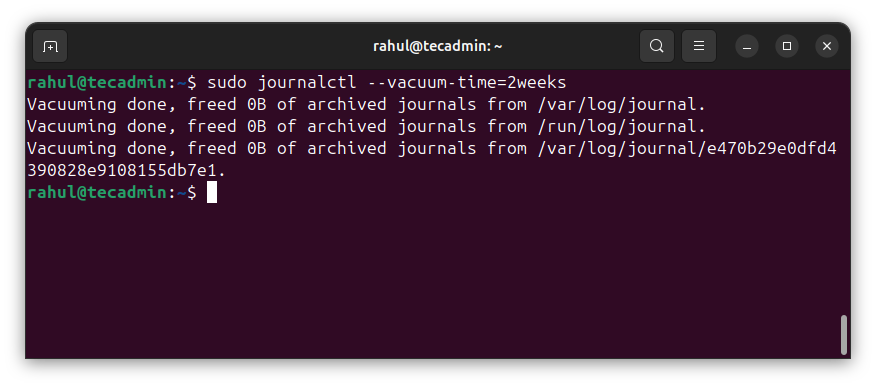
Log files can grow large and take up space on your system. These logs are useful for diagnosing issues but can be cleaned periodically. To clean them, use:
sudo journalctl –vacuum-time=2weeks
This command will remove log files older than two weeks.
Cleaning Journal Logs on ubuntu
Step 7: Clear Thumbnail Cache
The thumbnail cache stores image previews to speed up file browsing. Over time, this cache can grow and take up space. Clear it with:
rm -rf ~/.cache/thumbnails/*
This command will delete all files in the thumbnail cache directory.
Step 8: Delete Old Configuration Files
Old configuration files from uninstalled software can clutter your system. These files can be removed with:
sudo apt-get purge $(dpkg -l | awk ‘/^rc/ { print $2 }’)
This command will purge all residual configuration files.
Step 9: Clean Package Cache
Clean the package cache to free up space. This cache stores downloaded package files, which can accumulate over time. To clean it, run:
sudo apt-get autoclean
This command removes packages that can no longer be downloaded.
Step 10: Use BleachBit for System-Wide Cleaning
BleachBit is a powerful tool that cleans various areas of your system, including cache, temporary files, and logs. Install and run it with:
sudo apt-get install bleachbit
sudo bleachbit
Once BleachBit is open, you can select which areas of your system you want to clean.
Using Bleachbit on Ubuntu
Conclusion
Keeping your Ubuntu system clean doesn’t have to be complicated. By following these ten easy steps, you can ensure your system runs smoothly and efficiently. Regular maintenance helps prevent issues and keeps your computer in top shape. Remember to perform these tasks periodically to maintain optimal performance. Happy computing!
The post 10 Simple Steps to Clean Your Ubuntu System appeared first on TecAdmin.
Source: Read More

