
In my previous blog – Personalization in Sitecore XM Cloud: What’s New, What’s Different, and What It’s Built On!, I explored what makes personalization in Sitecore XM Cloud so powerful – from its cloud-native infrastructure and headless architecture to the built-in rule-based targeting engine. Now, I’m shifting from concepts to implementation. In this post, I’ll walk you through how to enable personalization using analytics identifiers that track and categorize visitor behavior in real time. Then, I’ll show how to use Page Builder to create audience-specific page variants, and personalize components – all with a few clicks, not code.
In Sitecore XM Cloud, personalization happens primarily at the page level. The process revolves around creating page variants and personalizing components. This functionality is fully integrated into Page Builder, allowing you to define variations of the page based on different personalization criteria.
Key Points:
- Personalization is configured directly within Page Builder on a per-page basis.
- You can create page variants – each tailored to specific audiences or conditions.
- Individual components on the page can be personalized : swapped, hidden and can be edited to show different content
- All of this is managed via the Personalize tab available on the page within Page Builder.
How to Check if Personalization is Enabled:
To determine whether personalization is set up:
- Go to the Page Builder for the desired page.
- Click on the Personalize tab.

If personalization is not enabled, you will see :
- No variant options available.
- A prompt or empty state indicating no personalization rules are define.

If personalization is enabled, you’ll see:
- Variants listed based on configured rules.
- Options to add/edit rules and personalize individual components.
Adding Analytics Identifiers to Enable Personalization
Analytics identifiers are essential for enabling personalization in Sitecore XM Cloud. They help track visitors, manage sessions, and unify data across sites for a complete view of user behavior. Without them, personalization rules and targeted content delivery won’t function. Assigning the same identifier to multiple sites allows for consolidated analytics, providing a holistic view of user engagement across different sites.
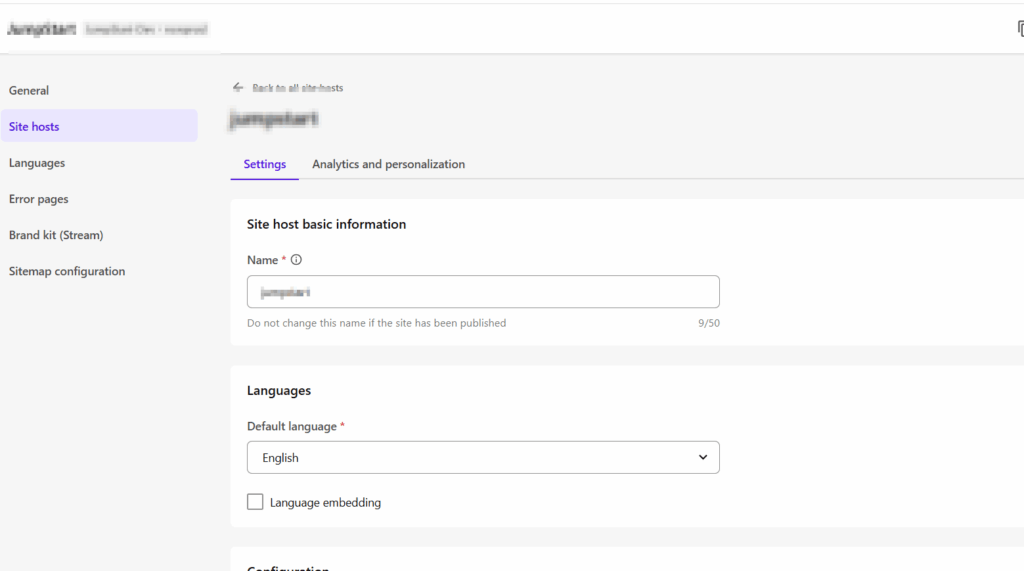
Step 1: Access Site Settings
- Navigate to the XM Cloud Portal: Log in to your XM Cloud environment.
- Open the Sites Dashboard: In the top navigation bar, click on Sites to view all your sites.
- Select the Desired Site: Locate the site you wish to configure. Click on the Actions menu (three dots) associated with that site and select Settings.
- Select the Site hosts: Browse through the options on the left side and select Site hosts option and then select the desired host
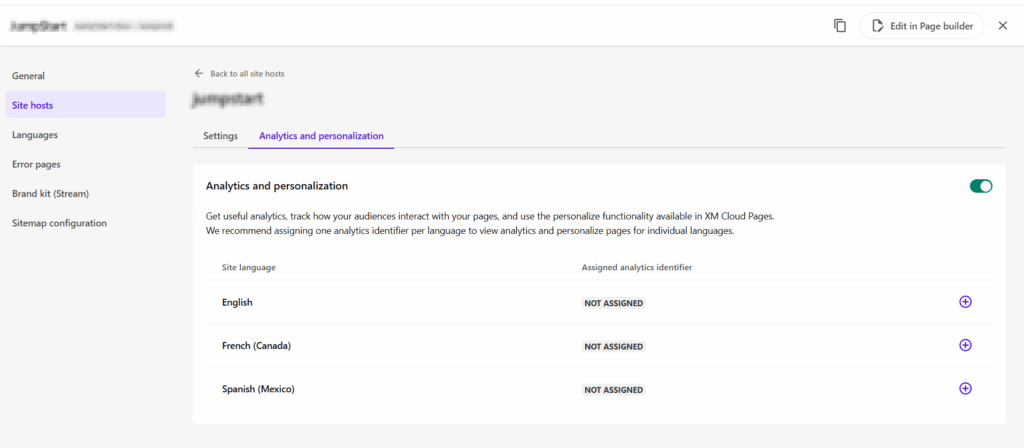
Step 2: Add or Assign an Analytics Identifier
- Navigate to the Analytics and Personalization Tab: Within the site settings, click on the Analytics and Personalization tab.
- Add Identifier for a Language: In the list of languages associated with the site, click the plus (+) icon next to the language you want to configure
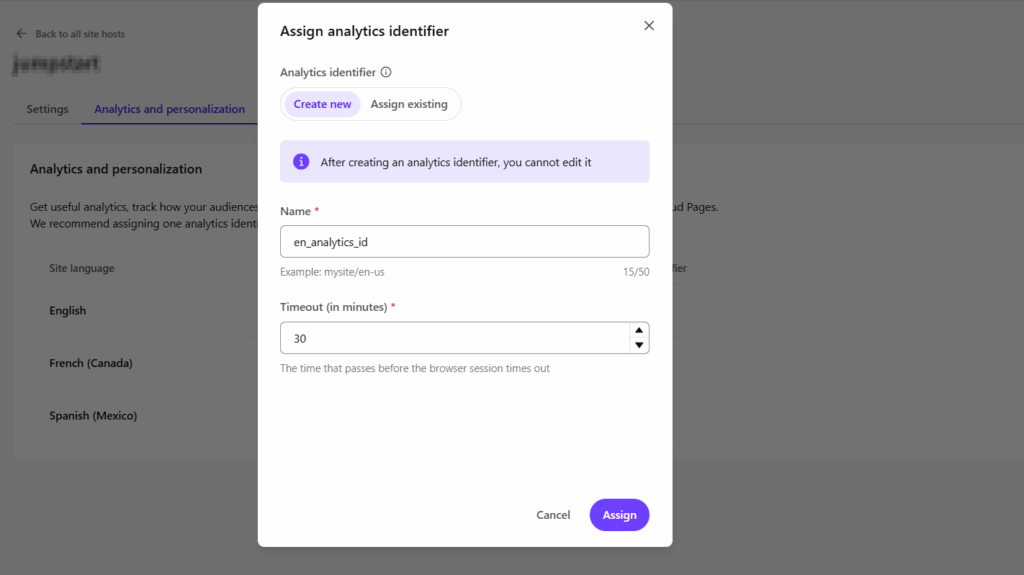
Step 3: Choose Identifier Type:
-
- Create a New Identifier: Select the Create new tab.
- Name the Identifier: Provide a unique name for the analytics identifier.
- Set Session Timeout: Define the session timeout duration (default is 30 minutes).
- Assign an Existing Identifier: Select the Assign existing tab.
- Select Identifier: Choose from the list of existing identifiers available in your environment.
- Create a New Identifier: Select the Create new tab.
Let’s Personalize a Page in Sitecore XM Cloud
- Navigate to the Page in the Page Builder
- From the XM Cloud portal, open your site and select the page you want to personalize.
- Once it loads in Page Builder, you’ll see a “Personalize” tab at the top navigation bar if personalization is enabled.

- Create a Page Variant
- Click on the Personalize tab.
- Select Create Variant.
- Provide a name for the variant (e.g. “Every Monday Campaign”)

- Click Next to proceed to audience configuration.
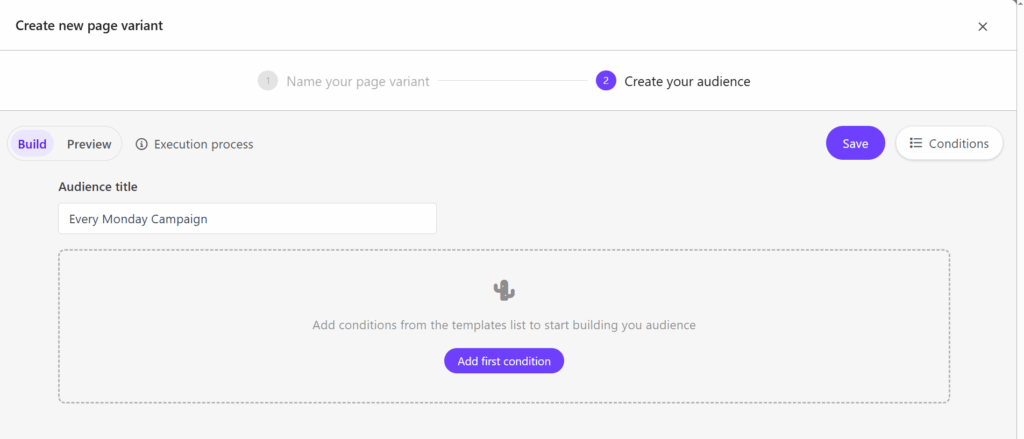
- Define the Audience for the Variant

Click Add first condition to define who should see this variant.
Choose from the available conditions such of different tags
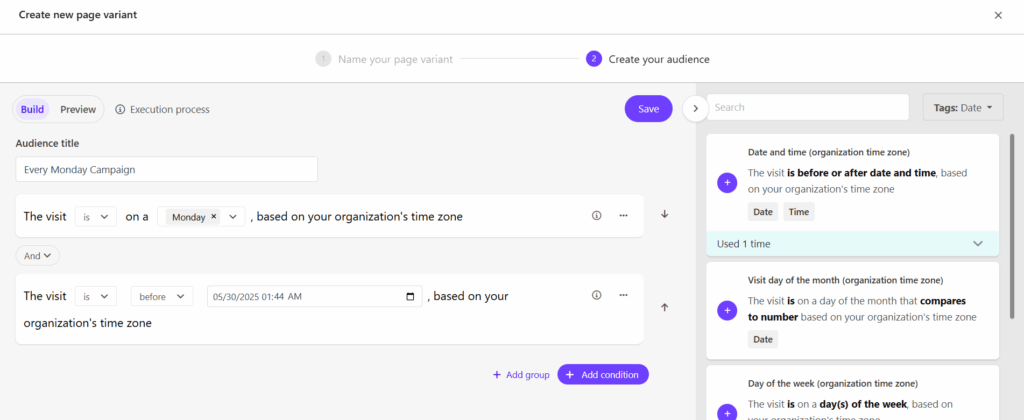
- Configure the selected condition using the provided fields.
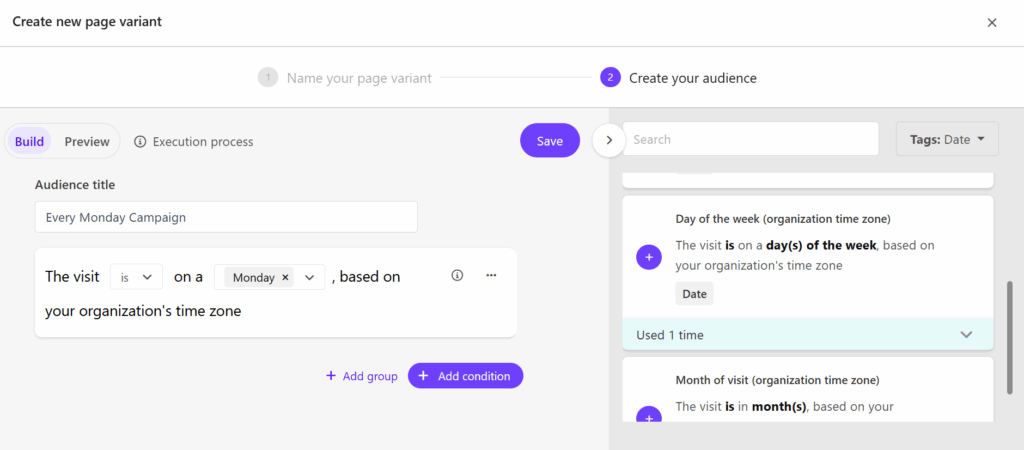
- You can add multiple conditions using AND/OR logic.
- Customize the Variant
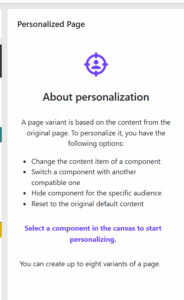
- Once you click on Save, your variant is created and the audience is defined, you can now edit the variant.
- On the side is a screenshot of the Page Builder that lists down all that we can do with personalization on the page.

- You’ll see a color-coded border or indicator showing that you’re editing a personalized version.
- Each change you make is isolated to that variant and won’t affect the default view.
- Preview the Variant
- Use the Preview feature to see what the page will look like for the targeted audience.
- Publish the Variant
- When satisfied, click Publish to activate your personalized variant.
- Sitecore XM Cloud will now automatically show the appropriate variant to users matching the defined audience.
Personalization in Sitecore XM Cloud isn’t just a feature – it’s a strategic advantage. By enabling analytics identifiers and using Page Builder to create tailored experiences, you can deliver the right content to the right audience at the right time. With this setup in place, you’re well on your way to building smarter, more engaging digital experiences.
In the next blog, I’ll take you behind the scenes of how personalized content is actually delivered in Sitecore XM Cloud. We’ll explore the request lifecycle, how the Cloud SDK plays a role in fetching and rendering personalized variants, and the technical flow that powers real-time targeting. This deeper dive will help you understand not just what personalization looks like, but how it works under the hood.
Source: Read MoreÂ