


While I have shared when to choose Connect in my previous blog: When to Choose Sitecore Connect, this post dives into understanding Sitecore Connect and leverage its powerful automation capabilities.
Sitecore Connect helps you to easily integrate Sitecore products with thousands of applications. Some of the key features and capabilities of Sitecore Connect include:
- Seamless Connectivity – Maximum integration flexibility with minimal complexity, ensuring compatibility across different authentication methods, data formats, and connection protocols.
- Automated Workflows – Marketers can easily automate processes across their digital ecosystem using an intuitive visual builder with drag-and-drop components, conditional logic, loops, and more.
- Versatile Data Transfer – Initiate data transfers through various mechanisms, including event-based triggers, scheduled intervals, webhooks, API calls, or Slack bots.
- Intelligent Data Mapping – Smart entity mapping suggestions with manual drag-and-drop field adjustments for customization.
- Comprehensive Monitoring – Real-time dashboards provide visibility into all workflows, allowing proactive issue resolution before they impact operations.
Getting Started with Sitecore Connect
When you first access the Sitecore Cloud Portal, you see Dashboard, Projects, and Community Library:
- Dashboard – Provides an overview of your integration projects and system performance.
- Projects – Navigate to your projects to create and manage integration recipes.
- Community Library – Explore pre-built apps, recipes, and connectors available for your use.
Connecting Applications
First action that you have to perform is to create a project. Once you create a project, The next step in building an integration is establishing a connection between Sitecore and another application. Sitecore Connect provides a variety of pre-built connectors, allowing integration with systems such as:
- Sitecore OrderCloud
- Sitecore CDP
- SQL Server
- Salesforce
- OpenAI
- Slack
- Jira
- Many more…
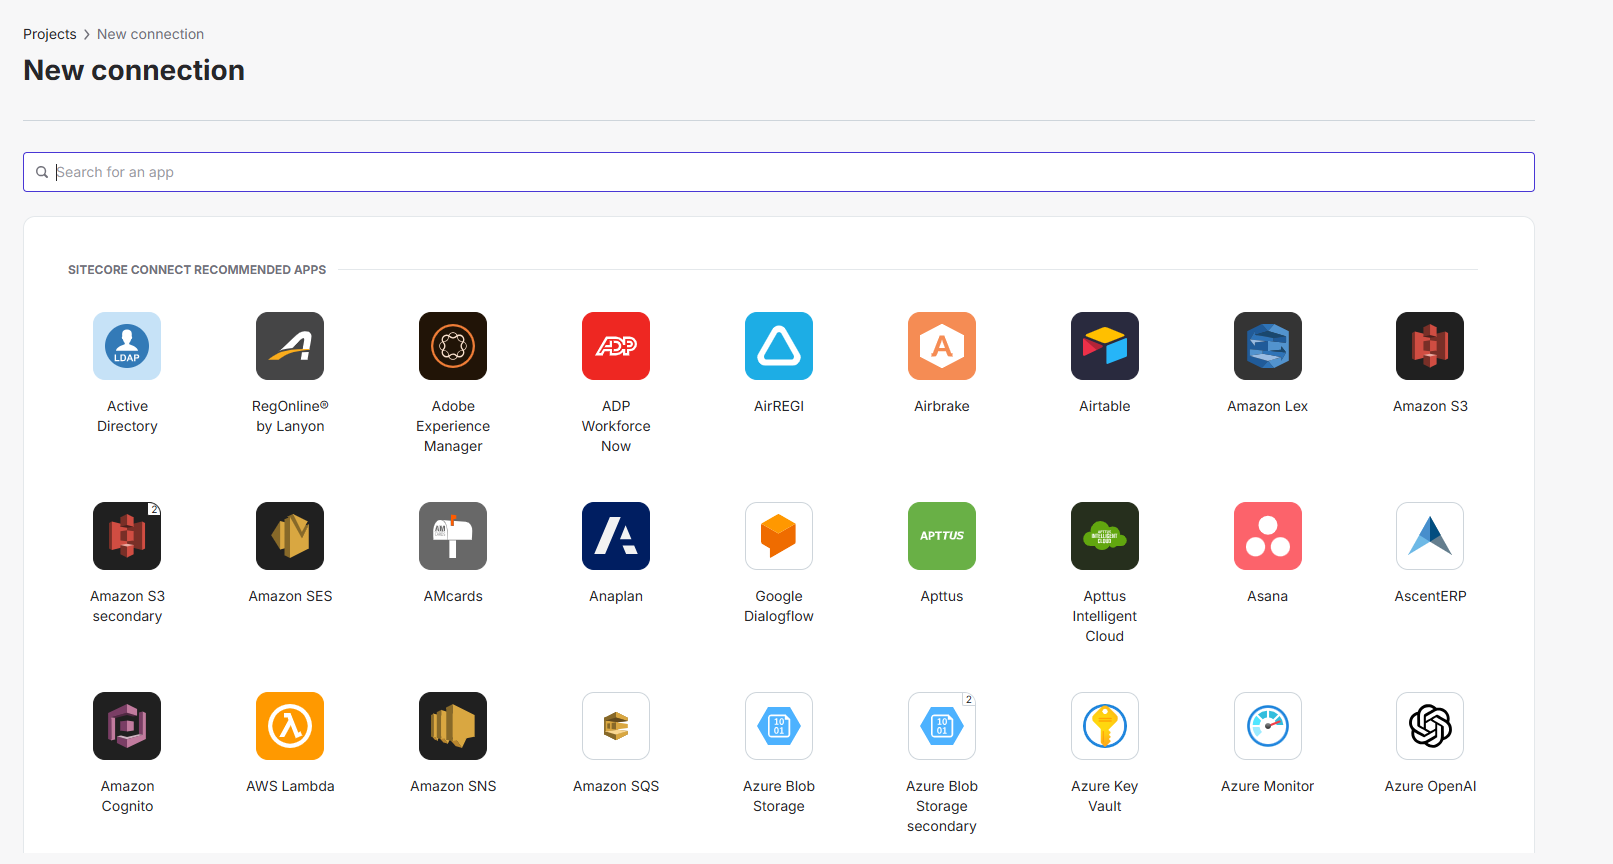
To create a connection:
- Once you create a connection you see available connectors (screenshot of available connectors in image below)
- Select the application you want to integrate with.
- Provide the required credentials and configuration details.
- Once connected, you can either listen for events or send data to the application.
Creating a Recipe: Automating Actions
Now that you have a connection ready, setting up steps to manage/transfer data is next step.
A recipe is an automated workflow that executes a series of steps to integrate and process data across multiple applications.
Recipes use connectors to integrate with different apps, enabling seamless data flow and process automation.
There are different types of recipes, including standard recipes, API recipes, and data pipeline recipes for various automation needs.
A recipe in Sitecore Connect is a sequence of automated steps that perform an integration workflow. Every recipe consists of:
- A Trigger – Defines what starts the recipe.
- Actions – A series of steps executed based on the trigger.
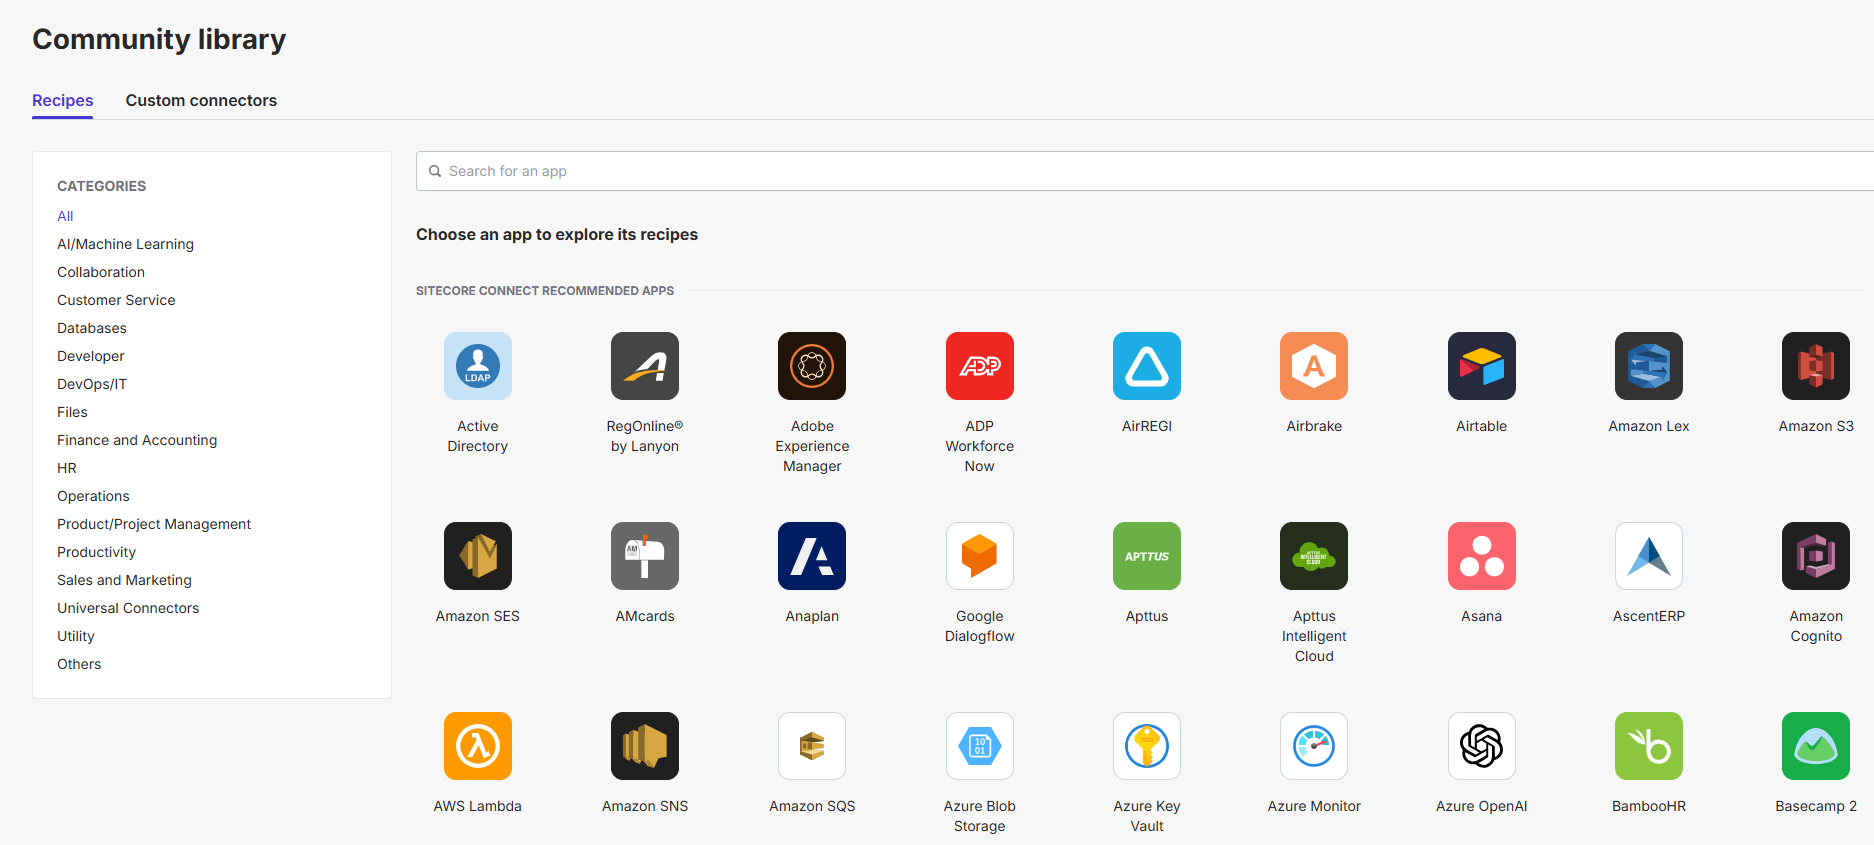
Leveraging Pre-Built Recipes
The Community Library contains a collection of pre-built recipes that can help accelerate your integration efforts. Before creating a new recipe, you can check if a similar one already exists. If a suitable recipe is available, you can either use it as-is or copy it into your project and modify it to fit your specific requirements. This approach saves time, reduces development effort, and ensures best practices are followed.
Selecting Triggers
Once you create a recipe, the first step is selecting starting point, which defines how and when the recipe starts executing. Sitecore Connect offers several types of triggers:
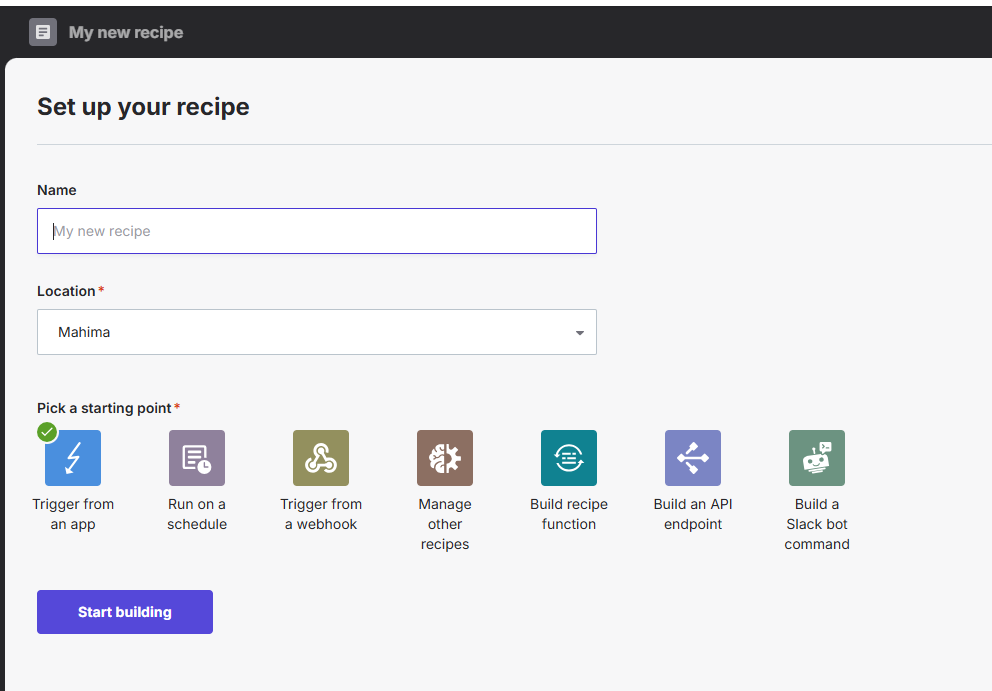
A trigger determines how and when the recipe starts executing. Triggers can be of different types:
- Trigger from an App – Starts when an event occurs in an application (e.g., a new product is created in OrderCloud).
- Run On a Schedule – As the name suggests runs at a defined time interval (e.g., sync customer data every 24 hours).
- Trigger from a Webhooks – Webhooks are notifications sent by an application to a target URL as soon as an event happens.
- Manage Other Recipes– Controls other recipes (e.g., a parent recipe triggers dependent workflows).
- Build recipe function – Allows modular execution by breaking large workflows into smaller callable recipes.
- Build an API endpoint – Enables external apps to call an API endpoint to trigger a recipe.
- Build a Slackbot command – Allows interaction with Sitecore and other business apps via Slack commands.
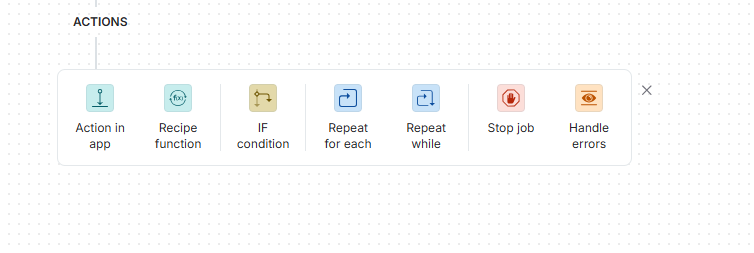
Adding Actions to a Recipe
After selecting trigger you can select action that will be performed
Once a trigger starts a recipe, various actions can be performed. Actions define what happens next and can involve:
- App-Specific Actions – Choose an app and define an action, such as updating a record or sending data.
- Logical Operators:
- If Conditions – Executes actions based on specific data conditions.
- Repeat for Each – Loops through lists of data items.
- Repeat While – Continues execution based on a condition.
Stop Job – Halts execution with success or failure status, with failure status you can also add error message.
Handle Errors – Defines error handling strategies in case of failures.
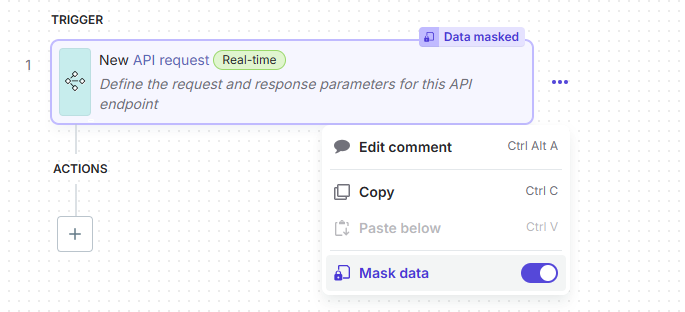
Additionally, every action allows options to mask sensitive data for security purposes.
The next step is to save and test the recipe to ensure it works as expected.
Conclusion
Sitecore Connect simplifies integrations by providing a structured approach to connecting applications, triggering workflows, and executing automated actions. By leveraging pre-built connectors, triggers, and logical actions, organizations can optimize their data workflows, reduce manual effort, and create seamless digital experiences.
Stay tuned for more insights into how to leverage Sitecore Connect for your business needs!
__PRESENT
__PRESENT__PRESENT__PRESENT__PRESENT
__PRESENT
Source: Read MoreÂ