


In Part-1, we learned about the importance of KUBEONE. Now, lets explore on demo part in this practical session will focus on creating High Availability Kubernetes Cluster on AWS using KUBEONE
Setup KubeOne
1. Downloading KubeOne
CREATE ec2 instance first with any type as suitable, then download KubeOne from below script. The below commands will be used to download KubeOne
sudo apt-get update
sudo apt-get -y install unzip
curl -sfL https://get.kubeone.io | sh
The above script downloads the latest version of KubeOne from GitHub, and unpacks it in the /usr/local/bin directory.
2. Downloading Terraform
We will be use Terraform to manage the infrastructure for the control plane, for this we need to install it. We will use the following scripts to download the terraform
Below is the official documentation link to install terraform:
https://developer.hashicorp.com/terraform/tutorials/aws-get-started/install-cli
This is the HashiCorp’s GPG signature and it will install HashiCorp’s Debian package repository.
sudo apt-get update && sudo apt-get install -y gnupg software-properties-common
Now Install the HashiCorp GPG key:
wget -O- https://apt.releases.hashicorp.com/gpg |
gpg –dearmor |
sudo tee /usr/share/keyrings/hashicorp-archive-keyring.gpg > /dev/nul
Verify the Key’s Fingerprint:
gpg –no-default-keyring
–keyring /usr/share/keyrings/hashicorp-archive-keyring.gpg
–fingerprint
Add the Official HashiCorp Repository into System:
echo “deb [signed-by=/usr/share/keyrings/hashicorp-archive-keyring.gpg]
https://apt.releases.hashicorp.com $(lsb_release -cs) main” |
sudo tee /etc/apt/sources.list.d/hashicorp.list
Download the package information from HashiCorp.
sudo apt update
Install Terraform from the new repository.
sudo apt-get install terraform -y
3. Configuring The Environment
Download The AWS CLI
sudo apt install unzip -y
curl “https://awscli.amazonaws.com/awscli-exe-linux-x86_64.zip” -o “awscliv2.zip”
unzip awscliv2.zip
sudo ./aws/install
KubeOne and Terraform need the cloud provider credentials exported as the environment variables.
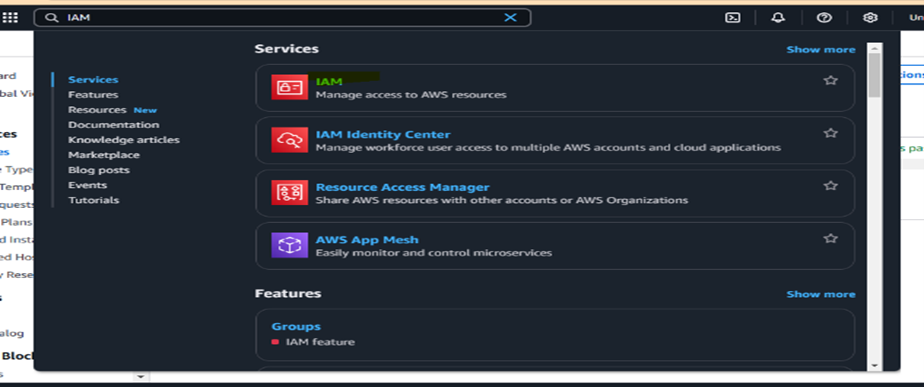
Create an IAM user
We need the IAM account with the appropriate permissions for Terraform to create the infrastructure and for the machine-controller to create worker nodes.
Click on ‘Users’ and ‘Create User’
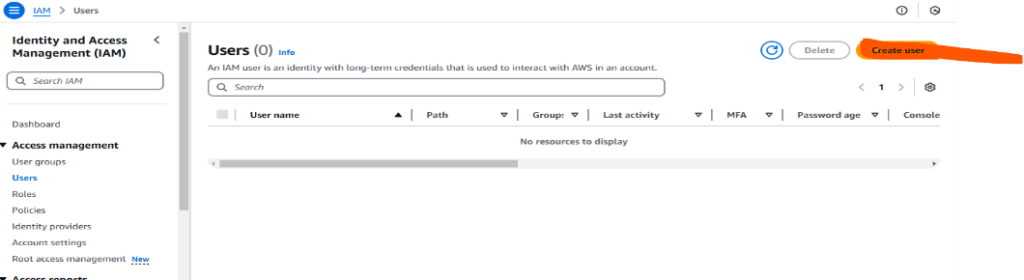
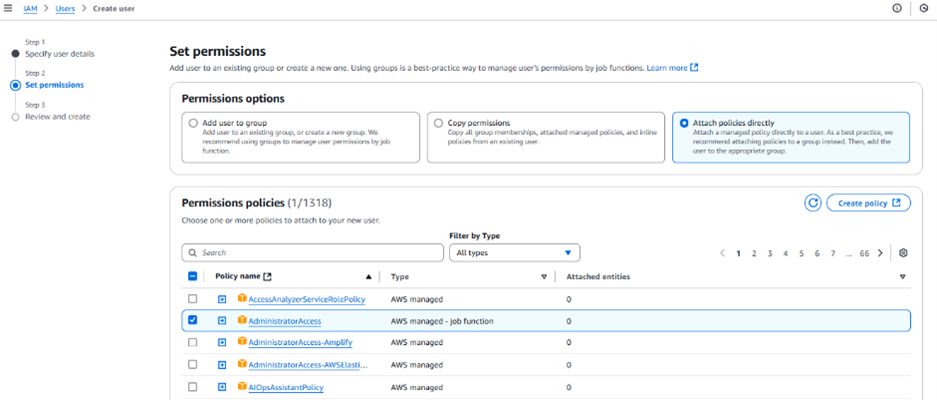
Once the User Created then ‘attach Policy’
Click to the create “Access Key and Secret Key”
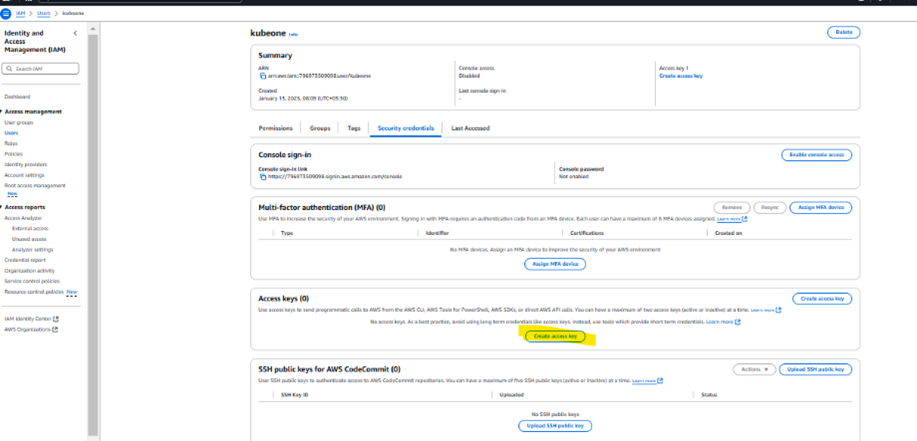
We will use “Aws Configure” to config the both keys
aws configure
4. Creating The Infrastructure
Create a key pair on the server
ssh-keygen -t rsa -b 4096 Now let’s move the directory with the example Terraform configs that has been created while installing KubeOne.cd kubeone_1.9.1_linux_amd64/examples/terraform/aws
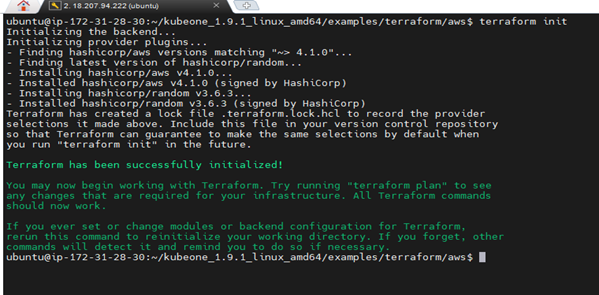
Before use the Terraform, we will initialize the directory structure and download the required plugins. Use the below init command
terraform init
Also in same directory, create the file i.e. terraform.tfvars it will contain Terraform variables to customize the infrastructure creation process.
vim terraform.tfvars
Now add the below two variables
cluster_name = “kubeone-cluster”
ssh_public_key_file = “~/.ssh/id_rsa.pub”
The cluster_name variable is used as prefix for cloud resources. The ssh_public_key_file is the path to a SSH public key this will deployed on the instances. KubeOne will be connects to instances over SSH for provisioning and configuration. If you want to generate then run the ssh-keygen.
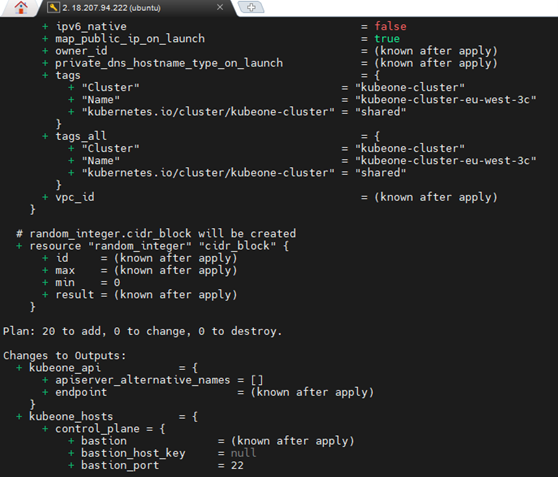
Now run terraform plan command to see what changes done.
terraform plan
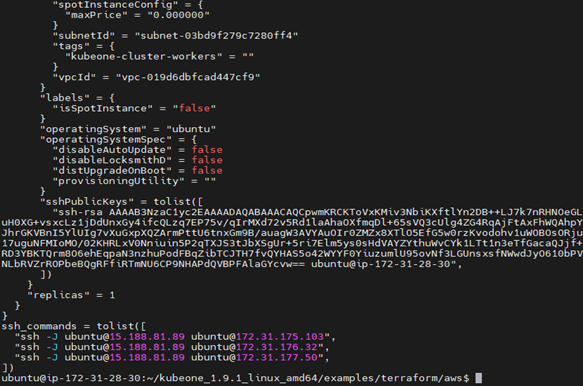
Now run terraform apply command and enter “YES”
terraform apply
The above command will create all the infrastructure that we needed to get started.
Finally, we need to save the Terraform state in a format KubeOne can read to get info about the AWS resources. This helps with setting up the cluster and creating worker nodes later. The format is already set in a file called output.tf, so all you have to do is run the output command.
terraform output -json > tf.json
This command creates a file named tf.json with the Terraform state in JSON format, which KubeOne can read. Once that’s done, we’re ready to set up our cluster in the next step.
Step 5. Provisioning The Cluster
Now that the infrastructure is ready, we can use KubeOne to set up a Kubernetes cluster.
The first step is to create a KubeOne configuration file (kubeone.yaml). This file will define details like how the cluster will be set up and which version of Kubernetes to use..
vim kubeone.yaml
Add the below code into above yaml file
apiVersion: kubeone.k8c.io/v1beta2
kind: KubeOneCluster
versions:
kubernetes: ‘1.30.0’
cloudProvider:
aws: {}
external: true
Before proceeding, choose the Kubernetes version you want to use and replace any placeholder values with the actual ones.
Now set the environment variable, use the export command for this
export AWS_ACCESS_KEY_ID=$(aws configure get aws_access_key_id)
export AWS_SECRET_ACCESS_KEY=$(aws configure get aws_secret_access_key)
Now run the below command again
kubeone apply -m kubeone.yaml -t tf.json
If we get the below error
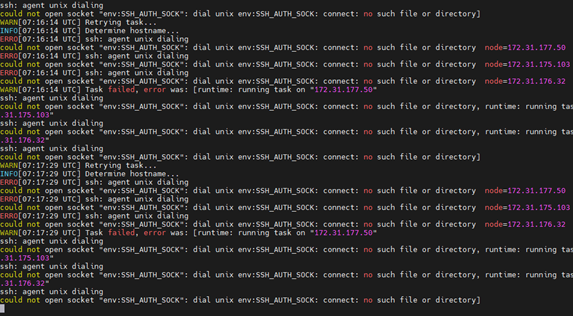
Now Run these below Commands to start agents
Start the fresh agent
# Start SSH agent correctly
eval “$(ssh-agent)”
# Verify the environment variables
echo $SSH_AUTH_SOCK
echo $SSH_AGENT_PID
Add the ssh keys
# Add your private key
ssh-add ~/.ssh/id_rsa
# Verify keys are added
ssh-add -l
Set the Correct Permissions:
# Fix SSH directory permissions
chmod 700 ~/.ssh
chmod 600 ~/.ssh/id_rsa
chmod 644 ~/.ssh/id_rsa.pub
Run the apply command again
kubeone apply -m kubeone.yaml -t tf.json
This will be creating cluster.
6. Install Kubectl
Let’s install the Kubectl:
curl -LO “https://dl.k8s.io/release/$(curl -L -s https://dl.k8s.io/release/stable.txt)/bin/linux/amd64/kubectl”
curl -LO “https://dl.k8s.io/release/$(curl -L -s https://dl.k8s.io/release/stable.txt)/bin/linux/amd64/kubectl.sha256”
echo “$(cat kubectl.sha256) kubectl” | sha256sum –check
sudo install -o root -g root -m 0755 kubectl /usr/local/bin/kubectl
chmod +x kubectl
mkdir -p ~/.local/bin
mv ./kubectl ~/.local/bin/kubectl
7. Configuring The Cluster Access
KubeOne automatically downloads the Kubeconfig file for your cluster, named <cluster_name>-kubeconfig (where <cluster_name> is from the terraform.tfvars file). You can use this file with kubectl like this:
kubectl –kubeconfig=<cluster_name>-kubeconfig
kubectl get nodes –kubeconfig=kubeone-cluster-kubeconfig

Now Copy the config to .Kube folder
cp kubeone-cluster-kubeconfig ~/.kube/config
Try now without –kubeconfig
kubectl get nodes

Let’s create one “nginx” pod using below scripts
Kubectl run nginx –image=nginx
Kubectl get pods

Shutting down the cluster
The goal of unprovisioning is to delete the cluster and free up cloud resources. Use it only if you no longer need the cluster. If you want to undo this, you can use the below reset command.
kubeone reset –manifest kubeone.yaml -t tf.json
Removing Infrastructure Using Terraform
If you’re using Terraform, you can delete all resources with the destroy command. Terraform will list what will be removed and ask you to confirm by typing “yes.” If your cluster is on GCP, you need to manually remove Routes created by kube-controller-manager in the cloud console before running terraform destroy.
terraform destroy
Remove all Servers and IAM user at end.
Conclusion:
KubeOne is a solid, reliable choice for automating Kubernetes cluster management, especially for users who need high availability and multi-cloud or hybrid support. It is particularly well-suited for organizations looking for a simple yet powerful solution for managing Kubernetes at scale without the overhead of more complex management platforms. However, it might not have as broad an ecosystem or user base as some of the more widely known alternatives.
Source: Read MoreÂ