

 Validator in Spring Boot: A Step-by-Step Guide")
In this blog post, I will guide you through the process of implementing a Spring Expression Language (SpEL) validator in a Spring Boot application. SpEL is a powerful expression language that supports querying and manipulating an object graph at runtime. By the end of this tutorial, you will have a working example of using SpEL for validation in your Spring Boot application.
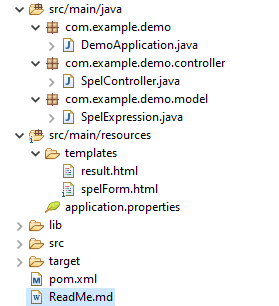
Project Structure
Step 1: Set Up Your Spring Boot Project
First things first, let’s set up your Spring Boot project. Head over to Spring Initializer and create a new project with the following dependencies:
- Spring Boot Starter Web
- Thymeleaf (for the form interface)
<dependencies>
	<dependency>
		<groupId>org.springframework.boot</groupId>
		<artifactId>spring-boot-starter-web</artifactId>
		<version>3.4.2</version>
	</dependency>
	<dependency>
		<groupId>org.springframework.boot</groupId>
		<artifactId>spring-boot-starter-thymeleaf</artifactId>
		<version>3.4.2</version>
	</dependency>
</dependencies>
Step 2: Create the Main Application Class
Next, we will create the main application class to bootstrap our Spring Boot application.
package com.example.demo;

import org.springframework.boot.SpringApplication;
import org.springframework.boot.autoconfigure.SpringBootApplication;

@SpringBootApplication
public class DemoApplication {

    public static void main(String[] args) {
        SpringApplication.run(DemoApplication.class, args);
    }
}
Step 3: Create a Model Class
Create a SpelExpression class to hold the user input.
package com.example.demo.model;

public class SpelExpression {
    private String expression;

    // Getters and Setters
    public String getExpression() {
        return expression;
    }

    public void setExpression(String expression) {
        this.expression = expression;
    }
}
Step 4: Create a Controller
Create a controller to handle user input and validate the SpEL expression.
package com.example.demo.controller;

import com.example.demo.model.SpelExpression;
import org.springframework.expression.ExpressionParser;
import org.springframework.expression.spel.SpelParseException;
import org.springframework.expression.spel.standard.SpelExpressionParser;
import org.springframework.stereotype.Controller;
import org.springframework.ui.Model;
import org.springframework.web.bind.annotation.GetMapping;
import org.springframework.web.bind.annotation.ModelAttribute;
import org.springframework.web.bind.annotation.PostMapping;

@Controller
public class SpelController {

    private final ExpressionParser parser = new SpelExpressionParser();

    @GetMapping("/spelForm")
    public String showForm(Model model) {
        model.addAttribute("spelExpression", new SpelExpression());
        return "spelForm";
    }

    @PostMapping("/validateSpel")
    public String validateSpel(@ModelAttribute SpelExpression spelExpression, Model model) {
        try {
            parser.parseExpression(spelExpression.getExpression());
            model.addAttribute("message", "The expression is valid.");
        } catch (SpelParseException e) {
            model.addAttribute("message", "Invalid expression: " + e.getMessage());
        }
        return "result";
    }
}
Step 5: Create Thymeleaf Templates
Create Thymeleaf templates for the form and the result page.
spelForm.html
<!DOCTYPE html>
<html xmlns:th="http://www.thymeleaf.org">
<head>
    <title>SpEL Form</title>
    <style>
        body {
            font-family: Arial, sans-serif;
            background-color: #f4f4f9;
            color: #333;
            margin: 0;
            padding: 0;
            display: flex;
            justify-content: center;
            align-items: center;
            height: 100vh;
        }
        .container {
            background-color: #fff;
            padding: 20px;
            border-radius: 8px;
            box-shadow: 0 0 10px rgba(0, 0, 0, 0.1);
            text-align: center;
        }
        h1 {
            color: #4CAF50;
        }
        form {
            margin-top: 20px;
        }
        label {
            display: block;
            margin-bottom: 8px;
            font-weight: bold;
        }
        input[type="text"] {
            width: 100%;
            padding: 8px;
            margin-bottom: 20px;
            border: 1px solid #ccc;
            border-radius: 4px;
        }
        button {
            padding: 10px 20px;
            background-color: #4CAF50;
            color: #fff;
            border: none;
            border-radius: 4px;
            cursor: pointer;
        }
        button:hover {
            background-color: #45a049;
        }
    </style>
</head>
<body>
    <div class="container">
        <h1>SpEL Expression Validator</h1>
        <form th:action="@{/validateSpel}" th:object="${spelExpression}" method="post">
            <div>
                <label>Expression:</label>
                <input type="text" th:field="*{expression}" />
            </div>
            <div>
                <button type="submit">Validate</button>
            </div>
        </form>
    </div>
</body>
</html>
result.html
<!DOCTYPE html>
<html xmlns:th="http://www.thymeleaf.org">
<head>
    <title>Validation Result</title>
    <style>
        body {
            font-family: Arial, sans-serif;
            background-color: #f4f4f9;
            color: #333;
            margin: 0;
            padding: 0;
            display: flex;
            justify-content: center;
            align-items: center;
            height: 100vh;
        }
        .container {
            background-color: #fff;
            padding: 20px;
            border-radius: 8px;
            box-shadow: 0 0 10px rgba(0, 0, 0, 0.1);
            text-align: center;
        }
        h1 {
            color: #4CAF50;
        }
        p {
            font-size: 18px;
        }
        a {
            display: inline-block;
            margin-top: 20px;
            padding: 10px 20px;
            background-color: #4CAF50;
            color: #fff;
            text-decoration: none;
            border-radius: 4px;
        }
        a:hover {
            background-color: #45a049;
        }
    </style>
</head>
<body>
    <div class="container">
        <h1>Validation Result</h1>
        <p th:text="${message}"></p>
        <a href="/spelForm">Back to Form</a>
    </div>
</body>
</html>
Step 6: Run the Application
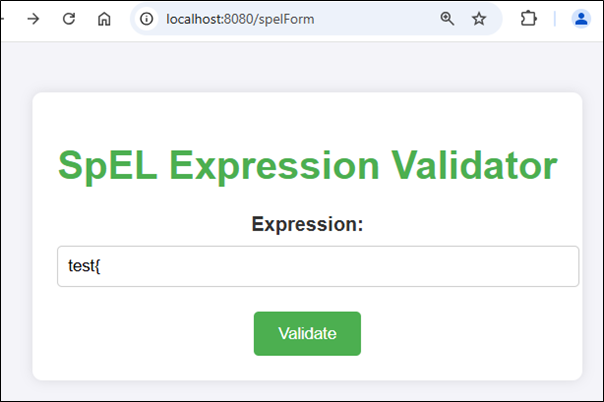
Now, it’s time to run your Spring Boot application. To test the SpEL validator, navigate to http://localhost:8080/spelForm in your browser.
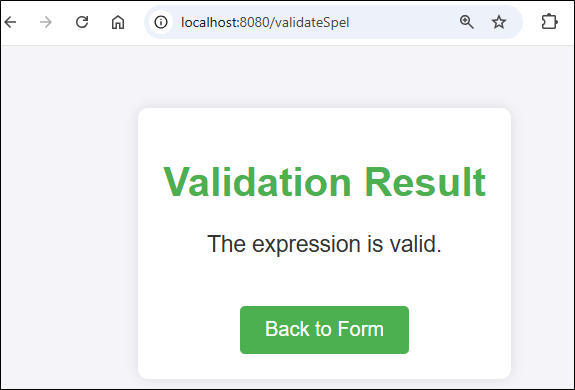
For Valid Expression

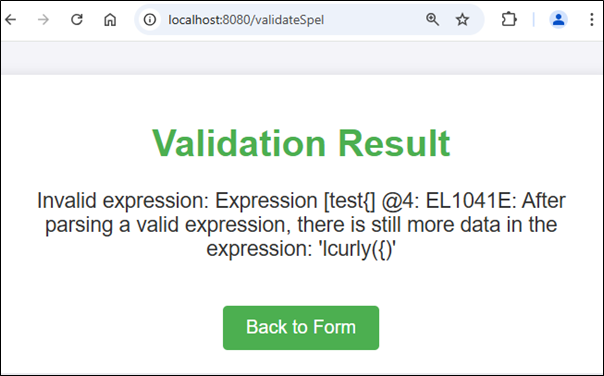
For Invalid Expression
Conclusion
Following this guide, you successfully implemented a SpEL validator in your Spring Boot application. This powerful feature enhances your application’s flexibility and robustness. Keep exploring SpEL for more dynamic and sophisticated solutions. Happy coding!
Source: Read MoreÂ
