


Introduction:
In today’s digital landscape, organizations increasingly rely on automated workflows to enhance efficiency and streamline processes. However, as these workflows grow in complexity, tracking their execution history becomes essential for ensuring reliability and facilitating troubleshooting.
This blog explores a powerful approach to logging workflow running history using child flows in Power Automate. By leveraging child flows, users can capture critical data such as flow names, statuses, and execution URLs, storing this information in SharePoint or Dataverse tables for easy access and analysis.
In this Blog Series, you will be briefly seeing these topics in two parts:
- Part 1: Step-by-Step Guide — Creating a child flow to capture the necessary data for tracking your workflow execution history
- Part 2: Step-by-Step Guide — Integrating Child flow to the Parent Flow & How to Access this child flow as a reusable template across the different projects or Teams.
In this Part, you will introduce the concept of creating a child flow to get the necessary data.
Prerequisites:
-
- SharePoint or Dataverse: Ensure you have access to either SharePoint or Dataverse to store and manage your data.
- Power Automate: A valid account to access Power Automate for creating and managing your workflows.
Step-by-Step Guide:
Now, let’s dive into the detailed process for creating flows in Power Automate.
Setting Up in SharePoint or Dataverse
- Create a List or Table named “Log Workflow Histories.”
- Add the Following Columns:
| Column Name | Data Type |
| Flow Name | Single Line of Text |
| Flow Run URL | Link / Hyperlink or Picture |
| Flow Start Time | Date and Time |
| Flow End Time | Date and Time |
| Flow Status | Single Line of Text |
Creating a Child Flow:
- Access Power Automate at Power Automate.
- Select “Solutions” from the left navigation pane.
- Open Your Existing Solution or create a new one by clicking “New Solution.”
- Create a Child Flow by navigating to:
- All > New > Automation > Cloud Flow > Instant.
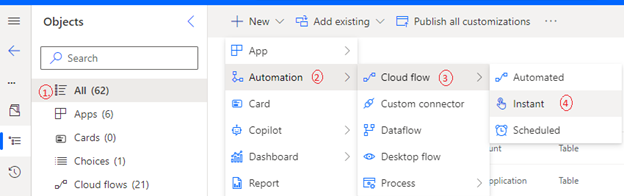
- All > New > Automation > Cloud Flow > Instant.
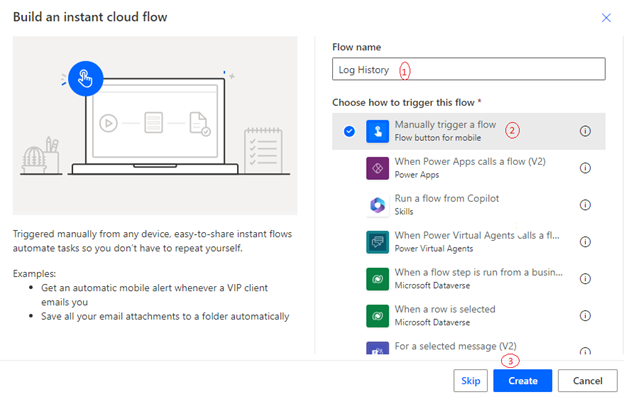
Step 1: Provide a Flow Name and Select the Manual Trigger
Choose a descriptive name for your flow that clearly indicates its purpose. This helps in identifying the flow later.
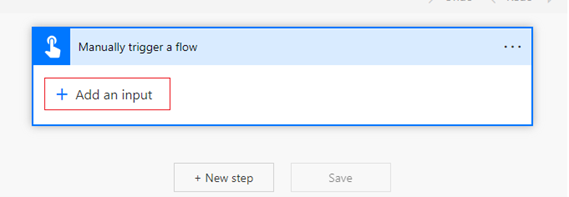
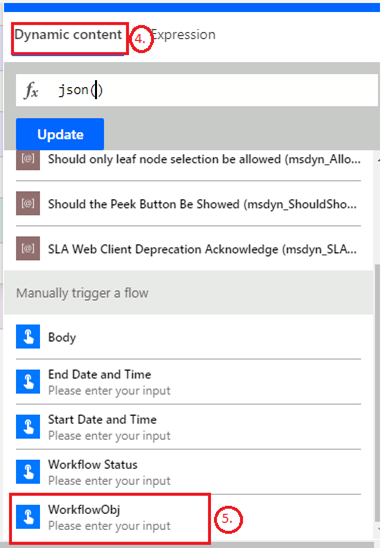
Step 2: Set Inputs in the Manual Trigger
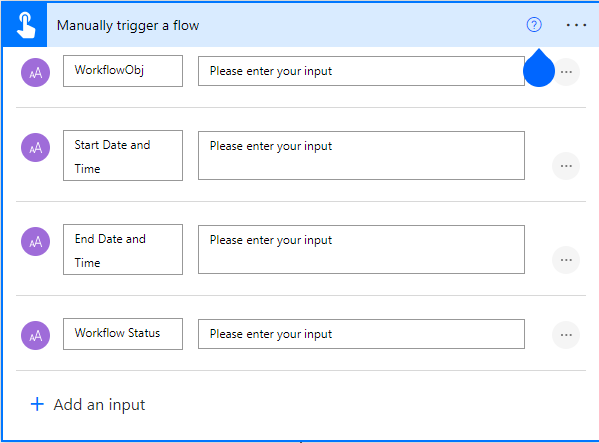
Input Source: The inputs for this flow will be provided by the parent flow. Ensure that the following inputs are configured to receive data from the parent flow:
- Input 1: Workflow Object (Type: Text)
- Input 2: Start Date and Time (Type: Text)
- Input 3: End Date and Time (Type: Text)
- Input 4: Workflow Status (Type: Text)
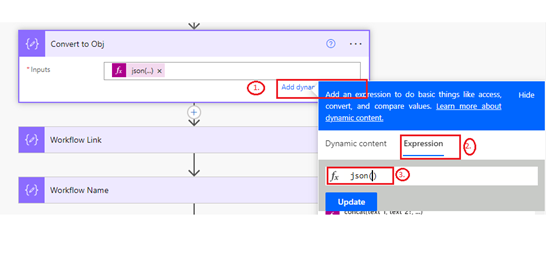
Step 3: Add a Compose Action to Convert the Workflow Object to JSON Format.
The Workflow Object we receive from the parent flow is in JSON format but is treated as a string in the manual trigger input. By converting it into a JSON object, we can easily extract specific information and manipulate the data as needed in subsequent steps of the flow.
- Add a Compose Action:
- Click on “+ New Step.”
- Search for and select “Compose.”
- Configure the Compose Action:
- In the Inputs field of the Compose action, enter the following expression to convert the Workflow Object to JSON format:
json(triggerBody()?['Workflow Object'])


- In the Inputs field of the Compose action, enter the following expression to convert the Workflow Object to JSON format:
- Name the Compose Action (Optional but Best Practice):
- You can rename the action to something descriptive, like “Convert Workflow Obj to JSON.” In this example, I have named “Convert to Obj”.
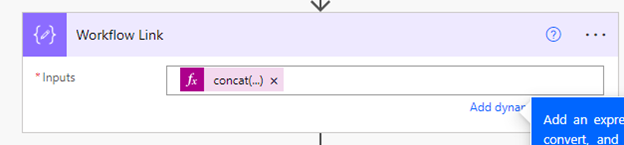
Step 4: Add a Compose Action to Extract the Workflow Link
This Compose action allows us to isolate and extract the workflow link from the previously converted JSON object. This makes it easier to use the link in further actions within the flow.
- Add Another Compose Action:
- Click on “+ New Step.”
- Search for and select “Compose.”
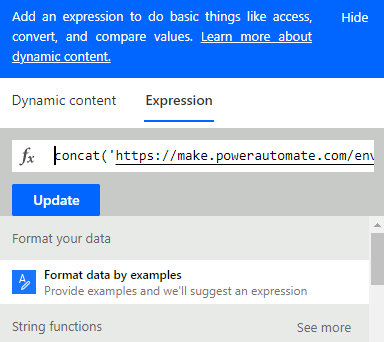
- Configure the Compose Action:
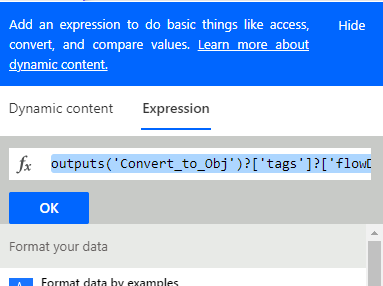
- In the Inputs field of this Compose action, enter the expression to extract the workflow link.
- The expression would be:
concat('https://make.powerautomate.com/environments/',outputs('Convert_to_Obj')?['tags']?['environmentName'],'/flows/',outputs('Convert_to_Obj')?['name'],'/runs/',outputs('Convert_to_Obj')?['run']?['name'])
‘Convert_to_Obj’ – replace it with the name of your previous compose action.
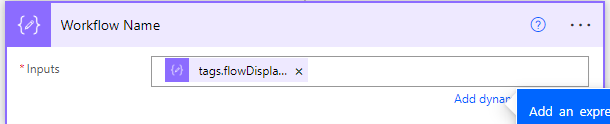
Step 5: Add another Compose Action to Extract the Flow Name
Please revisit Step 4 and replace the current expression with the following. Additionally, rename the Compose action to “Workflow Name.”
The Expression would be:outputs('Convert_to_Obj')?['tags']?['flowDisplayName']
The extraction from the workflow object is now complete. Next, it’s time to add the item to either a SharePoint list or a Dataverse table.
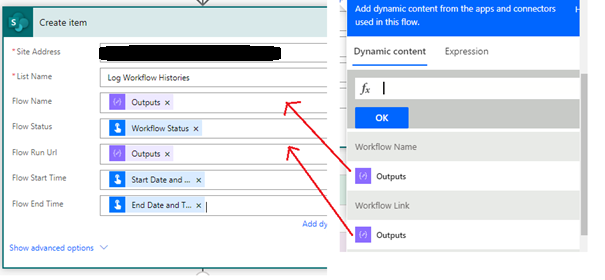
Step 6: Add an Item to SharePoint List
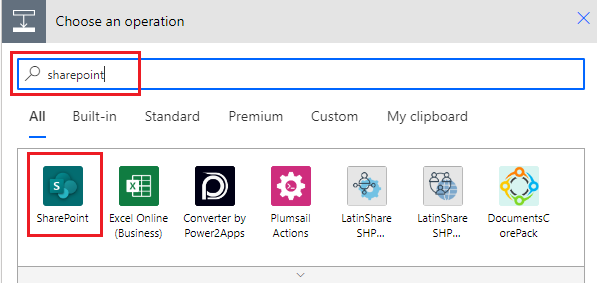
- Add a New Step:
- Click on “+ New Step.”
- Search for and select “SharePoint” from the list of connectors.
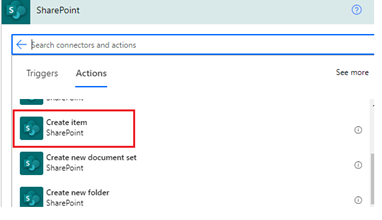
- Choose Action:
- Select the action “Create Item.”
- Select the action “Create Item.”
- Configure the Create Item Action:
- Site Address: Choose the SharePoint site where your list is located.
- List Name: Select the “Log Workflow Histories” list you created earlier.
- Map the Fields:
Fill in the fields using the outputs from previous steps:- Workflow Name: Use the output from the “Workflow Name” Compose action.
- Start Date and Time: Map this to the corresponding input from the manual trigger.
- End Date and Time: Map this to the corresponding input from the manual trigger.
- Workflow Status: Map this to the corresponding input from the manual trigger.
- Workflow Link: Use the output from the Compose action that extracted the workflow link.
You can follow either Step 6 or Step 7 based on your chosen data source—SharePoint or Dataverse. If you’re using SharePoint, refer to Step 6 for adding an item to the SharePoint list. If you’re using Dataverse, follow Step 7 to add a row to the Dataverse table.
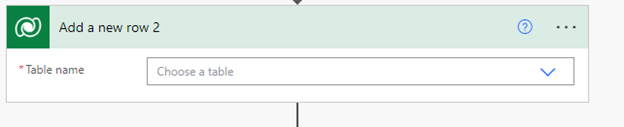
Step 7: Add an Item to Dataverse Table
- Add a New Step:
- Click on “+ New Step.”
- Search for and select “Dataverse” from the list of connectors.
- Choose Action:
- Select the action “Add a Row.”
- Select the action “Add a Row.”
- Configure the Add a Row Action:
- Table Name: Select the Dataverse table where you want to add the item (e.g., “Log Workflow Histories”).
- Map the Fields:
Fill in the fields using outputs from previous steps:- Workflow Name: Use the output from the “Workflow Name” Compose action.
- Start Date and Time: Map this to the corresponding input from the manual trigger.
- End Date and Time: Map this to the corresponding input from the manual trigger.
- Workflow Status: Map this to the corresponding input from the manual trigger.
- Workflow Link: Use the output from the Compose action that extracted the workflow link.
Conclusion:
“In the first part, we’ve explored how to create the child flow. In the next part of this series, we’ll show you how to integrate this child flow into a parent flow and start capturing the history for your critical flows. “
Source: Read MoreÂ