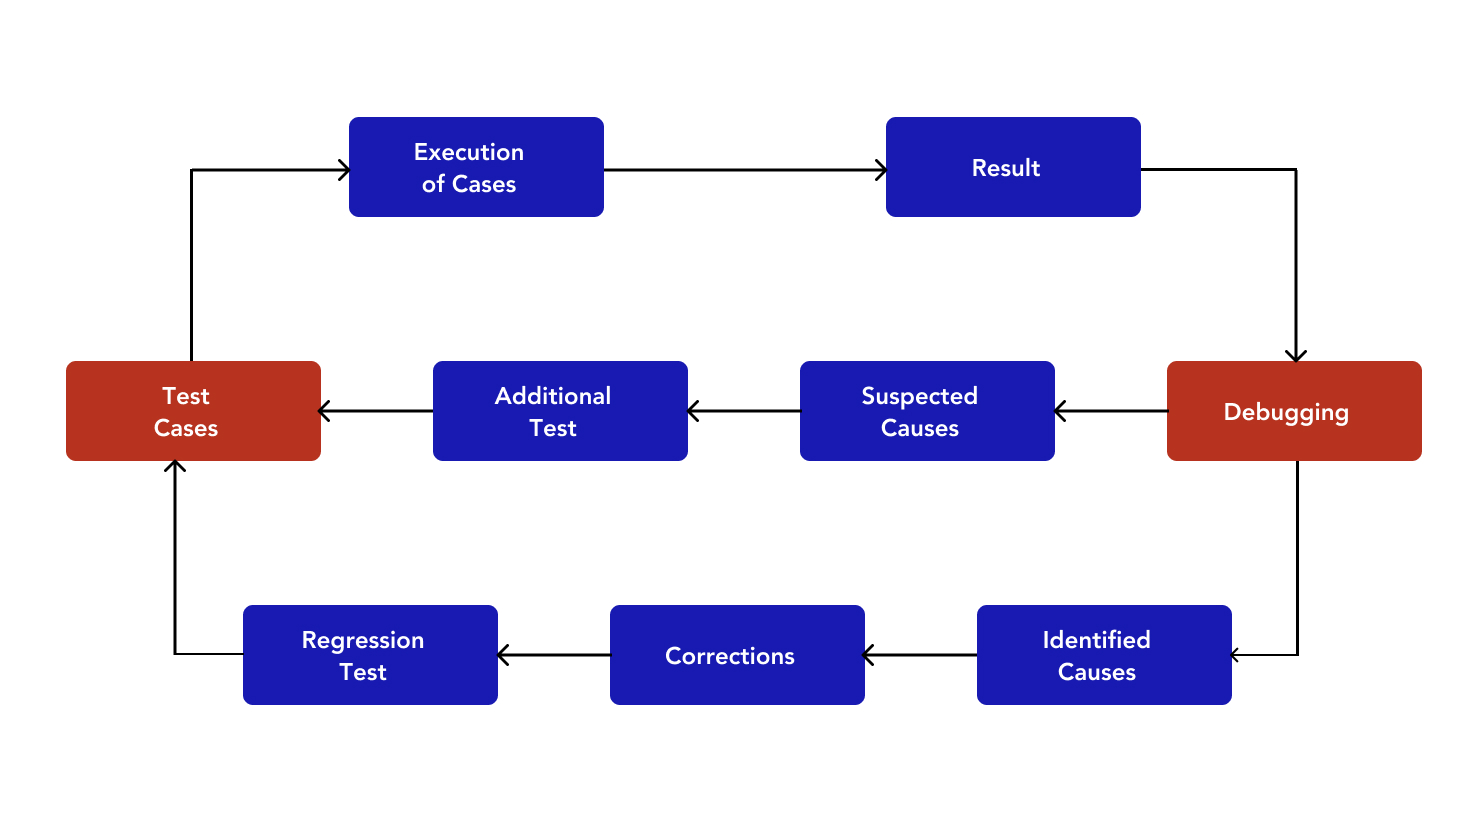
Appium Debugging is a crucial step in ensuring the reliability and efficiency of mobile test automation. It helps identify and fix issues that may arise during test execution. By using a clear and systematic approach to Appium Debugging, testers can quickly pinpoint problems, whether they are related to the app itself or the test scripts. Effective Appium Debugging involves analyzing logs, validating locators, adjusting waits, and testing across various devices. With the right techniques, you can improve the success rate of your automated tests and ensure smoother test execution.
What is Appium and How Does It Work?
Appium is an open-source automation tool for testing mobile applications. It supports testing of native, hybrid, and mobile web applications across iOS and Android platforms. Appium allows you to write tests in multiple programming languages, such as Java, Python, Ruby, and JavaScript, making it flexible for developers and testers.
Appium uses WebDriver, which is a widely adopted standard for browser automation, to interact with mobile apps. It doesn’t require access to the source code of the app, allowing for testing on real devices or emulators/simulators. Appium is widely used for both functional and performance testing, ensuring that mobile apps perform as expected under different conditions.
Common Debugging Techniques for Failed Appium Tests
Appium Debugging is the process of finding and fixing problems in your Appium tests. Appium is a tool used to automate testing for mobile apps on Android and iOS. When tests fail or don’t work as expected, debugging helps figure out what went wrong and how to fix it.
Here’s what’s involved in Appium Debugging:
1. Analyze Logs
Appium Server Logs
Review the logs made by the Appium server as they will give useful details. Look for errors, warnings, and stack traces. This can help you spot the problem.
Device Logs
You can use tools like ADB logcat for Android and Console logs for iOS during Appium Debugging. These tools help you see problems that occur on the device and provide valuable insights into device-side issues.
Test Framework Logs
- If you use a framework like TestNG or JUnit, enable detailed logging in your test cases.
- This will provide you with more information about any test failures.
2. Validate Locator Strategy
Ensure Valid Locators
- Make sure the locators, like ID, XPath, and className, in your tests are right.
- Check that they are visible on the screen of the current app.
Use Debugging Tools
- Appium Inspector: View UI elements and their details.
- uiautomatorviewer (Android) or Xcode Accessibility Inspector (iOS): Review and correct element locators.
3. Reproduce the Issue Manually
- Go through the same steps from the test that didn’t work.
- This will help you find out if the issue is in the app or in the test script.
- Doing this will show if the problem comes from the app or from automation.
4. Verify App State
Pre-step Validation
- Ensure the app is set up right before you start each step.
- Add checks to stop any errors from happening.
Screenshots
- Take screenshots while the test is going on.
- Doing this will help you see how the app works at each step.
5. Inspect Waits and Timeouts
Replace Hardcoded Sleeps
- Keep away from flaky tests.
- Use explicit waits instead.
- Utilize fluent waits.
Validate Response Time
- Ensure the app replies in the right time.
6. Run Tests in Isolation
Isolate the Failing Test
- Run the failing test by itself.
- This helps you see if other tests are affecting its results.
Reset App State
- Clear the app data.
- Restart the app or your session.
- Do this before you run the test.
- It helps to make sure everything is fresh.

7. Debug Network Calls
Monitor API Interactions
- Use tools such as Charles Proxy or Wireshark.
- Keep an eye on network traffic.
- Check API responses while testing.
8. Check Device/Emulator Stability
Device Performance
- Keep the device or emulator stable.
- It must respond correctly.
- It should have enough resources.
Restart Devices
- Restart your devices or emulators.
- This can help solve performance problems.
- Make sure to do this before you start any tests.
9. Review Desired Capabilities
Validate Configuration
Double-check the capabilities you send to the Appium server. Make sure they match what you need for your test environment. A frequent issue is if the platform versions or app package names do not align.
10. Enable Debugging Modes
Use Breakpoints
- Put breakpoints in your IDE.
- Run the test in debug mode.
- This will let you look at the app’s state.
- You can check the values of variables step by step.
Inspect Appium Session
You can use Appium’s session details with tools like Appium Inspector. You can also send direct session commands. This helps you check and fix your work.
11. Use Real Devices
Compatibility Testing
Test using a mix of real devices and emulators. This helps find problems that are specific to the devices.
12. Consult Resources
Appium Community
- Check Appium GitHub issues, Stack Overflow, or other QA forums for similar problems.
- These sources are great for fixing Appium bugs or issues that relate to a version.
13. Update Dependencies
Keep Dependencies Current
- Ensure that Appium, Appium drivers, and other necessary tools are up to date.
- Verify that the versions of Appium, your operating system, and the app you are testing are compatible.
14. Enable Screen Recording
Record Test Execution
Use Appium to record your screen while the tests run. This helps you spot problems later by providing useful video insights.
Conclusion
Appium Debugging can be a challenging process, but with the right approach, it becomes much more manageable. By analyzing logs, validating locators, and ensuring the app is in the correct state, testers can quickly identify the root causes of failures. Additionally, tools like Appium Inspector and network traffic monitors, along with proper handling of waits and timeouts, help in diagnosing and fixing issues efficiently.
Incorporating techniques such as isolating tests, updating dependencies, and using screen recording for visual insights can significantly improve the Appium Debugging process. Leveraging these strategies not only enhances test stability but also helps in resolving issues faster, leading to more reliable and effective test automation overall.
Enhance your testing process today! Explore more Appium Debugging techniques and elevate your automation testing strategy. Visit our Mobile App Automation Services to learn how we can help streamline your testing efforts. Start debugging smarter now!
Frequently Asked Questions
-
What is automation debugging?
Automation debugging is the process of identifying, analyzing, and resolving issues in automated test scripts or processes. It involves examining test logs, reviewing code, and using debugging tools to pinpoint errors or failures in test automation frameworks. Automation debugging helps ensure that tests run smoothly, accurately validate software functionality, and deliver reliable results in less time. This practice is crucial for maintaining the efficiency and reliability of automated testing workflows.
-
What is Appium vs Selenium?
Appium and Selenium are both powerful tools for automated testing, but they target different platforms:
Appium: A mobile automation framework designed specifically for testing native, hybrid, and mobile web applications on iOS and Android devices. It supports cross-platform testing, allowing a single script to run on multiple platforms.
Selenium: A web automation framework used for testing web applications across various browsers like Chrome, Firefox, and Safari. It is widely used for desktop browser-based testing.
The post Appium Debugging: Common Techniques for Failed Tests appeared first on Codoid.
Source: Read More


