
In this tutorial, we’ll build a Flutter application that demonstrates how to perform CRUD (Create, Read, Update, Delete) operations using Hive for local data storage.
Hive is a lightweight, fast key-value database written in pure Dart. Unlike SQLite, it doesn’t need a heavy SQL engine. It stores data in boxes, which you can think of as containers (similar to tables, but simpler).
For a small CRUD app like this, Hive is a great fit because:
It’s offline-first, and all data is stored locally on the device – no internet required.
It’s type-safe and integrates well with Dart models (like our
Item).It’s much faster than SQLite for simple operations.
It has a Flutter-friendly API (
hive_flutter) for things like reactive updates.
Hive is great for a number of different use cases, like storing app preferences/settings, managing small to medium lists of structured data (like notes, tasks, or shopping lists), offline caching for API responses, and storing session or user profile data locally.
Here, Hive is powering the to-do/inventory-like list of items, which means everything (title, quantity) is stored locally and persists even after the app restarts.
By the end of this tutorial, you’ll have a fully functional app that lets you add, edit, delete, and view items locally. I’ll provide clear explanations of the code along the way.
Table of Contents:
Prerequisites
Before we begin, make sure you have the following:
Flutter SDK installed (version 3.0 or higher recommended).
Basic knowledge of Flutter: widgets, stateful/stateless widgets, and navigation.
A code editor like VS Code or Android Studio.
Familiarity with Dart classes, maps, and enums.
Step 1: Project Setup
Start by creating a new Flutter project:
flutter create flutter_hive_crud
<span class="hljs-built_in">cd</span> flutter_hive_crud
Open pubspec.yaml and add the following dependencies:
<span class="hljs-attr">dependencies:</span>
  <span class="hljs-attr">hive:</span> <span class="hljs-string">^2.2.3</span>
  <span class="hljs-attr">hive_flutter:</span> <span class="hljs-string">^1.1.0</span>
  <span class="hljs-attr">fluttertoast:</span> <span class="hljs-string">^8.2.12</span>
  <span class="hljs-attr">equatable:</span> <span class="hljs-string">^2.0.7</span>
Install them:
flutter pub get
hive– Lightweight key-value database for Flutter.hive_flutter– Flutter bindings for Hive.fluttertoast– Displays toast messages.equatable– Simplifies value equality in Dart objects.
Step 2: Project Folder Structure
Organize your project like this:
lib/
├── main.dart
├── model/
│   └── item.dart
├── controller/
│   └── controller.dart
├── constants/
│   ├── string_constants.dart
│   └── enums/
│       ├── status.dart
│       └── yes_no.dart
└── screens/
    ├── main_screen.dart
    └── widgets/
        ├── are_you_sure.dart
        ├── single_list_tile.dart
        ├── text_action.dart
        └── toast.dart
This structure keeps the app modular and maintainable.
Step 3: Implementing the Application
We’ll go through the process file by file, and I’ll explain what each piece does as we go.
1. main.dart
This is the entry point of the application. It initializes Hive and launches the app.
<span class="hljs-keyword">import</span> <span class="hljs-string">'package:flutter/material.dart'</span>;
<span class="hljs-keyword">import</span> <span class="hljs-string">'package:hive_flutter/hive_flutter.dart'</span>;
<span class="hljs-keyword">import</span> <span class="hljs-string">'screens/main_screen.dart'</span>;
<span class="hljs-keyword">import</span> <span class="hljs-string">'constants/string_constants.dart'</span>;

Future<<span class="hljs-keyword">void</span>> main() <span class="hljs-keyword">async</span> {
  WidgetsFlutterBinding.ensureInitialized();

  <span class="hljs-comment">// Initialize Hive for Flutter</span>
  <span class="hljs-keyword">await</span> Hive.initFlutter();

  <span class="hljs-comment">// Open the Hive box to store items</span>
  <span class="hljs-keyword">await</span> Hive.openBox(StringConstants.hiveBox);

  runApp(<span class="hljs-keyword">const</span> MyApp());
}

<span class="hljs-class"><span class="hljs-keyword">class</span> <span class="hljs-title">MyApp</span> <span class="hljs-keyword">extends</span> <span class="hljs-title">StatelessWidget</span> </span>{
  <span class="hljs-keyword">const</span> MyApp({<span class="hljs-keyword">super</span>.key});

  <span class="hljs-meta">@override</span>
  Widget build(BuildContext context) {
    <span class="hljs-keyword">return</span> MaterialApp(
      title: <span class="hljs-string">'Flutter Hive CRUD'</span>,
      theme: ThemeData(
        colorScheme: ColorScheme.fromSeed(seedColor: Colors.brown),
        useMaterial3: <span class="hljs-keyword">true</span>,
      ),
      home: <span class="hljs-keyword">const</span> MainScreen(),
    );
  }
}
Here’s what’s going on in this code:
WidgetsFlutterBinding.ensureInitialized()ensures Flutter widgets are ready.Hive.initFlutter()initializes Hive in Flutter.Hive.openBox(...)opens a persistent storage box.MyAppsets up the Material theme and main screen.
2. item.dart (Model)
Since Hive stores data as key-value pairs, we need to decide how to represent each item (like a shopping list entry or product in stock). To keep our code organized, we’ll wrap each item in a Dart class called Item. That way, we can easily create, update, and convert items to Maps when saving them into Hive.
<span class="hljs-keyword">import</span> <span class="hljs-string">'package:equatable/equatable.dart'</span>;

<span class="hljs-class"><span class="hljs-keyword">class</span> <span class="hljs-title">Item</span> <span class="hljs-keyword">extends</span> <span class="hljs-title">Equatable</span> </span>{
  <span class="hljs-keyword">final</span> <span class="hljs-built_in">String</span> title;
  <span class="hljs-keyword">final</span> <span class="hljs-built_in">int</span> quantity;

  <span class="hljs-keyword">const</span> Item({<span class="hljs-keyword">required</span> <span class="hljs-keyword">this</span>.title, <span class="hljs-keyword">required</span> <span class="hljs-keyword">this</span>.quantity});

  <span class="hljs-meta">@override</span>
  <span class="hljs-built_in">List</span><<span class="hljs-built_in">Object</span>> <span class="hljs-keyword">get</span> props => [title, quantity];

  <span class="hljs-comment">// Convert Item to Map for Hive storage</span>
  <span class="hljs-built_in">Map</span><<span class="hljs-built_in">String</span>, <span class="hljs-built_in">dynamic</span>> toMap() {
    <span class="hljs-keyword">return</span> {<span class="hljs-string">'title'</span>: title, <span class="hljs-string">'quantity'</span>: quantity};
  }

  <span class="hljs-comment">// Create Item from Map</span>
  <span class="hljs-keyword">factory</span> Item.fromMap(<span class="hljs-built_in">Map</span><<span class="hljs-built_in">String</span>, <span class="hljs-built_in">dynamic</span>> map) {
    <span class="hljs-keyword">return</span> Item(title: map[<span class="hljs-string">'title'</span>], quantity: map[<span class="hljs-string">'quantity'</span>]);
  }
}
So every time we save or fetch data, we’re just converting between Item (class instance) and Map (Hive format).
Here’s what’s going on:
Equatableallows comparing items by value instead of reference.toMap()andfromMap()convert between Dart objects and the Hive storage format.
3. controller.dart (Hive Controller)
This controller handles all Hive CRUD operations and UI updates.
<span class="hljs-keyword">import</span> <span class="hljs-string">'package:flutter/material.dart'</span>;
<span class="hljs-keyword">import</span> <span class="hljs-string">'package:flutter_hive_crud/constants/string_constants.dart'</span>;
<span class="hljs-keyword">import</span> <span class="hljs-string">'package:flutter_hive_crud/screens/widgets/toast.dart'</span>;
<span class="hljs-keyword">import</span> <span class="hljs-string">'package:hive_flutter/hive_flutter.dart'</span>;
<span class="hljs-keyword">import</span> <span class="hljs-string">'../constants/enums/status.dart'</span>;
<span class="hljs-keyword">import</span> <span class="hljs-string">'../model/item.dart'</span>;

<span class="hljs-class"><span class="hljs-keyword">class</span> <span class="hljs-title">HiveController</span> </span>{
  <span class="hljs-keyword">final</span> BuildContext context;
  <span class="hljs-keyword">final</span> <span class="hljs-built_in">Function</span> fetchDataFunction;

  HiveController({<span class="hljs-keyword">required</span> <span class="hljs-keyword">this</span>.context, <span class="hljs-keyword">required</span> <span class="hljs-keyword">this</span>.fetchDataFunction});

  <span class="hljs-keyword">final</span> hiveBox = Hive.box(StringConstants.hiveBox);

  <span class="hljs-comment">// Fetch all items from Hive</span>
  <span class="hljs-built_in">List</span><<span class="hljs-built_in">Map</span><<span class="hljs-built_in">String</span>, <span class="hljs-built_in">dynamic</span>>> fetchData() {
    <span class="hljs-keyword">return</span> hiveBox.keys.map((key) {
      <span class="hljs-keyword">final</span> item = hiveBox.<span class="hljs-keyword">get</span>(key);
      <span class="hljs-keyword">return</span> {
        <span class="hljs-string">'key'</span>: key,
        <span class="hljs-string">'title'</span>: item[<span class="hljs-string">'title'</span>],
        <span class="hljs-string">'quantity'</span>: item[<span class="hljs-string">'quantity'</span>],
      };
    }).toList().reversed.toList();
  }

  Future<<span class="hljs-keyword">void</span>> createItem({<span class="hljs-keyword">required</span> Item item}) <span class="hljs-keyword">async</span> {
    <span class="hljs-keyword">try</span> {
      <span class="hljs-keyword">await</span> hiveBox.add(item.toMap());
      afterAction(<span class="hljs-string">'saved'</span>);
    } <span class="hljs-keyword">catch</span> (e) {
      toastInfo(msg: <span class="hljs-string">'Failed to create item'</span>, status: Status.error);
    }
  }

  Future<<span class="hljs-keyword">void</span>> editItem({<span class="hljs-keyword">required</span> Item item, <span class="hljs-keyword">required</span> <span class="hljs-built_in">int</span> itemKey}) <span class="hljs-keyword">async</span> {
    <span class="hljs-keyword">try</span> {
      hiveBox.put(itemKey, item.toMap());
      afterAction(<span class="hljs-string">'edited'</span>);
    } <span class="hljs-keyword">catch</span> (e) {
      toastInfo(msg: <span class="hljs-string">'Failed to edit item'</span>, status: Status.error);
    }
  }

  Future<<span class="hljs-keyword">void</span>> deleteItem({<span class="hljs-keyword">required</span> <span class="hljs-built_in">int</span> key}) <span class="hljs-keyword">async</span> {
    <span class="hljs-keyword">try</span> {
      <span class="hljs-keyword">await</span> hiveBox.delete(key);
      afterAction(<span class="hljs-string">'deleted'</span>);
    } <span class="hljs-keyword">catch</span> (e) {
      toastInfo(msg: <span class="hljs-string">'Failed to delete item'</span>, status: Status.error);
    }
  }

  Future<<span class="hljs-keyword">void</span>> clearItems() <span class="hljs-keyword">async</span> {
    <span class="hljs-keyword">try</span> {
      <span class="hljs-keyword">await</span> hiveBox.clear();
      afterAction(<span class="hljs-string">'cleared'</span>);
    } <span class="hljs-keyword">catch</span> (e) {
      toastInfo(msg: <span class="hljs-string">'Failed to clear items'</span>, status: Status.error);
    }
  }

  <span class="hljs-keyword">void</span> afterAction(<span class="hljs-built_in">String</span> keyword) {
    toastInfo(msg: <span class="hljs-string">'Item <span class="hljs-subst">$keyword</span> successfully'</span>, status: Status.success);
    fetchDataFunction(); <span class="hljs-comment">// Refresh UI</span>
    Navigator.of(context).pop(); <span class="hljs-comment">// Close modals</span>
  }
}
Let’s break down this HiveController code block by block, explaining exactly what each section does and why it’s important.
Imports:
<span class="hljs-keyword">import</span> <span class="hljs-string">'package:flutter/material.dart'</span>;
<span class="hljs-keyword">import</span> <span class="hljs-string">'package:flutter_hive_crud/constants/string_constants.dart'</span>;
<span class="hljs-keyword">import</span> <span class="hljs-string">'package:flutter_hive_crud/screens/widgets/toast.dart'</span>;
<span class="hljs-keyword">import</span> <span class="hljs-string">'package:hive_flutter/hive_flutter.dart'</span>;
<span class="hljs-keyword">import</span> <span class="hljs-string">'../constants/enums/status.dart'</span>;
<span class="hljs-keyword">import</span> <span class="hljs-string">'../model/item.dart'</span>;
Here’s what’s happening:
flutter/material.dart– Provides Flutter’s material design widgets and utilities.string_constants.dart– Contains app-wide constants, for example the name of the Hive box.toast.dart– Utility to display toast messages for success or error feedback.hive_flutter.dart– Hive package integration with Flutter.status.dart– Enum representing status types (errororsuccess) for toast messages.item.dart– The model class representing an individual item (title + quantity).
These imports allow the controller to manage Hive data and interact with the UI.
Class definition and constructor:
<span class="hljs-class"><span class="hljs-keyword">class</span> <span class="hljs-title">HiveController</span> </span>{
  <span class="hljs-keyword">final</span> BuildContext context;
  <span class="hljs-keyword">final</span> <span class="hljs-built_in">Function</span> fetchDataFunction;

  HiveController({<span class="hljs-keyword">required</span> <span class="hljs-keyword">this</span>.context, <span class="hljs-keyword">required</span> <span class="hljs-keyword">this</span>.fetchDataFunction});
Here’s what’s going on:
HiveController– This class manages all CRUD operations for Hive.context– The current FlutterBuildContext, used to navigate and show modals or dialogs.fetchDataFunction– A function passed from the UI that refreshes the list after performing any Hive operation.
The constructor requires both parameters, ensuring that every instance of HiveController has access to the UI context and a way to refresh data.
Hive box reference:
<span class="hljs-keyword">final</span> hiveBox = Hive.box(StringConstants.hiveBox);
Here,
hiveBoxis a reference to the Hive box defined inStringConstants.hiveBox.A Hive box is like a key-value store where we save our items locally.
This allows the controller to interact with Hive without needing to re-open the box each time.
Fetching data:
  <span class="hljs-built_in">List</span><<span class="hljs-built_in">Map</span><<span class="hljs-built_in">String</span>, <span class="hljs-built_in">dynamic</span>>> fetchData() {
    <span class="hljs-keyword">return</span> hiveBox.keys.map((key) {
      <span class="hljs-keyword">final</span> item = hiveBox.<span class="hljs-keyword">get</span>(key);
      <span class="hljs-keyword">return</span> {
        <span class="hljs-string">'key'</span>: key,
        <span class="hljs-string">'title'</span>: item[<span class="hljs-string">'title'</span>],
        <span class="hljs-string">'quantity'</span>: item[<span class="hljs-string">'quantity'</span>],
      };
    }).toList().reversed.toList();
  }
Here’s what this code is doing:
hiveBox.keys– Retrieves all the keys stored in the Hive box..map((key) => ...)– Iterates through each key and fetches the associated item.Converts each item into a Map containing:
'key'– The unique Hive key (used for updates/deletes).'title'– Item title.'quantity'– Item quantity.
.toList().reversed.toList()– Converts the mapped iterable to a list and reverses it so newest items appear first.
This method returns a list of items ready for display in the UI.
Creating an item:
  Future<<span class="hljs-keyword">void</span>> createItem({<span class="hljs-keyword">required</span> Item item}) <span class="hljs-keyword">async</span> {
    <span class="hljs-keyword">try</span> {
      <span class="hljs-keyword">await</span> hiveBox.add(item.toMap());
      afterAction(<span class="hljs-string">'saved'</span>);
    } <span class="hljs-keyword">catch</span> (e) {
      toastInfo(msg: <span class="hljs-string">'Failed to create item'</span>, status: Status.error);
    }
  }
In this code,
item.toMap()– Converts theItemobject to a Map so Hive can store it.hiveBox.add(...)– Adds a new entry to the Hive box, generating a unique key automatically.afterAction('saved')– Shows a success toast, refreshes the UI, and closes any open modal.The
catchblock handles errors and displays a toast if something goes wrong.
Editing an item:
  Future<<span class="hljs-keyword">void</span>> editItem({<span class="hljs-keyword">required</span> Item item, <span class="hljs-keyword">required</span> <span class="hljs-built_in">int</span> itemKey}) <span class="hljs-keyword">async</span> {
    <span class="hljs-keyword">try</span> {
      hiveBox.put(itemKey, item.toMap());
      afterAction(<span class="hljs-string">'edited'</span>);
    } <span class="hljs-keyword">catch</span> (e) {
      toastInfo(msg: <span class="hljs-string">'Failed to edit item'</span>, status: Status.error);
    }
  }
In this code,
hiveBox.put(itemKey, item.toMap())– Updates the item at the specific key with the new data.afterAction('edited')– Handles feedback and UI updates.The
catchblock handles any errors during the edit process.
Deleting an item:
  Future<<span class="hljs-keyword">void</span>> deleteItem({<span class="hljs-keyword">required</span> <span class="hljs-built_in">int</span> key}) <span class="hljs-keyword">async</span> {
    <span class="hljs-keyword">try</span> {
      <span class="hljs-keyword">await</span> hiveBox.delete(key);
      afterAction(<span class="hljs-string">'deleted'</span>);
    } <span class="hljs-keyword">catch</span> (e) {
      toastInfo(msg: <span class="hljs-string">'Failed to delete item'</span>, status: Status.error);
    }
  }
Here,
hiveBox.delete(key)– Removes the item associated with the specified key from Hive.Calls
afterAction('deleted')to refresh UI and show a success message.Errors are handled with a toast.
Clearing all items:
  Future<<span class="hljs-keyword">void</span>> clearItems() <span class="hljs-keyword">async</span> {
    <span class="hljs-keyword">try</span> {
      <span class="hljs-keyword">await</span> hiveBox.clear();
      afterAction(<span class="hljs-string">'cleared'</span>);
    } <span class="hljs-keyword">catch</span> (e) {
      toastInfo(msg: <span class="hljs-string">'Failed to clear items'</span>, status: Status.error);
    }
  }
Here’s what’s happening:
hiveBox.clear()– Deletes all items in the Hive box.Useful for “Clear All” functionality in the app.
Success and errors are handled the same way as other actions.
After action helper:
  <span class="hljs-keyword">void</span> afterAction(<span class="hljs-built_in">String</span> keyword) {
    toastInfo(msg: <span class="hljs-string">'Item <span class="hljs-subst">$keyword</span> successfully'</span>, status: Status.success);
    fetchDataFunction(); <span class="hljs-comment">// Refresh UI</span>
    Navigator.of(context).pop(); <span class="hljs-comment">// Close modals</span>
  }
Here’s what’s going on:
toastInfo(...)– Displays a success toast, for example, “Item saved successfully.”fetchDataFunction()– Calls the function passed from the UI to reload the list.Navigator.of(context).pop()– Closes any open modal or dialog (like the item form).
This method avoids repetition, centralizing the logic after any CRUD operation.
Summary of HiveController Responsibilities:
Fetch items from Hive for UI display.
Create, update, delete, and clear items.
Provide user feedback via toast messages.
Refresh the UI automatically after any data change.
Manage modals and dialogs with context.
HiveControllerabstracts Hive operations for cleaner UI code.Methods:
createItem,editItem,deleteItem,clearItems.afterActionupdates the UI and shows success messages.
4. string_constants.dart
This is centralized storage for string constants like Hive box names.
<span class="hljs-class"><span class="hljs-keyword">class</span> <span class="hljs-title">StringConstants</span> </span>{
  <span class="hljs-keyword">static</span> <span class="hljs-keyword">const</span> hiveBox = <span class="hljs-string">'items'</span>;
}
In this code:
class StringConstants– Defines a class that’s only used to group constant values together.static– Means you don’t need to create an instance ofStringConstantsto use it. You can access it directly asStringConstants.hiveBox.const– Makes it a compile-time constant, so it can’t be modified anywhere in your code.'items'– This is just a string value. In this case, it’s the name of the Hive box you’ll be opening.
5. status.dart (Enum)
<span class="hljs-keyword">enum</span> Status { error, success }
In this code:
enum– Short for enumeration. It’s a special type that lets you define a fixed set of named values.Status– The name of the enum.{ error, success }– The possible values this enum can take.
So Status is now a custom type with only two valid values:
Status.error
Status.success
Why use it here?
Instead of passing around plain strings like "error" or "success" (which are easy to misspell), the code can use Status.error or Status.success.
For example, when showing a toast:
toastInfo(msg: <span class="hljs-string">'Item deleted'</span>, status: Status.success);
Or:
toastInfo(msg: <span class="hljs-string">'Failed to delete item'</span>, status: Status.error);
This makes the code safer (you can’t accidentally pass "sucess" and break things), clearer (you can see the intent immediately), and easier to maintain (if you add more statuses later like warning or info, it’s just one place to update).
6. yes_no.dart (Enum)
<span class="hljs-keyword">enum</span> YesNo { yes, no }
Defines a new type called
YesNo.It can only ever have two possible values:
YesNo.yesYesNo.no
Why use it?
Instead of passing around booleans (true / false) or strings ("yes" / "no"), you can use this enum to make your intent much clearer in code.
For example:
YesNo userAccepted = YesNo.yes;

<span class="hljs-keyword">if</span> (userAccepted == YesNo.yes) {
  <span class="hljs-built_in">print</span>(<span class="hljs-string">"User agreed!"</span>);
} <span class="hljs-keyword">else</span> {
  <span class="hljs-built_in">print</span>(<span class="hljs-string">"User declined!"</span>);
}
This is more descriptive than using a plain bool where you’d have to guess what true or false means in context.
Common use cases:
Confirmations (for example, “Do you want to save this file?”).
Settings toggles (for example, “Enable notifications?”).
API responses that return
"yes"/"no"as strings. You can map them to this enum for safer handling.
7. toast.dart
<span class="hljs-keyword">import</span> <span class="hljs-string">'package:fluttertoast/fluttertoast.dart'</span>;
<span class="hljs-keyword">import</span> <span class="hljs-string">'../../../constants/enums/status.dart'</span>;

<span class="hljs-keyword">void</span> toastInfo({<span class="hljs-keyword">required</span> <span class="hljs-built_in">String</span> msg, <span class="hljs-keyword">required</span> Status status}) {
  Fluttertoast.showToast(
    msg: msg,
    backgroundColor: status == Status.error ? Colors.red : Colors.green,
    toastLength: Toast.LENGTH_LONG,
    gravity: ToastGravity.TOP,
  );
}
This is a helper function for showing toast messages in your Flutter app.
A toast is a small, temporary popup message (usually at the bottom or top of the screen) used to quickly notify the user about something. For example, you might have “Item saved successfully” or “Error deleting item”.
8. are_you_sure.dart (Confirmation Dialog)
<span class="hljs-keyword">import</span> <span class="hljs-string">'dart:io'</span>;
<span class="hljs-keyword">import</span> <span class="hljs-string">'package:flutter/cupertino.dart'</span>;
<span class="hljs-keyword">import</span> <span class="hljs-string">'package:flutter/material.dart'</span>;

Future<<span class="hljs-keyword">void</span>> areYouSureDialog({
  <span class="hljs-keyword">required</span> <span class="hljs-built_in">String</span> title,
  <span class="hljs-keyword">required</span> <span class="hljs-built_in">String</span> content,
  <span class="hljs-keyword">required</span> BuildContext context,
  <span class="hljs-keyword">required</span> <span class="hljs-built_in">Function</span> action,
  <span class="hljs-built_in">bool</span> isKeyInvolved = <span class="hljs-keyword">false</span>,
  <span class="hljs-built_in">int</span> key = <span class="hljs-number">0</span>,
}) {
  <span class="hljs-keyword">return</span> showDialog(
    context: context,
    builder: (context) => Platform.isIOS
        ? CupertinoAlertDialog(
            title: Text(title),
            content: Text(content),
            actions: [
              CupertinoDialogAction(
                  onPressed: () =>
                      isKeyInvolved ? action(key: key) : action(),
                  child: <span class="hljs-keyword">const</span> Text(<span class="hljs-string">'Yes'</span>)),
              CupertinoDialogAction(
                  onPressed: () => Navigator.of(context).pop(),
                  child: <span class="hljs-keyword">const</span> Text(<span class="hljs-string">'Dismiss'</span>)),
            ],
          )
        : AlertDialog(
            title: Text(title),
            content: Text(content),
            actions: [
              ElevatedButton(
                  onPressed: () =>
                      isKeyInvolved ? action(key: key) : action(),
                  child: <span class="hljs-keyword">const</span> Text(<span class="hljs-string">'Yes'</span>)),
              ElevatedButton(
                  onPressed: () => Navigator.of(context).pop(),
                  child: <span class="hljs-keyword">const</span> Text(<span class="hljs-string">'Dismiss'</span>)),
            ],
          ),
  );
}
This code handles user confirmations for actions like delete or clear.
This function shows a platform-aware confirmation dialog (Are you sure?) that:
Works on iOS with a
CupertinoAlertDialog.Works on Android/others with a Material
AlertDialog.Calls a provided
actionwhen the user presses Yes.Closes the dialog when the user presses Dismiss.
Optionally passes a
keyinto the action function.
9. single_list_tile.dart (List Item Widget)
<span class="hljs-keyword">import</span> <span class="hljs-string">'package:flutter/material.dart'</span>;
<span class="hljs-keyword">import</span> <span class="hljs-string">'../../model/item.dart'</span>;
<span class="hljs-keyword">import</span> <span class="hljs-string">'text_action.dart'</span>;
<span class="hljs-keyword">import</span> <span class="hljs-string">'../../constants/enums/yes_no.dart'</span>;

<span class="hljs-class"><span class="hljs-keyword">class</span> <span class="hljs-title">SingleListItem</span> <span class="hljs-keyword">extends</span> <span class="hljs-title">StatelessWidget</span> </span>{
  <span class="hljs-keyword">final</span> Item item;
  <span class="hljs-keyword">final</span> <span class="hljs-built_in">int</span> itemKey;
  <span class="hljs-keyword">final</span> <span class="hljs-built_in">Function</span> editHandle;
  <span class="hljs-keyword">final</span> <span class="hljs-built_in">Function</span> deleteDialog;
  <span class="hljs-keyword">final</span> <span class="hljs-built_in">Function</span> deleteItem;

  <span class="hljs-keyword">const</span> SingleListItem({
    <span class="hljs-keyword">super</span>.key,
    <span class="hljs-keyword">required</span> <span class="hljs-keyword">this</span>.item,
    <span class="hljs-keyword">required</span> <span class="hljs-keyword">this</span>.itemKey,
    <span class="hljs-keyword">required</span> <span class="hljs-keyword">this</span>.editHandle,
    <span class="hljs-keyword">required</span> <span class="hljs-keyword">this</span>.deleteDialog,
    <span class="hljs-keyword">required</span> <span class="hljs-keyword">this</span>.deleteItem,
  });

  <span class="hljs-meta">@override</span>
  Widget build(BuildContext context) {
    <span class="hljs-keyword">return</span> Dismissible(
      key: ValueKey(itemKey),
      confirmDismiss: (_) => showDialog(
        context: context,
        builder: (_) => AlertDialog(
          title: <span class="hljs-keyword">const</span> Text(<span class="hljs-string">'Are you sure?'</span>),
          content: Text(<span class="hljs-string">'Delete <span class="hljs-subst">${item.title}</span>?'</span>),
          actions: [
            textAction(<span class="hljs-string">'Yes'</span>, YesNo.yes, context),
            textAction(<span class="hljs-string">'No'</span>, YesNo.no, context),
          ],
        ),
      ),
      onDismissed: (_) => deleteItem(key: itemKey),
      background: Container(
        color: Colors.red,
        alignment: Alignment.centerRight,
        padding: <span class="hljs-keyword">const</span> EdgeInsets.only(right: <span class="hljs-number">20</span>),
        child: <span class="hljs-keyword">const</span> Icon(Icons.delete, color: Colors.white),
      ),
      child: ListTile(
        title: Text(item.title),
        subtitle: Text(item.quantity.toString()),
        trailing: Row(
          mainAxisSize: MainAxisSize.min,
          children: [
            IconButton(onPressed: () => editHandle(item: item, key: itemKey), icon: <span class="hljs-keyword">const</span> Icon(Icons.edit)),
            IconButton(onPressed: () => deleteDialog(key: itemKey), icon: <span class="hljs-keyword">const</span> Icon(Icons.delete)),
          ],
        ),
      ),
    );
  }
}
This code represents each list item with edit/delete options and swipe-to-delete functionality.
This widget represents one item (like a row in a shopping list, todo list, inventory app, and so on) with:
Swipe-to-delete functionality.
Edit and delete buttons.
A confirmation dialog before dismissing
10. main_screen.dart (UI + State Management)
This is the main screen that puts everything together, including forms, lists, and modals.
Due to length, the full explanation is already well-commented in the original code, covering:
itemModal()– Bottom sheet form for create/edit.fetchData()– Load items from Hive.editHandle()– Load item for editing.deleteDialog()– Confirm delete.clearAllDialog()– Confirm clearing all items.
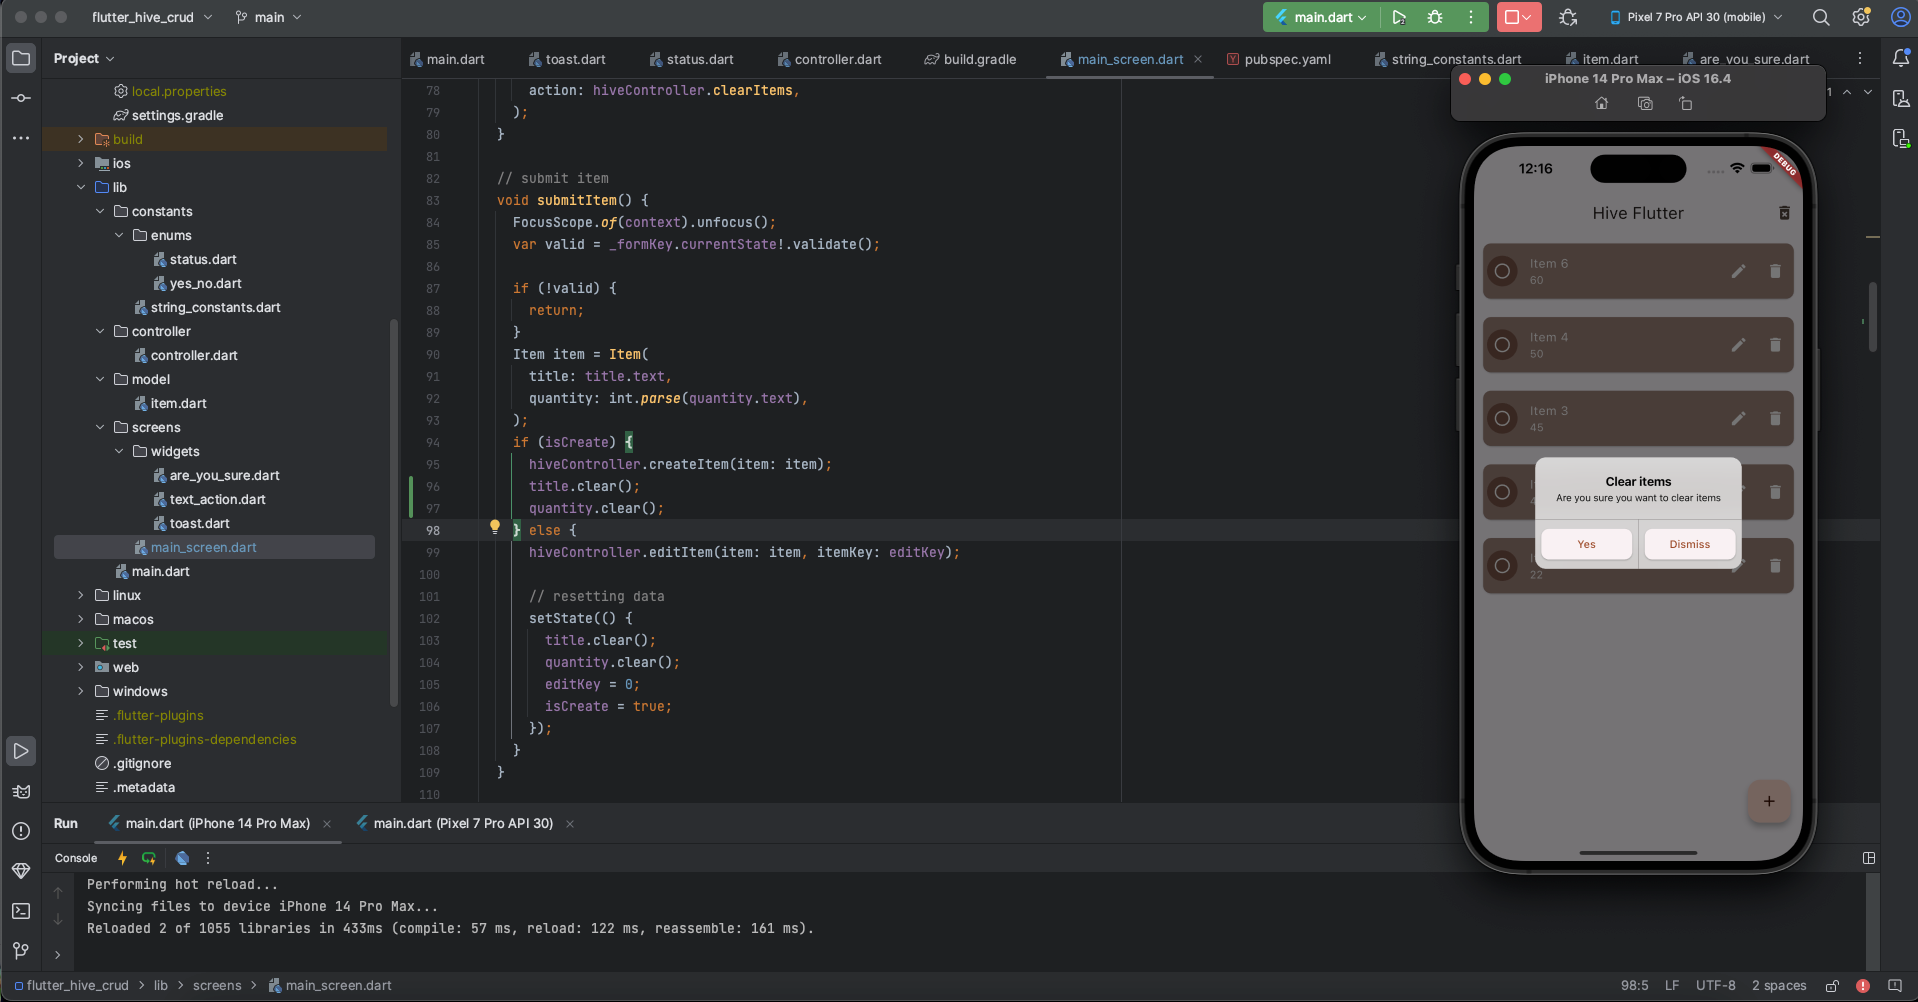
Screenshots


Conclusion
You now have a fully functional Flutter app with Hive for local data persistence. Your app can:
Create, Read, Update, Delete items.
Show toast messages for feedback.
Confirm actions with dialogs for Android and iOS.
Clean, modular architecture with controllers, models, and widgets.
You can explore Hive further in the Hive Package Documentation if you want to learn more.
Source: freeCodeCamp Programming Tutorials: Python, JavaScript, Git & MoreÂ

