
A Large Language Model (LLM) is a type of machine learning model that is trained to understand and generate human-like text. These models are trained on vast datasets to capture the nuances of human language, enabling them to generate coherent and contextually relevant responses.
You can enhance the performance of an LLM by providing context — structured or unstructured data, such as documents, articles, or knowledge bases — tailored to the domain or information you want the model to specialize in. Using techniques like prompt engineering and context injection, you can build an intelligent chatbot capable of navigating extensive datasets, retrieving relevant information, and delivering responses.
Whether it’s storing recipes, code documentation, research articles, or answering domain-specific queries, an LLM-based chatbot can adapt to your needs with customization and privacy. You can deploy it locally to create a highly specialized conversational assistant that respects your data.
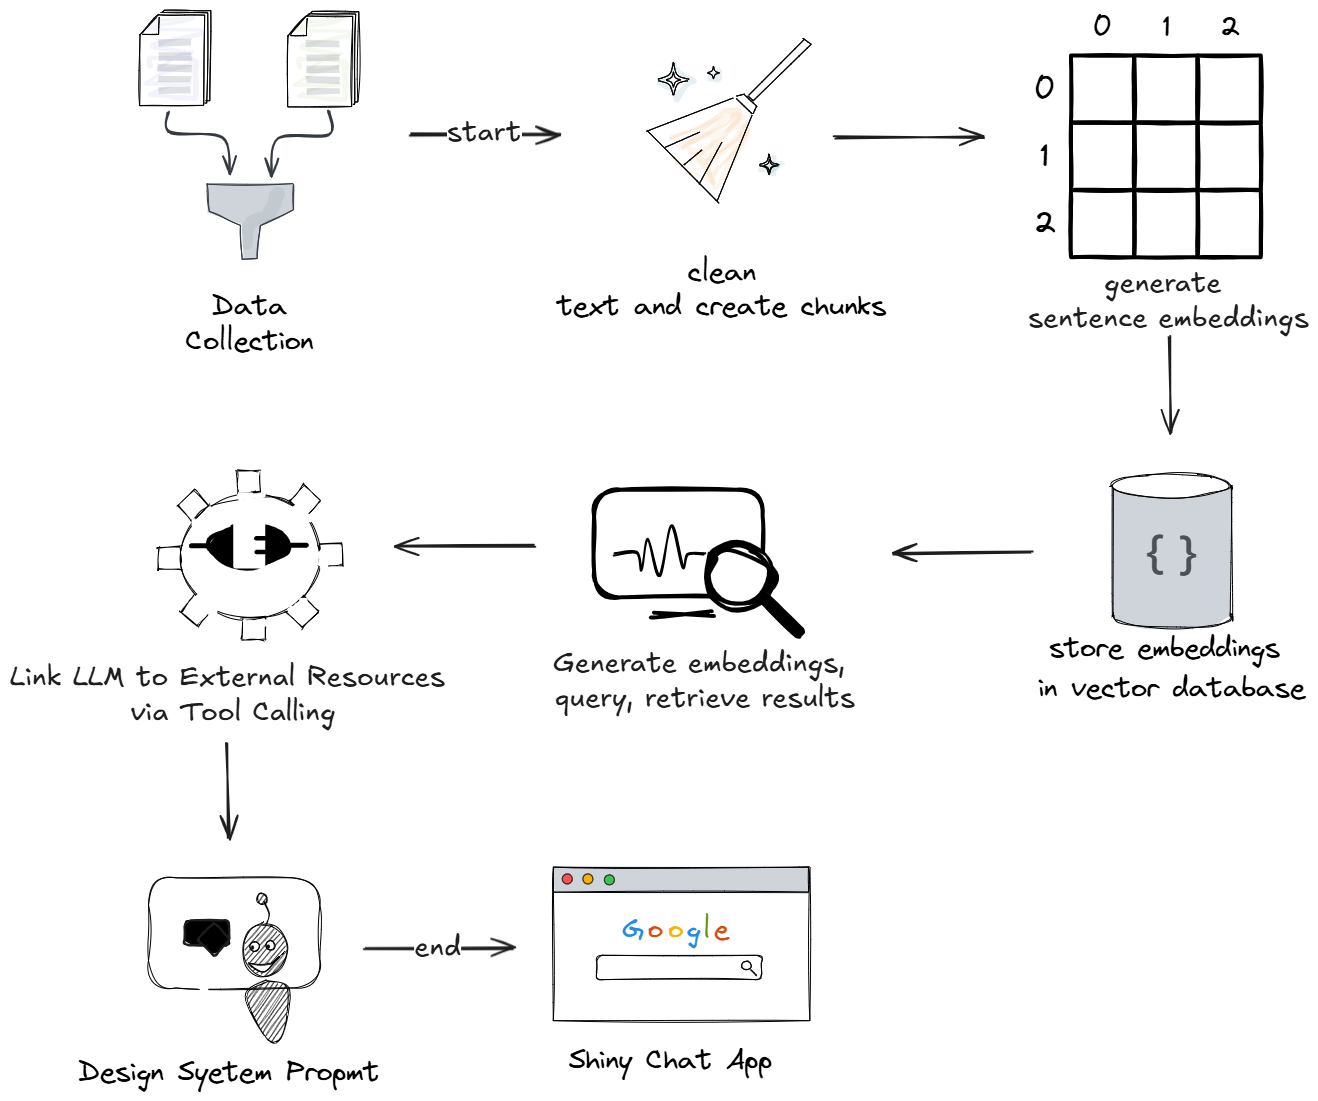
In this article, you will learn how to build a local Retrieval-Augmented Generation (RAG) application using Ollama and ChromaDB in R. By the end, you’ll have a custom conversational assistant with a Shiny interface that efficiently retrieves information while maintaining privacy and customization.
Table of Contents
What is RAG?
Retrieval-Augmented Generation (RAG) is a method that integrates retrieval systems with generative AI, enabling chatbots to access recent and specific information from external sources.
By using a retrieval pipeline, the chatbot can fetch up-to-date, relevant data and combine it with the generative model’s language capabilities, producing responses that are both accurate and contextually enriched. This makes RAG particularly useful for applications requiring fact-based, real-time knowledge delivery.
Project Overview
Project Setup
Prerequisites
Before you begin, ensure you have installed the latest version of the items listed here:
RStudio: The IDE – RStudio is the primary workspace where you’ll write and test your R code. Its user-friendly interface, debugging tools, and integrated environment make it ideal for data analysis and chatbot development.
R: The Programming Language – R is the backbone of your project. You’ll use it to handle data manipulation, apply statistical models, and integrate your recipe chatbot components seamlessly.
Python – Some libraries, like the embedding library you’ll use for text vectorization, are built on Python. It’s vital to have Python installed to enable these functionalities alongside your R code.
Java – Java serves as a foundational element for certain embedding libraries. It ensures efficient processing and compatibility for text embedding tasks required to train your chatbot.
Docker Desktop – Docker Desktop allows you to run ChromaDB, the vector database, locally on your machine. This enables fast and reliable storage of embeddings, ensuring your chatbot retrieves relevant information quickly.
Ollama – Ollama brings powerful Large Language Models (LLMs) directly to your local computer, removing the need for cloud resources. It lets you access multiple models, customize outputs, and integrate them into your chatbot effortlessly.
Ollama Installation
Ollama is an open-sourced tool you can use to run and manage LLMs on your computer. Once installed, you can access various LLMs as per your needs. You will be using llama3.2:3b-instruct-q4_K_M model to build this chatbot.
A quantized model is a version of a machine learning model that has been optimized to use less memory and computational power by reducing the precision of the numbers it uses. This enables you to use an LLM locally, especially when you don’t have access to a GPU (Graphics Processing Unit – a specialized processor that perform complex computations).
To start, you can download and install the Ollama software here.
Then you can confirm installation by running this command:
ollama --version
Run the following command to start Ollama:
ollama serve
Next, run the following command to pull the Q4_K_M quantization of llama3.2:3b-instruct:
ollama pull llama3.2:3b-instruct-q4_K_M
Then confirm that the model was extracted with this:
ollama list
If the model extraction was successful, a list containing the model’s name, ID, and size will be returned, like so:

Now you can chat with the model:
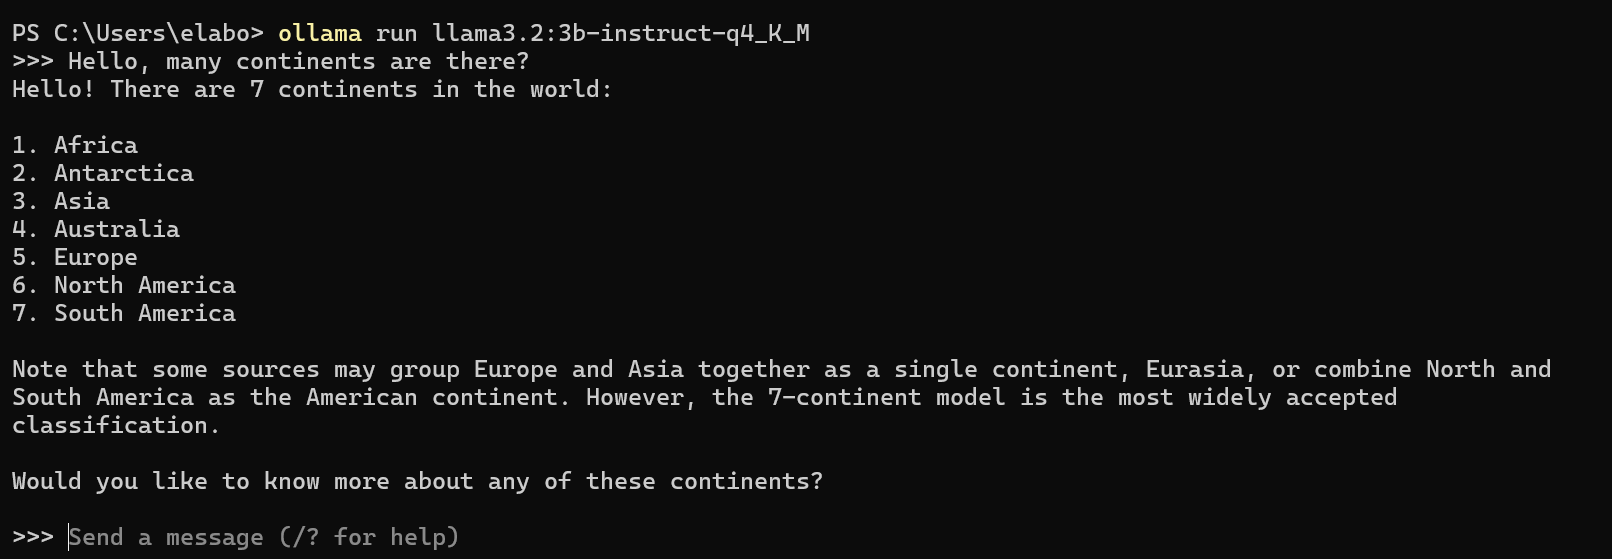
ollama run llama3.2:3b-instruct-q4_K_M
If successful, you should receive a prompt that you can test by asking a question and getting an answer. For example:
Then you can exit the console by typing /bye or ctrl + D
Data Collection and Cleaning
The chatbot you are building will be a cooking assistant that suggests recipes given your available ingredients, what you want to eat, and how much food a recipe yields.
You first have to get the data to train the model. You will be using a dataset that contains recipes from Kaggle.
To start, load the necessary libraries:
<span class="hljs-comment"># loading required libraries</span>
<span class="hljs-keyword">library</span>(xml2) <span class="hljs-comment">#read, parse, and manipulate XML,HTML documents</span>
<span class="hljs-keyword">library</span>(jsonlite) <span class="hljs-comment">#manipulate JSON objects</span>

<span class="hljs-keyword">library</span>(RKaggle) <span class="hljs-comment"># download datasets from Kaggle </span>
<span class="hljs-keyword">library</span>(dplyr)   <span class="hljs-comment"># data manipulation</span>
Then download and save recipe dataset:
<span class="hljs-comment"># Download and read the "recipe" dataset from Kaggle</span>
recipes_list <- RKaggle::get_dataset(<span class="hljs-string">"thedevastator/better-recipes-for-a-better-life"</span>)
Inspect the dataframe and extract the first element like this:
<span class="hljs-comment"># inspect the dataset</span>
class(recipes_list)
str(recipes_list)
head(recipes_list)
<span class="hljs-comment"># extract the first tibble</span>
recipes_df <- recipes_list[[<span class="hljs-number">1</span>]]
A quick inspection of the recipes_list object shows that it contains two objects of type tibble. You will be using only the first element for this project. A tibble is a type of data structure used for storing and manipulating data. It’s similar to a traditional dataframe, but it’s designed to enforce stricter rules and perform fewer automatic actions compared to traditional dataframes.
We’ll use a regular dataframe in this project because more people are likely familiar with it. It can also efficiently handle row indexing, which is crucial for accessing and manipulating specific rows in our recipe dataset.
In the code block below, you’ll convert the tibble to a dataframe and then drop the first column, which is the index column. Then you’ll inspect the newly converted dataframe and drop unnecessary columns.
Unnecessary columns are best removed to streamline the dataset and focus on relevant features. In this project, we’ll drop certain columns that aren’t particularly useful for training the chatbot. This ensures that the model concentrates on meaningful data to improve its accuracy and functionality.
<span class="hljs-comment"># convert to dataframe and drop the first column</span>
recipes_df <- as.data.frame(recipes_df[, -<span class="hljs-number">1</span>])
<span class="hljs-comment"># inspect the converted dataframe</span>
head(recipes_df)
class(recipes_df)
colnames(recipes_df)
<span class="hljs-comment"># drop unnecessary columns</span>
cleaned_recipes_df <- subset(recipes_df, select = -c(yield,rating,url,cuisine_path,nutrition,timing,img_src))
Now you need to identify rows with NA (missing) values, which you can do like this:
<span class="hljs-comment"># Identify rows and columns with NA values</span>
which(is.na(cleaned_recipes_df), arr.ind = <span class="hljs-literal">TRUE</span>)

<span class="hljs-comment"># a quick inspection reveals columns [2:4] have missing values</span>
subset_column_names <- colnames(cleaned_recipes_df)[<span class="hljs-number">2</span>:<span class="hljs-number">4</span>]
subset_column_names
It is important to handle NA values to ensure that your data is complete, to prevent errors, and to preserve context.
Now, replace the NA values and confirm that there are no missing values:
<span class="hljs-comment"># Replace NA values dynamically based on conditions</span>
cols_to_modify <- c(<span class="hljs-string">"prep_time"</span>, <span class="hljs-string">"cook_time"</span>, <span class="hljs-string">"total_time"</span>)
cleaned_recipes_df[cols_to_modify] <- lapply(
  cleaned_recipes_df[cols_to_modify],
  <span class="hljs-keyword">function</span>(x, df) {
    <span class="hljs-comment"># Replace NA in prep_time and cook_time where both are NA</span>
    replace(x, is.na(df$prep_time) & is.na(df$cook_time), <span class="hljs-string">"unknown"</span>)
  },
  df = cleaned_recipes_df  <span class="hljs-comment"># Pass the whole dataframe for conditions</span>
)
cleaned_recipes_df <- cleaned_recipes_df %>%
  mutate(
    prep_time = case_when(
      <span class="hljs-comment"># If cooktime is present but preptime is NA, replace with "no preparation required"</span>
      !is.na(cook_time) & is.na(prep_time) ~ <span class="hljs-string">"no preparation required"</span>,
      <span class="hljs-comment"># Otherwise, retain original value</span>
      <span class="hljs-literal">TRUE</span> ~ as.character(prep_time)
    ),
    cook_time = case_when(
      <span class="hljs-comment"># If prep_time is present but cook_time is NA, replace with "no cooking required"</span>
      !is.na(prep_time) & is.na(cook_time) ~ <span class="hljs-string">"no cooking required"</span>,
      <span class="hljs-comment"># Otherwise, retain original value</span>
      <span class="hljs-literal">TRUE</span> ~ as.character(cook_time)
    )
  )
<span class="hljs-comment"># confirm there are no missing values</span>
any(is.na(cleaned_recipes_df))
)

<span class="hljs-comment"># confirm the replacing NA logic works by inspecting specific rows</span>
cleaned_recipes_df[<span class="hljs-number">1081</span>,]
cleaned_recipes_df[<span class="hljs-number">1</span>,]
cleaned_recipes_df[<span class="hljs-number">405</span>,]
For this tutorial, we’ll subset the dataframe to the first 250 rows for demo purposes. This saves on time when it comes to generating embeddings.
<span class="hljs-comment"># recommended for demo/learning purposes</span>
cleaned_recipes_df <- head(cleaned_recipes_df,<span class="hljs-number">250</span>)
How to Create Chunks
To understand why chunking is important before embedding, you need to understand what an embedding is.
An embedding is a vectoral representation of a word or a sentence. Machines don’t understand human text – they understand numbers. LLMs work by transforming human text to numerical representations in order to give answers. The process of generating embeddings requires a lot of computation, and breaking down the data to be embedded optimizes the embedding process.
So now we’re going to split the dataframe into smaller chunks of a specified size to enable efficient batch processing and iteration.
<span class="hljs-comment"># Define the size of each chunk (number of rows per chunk)</span>
chunk_size <- <span class="hljs-number">1</span>

<span class="hljs-comment"># Get the total number of rows in the dataframe</span>
n <- nrow(cleaned_recipes_df)

<span class="hljs-comment"># Create a vector of group numbers for chunking</span>
<span class="hljs-comment"># Each group number repeats for 'chunk_size' rows</span>
<span class="hljs-comment"># Ensure the vector matches the total number of rows</span>
r <- rep(<span class="hljs-number">1</span>:ceiling(n/chunk_size), each = chunk_size)[<span class="hljs-number">1</span>:n]

<span class="hljs-comment"># Split the dataframe into smaller chunks (subsets) based on the group numbers</span>
chunks <- split(cleaned_recipes_df, r)
How to Generate Sentence Embeddings
As previously mentioned, embeddings are vector representations of words or sentences. Embeddings can be generated from both words and sentences. How you choose to generate embeddings depends on your intended application of the LLM.
Word embeddings are numerical representations of individual words in a continuous vector space. They capture semantic relationships between words, allowing similar words to have vectors close to each other.
Word embeddings can be used in search engines as they support word-level queries by matching embeddings to retrieve relevant documents. They can also be used in text classification to classify documents, emails, or tweets based on word-level features (for example, detecting spam emails or sentiment analysis).
Sentence embeddings are numerical representations of entire sentences in a vector space, designed to capture the overall meaning and context of the sentence. They are used in settings where sentences provide better context like question answering systems where user queries are matched to relevant sentences or documents for more precise retrieval.
For our recipe chatbot, sentence embedding is the best choice.
First, create an empty dataframe that has three columns.
<span class="hljs-comment">#empty dataframe</span>
recipe_sentence_embeddings <-  data.frame(
  recipe = character(),
  recipe_vec_embeddings = I(list()),
  recipe_id = character()
)
The first column will hold the actual recipe in text form, the recipe_vec_embeddings column will hold the generated sentence embeddings, and the recipe_id holds a unique id for each recipe. This will help in indexing and retrieval from the vector database.
Next, it’s helpful to define a progress bar, which you can do like this:
<span class="hljs-comment"># create a progress bar</span>
pb <- txtProgressBar(min = <span class="hljs-number">1</span>, max = length(chunks), style = <span class="hljs-number">3</span>)
Embedding can take a while, so it’s important to keep track of the progress of the process.
Now it’s time to generate embeddings and populate the dataframe.
Write a for loop that executes the code block as long as the length of the chunks.
<span class="hljs-keyword">for</span> (i <span class="hljs-keyword">in</span> <span class="hljs-number">1</span>:length(chunks)) {}
The recipe field is the text at the chunk that is currently being executed and the unique chunk id is generated by pasting the index of the chunk and the text “chunk”.
<span class="hljs-keyword">for</span> (i <span class="hljs-keyword">in</span> <span class="hljs-number">1</span>:length(chunks)) {
    recipe <- as.character(chunks[i])
    recipe_id <- paste0(<span class="hljs-string">"recipe"</span>,i)
}
The text embed function from the text library generates either sentence or word embeddings. It takes in a character variable or a dataframe and produces a tibble of embeddings. You can read loading instructions here for smooth running of the text library.
The batch_size defines how many rows are embedded at a time from the input. Setting the keep_token_embeddings discards the embeddings for individual tokens after processing, and aggregation_from_layers_to_tokens “concatenates” or combines embeddings from specified layers to create detailed embeddings for each token. A token is the smallest unit of text that a model can process.
<span class="hljs-keyword">for</span> (i <span class="hljs-keyword">in</span> <span class="hljs-number">1</span>:length(chunks)) {
    recipe <- as.character(chunks[i])
    recipe_id <- paste0(<span class="hljs-string">"recipe"</span>,i)
    recipe_embeddings <- textEmbed(as.character(recipe),
                                layers = <span class="hljs-number">10</span>:<span class="hljs-number">11</span>,
                                aggregation_from_layers_to_tokens = <span class="hljs-string">"concatenate"</span>,
                                aggregation_from_tokens_to_texts = <span class="hljs-string">"mean"</span>,
                                keep_token_embeddings = <span class="hljs-literal">FALSE</span>,
                                batch_size = <span class="hljs-number">1</span>
  )
}
In order to specify sentence embeddings, you need to set the argument to the aggregation_from_tokens_to_texts parameter as "mean".
aggregation_from_tokens_to_texts = <span class="hljs-string">"mean"</span>
The “mean” operation averages the embeddings of all tokens in a sentence to generate a single vector that represents the entire sentence. This sentence-level embedding captures the overall meaning and semantics of the text, regardless of its token length.
<span class="hljs-comment"># convert tibble to vector</span>
  recipe_vec_embeddings <- unlist(recipe_embeddings, use.names = <span class="hljs-literal">FALSE</span>)
  recipe_vec_embeddings <- list(recipe_vec_embeddings)
The embedding function returns a tibble object. In order to obtain a vector embedding, you need to first unlist the tibble and drop the row names and then list the result to form a simple vector.
  <span class="hljs-comment"># Append the current chunk's data to the dataframe</span>
  recipe_sentence_embeddings <- recipe_sentence_embeddings %>%
    add_row(
      recipe = recipe,
      recipe_vec_embeddings = recipe_vec_embeddings,
      recipe_id = recipe_id
    )
Finally, update the empty dataframe after each iteration with the newly generated data.
  <span class="hljs-comment"># track embedding progress</span>
  setTxtProgressBar(pb, i)
In order to keep track of the embedding progress, you can use the earlier defined progress bar inside the loop. It will update at the end of every iteration.
Complete Code Block:
<span class="hljs-comment"># load required library</span>
<span class="hljs-keyword">library</span>(text)
<span class="hljs-comment"># # ensure to read loading instructions here for smooth running of the 'text' library</span>
<span class="hljs-comment"># # https://www.r-text.org/</span>
<span class="hljs-comment"># embedding data</span>
<span class="hljs-keyword">for</span> (i <span class="hljs-keyword">in</span> <span class="hljs-number">1</span>:length(chunks)) {
  recipe <- as.character(chunks[i])
  recipe_id <- paste0(<span class="hljs-string">"recipe"</span>,i)
  recipe_embeddings <- textEmbed(as.character(recipe),
                                layers = <span class="hljs-number">10</span>:<span class="hljs-number">11</span>,
                                aggregation_from_layers_to_tokens = <span class="hljs-string">"concatenate"</span>,
                                aggregation_from_tokens_to_texts = <span class="hljs-string">"mean"</span>,
                                keep_token_embeddings = <span class="hljs-literal">FALSE</span>,
                                batch_size = <span class="hljs-number">1</span>
  )

  <span class="hljs-comment"># convert tibble to vector</span>
  recipe_vec_embeddings <- unlist(recipe_embeddings, use.names = <span class="hljs-literal">FALSE</span>)
  recipe_vec_embeddings <- list(recipe_vec_embeddings)

  <span class="hljs-comment"># Append the current chunk's data to the dataframe</span>
  recipe_sentence_embeddings <- recipe_sentence_embeddings %>%
    add_row(
      recipe = recipe,
      recipe_vec_embeddings = recipe_vec_embeddings,
      recipe_id = recipe_id
    )

  <span class="hljs-comment"># track embedding progress</span>
  setTxtProgressBar(pb, i)

}
How to Set Up the Vector Database for Embedding Storage
A vector database is a special type of database that stores embeddings and allows you to query and retrieve relevant information. There are numerous vector databases available, but for this project, you will use ChromaDB, an open-source option that integrates with the R environment through the rchroma library.
ChromaDB runs locally in a Docker container. Just make sure you have Docker installed and running on your device.
Then load the rchroma library and run your ChromaDB instance:
<span class="hljs-comment"># load rchroma library</span>
<span class="hljs-keyword">library</span>(rchroma)
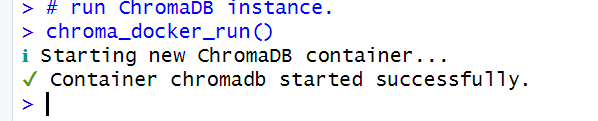
<span class="hljs-comment"># run ChromaDB instance.</span>
chroma_docker_run()
If it was successful, you should see this in the console:
Next, connect to a local ChromaDB instance and check the connection:
<span class="hljs-comment"># Connect to a local ChromaDB instance</span>
client <- chroma_connect()

<span class="hljs-comment"># Check the connection</span>
heartbeat(client)
version(client)
Now you’ll need to create a collection and confirm that it was created. Collections in ChromaDB function similarly to tables in conventional databases.
<span class="hljs-comment"># Create a new collection</span>
create_collection(client, <span class="hljs-string">"recipes_collection"</span>)

<span class="hljs-comment"># List all collections</span>
list_collections(client)
Now, add embeddings to the collection. To add embeddings to the recipes_collection, use the add_documents function.
<span class="hljs-comment"># Add documents to the collection</span>
add_documents(
  client,
  <span class="hljs-string">"recipes_collection"</span>,
  documents = recipe_sentence_embeddings$recipe,
  ids = recipe_sentence_embeddings$recipe_id,
  embeddings = recipe_sentence_embeddings$recipe_vec_embeddings
)
The add_documents() function is used to add recipe data to the recipes_collection. Here’s a breakdown of its arguments and how the corresponding data is accessed:
documents: This argument represents the recipe text. It is sourced from therecipecolumn of therecipe_sentence_embeddingsdataframe.ids: This is the unique identifier for each recipe. It is extracted from therecipe_idcolumn of the same dataframe.embeddings: This contains the sentence embeddings, which were previously generated for each recipe. These embeddings are accessed from therecipe_vec_embeddingscolumn of the dataframe.
All three arguments—documents, ids, and embeddings—are obtained by subsetting their respective columns from the recipe_sentence_embeddings dataframe.
How to Write the User Input Query Embedding Function
In order to retrieve information from a vector database, you must first embed your query text. The database compares your query’s embedding with its stored embeddings to find and retrieve the most relevant document.
It’s important to ensure that the dimensions (rows × columns) of your query embedding match those of the database embeddings. This alignment is achieved by using the same embedding model to generate your query.
Matching embeddings involves calculating the similarity (for example, cosine similarity) between the query and stored embeddings, identifying the closest match for effective retrieval.
Let’s write a function that allows us to embed a query which then queries similar documents using the generated embeddings. Wrapping it in a function makes it reusable.
  <span class="hljs-comment">#sentence embeddings function and query</span>
  question <- <span class="hljs-keyword">function</span>(sentence){
    sentence_embeddings <- textEmbed(sentence,
                                     layers = <span class="hljs-number">10</span>:<span class="hljs-number">11</span>,
                                     aggregation_from_layers_to_tokens = <span class="hljs-string">"concatenate"</span>,
                                     aggregation_from_tokens_to_texts = <span class="hljs-string">"mean"</span>,
                                     keep_token_embeddings = <span class="hljs-literal">FALSE</span>
    )

    <span class="hljs-comment"># convert tibble to vector</span>
    sentence_vec_embeddings <- unlist(sentence_embeddings, use.names = <span class="hljs-literal">FALSE</span>)
    sentence_vec_embeddings <- list(sentence_vec_embeddings)

    <span class="hljs-comment"># Query similar documents using embeddings</span>
    results <- query(
      client,
      <span class="hljs-string">"recipes_collection"</span>,
      query_embeddings = sentence_vec_embeddings ,
      n_results = <span class="hljs-number">2</span>
    )
    results

  }
This chunk of code is similar to how we have previously used the text_embed() function. The query() function is added to enable querying the vector database, particularly the recipes’ collection, and returns the top two documents that closely match a user’s query.
Our function thus takes in a sentence as an argument and embeds the sentence to generate sentence embeddings. It then queries the database and returns two documents that match the query most.
Tool Calling
To interact with Ollama in R, you will utilize the ellmer library. This library streamlines the use of large language models (LLMs) by offering an interface that enables seamless access to and interaction with a variety of LLM providers.
To enhance the LLM’s usage, we need to provide context to it. You can do this by tool calling. Tool calling allows an LLM to access external resources in order to enhance its functionality.
For this project, we are implementing Retrieval-Augmented Generation (RAG), which combines retrieving relevant information from a vector database and generating responses using an LLM. This approach improves the chatbot’s ability to provide accurate and contextually relevant answers.
Now, define a function that links to the LLM to provide context using the tool() function from the ellmer library.
<span class="hljs-comment"># load ellmer library</span>
<span class="hljs-keyword">library</span>(ellmer)

<span class="hljs-comment"># function that links to llm to provide context</span>
  tool_context  <- tool(
    question,
    <span class="hljs-string">"obtains the right context for a given question"</span>,
    sentence = type_string()

  )
The tool() function takes the question function that returns the relevant documents that we’ll use as context as the first argument. We’ll use the documents to help the LLM answer questions accordingly.
The text, “obtains the right context for a given question”, is a description of what the tool will be doing.
Finally, the sentence = type_string() defines what type of object the question() function expects.
How to Initialize the Chat System, Design Prompts, and Integrate Tools
Next, you’ll set up a conversational AI system by defining its role and functionality. Using system prompt design, you will shape the assistant’s behavior, tone, and focus as a culinary assistant. You’ll also integrate external tools to extend the chatbot’s capabilities by registering tools. Let’s dive in.
First, you need to initialize a Chat Object:
<span class="hljs-comment">#  Initialize the chat system with propmpt instructions.</span>
  chat <- chat_ollama(system_prompt = <span class="hljs-string">"You are a knowledgeable culinary assistant specializing in recipe recommendations.
                      You provide tailored meal suggestions based on the user's available ingredients and the desired amount of food or servings.
                      Ensure the recipes align closely with the user's inputs and yield the expected quantity."</span>,
                      model = <span class="hljs-string">"llama3.2:3b-instruct-q4_K_M"</span>)
You can do that using the chat_ollama() function. This sets up a conversational agent with the specified system prompt and model.
The system prompt defines the conversational behavior, tone, and focus of the LLM while the model argument specifies the language model (llama3.2:3b-instruct-q4_K_M) that the chat system will use to generate responses.
Next, you need to register a tool.
 <span class="hljs-comment">#register tool</span>
  chat$register_tool(tool_context)
We need to tell our chat object about our tool_context() function. Do this by registering a tool using the register_tool() function.
How to Interact with Your Chatbot Using a Shiny App
To interact with the chatbot you’ve just created, we’ll use Shiny, a framework for building interactive web applications in R. Shiny provides a user-friendly graphical interface that allows seamless interaction with the chatbot.
For this purpose, we’ll use the shinychat library, which simplifies the process of building a chat interface within a Shiny app. This involves defining two key components:
User Interface (UI):
Responsible for the visual layout and what the user sees.
In this case,
chat_ui("chat")is used to create the interactive chat interface.
Server Function:
Handles the functionality and logic of the application.
It connects the chatbot to external tools and manages processes like embedding queries, retrieving relevant responses, and handling user inputs.
<span class="hljs-comment"># load the required library</span>
<span class="hljs-keyword">library</span>(shinychat)

<span class="hljs-comment"># wrap the chat code in a Shiny App</span>
ui <- bslib::page_fluid(
  chat_ui(<span class="hljs-string">"chat"</span>)
)

server <- <span class="hljs-keyword">function</span>(input, output, session) {
  <span class="hljs-comment"># Connect to a local ChromaDB instance running on docker with embeddings loaded</span>
  client <- chroma_connect()

  <span class="hljs-comment">#sentence embeddings function and query</span>
  question <- <span class="hljs-keyword">function</span>(sentence){
    sentence_embeddings <- textEmbed(sentence,
                                     layers = <span class="hljs-number">10</span>:<span class="hljs-number">11</span>,
                                     aggregation_from_layers_to_tokens = <span class="hljs-string">"concatenate"</span>,
                                     aggregation_from_tokens_to_texts = <span class="hljs-string">"mean"</span>,
                                     keep_token_embeddings = <span class="hljs-literal">FALSE</span>
    )

    <span class="hljs-comment"># convert tibble to vector</span>
    sentence_vec_embeddings <- unlist(sentence_embeddings, use.names = <span class="hljs-literal">FALSE</span>)
    sentence_vec_embeddings <- list(sentence_vec_embeddings)

    <span class="hljs-comment"># Query similar documents using embeddings</span>
    results <- query(
      client,
      <span class="hljs-string">"recipes_collection"</span>,
      query_embeddings = sentence_vec_embeddings ,
      n_results = <span class="hljs-number">2</span>
    )
    results

  }


  <span class="hljs-comment"># function that provides context</span>
  tool_context  <- tool(
    question,
    <span class="hljs-string">"obtains the right context for a given question"</span>,
    sentence = type_string()

  )

  <span class="hljs-comment">#  Initialize the chat system with the first chunk</span>
  chat <- chat_ollama(system_prompt = <span class="hljs-string">"You are a knowledgeable culinary assistant specializing in recipe recommendations.
                      You provide tailored meal suggestions based on the user's available ingredients and the desired amount of food or servings.
                      Ensure the recipes align closely with the user's inputs and yield the expected quantity."</span>,
                      model = <span class="hljs-string">"llama3.2:3b-instruct-q4_K_M"</span>)
  <span class="hljs-comment">#register tool</span>
  chat$register_tool(tool_context)

  observeEvent(input$chat_user_input, {
    stream <- chat$stream_async(input$chat_user_input)
    chat_append(<span class="hljs-string">"chat"</span>, stream)
  })
}

shinyApp(ui, server)
Alright, let’s understand how this is working:
User input monitoring with
observeEvent(): TheobserveEvent()block monitors user inputs from the chat interface (input$chat_user_input). When a user sends a message, the chatbot processes it, retrieves relevant context using the embeddings, and streams the response dynamically to the chat interface.Tool calling for context: The chatbot employs tool calling to interact with external resources (like the vector database) and enhance its functionality. In this project, Retrieval-Augmented Generation (RAG) ensures the chatbot provides accurate and context-rich responses by integrating retrieval and generation seamlessly.
This approach brings the chatbot to life, enabling users to interact with it dynamically through a responsive Shiny app.
Complete Code
The R scripts have been split in two, with data.R containing code that handles data gathering and cleaning, text chunking, sentence embeddings generation, creating a vector database, and loading documents to it.
The chat.R script contains code that handles user input querying, context retrieval, chat initialization, system prompt design, tool integration, and a chat Shiny app.
data.R
<span class="hljs-comment"># install and load required packages</span>
<span class="hljs-comment"># install devtools from CRAN</span>
install.packages(<span class="hljs-string">'devtools'</span>)
devtools::install_github(<span class="hljs-string">"benyamindsmith/RKaggle"</span>)

<span class="hljs-keyword">library</span>(text)
<span class="hljs-keyword">library</span>(rchroma)
<span class="hljs-keyword">library</span>(RKaggle)
<span class="hljs-keyword">library</span>(dplyr)

<span class="hljs-comment"># run ChromaDB instance.</span>
chroma_docker_run()

<span class="hljs-comment"># Connect to a local ChromaDB instance</span>
client <- chroma_connect()

<span class="hljs-comment"># Check the connection</span>
heartbeat(client)
version(client)


<span class="hljs-comment"># Create a new collection</span>
create_collection(client, <span class="hljs-string">"recipes_collection"</span>)

<span class="hljs-comment"># List all collections</span>
list_collections(client)

<span class="hljs-comment"># Download and read the "recipe" dataset from Kaggle</span>
recipes_list <- RKaggle::get_dataset(<span class="hljs-string">"thedevastator/better-recipes-for-a-better-life"</span>)

<span class="hljs-comment"># extract the first tibble</span>
recipes_df <- recipes_list[[<span class="hljs-number">1</span>]]

<span class="hljs-comment"># convert to dataframe and drop the first column</span>
recipes_df <- as.data.frame(recipes_df[, -<span class="hljs-number">1</span>])

<span class="hljs-comment"># drop unnecessary columns</span>
cleaned_recipes_df <- subset(recipes_df, select = -c(yield,rating,url,cuisine_path,nutrition,timing,img_src))

<span class="hljs-comment">## Replace NA values dynamically based on conditions</span>
<span class="hljs-comment"># Replace NA when all columns have NA values</span>
cols_to_modify <- c(<span class="hljs-string">"prep_time"</span>, <span class="hljs-string">"cook_time"</span>, <span class="hljs-string">"total_time"</span>)
cleaned_recipes_df[cols_to_modify] <- lapply(
  cleaned_recipes_df[cols_to_modify],
  <span class="hljs-keyword">function</span>(x, df) {
    <span class="hljs-comment"># Replace NA in prep_time and cook_time where both are NA</span>
    replace(x, is.na(df$prep_time) & is.na(df$cook_time), <span class="hljs-string">"unknown"</span>)
  },
  df = cleaned_recipes_df
)

<span class="hljs-comment"># Replace NA when either or columns have NA values</span>
cleaned_recipes_df <- cleaned_recipes_df %>%
  mutate(
    prep_time = case_when(
      <span class="hljs-comment"># If cook_time is present but prep_time is NA, replace with "no preparation required"</span>
      !is.na(cook_time) & is.na(prep_time) ~ <span class="hljs-string">"no preparation required"</span>,
      <span class="hljs-comment"># Otherwise, retain original value</span>
      <span class="hljs-literal">TRUE</span> ~ as.character(prep_time)
    ),
    cook_time = case_when(
      <span class="hljs-comment"># If prep_time is present but cook_time is NA, replace with "no cooking required"</span>
      !is.na(prep_time) & is.na(cook_time) ~ <span class="hljs-string">"no cooking required"</span>,
      <span class="hljs-comment"># Otherwise, retain original value</span>
      <span class="hljs-literal">TRUE</span> ~ as.character(cook_time)
    )
  )

<span class="hljs-comment"># chunk the dataset</span>
chunk_size <- <span class="hljs-number">1</span>
n <- nrow(cleaned_recipes_df)
r <- rep(<span class="hljs-number">1</span>:ceiling(n/chunk_size),each = chunk_size)[<span class="hljs-number">1</span>:n]
chunks <- split(cleaned_recipes_df,r)

<span class="hljs-comment">#empty dataframe</span>
recipe_sentence_embeddings <-  data.frame(
  recipe = character(),
  recipe_vec_embeddings = I(list()),
  recipe_id = character()
)

<span class="hljs-comment"># create a progress bar</span>
pb <- txtProgressBar(min = <span class="hljs-number">1</span>, max = length(chunks), style = <span class="hljs-number">3</span>)

<span class="hljs-comment"># embedding data</span>
<span class="hljs-keyword">for</span> (i <span class="hljs-keyword">in</span> <span class="hljs-number">1</span>:length(chunks)) {
  recipe <- as.character(chunks[i])
  recipe_id <- paste0(<span class="hljs-string">"recipe"</span>,i)
  recipe_embeddings <- textEmbed(as.character(recipe),
                                layers = <span class="hljs-number">10</span>:<span class="hljs-number">11</span>,
                                aggregation_from_layers_to_tokens = <span class="hljs-string">"concatenate"</span>,
                                aggregation_from_tokens_to_texts = <span class="hljs-string">"mean"</span>,
                                keep_token_embeddings = <span class="hljs-literal">FALSE</span>,
                                batch_size = <span class="hljs-number">1</span>
  )

  <span class="hljs-comment"># convert tibble to vector</span>
  recipe_vec_embeddings <- unlist(recipe_embeddings, use.names = <span class="hljs-literal">FALSE</span>)
  recipe_vec_embeddings <- list(recipe_vec_embeddings)

  <span class="hljs-comment"># Append the current chunk's data to the dataframe</span>
  recipe_sentence_embeddings <- recipe_sentence_embeddings %>%
    add_row(
      recipe = recipe,
      recipe_vec_embeddings = recipe_vec_embeddings,
      recipe_id = recipe_id
    )

  <span class="hljs-comment"># track embedding progress</span>
  setTxtProgressBar(pb, i)

}

<span class="hljs-comment"># Add documents to the collection</span>
add_documents(
  client,
  <span class="hljs-string">"recipes_collection"</span>,
  documents = recipe_sentence_embeddings$recipe,
  ids = recipe_sentence_embeddings$recipe_id,
  embeddings = recipe_sentence_embeddings$recipe_vec_embeddings
)
chat.R
<span class="hljs-comment"># Load required packages</span>
<span class="hljs-keyword">library</span>(ellmer)
<span class="hljs-keyword">library</span>(text)
<span class="hljs-keyword">library</span>(rchroma)
<span class="hljs-keyword">library</span>(shinychat)

ui <- bslib::page_fluid(
  chat_ui(<span class="hljs-string">"chat"</span>)
)

server <- <span class="hljs-keyword">function</span>(input, output, session) {
  <span class="hljs-comment"># Connect to a local ChromaDB instance running on docker with embeddings loaded </span>
  client <- chroma_connect()

  <span class="hljs-comment"># sentence embeddings function and query</span>
  question <- <span class="hljs-keyword">function</span>(sentence){
    sentence_embeddings <- textEmbed(sentence,
                                     layers = <span class="hljs-number">10</span>:<span class="hljs-number">11</span>,
                                     aggregation_from_layers_to_tokens = <span class="hljs-string">"concatenate"</span>,
                                     aggregation_from_tokens_to_texts = <span class="hljs-string">"mean"</span>,
                                     keep_token_embeddings = <span class="hljs-literal">FALSE</span>
    )

    <span class="hljs-comment"># convert tibble to vector</span>
    sentence_vec_embeddings <- unlist(sentence_embeddings, use.names = <span class="hljs-literal">FALSE</span>)
    sentence_vec_embeddings <- list(sentence_vec_embeddings)

    <span class="hljs-comment"># Query similar documents</span>
    results <- query(
      client,
      <span class="hljs-string">"recipes_collection"</span>,
      query_embeddings = sentence_vec_embeddings ,
      n_results = <span class="hljs-number">2</span>
    )
    results

  }


  <span class="hljs-comment"># function that provides context</span>
  tool_context  <- tool(
    question,
    <span class="hljs-string">"obtains the right context for a given question"</span>,
    sentence = type_string()

  )

  <span class="hljs-comment">#  Initialize the chat system </span>
  chat <- chat_ollama(system_prompt = <span class="hljs-string">"You are a knowledgeable culinary assistant specializing in recipe recommendations.
                      You provide tailored meal suggestions based on the user's available ingredients and the desired amount of food or servings.
                      Ensure the recipes align closely with the user's inputs and yield the expected quantity."</span>,
                      model = <span class="hljs-string">"llama3.2:3b-instruct-q4_K_M"</span>)
  <span class="hljs-comment">#register tool</span>
  chat$register_tool(tool_context)

  observeEvent(input$chat_user_input, {
    stream <- chat$stream_async(input$chat_user_input)
    chat_append(<span class="hljs-string">"chat"</span>, stream)
  })
}

shinyApp(ui, server)
You can find the complete code here.
Conclusion
Building a local Retrieval-Augmented Generation (RAG) application using Ollama and ChromaDB in R programming offers a powerful way to create a specialized conversational assistant.
By leveraging the capabilities of large language models and vector databases, you can efficiently manage and retrieve relevant information from extensive datasets.
This approach not only enhances the performance of language models but also ensures customization and privacy by running the application locally.
Whether you’re developing a cooking assistant or any other domain-specific chatbot, this method provides a robust framework for delivering intelligent and contextually aware responses.
Source: freeCodeCamp Programming Tutorials: Python, JavaScript, Git & MoreÂ

