
The fastest way to gather valuable information about your site’s users is still by talking to them. And what better way to do this than by adding a chat system to your app?
For my case, I just wanted to add a chat system to my portfolio website so I could get valuable info from potential employers and clients. I ended up building something like this:
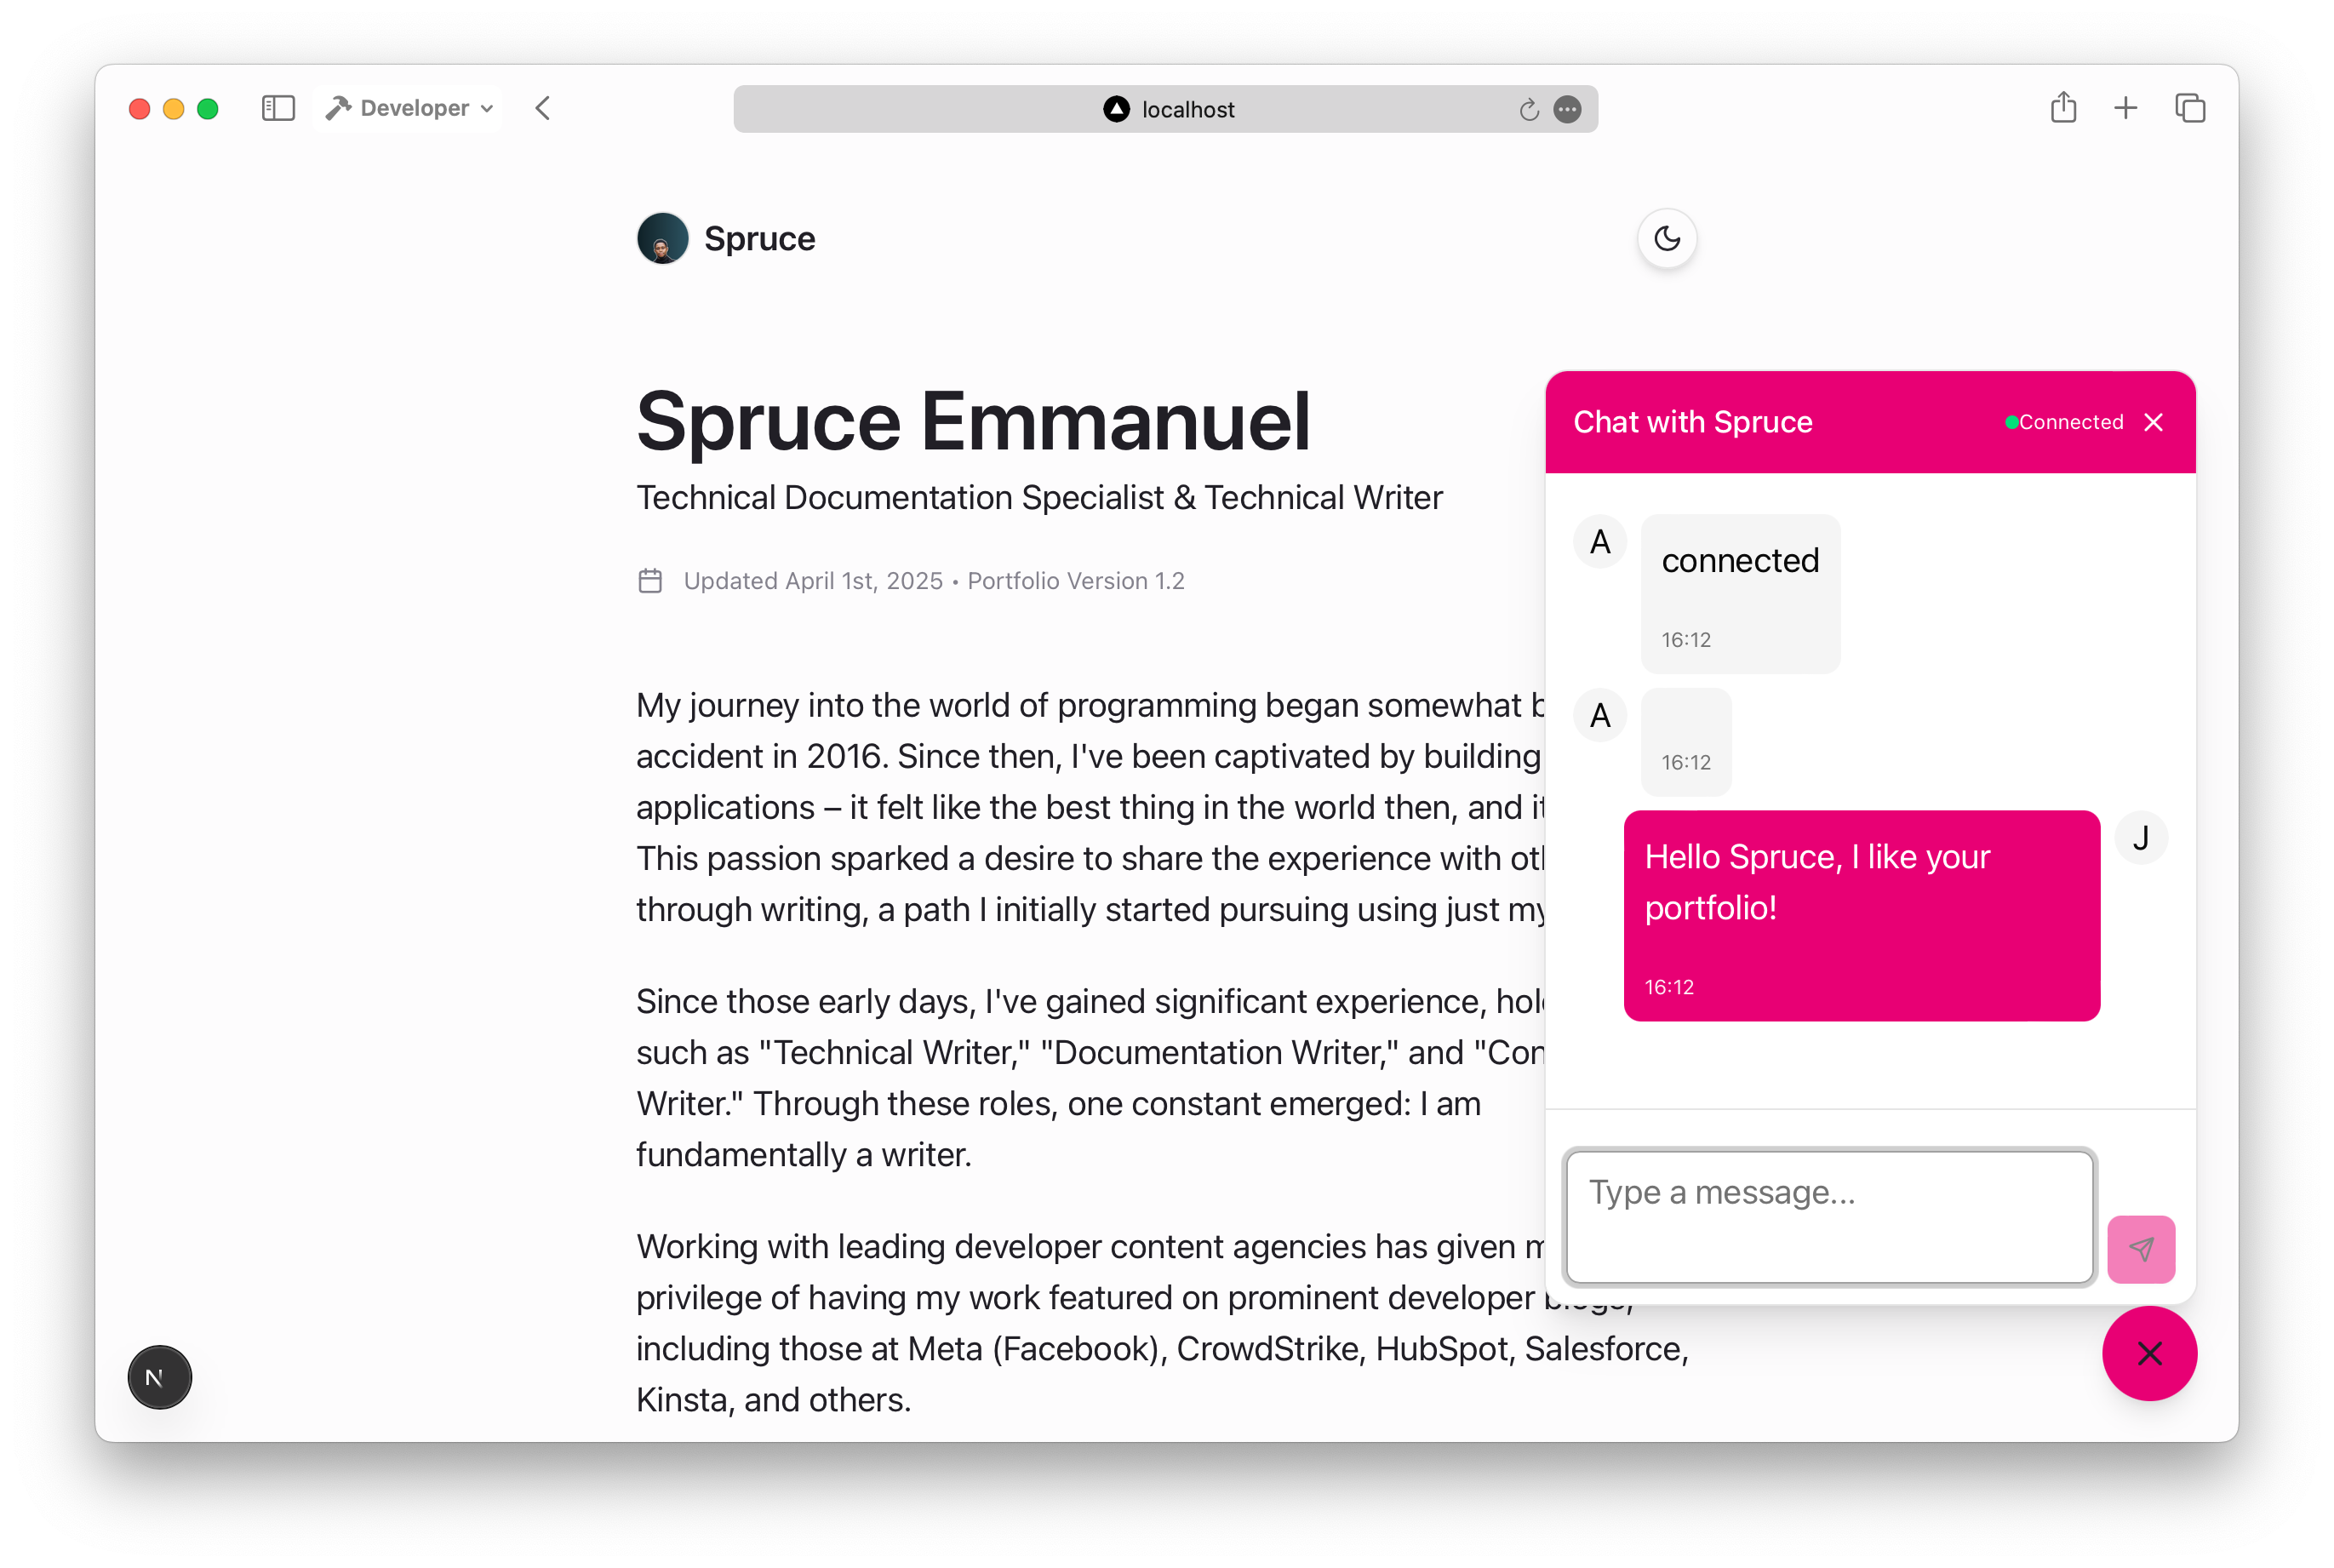
Table of Contents
Why Rocket.Chat, you may ask?
Rocket.Chat is a great option because:
-
Open Source: It’s free and customizable.
-
Comprehensive APIs: Their APIs make integration simple.
-
Flexible Hosting: Self-host your own or use their cloud version with a free trial (which we’ll use here).
Prerequisites
Before you continue, there are a few things you should know and have:
-
A running Rocket.Chat server (either self-hosted or on Rocket.Chat Cloud). Here, I’ll show you how to set up one with Rocket.Chat Cloud.
-
A working knowledge of JavaScript fundamentals.
Getting Started
First things first, let’s set up a Rocket.Chat server. Again, you can either self host your own or use their cloud version. And don’t worry – you don’t have to pay anything right now or for this tutorial, as they provide a 30 day free trial.
Step 1: Set Up the Rocket.Chat Server
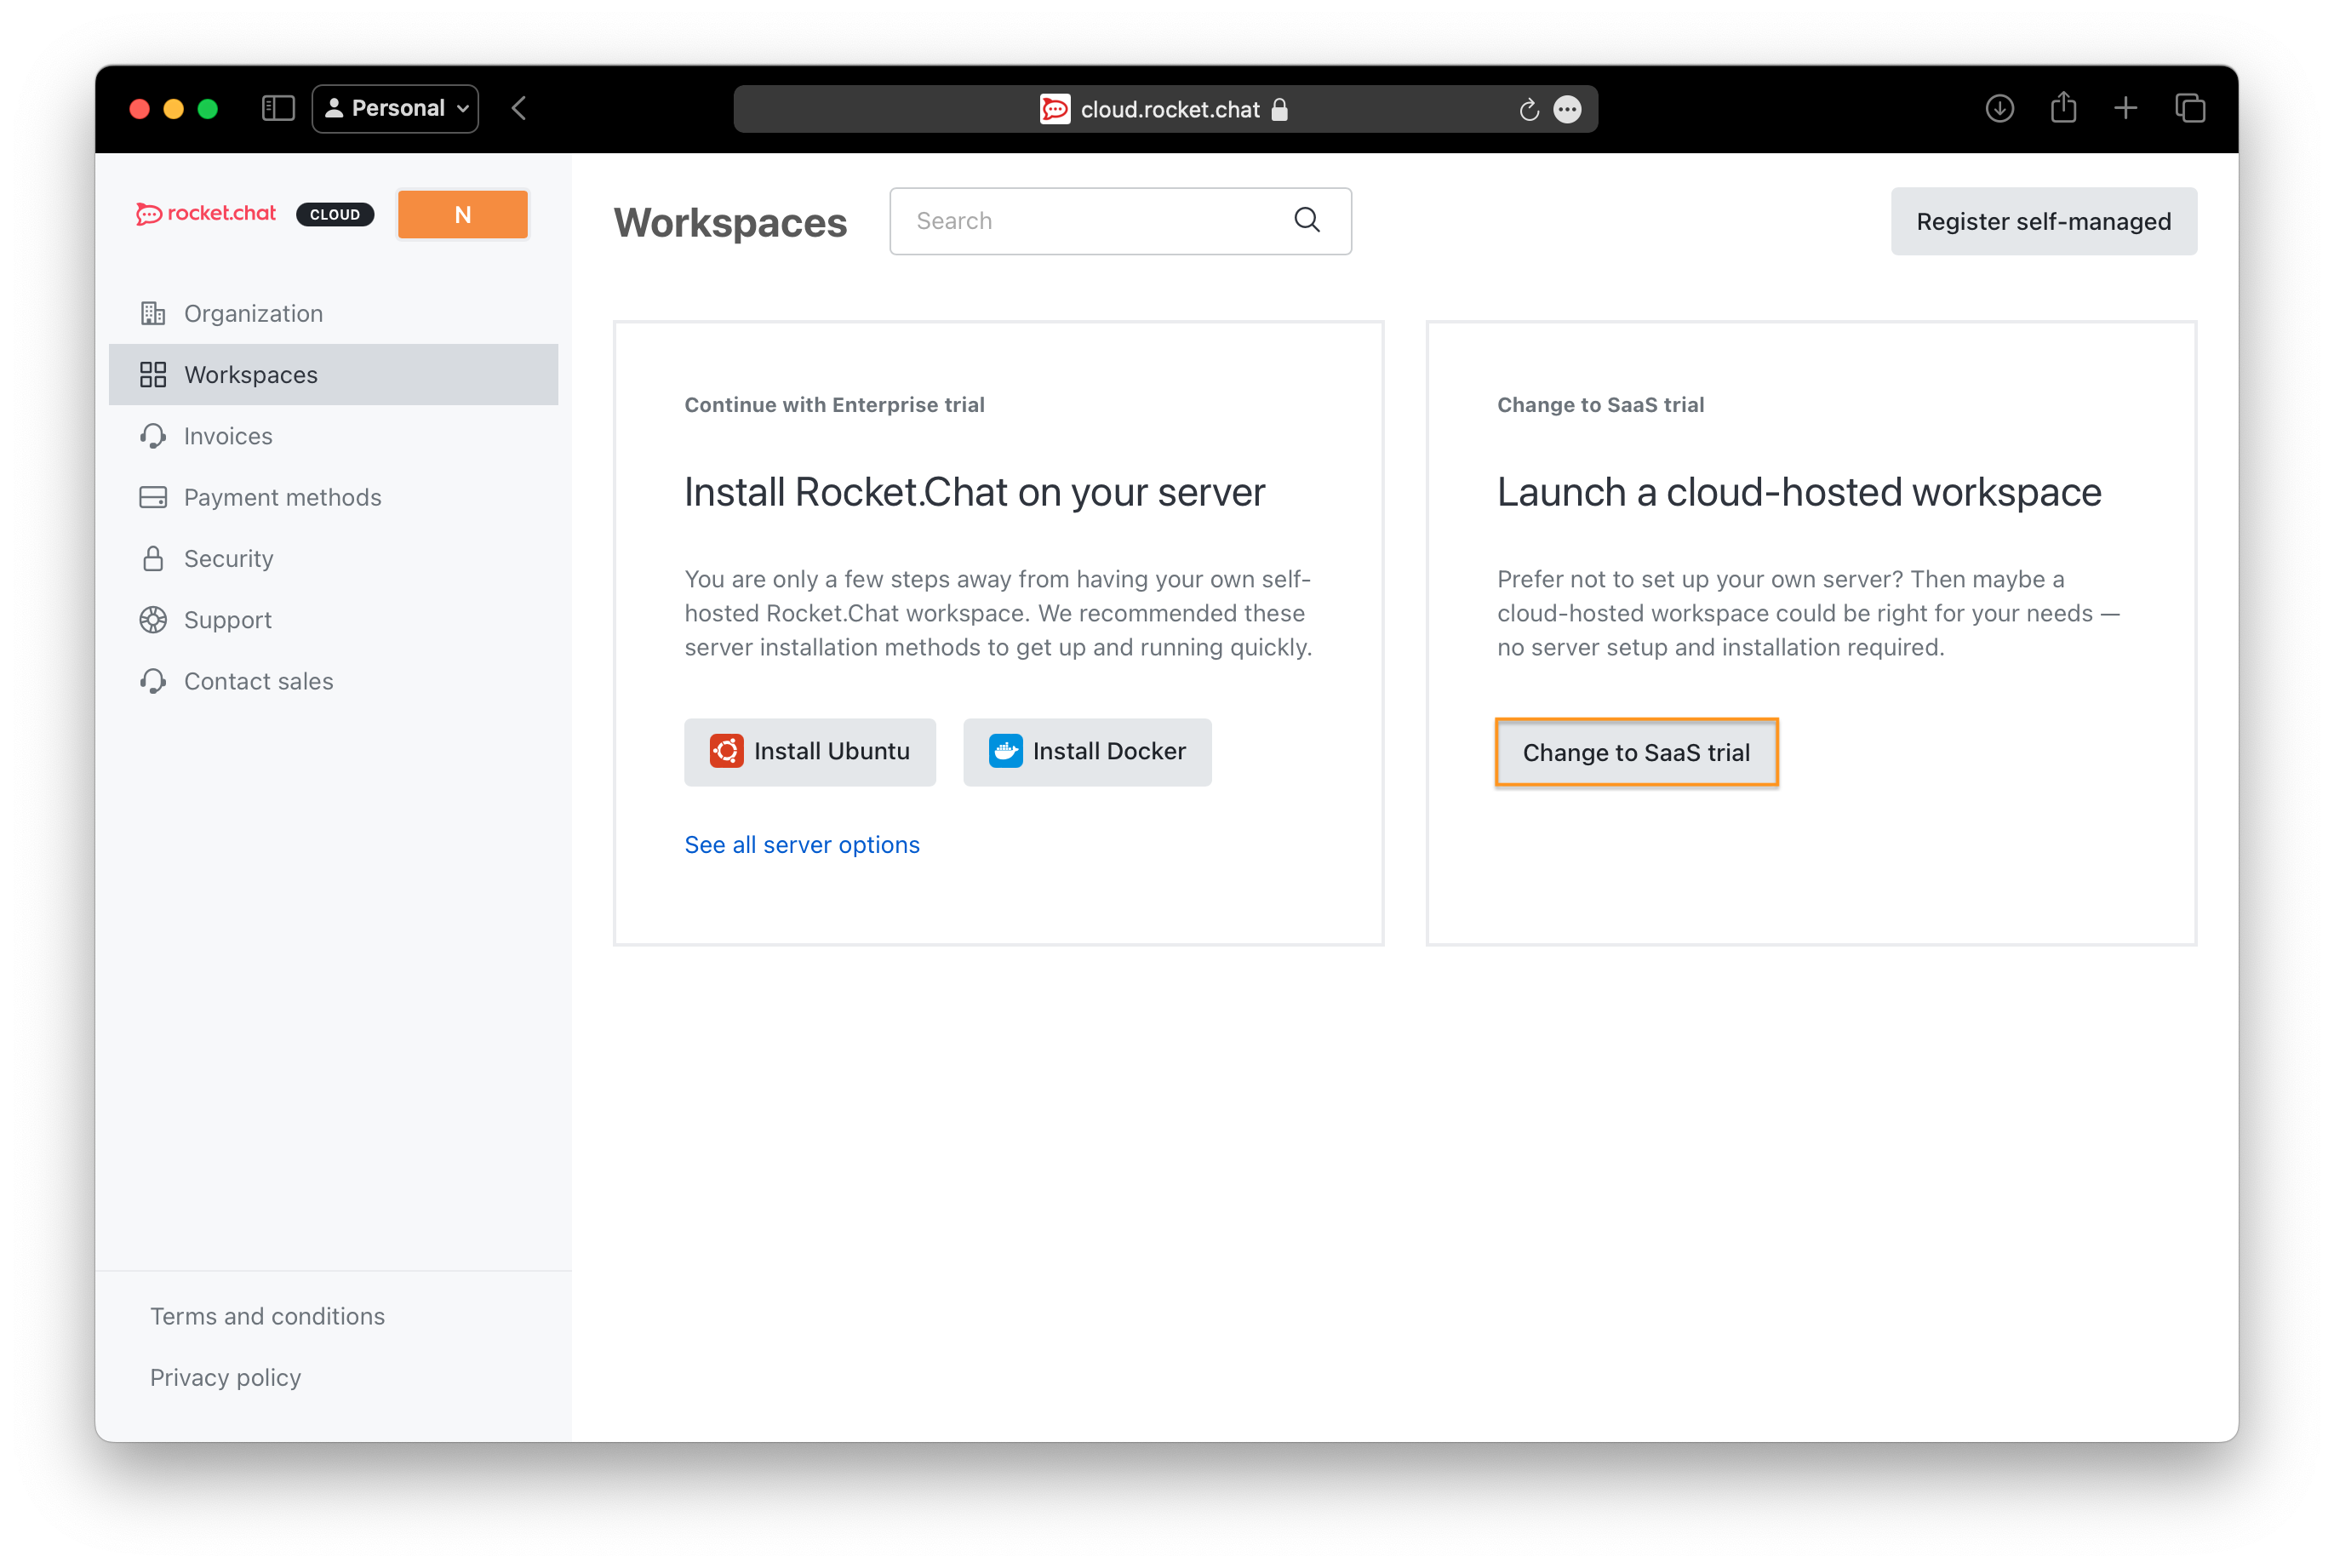
Head over to https://cloud.rocket.chat and create your free account.
Once you’re logged in, click on the “Change to SaaS trial” button to launch a cloud-hosted server.
Next, create a Cloud Workspace by providing your workspace name, URL, and server region.

It will take a little while to set up. When it’s done, you should see something similar to this:

Now copy your server URL—it should look like this: https://example.rocket.chat.
Step 2: Configure the Rocket.Chat Server
Before diving into the code, we need to configure our server so we can use the livechat API.
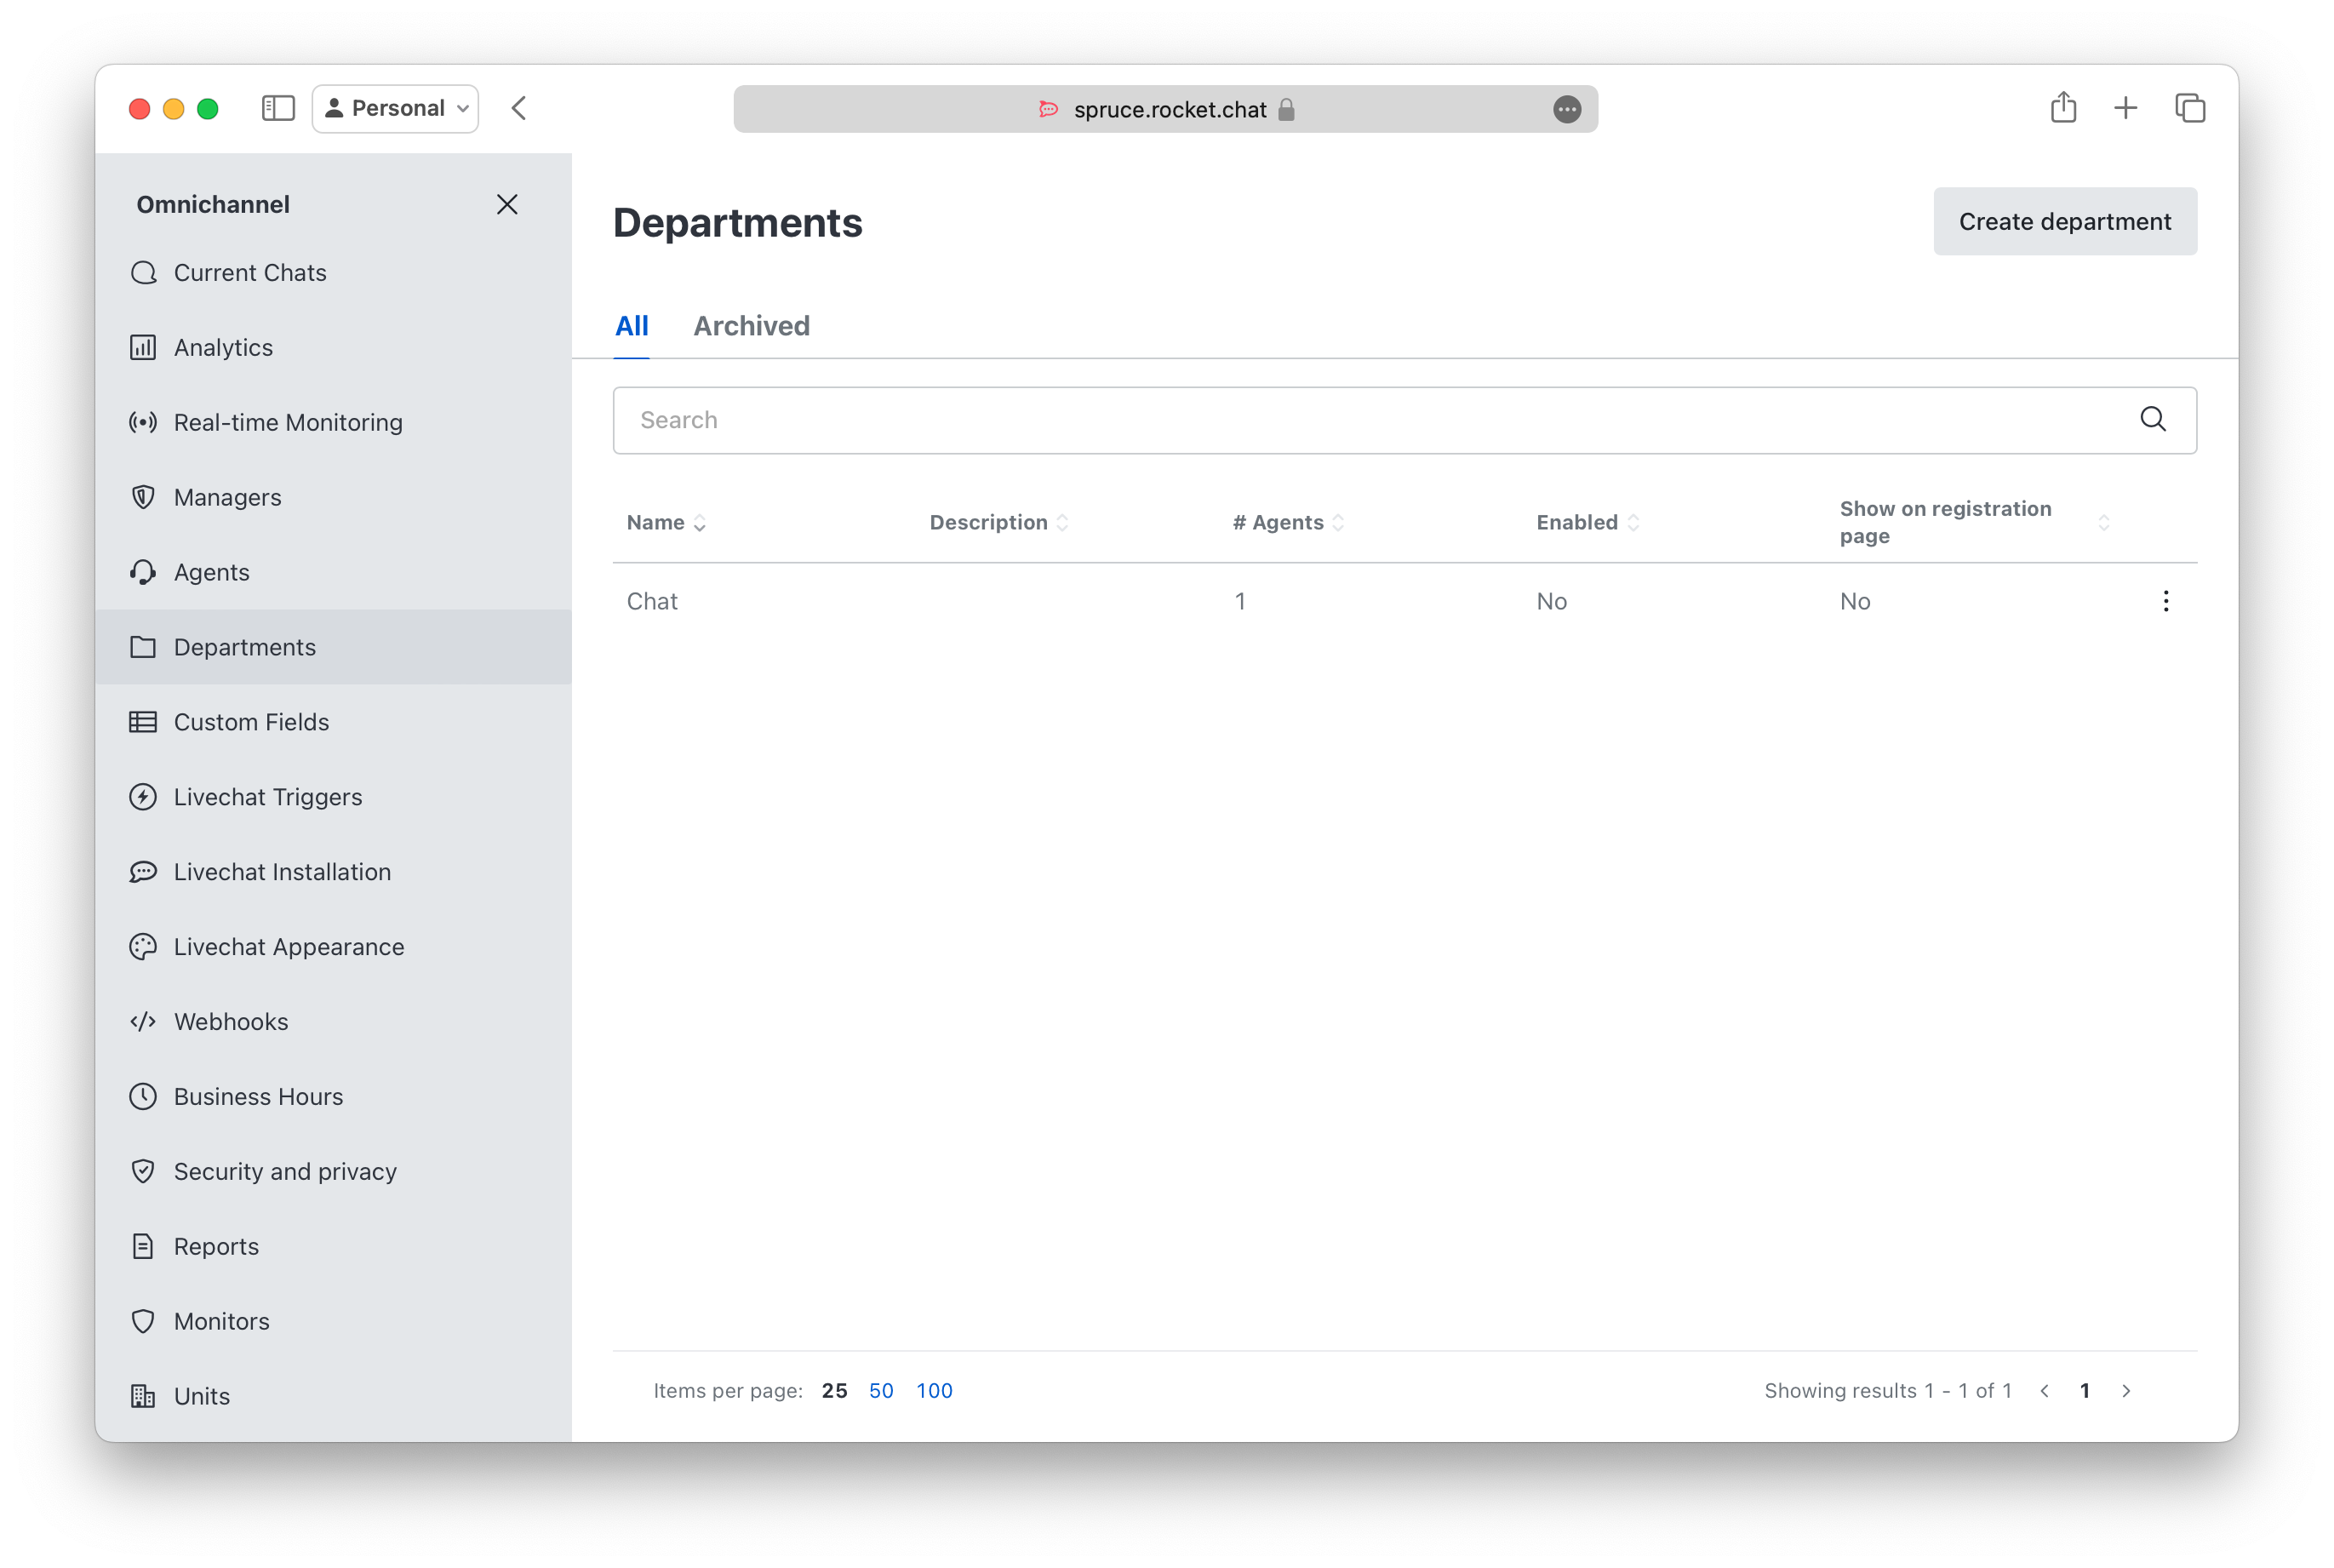
To start, open your Rocket.Chat server and click on the menu button, then click on Omnichannel.

Click on Agents on the sidebar and add yourself as an agent.

Next, click on Departments and create a Department. I’ll call mine Chats.
Now you need to configure a few things about the Livechat widget:
-
Make sure you turn on the offline form and set the Email Address to Send Offline Messages.
-
Also, configure your business hours to the times you’ll be available.
Step 3: Register the Visitor
Next, we need to register the visitor and create a room for them. To do this, you need to collect the visitor’s name and email and generate a random unique ID.
How to Register the Visitor
First, we need to register the visitor in the server. We need their name, email, and token. You send those to this endpoint: /api/v1/livechat/visitor. Here’s an example code that you might send from your backend:
<span class="hljs-keyword">const</span> body = {
  <span class="hljs-attr">name</span>: <span class="hljs-string">"Visitor Name"</span>,          <span class="hljs-comment">// Replace with the visitor's name</span>
  <span class="hljs-attr">email</span>: <span class="hljs-string">"visitor@example.com"</span>,  <span class="hljs-comment">// Replace with the visitor's email</span>
  <span class="hljs-attr">token</span>: <span class="hljs-string">"unique-visitor-token"</span>  <span class="hljs-comment">// Replace with a generated unique token</span>
};

fetch(<span class="hljs-string">`<span class="hljs-subst">${process.env.ROCKETCHAT_URL}</span>/api/v1/livechat/visitor`</span>, {
  <span class="hljs-attr">method</span>: <span class="hljs-string">'POST'</span>,
  <span class="hljs-attr">headers</span>: {
    <span class="hljs-string">'Content-Type'</span>: <span class="hljs-string">'application/json'</span>,
    <span class="hljs-string">'Cache-Control'</span>: <span class="hljs-string">'no-cache'</span>
  },
  <span class="hljs-attr">body</span>: <span class="hljs-built_in">JSON</span>.stringify(body)
})
  .then(<span class="hljs-function"><span class="hljs-params">response</span> =></span> response.json())
  .then(<span class="hljs-function"><span class="hljs-params">data</span> =></span> {
    <span class="hljs-keyword">if</span> (data.success) {
      <span class="hljs-built_in">console</span>.log(<span class="hljs-string">"Visitor registered:"</span>, data);
    } <span class="hljs-keyword">else</span> {
      <span class="hljs-built_in">console</span>.error(<span class="hljs-string">"Visitor registration failed:"</span>, data);
    }
  })
  .catch(<span class="hljs-function"><span class="hljs-params">error</span> =></span> <span class="hljs-built_in">console</span>.error(<span class="hljs-string">"Error in visitor registration:"</span>, error));
How to Create or Retrieve the Chat Room
After you’ve registered the visitor, you need to create a room for them so they can send you messages and you can respond.
Call this endpoint /api/v1/livechat/room with the visitor token as a query parameter. If the visitor already has a room, it’ll be returned. If not, a new one will be created. This is how you can make that request from your backend:
<span class="hljs-keyword">const</span> token = <span class="hljs-string">"unique-visitor-token"</span>; <span class="hljs-comment">// Replace with the actual visitor token</span>

fetch(<span class="hljs-string">`<span class="hljs-subst">${process.env.ROCKETCHAT_URL}</span>/api/v1/livechat/room?token=<span class="hljs-subst">${token}</span>`</span>, {
  <span class="hljs-attr">method</span>: <span class="hljs-string">'GET'</span>,
  <span class="hljs-attr">headers</span>: { <span class="hljs-string">'Content-Type'</span>: <span class="hljs-string">'application/json'</span> },
})
  .then(<span class="hljs-function"><span class="hljs-params">response</span> =></span> response.json())
  .then(<span class="hljs-function"><span class="hljs-params">data</span> =></span> {
    <span class="hljs-keyword">if</span> (data.success) {
      <span class="hljs-built_in">console</span>.log(<span class="hljs-string">"Room retrieved:"</span>, data);
    } <span class="hljs-keyword">else</span> {
      <span class="hljs-built_in">console</span>.error(<span class="hljs-string">"Failed to retrieve room:"</span>, data);
    }
  })
  .catch(<span class="hljs-function"><span class="hljs-params">error</span> =></span> <span class="hljs-built_in">console</span>.error(<span class="hljs-string">"Error in retrieving room:"</span>, error));
How to Retrieve Livechat Configuration
Lastly, we need to get the info about the visitor and the agent we registered. Use this API endpoint to get the visitor token, room ID, and agent info. You can use it to check if the agent is online before trying to connect to the WebSocket.
<span class="hljs-keyword">const</span> token = <span class="hljs-string">"unique-visitor-token"</span>; <span class="hljs-comment">// Replace with the actual visitor token</span>
<span class="hljs-keyword">const</span> url = <span class="hljs-string">`<span class="hljs-subst">${process.env.ROCKETCHAT_URL}</span>/api/v1/livechat/config?token=<span class="hljs-subst">${token}</span>`</span>;

fetch(url, {
  <span class="hljs-attr">method</span>: <span class="hljs-string">'GET'</span>,
  <span class="hljs-attr">headers</span>: { <span class="hljs-string">'Content-Type'</span>: <span class="hljs-string">'application/json'</span> },
})
  .then(<span class="hljs-function"><span class="hljs-params">response</span> =></span> response.json())
  .then(<span class="hljs-function"><span class="hljs-params">data</span> =></span> {
    <span class="hljs-keyword">if</span> (data.success) {
      <span class="hljs-built_in">console</span>.log(<span class="hljs-string">"Livechat config:"</span>, data);
    } <span class="hljs-keyword">else</span> {
      <span class="hljs-built_in">console</span>.error(<span class="hljs-string">"Failed to get livechat config:"</span>, data);
    }
  })
  .catch(<span class="hljs-function"><span class="hljs-params">error</span> =></span> <span class="hljs-built_in">console</span>.error(<span class="hljs-string">"Error fetching livechat config:"</span>, error));
Step 4: Create the Connection to WebSocket
To establish the live chat experience, we need to open a WebSocket connection to Rocket.Chat and handle messaging.
WebSocket Connection Example
First, open the WebSocket like this:
<span class="hljs-keyword">const</span> rocketChatSocket = <span class="hljs-keyword">new</span> WebSocket(<span class="hljs-string">"ws://example.rocket.chat/websocket"</span>);
Then connect:
<span class="hljs-keyword">const</span> connectRequest = {
  <span class="hljs-attr">msg</span>: <span class="hljs-string">"connect"</span>,
  <span class="hljs-attr">version</span>: <span class="hljs-string">"1"</span>,
  <span class="hljs-attr">support</span>: [<span class="hljs-string">"1"</span>, <span class="hljs-string">"pre2"</span>, <span class="hljs-string">"pre1"</span>]
};
rocketChatSocket.send(<span class="hljs-built_in">JSON</span>.stringify(connectRequest));
You can keep the connection alive by responding to the server’s "ping" messages with a "pong".
rocketChatSocket.onmessage = <span class="hljs-function">(<span class="hljs-params">event</span>) =></span> {
  <span class="hljs-keyword">try</span> {
    <span class="hljs-keyword">const</span> data = <span class="hljs-built_in">JSON</span>.parse(event.data);
    <span class="hljs-keyword">if</span> (data.msg === <span class="hljs-string">"ping"</span>) {
      <span class="hljs-built_in">console</span>.log(<span class="hljs-string">"Received ping from server, sending pong"</span>);
      rocketChatSocket.send(<span class="hljs-built_in">JSON</span>.stringify({ <span class="hljs-attr">msg</span>: <span class="hljs-string">"pong"</span> }));
    }
  } <span class="hljs-keyword">catch</span> (error) {
    <span class="hljs-built_in">console</span>.error(<span class="hljs-string">"Error parsing WebSocket message:"</span>, error);
  }
};
You can subscribe to the room created for the visitor. Just use the visitor’s token and room ID from the previous sections.
<span class="hljs-keyword">const</span> subscribeRequest = {
  <span class="hljs-attr">msg</span>: <span class="hljs-string">"sub"</span>,
  <span class="hljs-attr">id</span>: <span class="hljs-string">"unique-subscription-id"</span>, <span class="hljs-comment">// Replace with your unique ID</span>
  <span class="hljs-attr">name</span>: <span class="hljs-string">"stream-room-messages"</span>,
  <span class="hljs-attr">params</span>: [
    <span class="hljs-string">"fetched-room-id"</span>, <span class="hljs-comment">// Replace with the room ID variable</span>
    {
      <span class="hljs-attr">useCollection</span>: <span class="hljs-literal">false</span>,
      <span class="hljs-attr">args</span>: [
        { <span class="hljs-attr">visitorToken</span>: <span class="hljs-string">"visitor-token"</span> } <span class="hljs-comment">// Replace with your visitor token variable</span>
      ],
    },
  ],
};
rocketChatSocket.send(<span class="hljs-built_in">JSON</span>.stringify(subscribeRequest));
You can also listen for incoming messages. Here’s how you can process new messages as they arrive:
rocketChatSocket.onmessage = <span class="hljs-function">(<span class="hljs-params">event</span>) =></span> {
  <span class="hljs-keyword">try</span> {
    <span class="hljs-keyword">const</span> data = <span class="hljs-built_in">JSON</span>.parse(event.data);
    <span class="hljs-keyword">if</span> (
      data.msg === <span class="hljs-string">"changed"</span> &&
      data.collection === <span class="hljs-string">"stream-room-messages"</span>
    ) {
      <span class="hljs-comment">// Handle new messages</span>
      <span class="hljs-keyword">if</span> (data.fields && data.fields.args && data.fields.args.length > <span class="hljs-number">0</span>) {
        <span class="hljs-keyword">const</span> newMessage = data.fields.args[<span class="hljs-number">0</span>];
        <span class="hljs-comment">// Assume isValidChatMessage is defined to validate the message format</span>
        <span class="hljs-keyword">if</span> (isValidChatMessage(newMessage)) {
          <span class="hljs-comment">// Update your messages list here</span>
          <span class="hljs-built_in">console</span>.log(<span class="hljs-string">"New message received:"</span>, newMessage);
        }
      }
    }
  } <span class="hljs-keyword">catch</span> (error) {
    <span class="hljs-built_in">console</span>.error(<span class="hljs-string">"Error parsing WebSocket message:"</span>, error);
  }
};
What if you want to send livechat messages? Just use this code to do so:
<span class="hljs-keyword">const</span> sendMessageRequest = {
  <span class="hljs-attr">msg</span>: <span class="hljs-string">"method"</span>,
  <span class="hljs-attr">method</span>: <span class="hljs-string">"sendMessageLivechat"</span>,
  <span class="hljs-attr">params</span>: [
    {
      <span class="hljs-attr">_id</span>: <span class="hljs-string">"unique-message-id"</span>,  <span class="hljs-comment">// Replace with a generated unique ID for the message</span>
      <span class="hljs-attr">rid</span>: <span class="hljs-string">"room-id"</span>,            <span class="hljs-comment">// Replace with the actual room ID</span>
      <span class="hljs-attr">msg</span>: <span class="hljs-string">"Your message here"</span>,  <span class="hljs-comment">// Replace with the message text you want to send</span>
      <span class="hljs-attr">token</span>: <span class="hljs-string">"visitor-token"</span>     <span class="hljs-comment">// Replace with the actual visitor token</span>
    }
  ],
  <span class="hljs-attr">id</span>: <span class="hljs-string">"unique-request-id"</span>        <span class="hljs-comment">// Replace with a unique request ID</span>
};

rocketChatSocket.send(<span class="hljs-built_in">JSON</span>.stringify(sendMessageRequest));
In your actual implementation, you can integrate these examples into your backend or client-side logic as needed.
You can take a look at the source code for how I implemented mine with Next.js or you can look at the live demo.
Conclusion
Adding a Livechat feature to your web apps shouldn’t be hard. With Rocket.Chat’s livechat API, you can quickly integrate chat functionality and gain valuable insights from your users. I even built an SDK wrapper to make it easier to use.
Now it’s your turn! Try out Rocket.Chat’s API and build your own live chat system. You can explore more in the Rocket.Chat documentation.
Happy coding!
Source: freeCodeCamp Programming Tutorials: Python, JavaScript, Git & MoreÂ