


Hey there! 👋, How’s it going?
I hope you’re doing well. Whether you’re a seasoned coder, a curious learner, or just someone browsing through, welcome to my little corner of the internet.
In this tutorial, we’ll dive into how you can deploy a web service on Microsoft Azure app service. It’s a topic I’ve been excited to explore, and I hope you’ll find it insightful and helpful. So grab a coffee, sit back, and let’s get started.
Prerequisites
-
Basic understanding of RESTful web services
-
Programming knowledge
-
Docker basics
-
Docker Hub account
-
Command Line Interface (CLI) skills
What we’ll cover:
Before we actually get started, I’d like to go over some key terminologies that I’ll be using throughout this tutorial. Understanding these terms will make it easier to follow along and get the most out of what we’re discussing. Let’s dive in!
Key Terminologies
1. Docker
Docker is an open-source platform that simplifies application development, shipping, and deployment by using containers. With Docker, there are three key things you can do:
-
build once and run anywhere
-
keep environment consistent, and
-
easily scale your application with container orchestration tools like Kubernetes.
2. Docker Hub
Docker Hub is a cloud-based repository where developers can store, share, and manage Docker images. You can think of it as the GitHub for Docker images 😉.
3. Docker Image
A Docker image is a lightweight, standalone, and executable package that includes everything needed to run a piece of software. You can also think of it as a blueprint for creating and running a container.
Once built, an image is immutable, meaning it cannot change after creation. Instead, you create a new version when updates are needed. This means that you’ll need to rebuild if you update the code that’s being run in the container.
4. Container
A container is a running instance of a Docker image. It provides an isolated environment where an application runs with all its dependencies, without interfering with the host system or other containers.
Wait, what?! 😕 Well, simply put, a container is like a tiny virtual machine that runs the built Docker image. But unlike traditional VMs, it has no init process (PID 1), meaning it always runs on a host system rather than being fully independent. By now, you should be getting the idea: no image, no container. A container depends on an image to exist. You have to cook before you serve, right? 🍽️
5. Azure Resource Group
An Azure resource group refers to a store or folder containing all related resources for an application you want to deploy to production using MS Azure Cloud. For example, if I want to deploy an eCommerce web app with MS Azure, I could create a resource group called EcommWebAppRG. I’d use this to create all the resources I needed for the web app to go live and be accessible – like VMs, DBs, caches, and other services.
Alrighty, now that all the terms are out of the way, lets get started with the tutorial so you can learn how to deploy a web service on Azure App Service.
Since we are deploying an app, let’s start by creating simple REST API app. I’ll be using Golang for the API development, but you can use any programming language/framework of your choice. If you’d like to follow along with the app for this tutorial, I’ve provided the source code here.
How to Install Docker and Docker Compose
To install Docker and Docker compose on your PC, for Mac and Windows you’ll need to download Docker desktop for your Operating System here.
For Linux, you can run the following command:
sudo apt update # update apt registry
sudo apt install docker.io # for docker engine
sudo apt install docker-compose-plugin
After downloading the Docker desktop for your application, open your terminal and enter the following command to verify that Docker and Docker Compose have been successfully installed on your machine:
docker-compose -v # this should show the version of docker compose cli you have on your PC
My Docker Compose version is:
Docker Compose version v2.31.0-desktop.2
docker -v
You should see something similar if Docker has successfully been installed on your machine:
Docker version 27.4.0, build bde2b89
How to Create a Simple Get Client Info Web Service
Alright, I’ll use this handy tool called sparky_generate to generate the app code template. sparky_generate is a command line tool used to generate boilerplate code for backend development using various backend languages and frameworks.
Use this command to install and setup the tool on your Mac or Linux machine. If you are on Windows, you can use WSL.
wget https://raw.githubusercontent.com/Ayobami6/sparky_generate/refs/heads/main/install.sh
chmod 711 install.sh
./install.sh # run the install command like so
sparky # run the sparky command like so
You should see something similar to the below. Select whatever framework you want to use for your backend service.
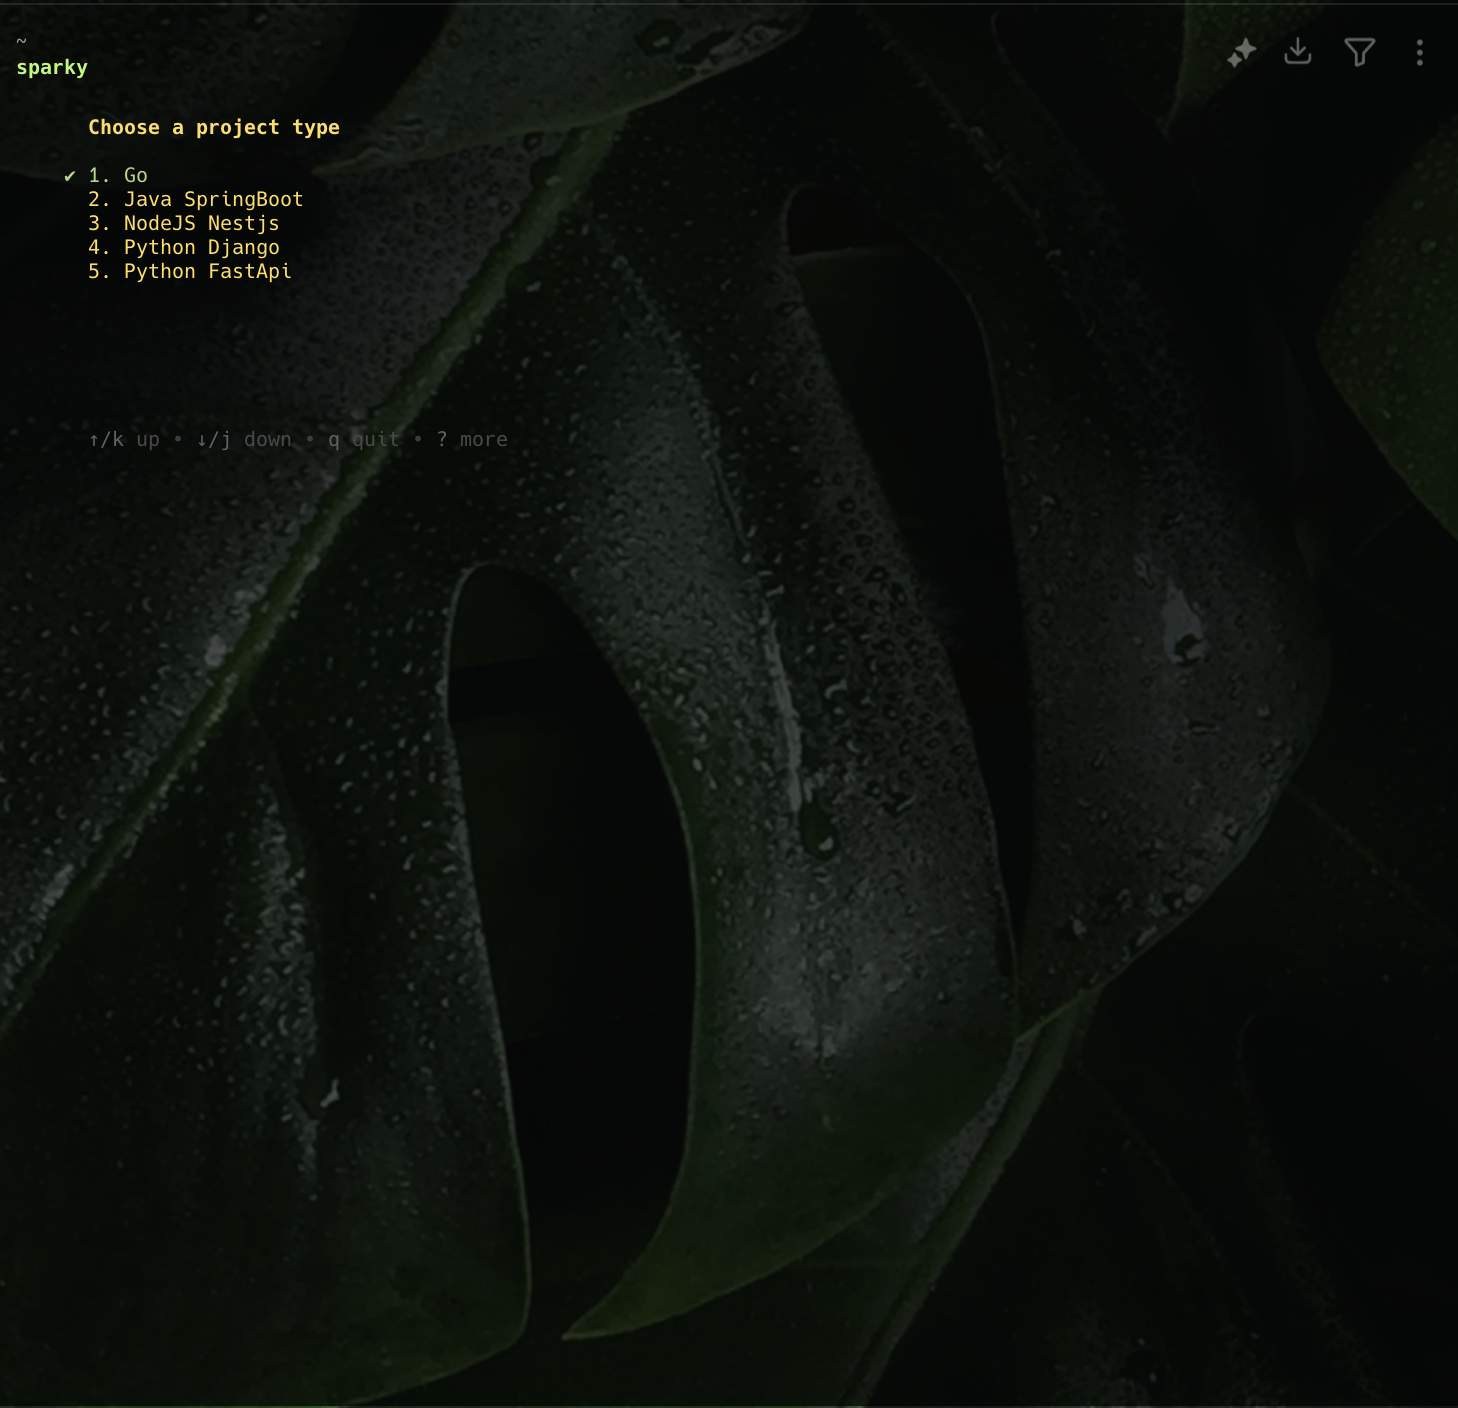
I will select Go, because I’m using Go for this tutorial. You should have your project template ready once you’ve selected your framework. I won’t go through how to code the web service since it’s out of scope for this tutorial. The goal here is to deploy on Azure using Azure App Service.
How to Build the App’s Docker Image
To build the Docker image for our app, we first need to create a Docker file that will include all the steps needed to build the image.
touch Dockerfile
We will be using a multistage Docker build to reduce the size of our Docker image. We need something as light as possible.
The multistage Docker build helps reduce size because we use different stages for different concerns. This helps ensure that only what’s needed runs the application in the final stage. For example, we might need certain artifacts to build the application, but we don’t need them to run the application. This is why we have the builder and runner stages in the Docker file below.
Our first stage (build) is concerned with building and bundling the application. The second stage (runner) is just used to run the executable we built in the first stage. So basically all files, modules, and so on used in the build process will be discarded in the runner since they’ve already served their purposes.
# using the first stage as build
FROM golang:1.23-alpine AS build # using alpine base image to reduce size

# install git on the machine
RUN apk add --no-cache git

# setting the current work directory on the vm to be /app
WORKDIR /app

# Copying all go dependency files to the working directory
COPY go.mod go.sum ./

# Install go dependencies
RUN go mod download

# copy all remaining files to the working directory
COPY . .
# build the execuatable

# build the go program
RUN go build -o api cmd/main.go

# stage 2 AKA the runner
FROM alpine:3.18

RUN  apk add --no-cache ca-certificates

# copy the go executable to the working directory
COPY --from=build /app/api .

# expose the service running port
EXPOSE 6080
This Dockerfile outlines all the steps for building a Docker image for our app. Lets go through all these steps line by line. Because we are using a multistage build here, our stages are build and runner.
-
The first stage build starts from the first
FROM golang:1.23-alpine AS build. It initializes a stage with all the steps in the stage. It states that the base image to be used for all the steps in this stage should use a pre-existing golang:1.23 image using an Alpine Linux distro to run all the steps in the stage. -
Next, we have
RUN, which is used to run the commandapk add git, followed by setting the working directory to the /app folder. -
Then we have the
COPYcommand that copies all the Go dependencies that will run the Go program. -
Following that is
RUN go mod downloadwhich is used to install all the dependencies. -
We then have the command
COPY . .to copy all the files to the working directory /app of the image -
Then the last step in the build stage,
RUN go build -o api cmd/main.go, builds the app code main.go to an executable API. The second stage “runner“ uses analpine:3.18base image, and also uses theRUNdirective to add ca-certificates to the Alpine base image. TheCOPYis used here to copy just the built executable file from the builder image to the runner image. -
We then expose port 6080 so our built container can accept an HTTP connection from port 6080.
Now, let’s write our docker-compose.yml file to define and run our containerized service::
services:

  client_info_app:
    build:
      context: .
      dockerfile: Dockerfile
    container_name: info_app

    ports:
      - "6080:6080"

    command: "./api"
Understanding the YAML Structure
YAML follows a key-value structure similar to a dictionary or hashmap. In our file, the top-level key is services, which acts as the parent key. Within services, we define individual service configurations.
In this case, we have a single service named client_info_app, which contains the necessary properties for Docker to build and run it.
-
build: This specifies how to build the Docker image for the service. Thecontext: .tells Docker to look for theDockerfilein the same directory as thedocker-compose.ymlfile. -
container_name: This assigns a custom name (info_app) to the running container, making it easier to reference. -
ports: Defines the port mappings between the host and the container. The-before"6080:6080"indicates that multiple mappings could be listed. Here, port6080on the host is mapped to port6080inside the container. -
command: Specifies the command to execute inside the container once it starts. In this case, it runs./api.
This structure allows us to define and configure multiple services within the services key if needed, but for now, we are only defining client_info_app.
How to Run the App in the Container
You can use this command to start the container:
docker-compose up client_info_app
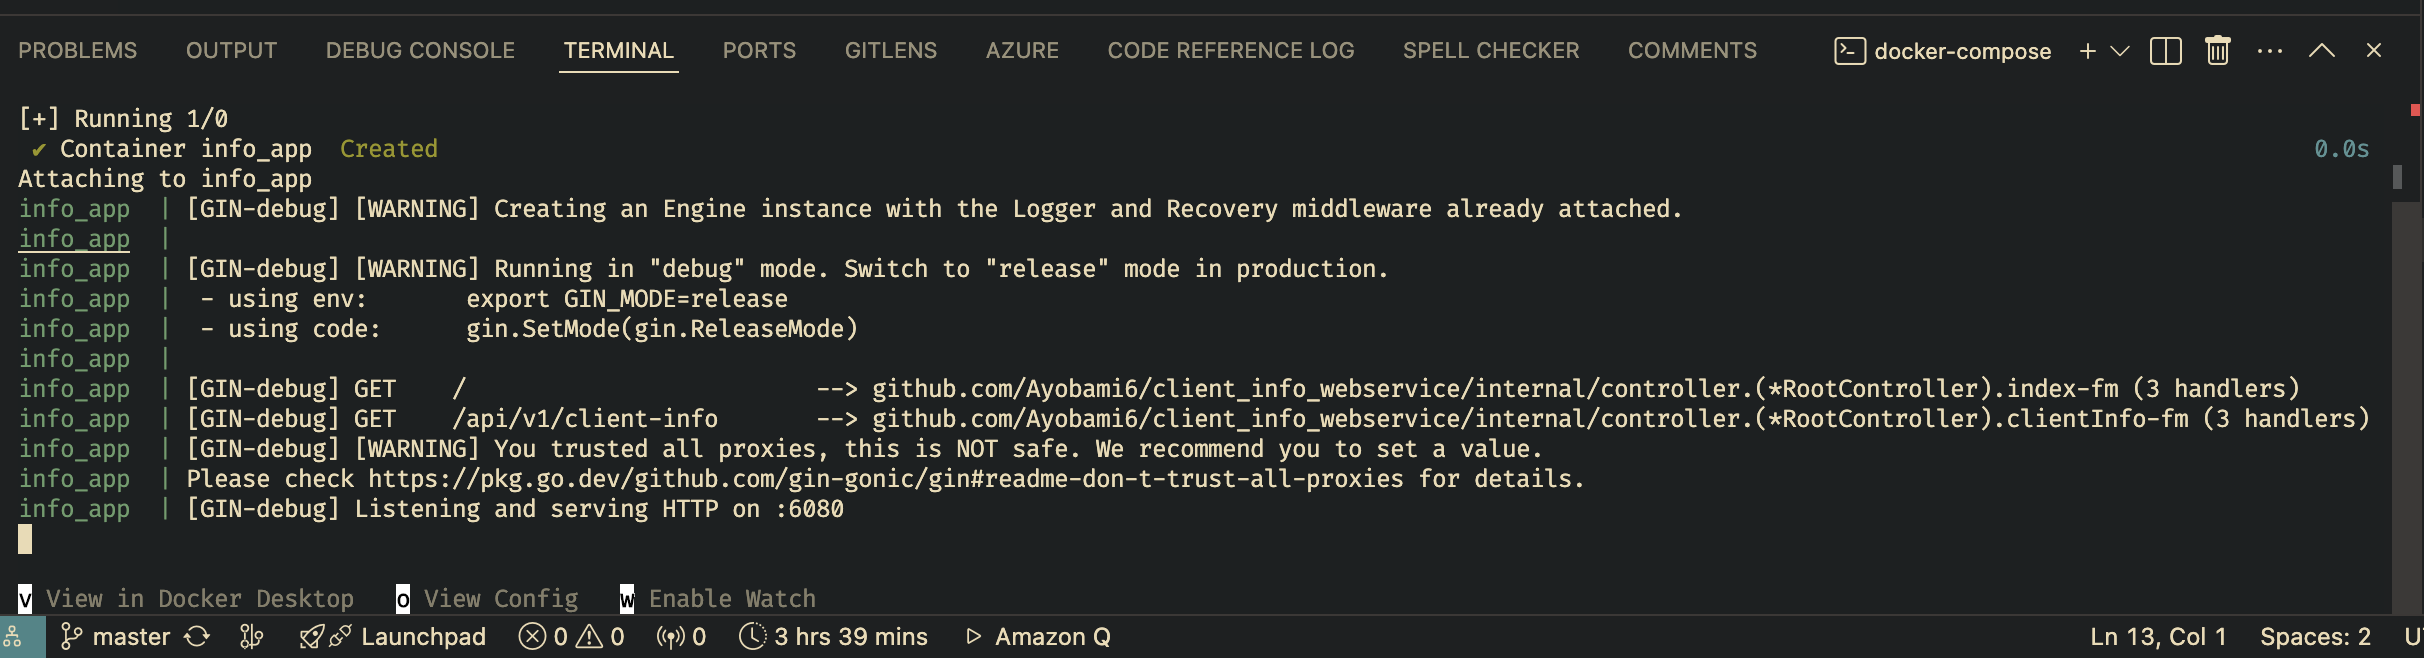
The above command will first build the image if it doesn’t exist. Then it runs it, because remember: no image, no container.
If all looks good, you should have something similar to this, depending on your application framework:
You should also verify that your Docker image has been built as well. To do that, run the following:
docker images

Voilà! You now have your Docker image built and ready for deployment on Azure App Service.
Let’s go on to the Azure Portal to deploy the app.
Note: if you don’t have an active Azure Subscription, that’s fine – you can still follow along. If you want to get a trial account, you can get one here.
How to Create an Azure Resource Group on Azure Portal.
As a reminder, an Azure resource group refers to a store or folder containing all related resources for an application you want to deploy to production using MS Azure Cloud. Now let’s go about creating one.
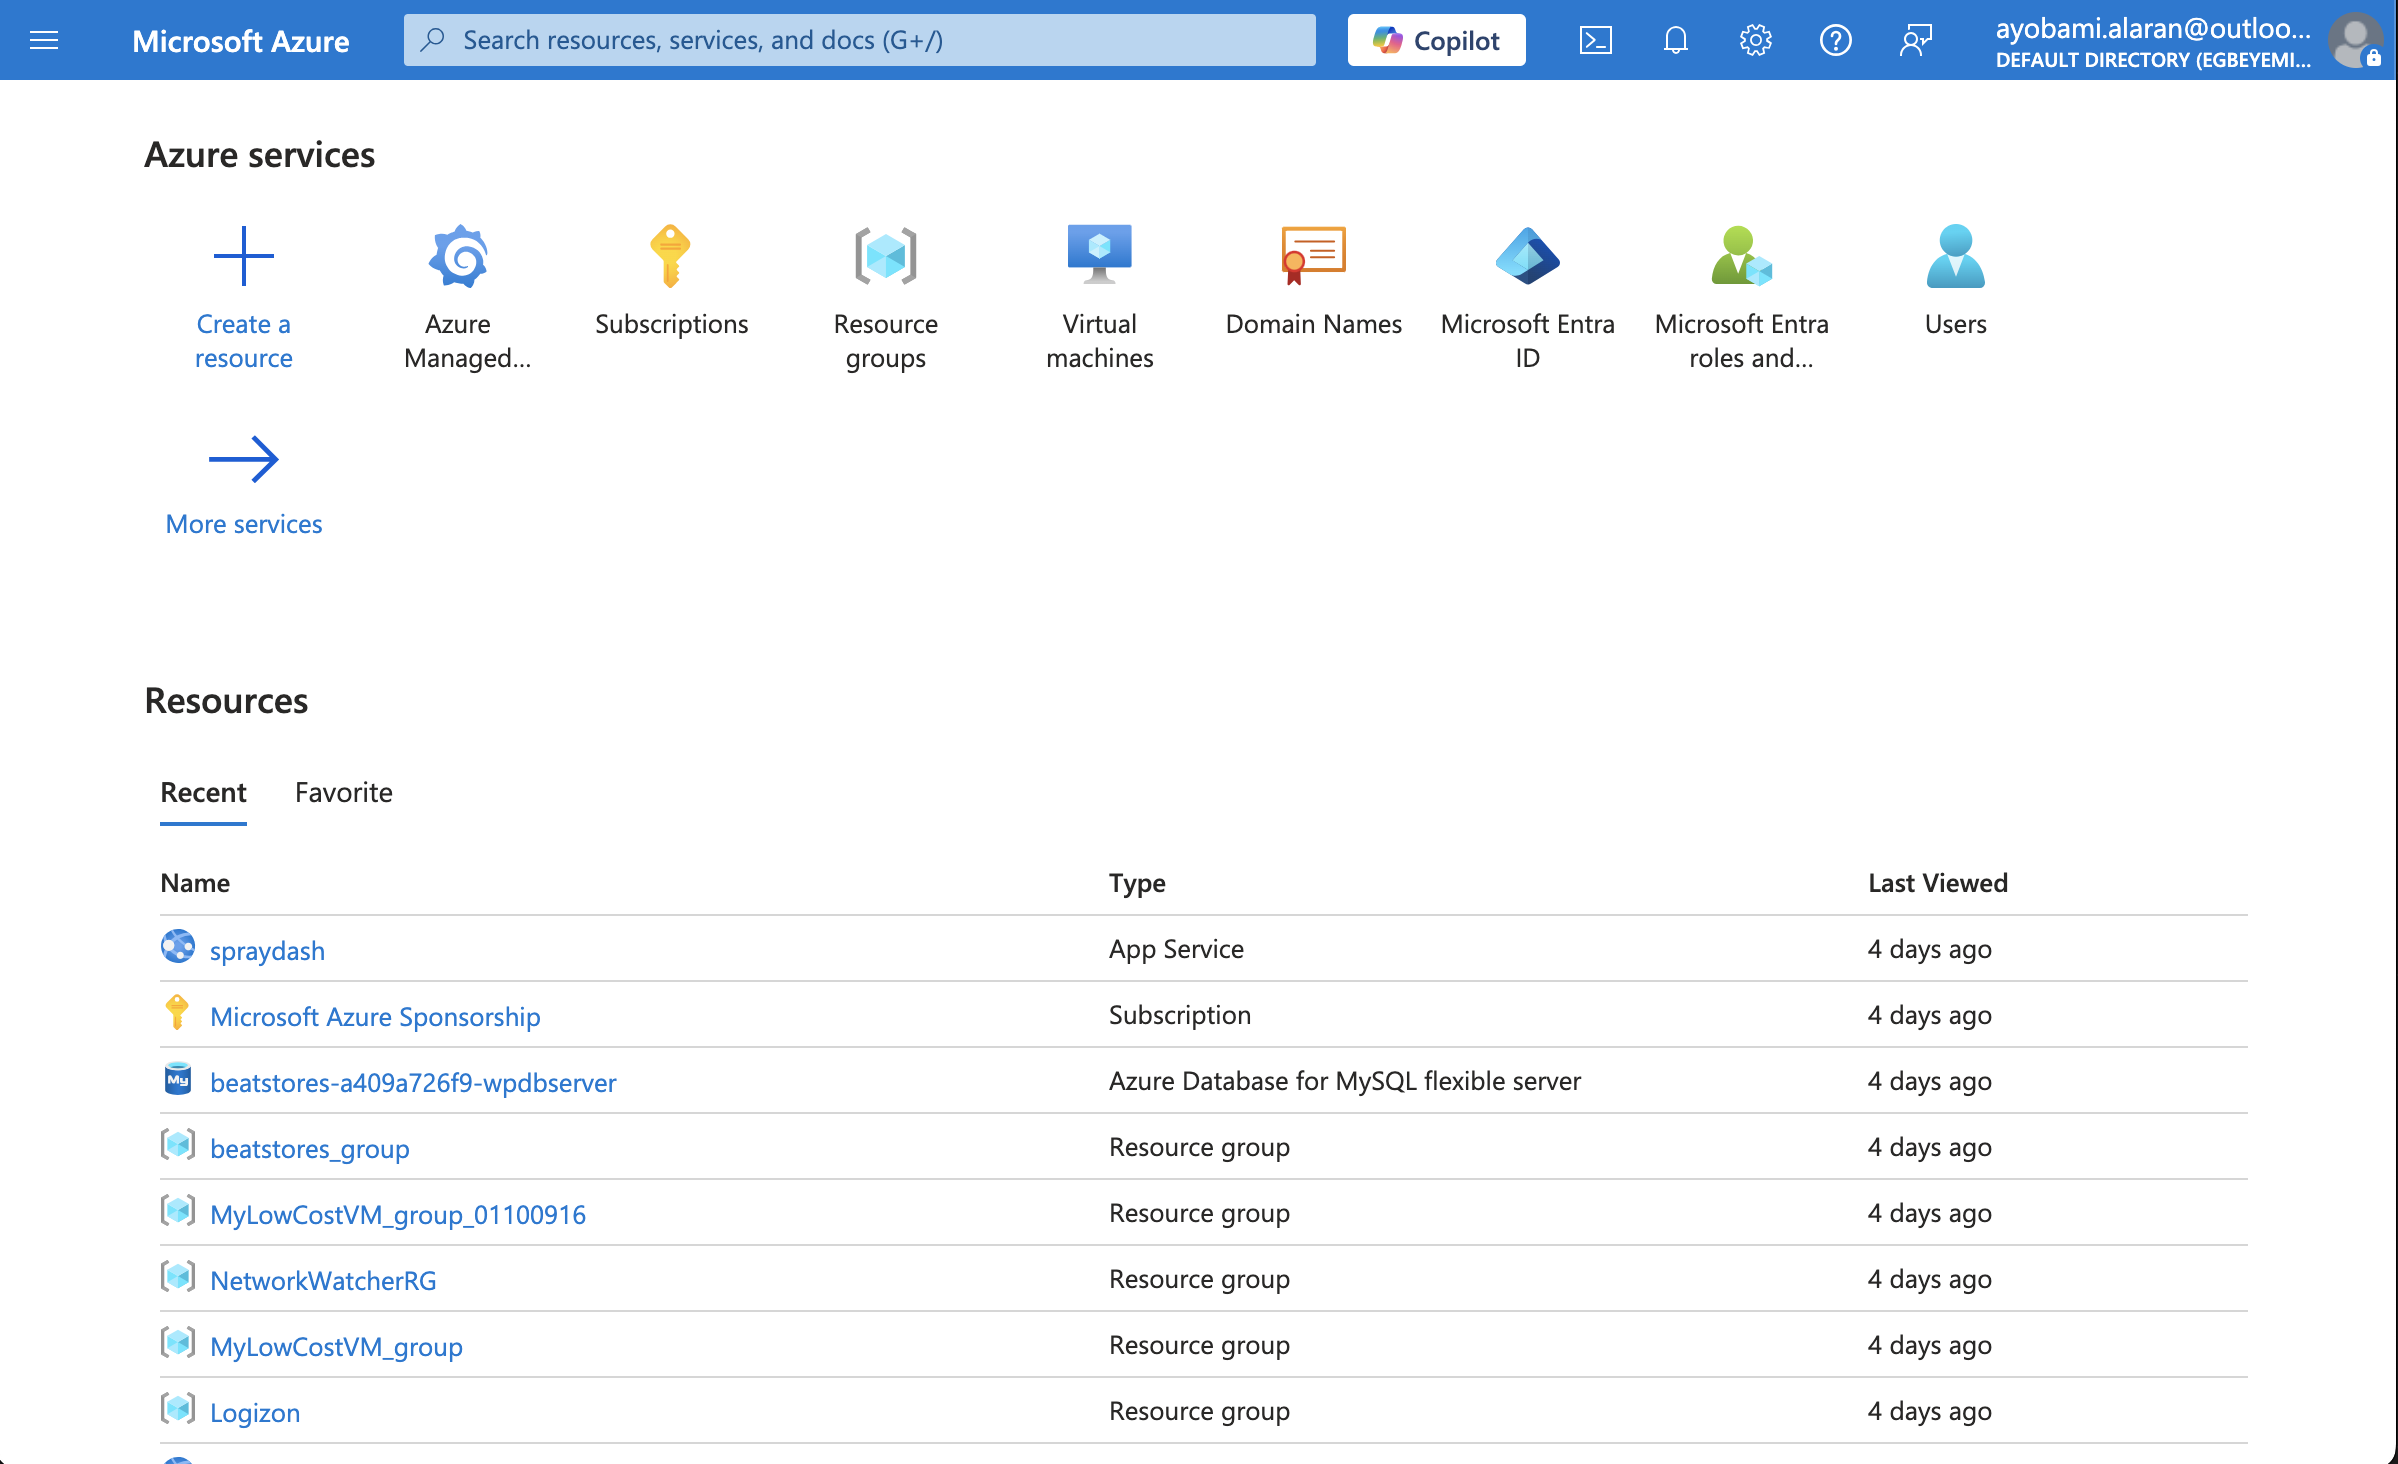
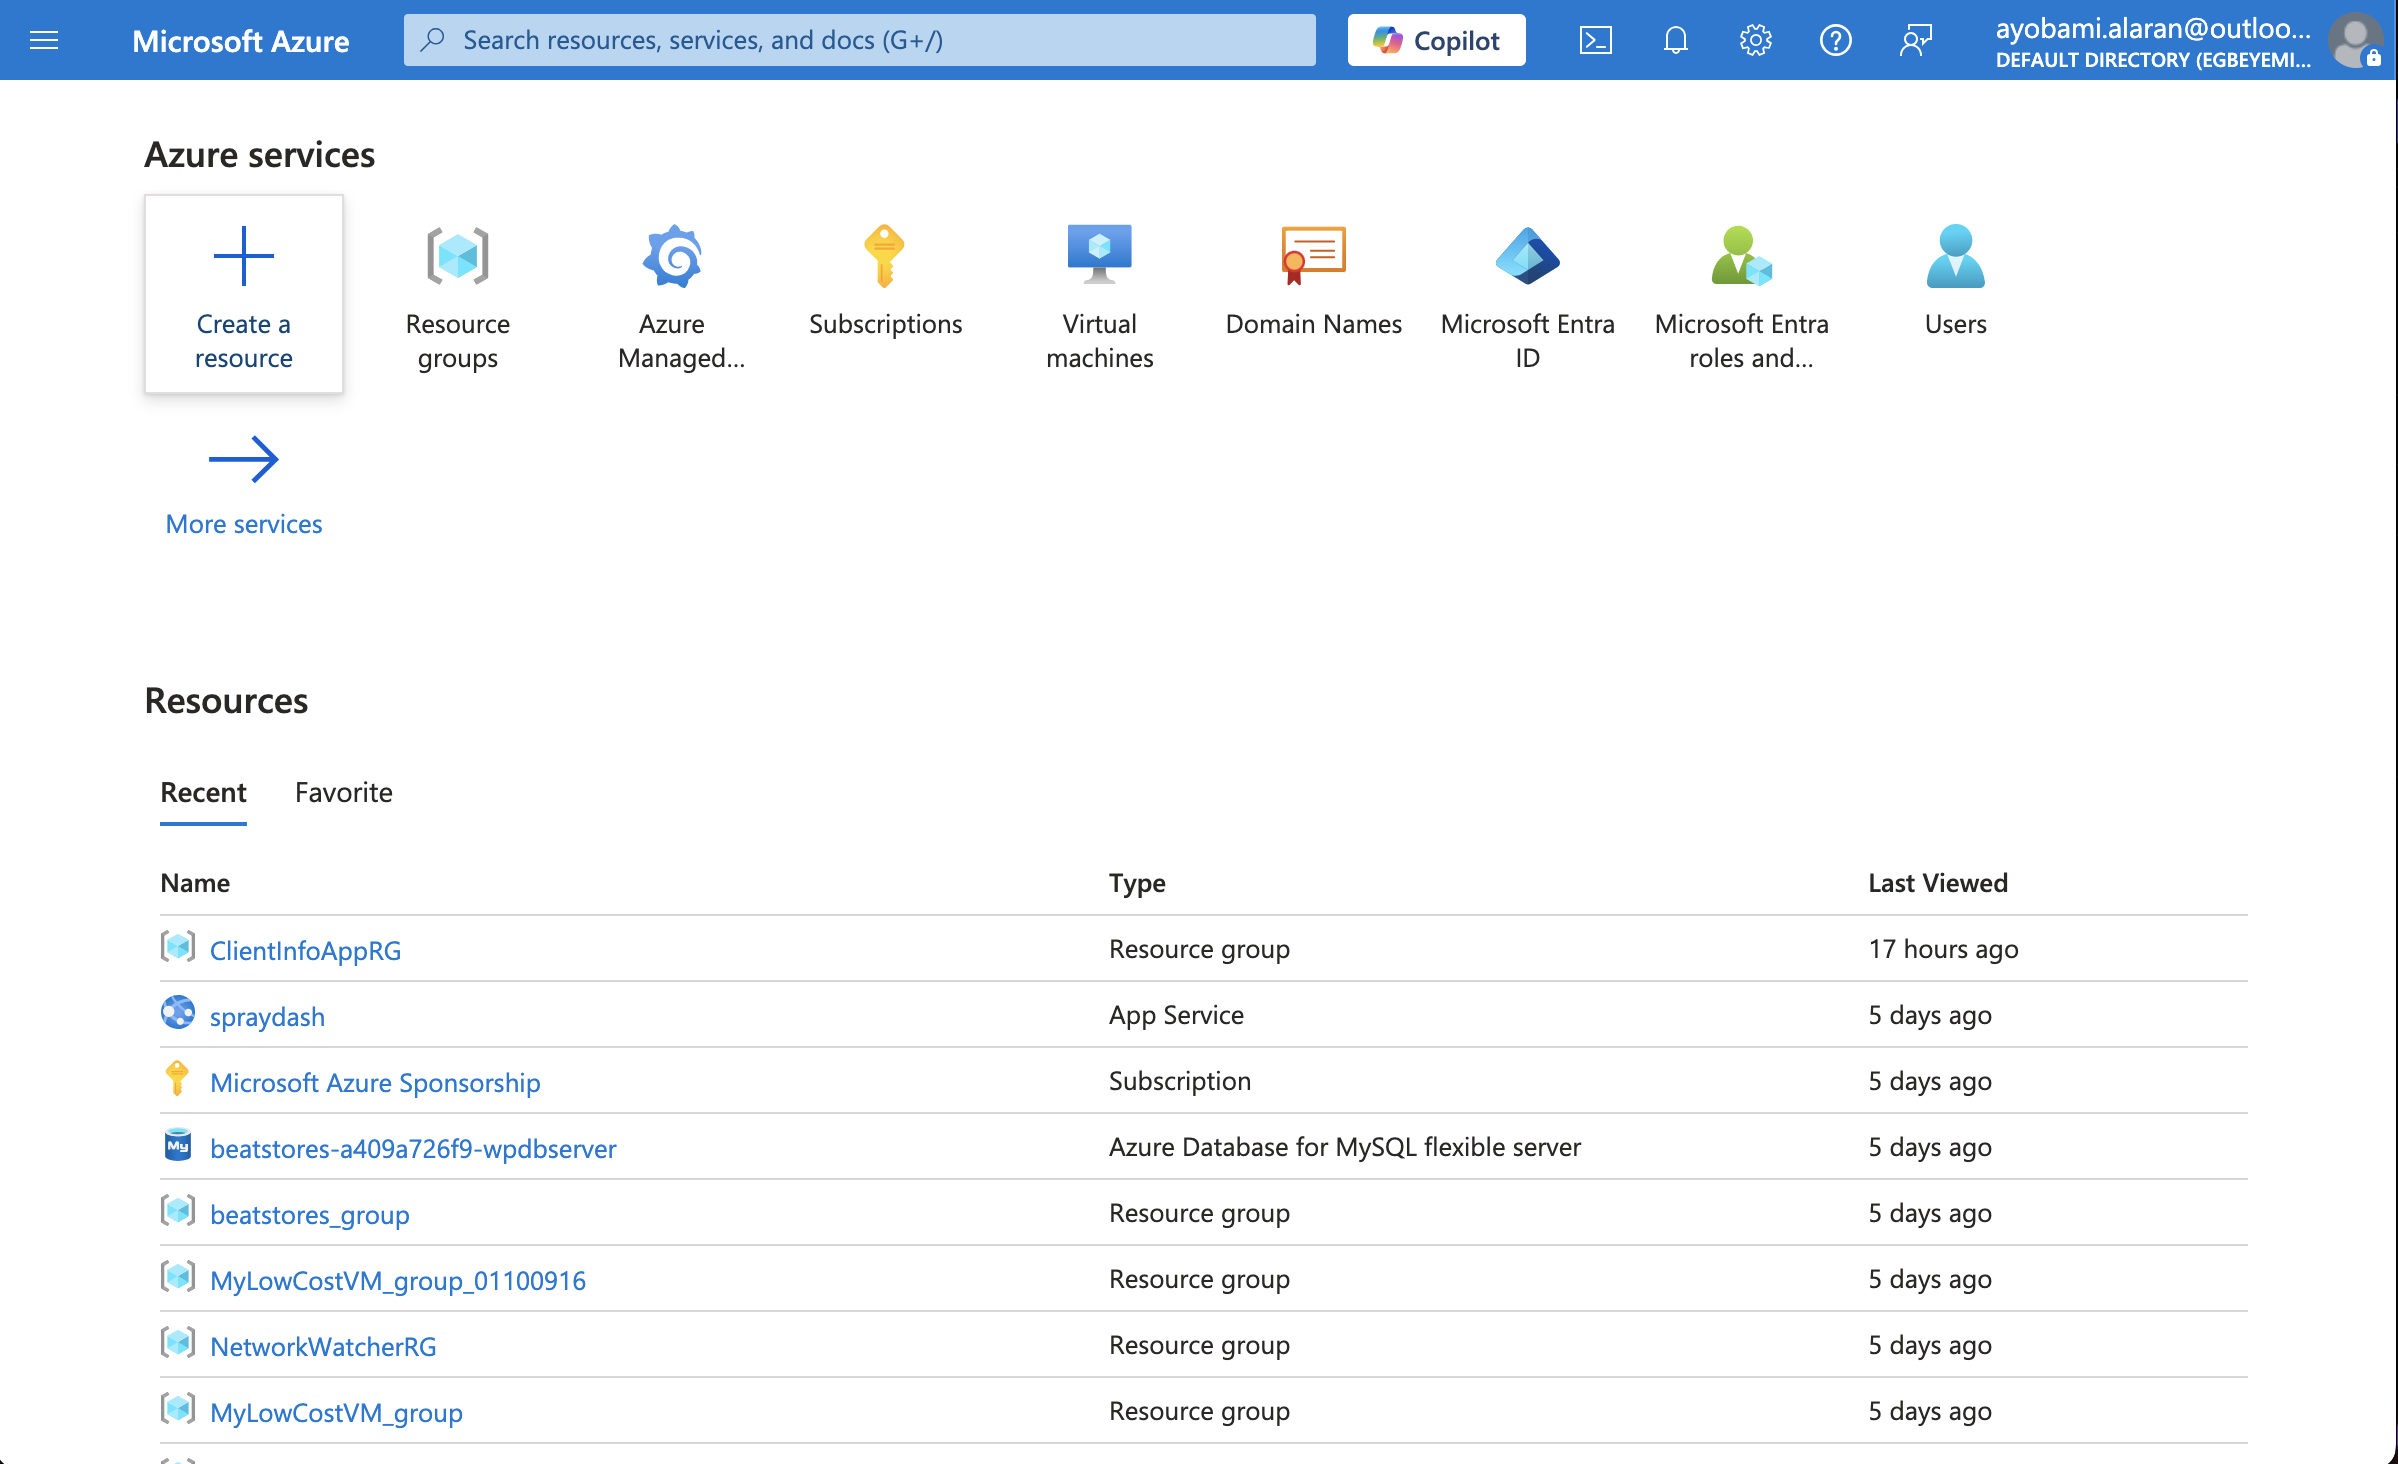
When you login to the Azure portal, you should see some like this, the dashboard:
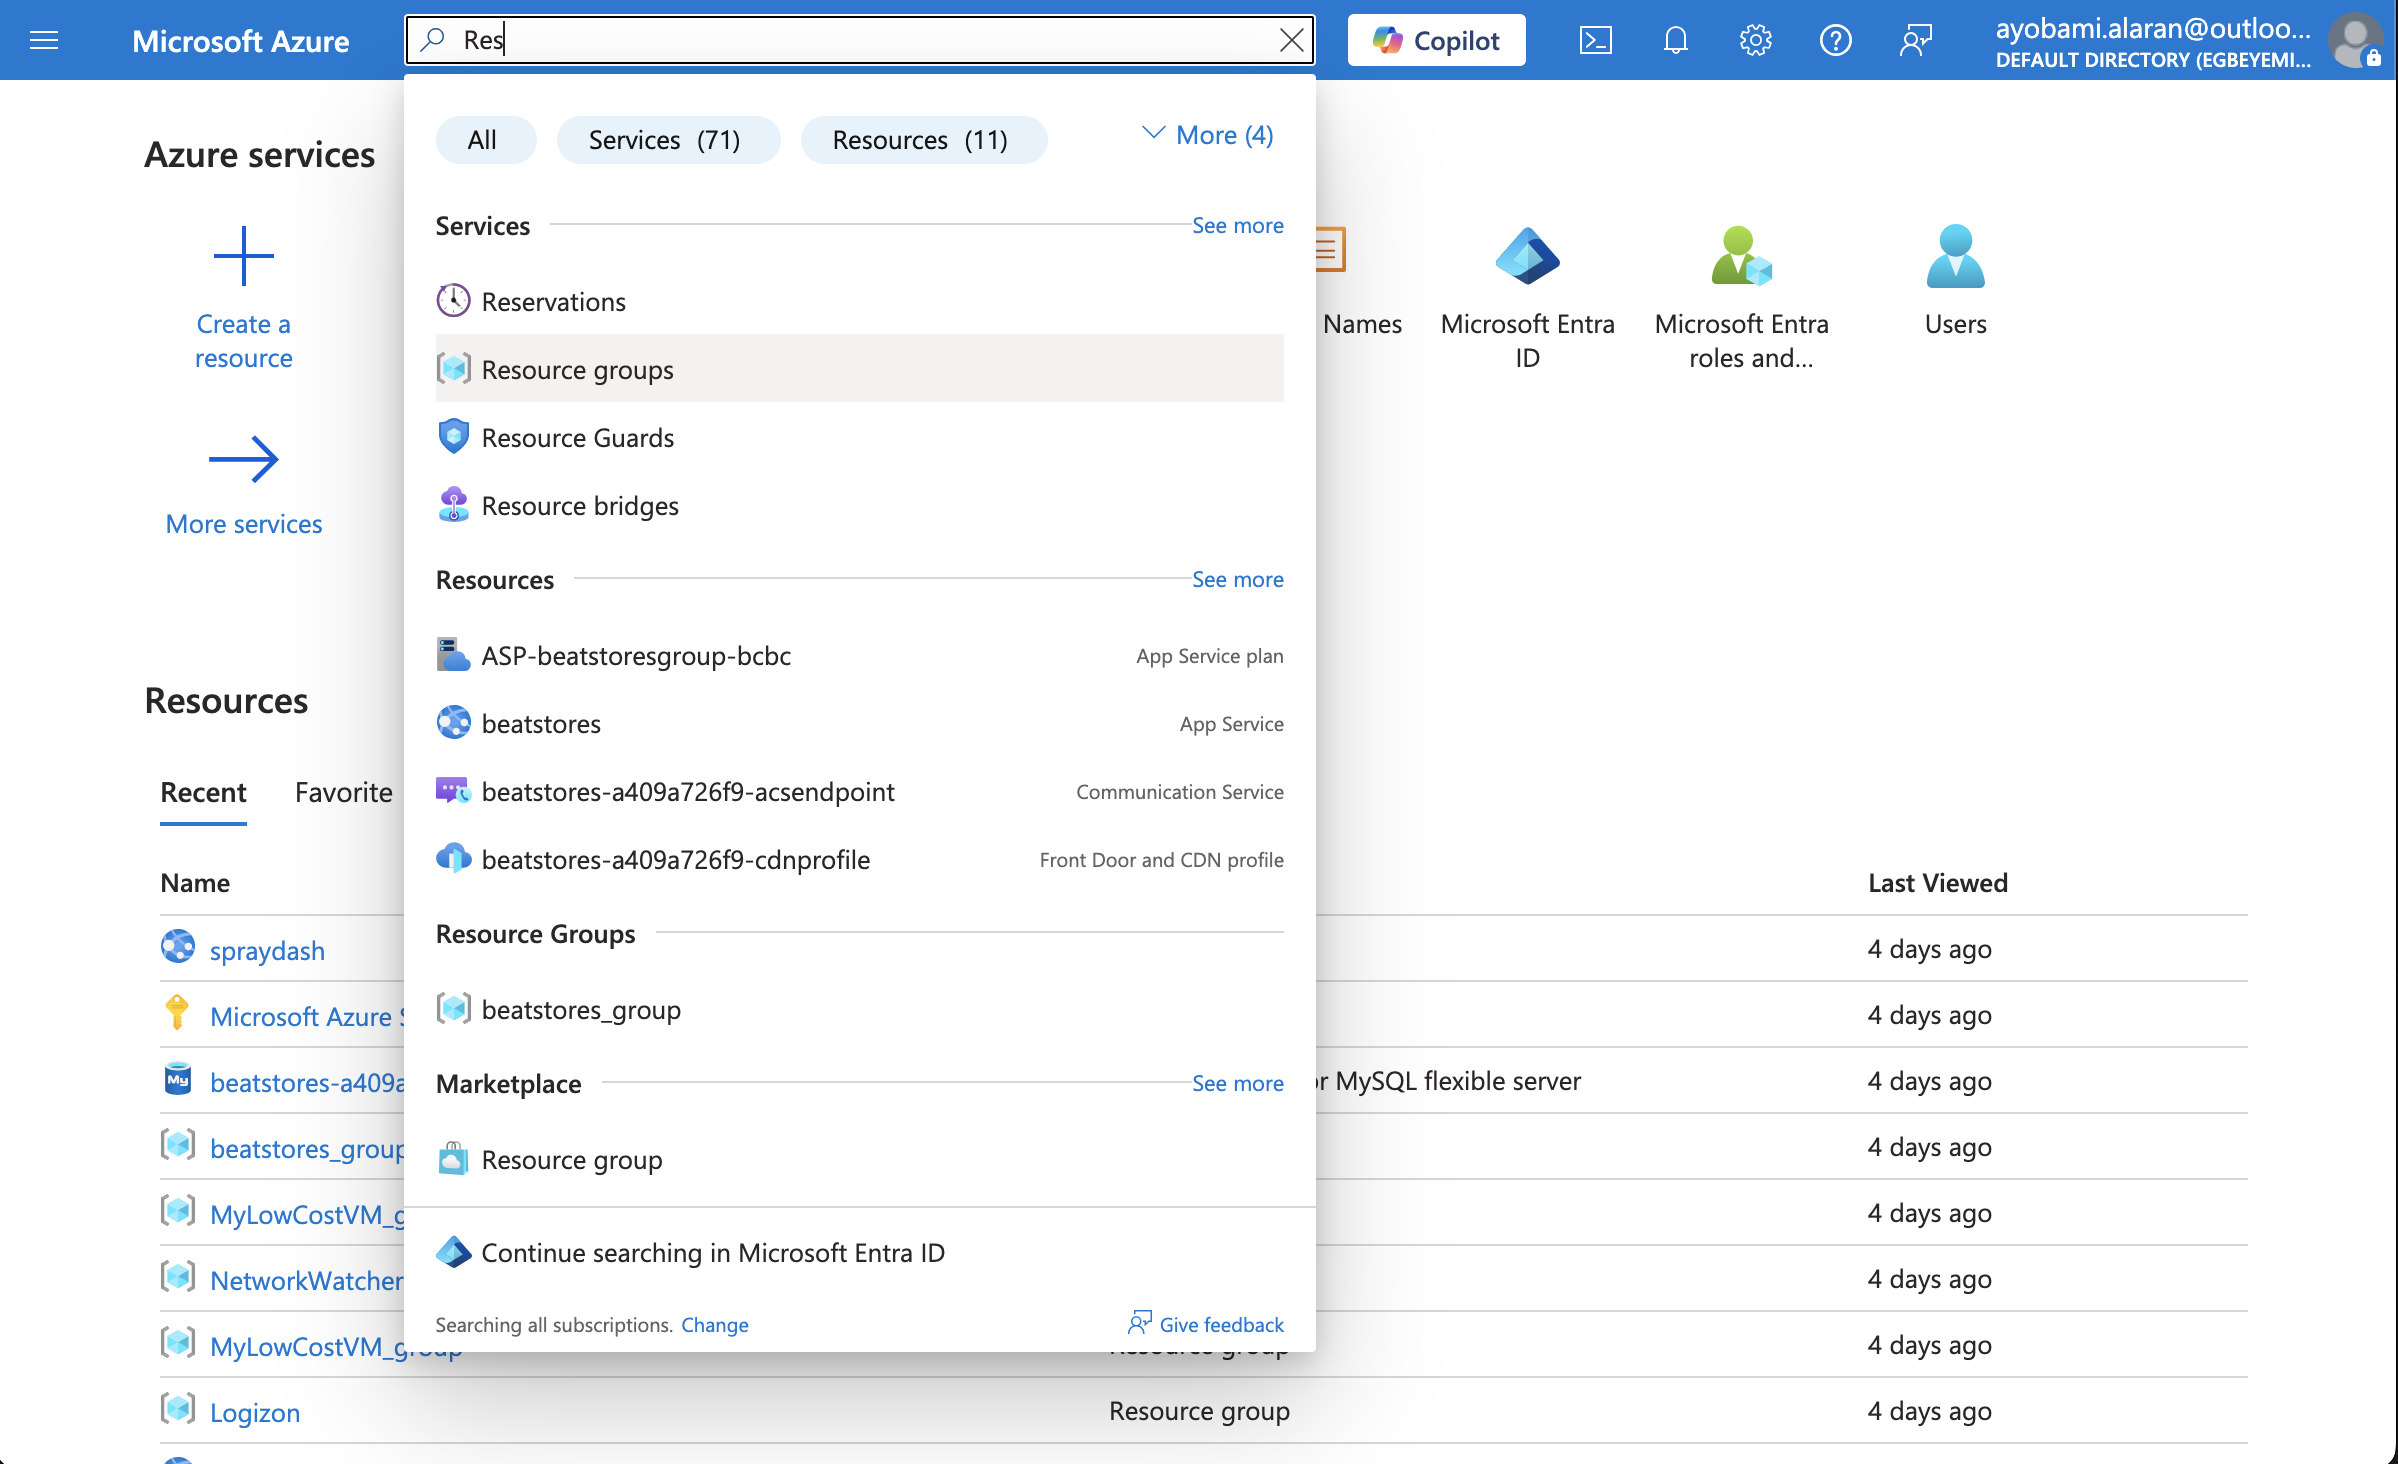
Search for Resource group using the search bar:
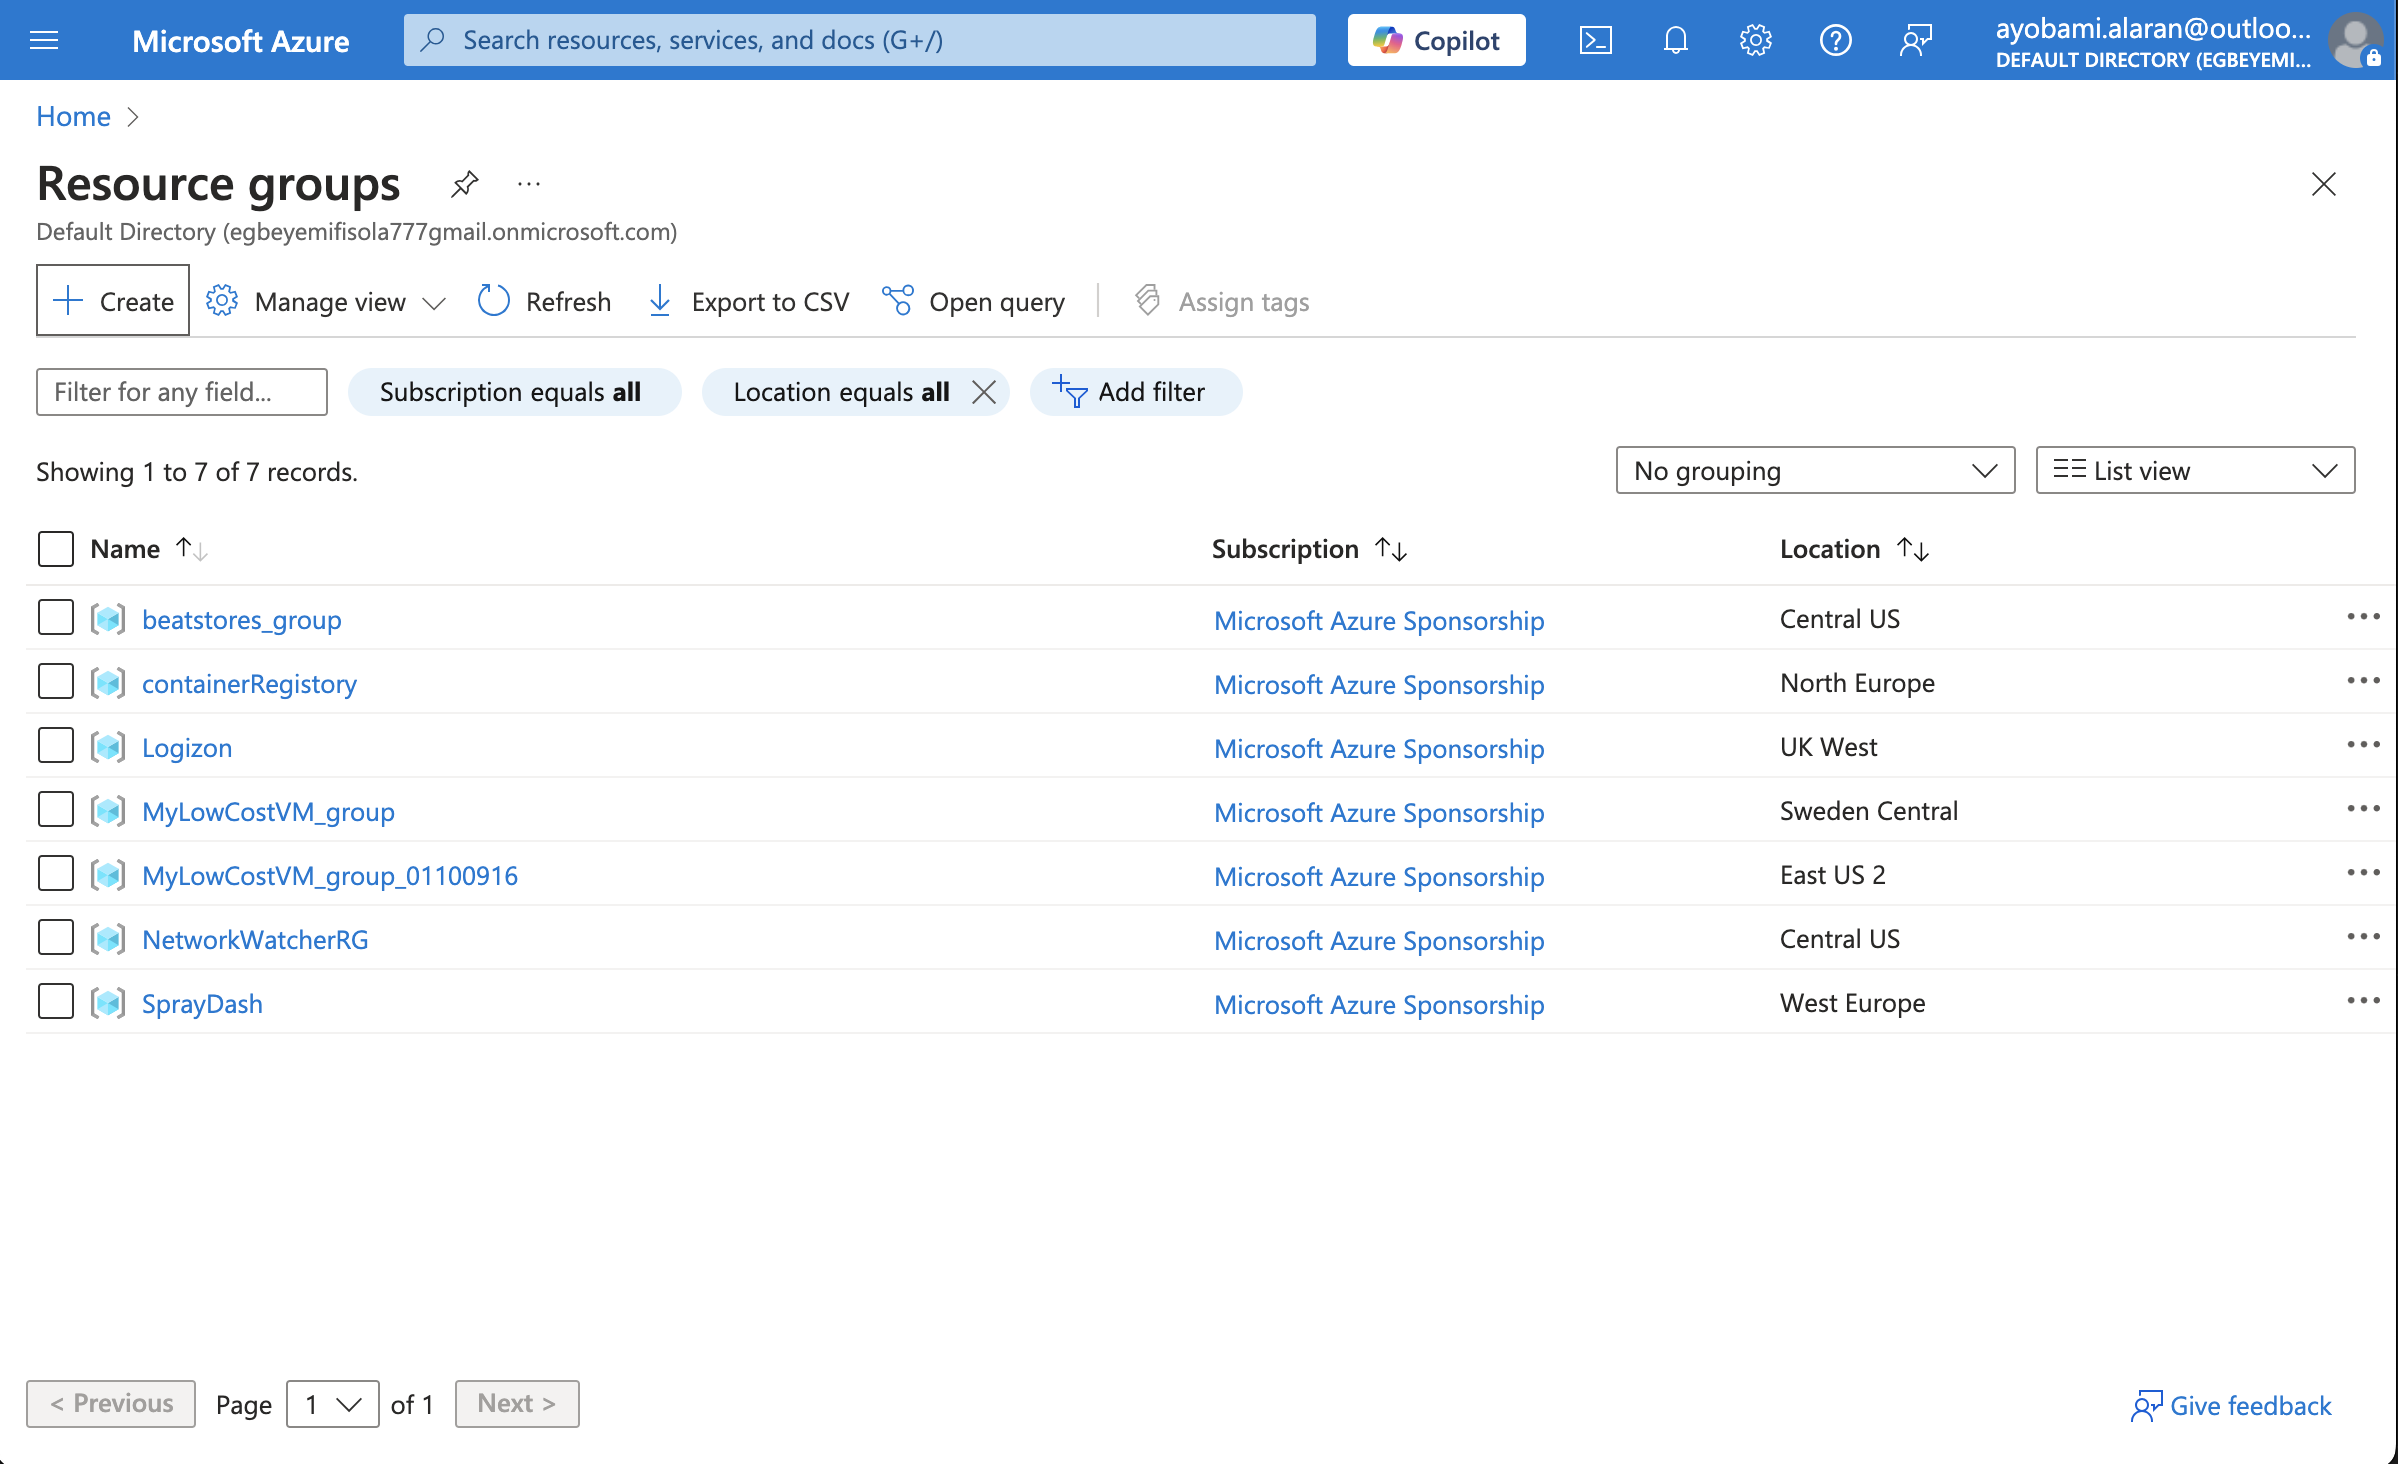
Click on Create to create a new resource group:

Give your resource group a name and select a region for it. Here I will use the default East US 2, but you can use any you want. Then click on Review + create.
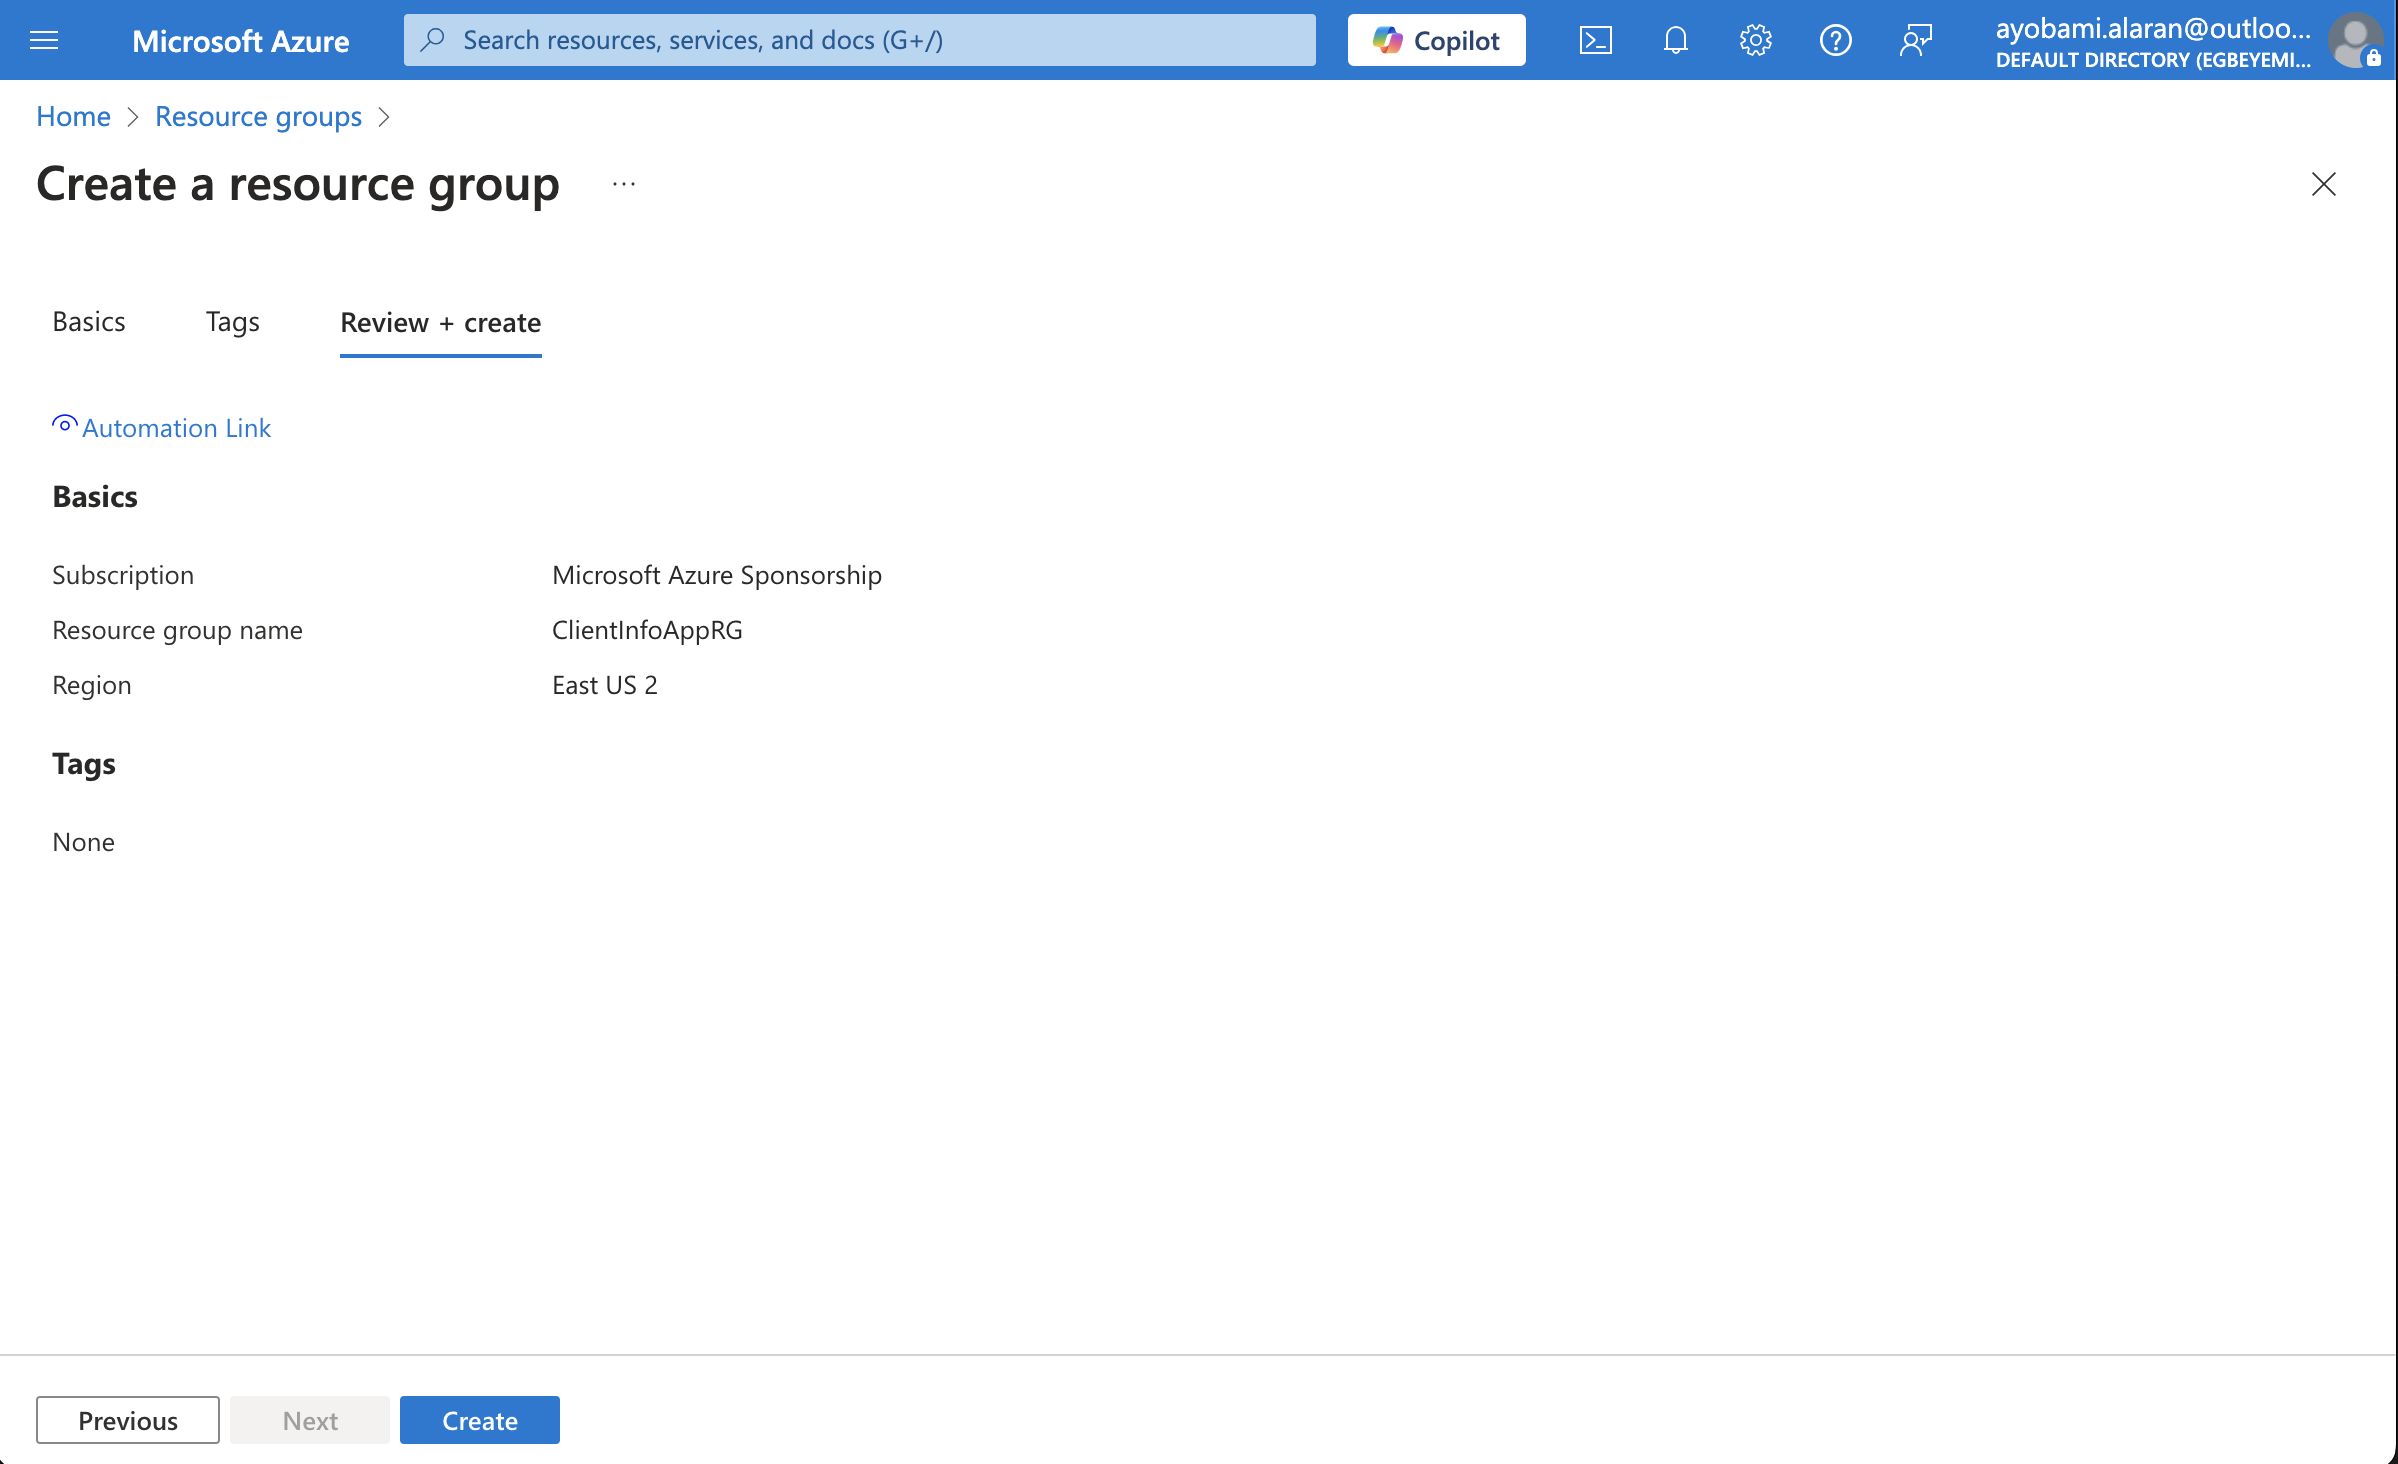
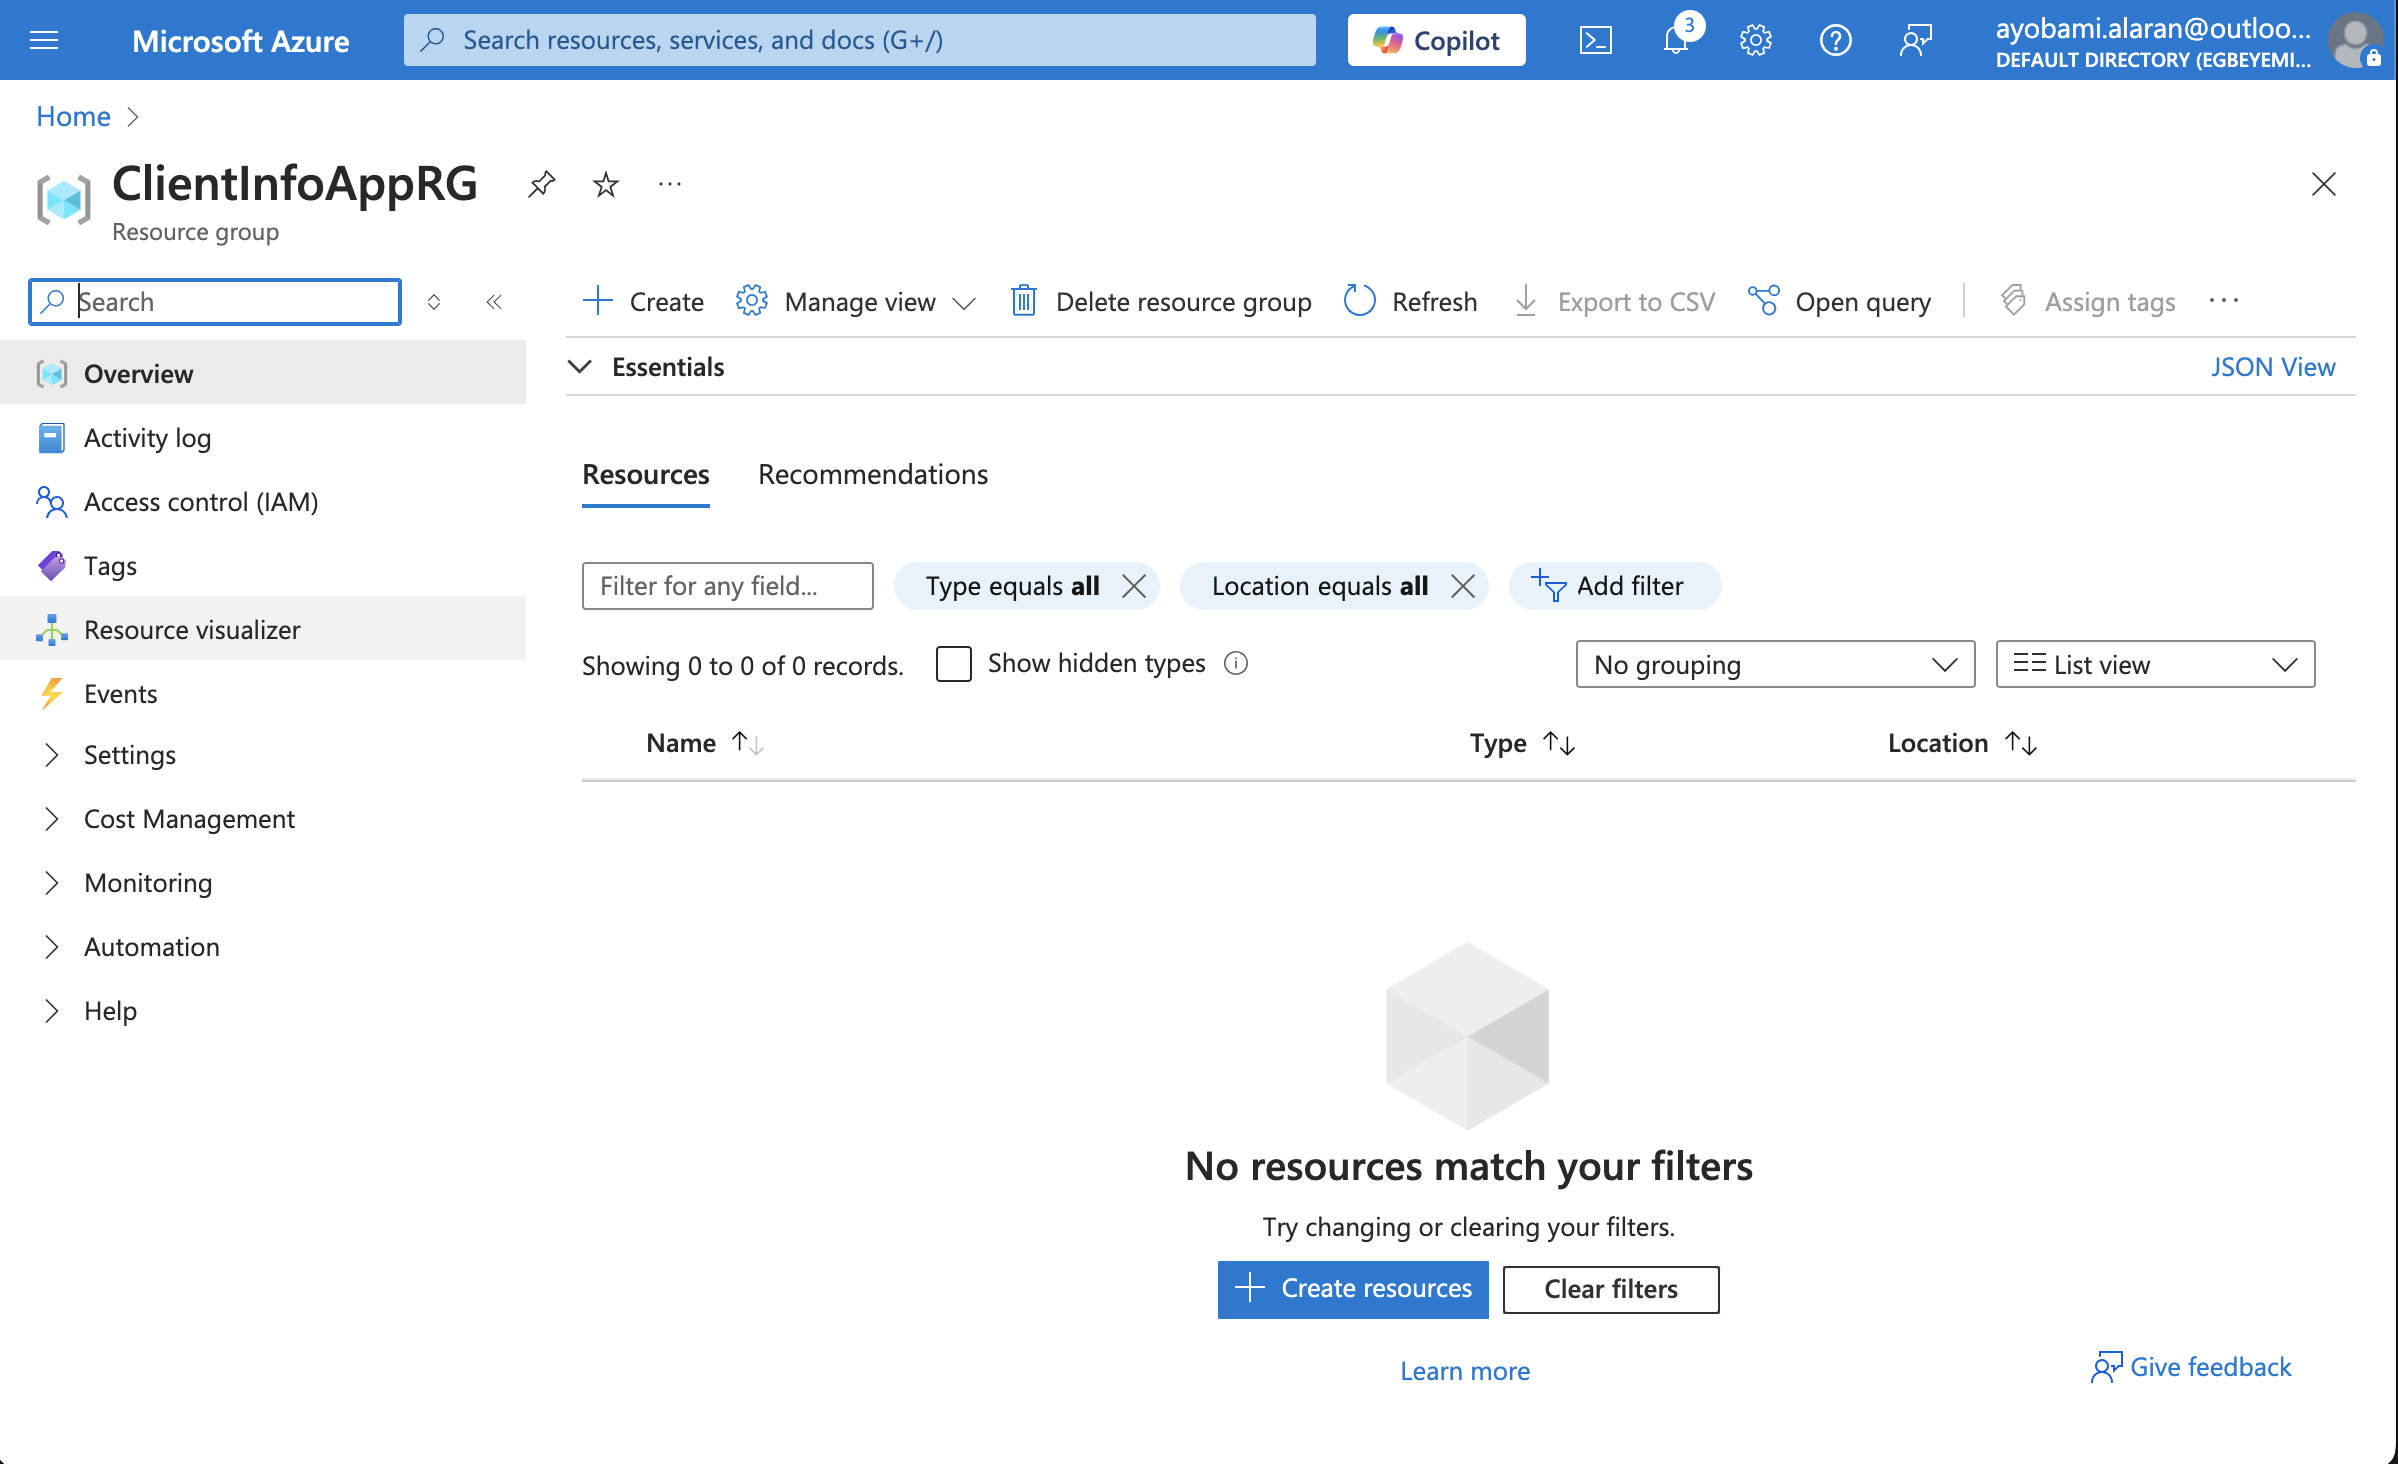
You should see something like the above after creating the resource group.
How to Deploy to Azure App Service
Ok now that we’ve created the resource group, let’s go ahead and create the Azure App Service. To do this, navigate back to the dashboard and click on Create a resource.
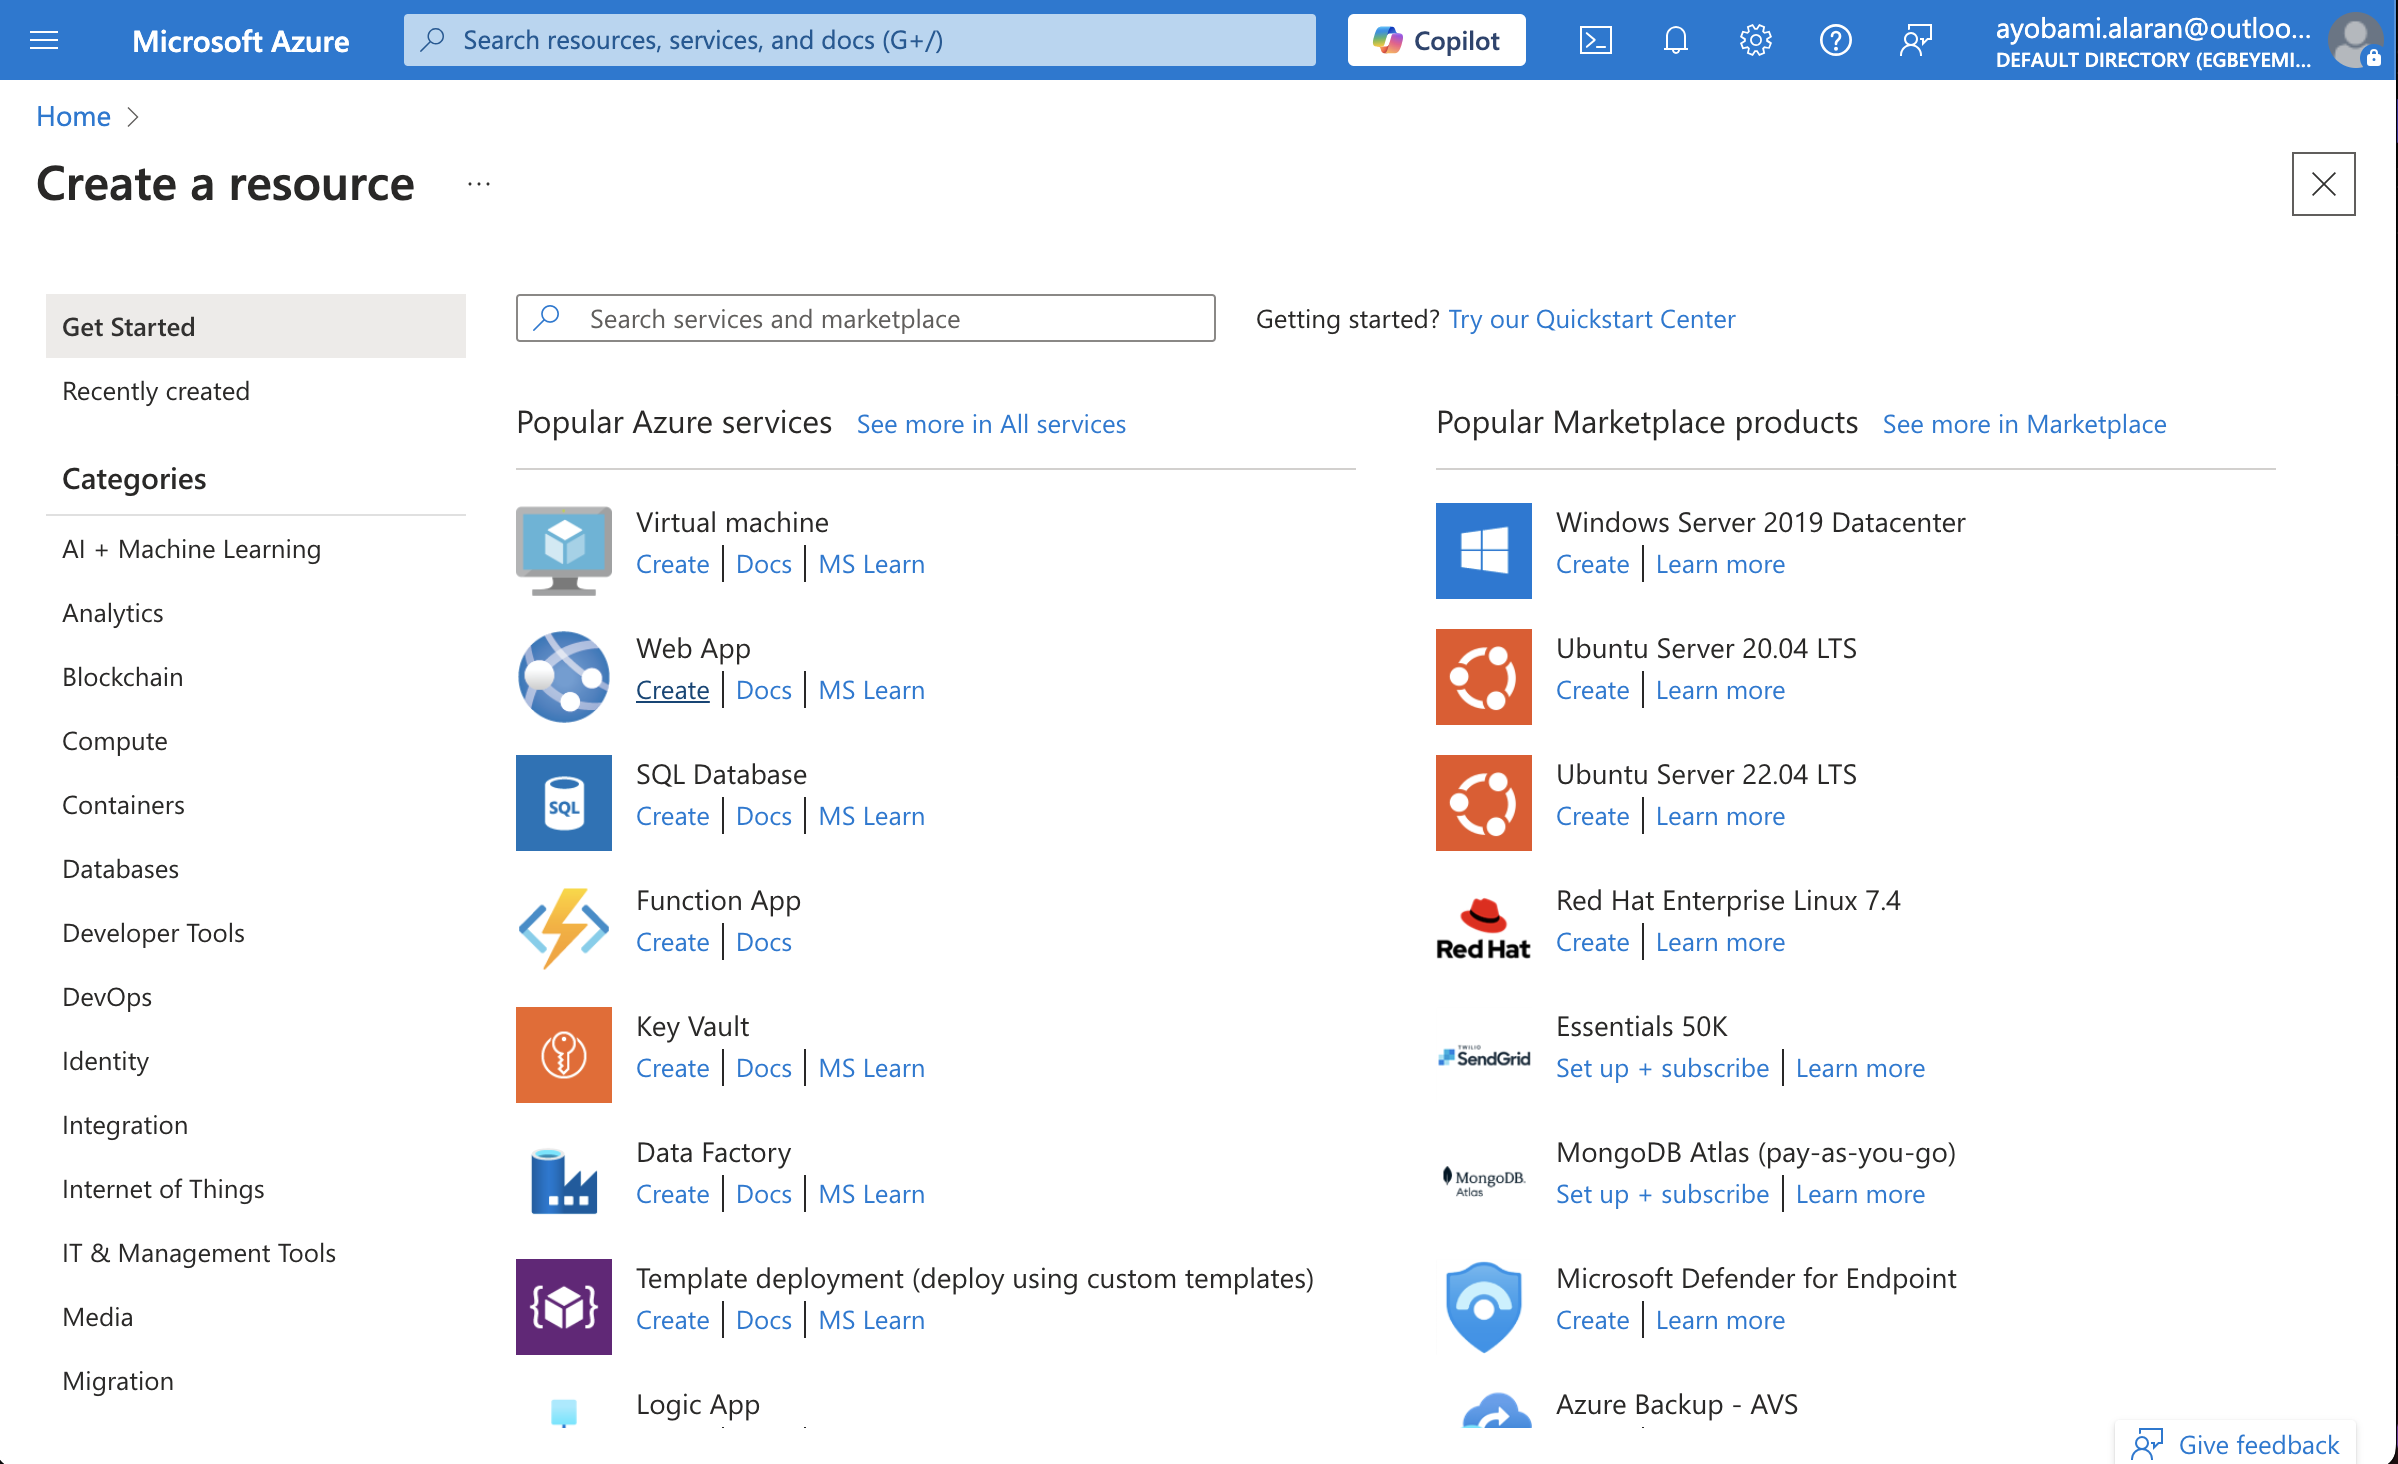
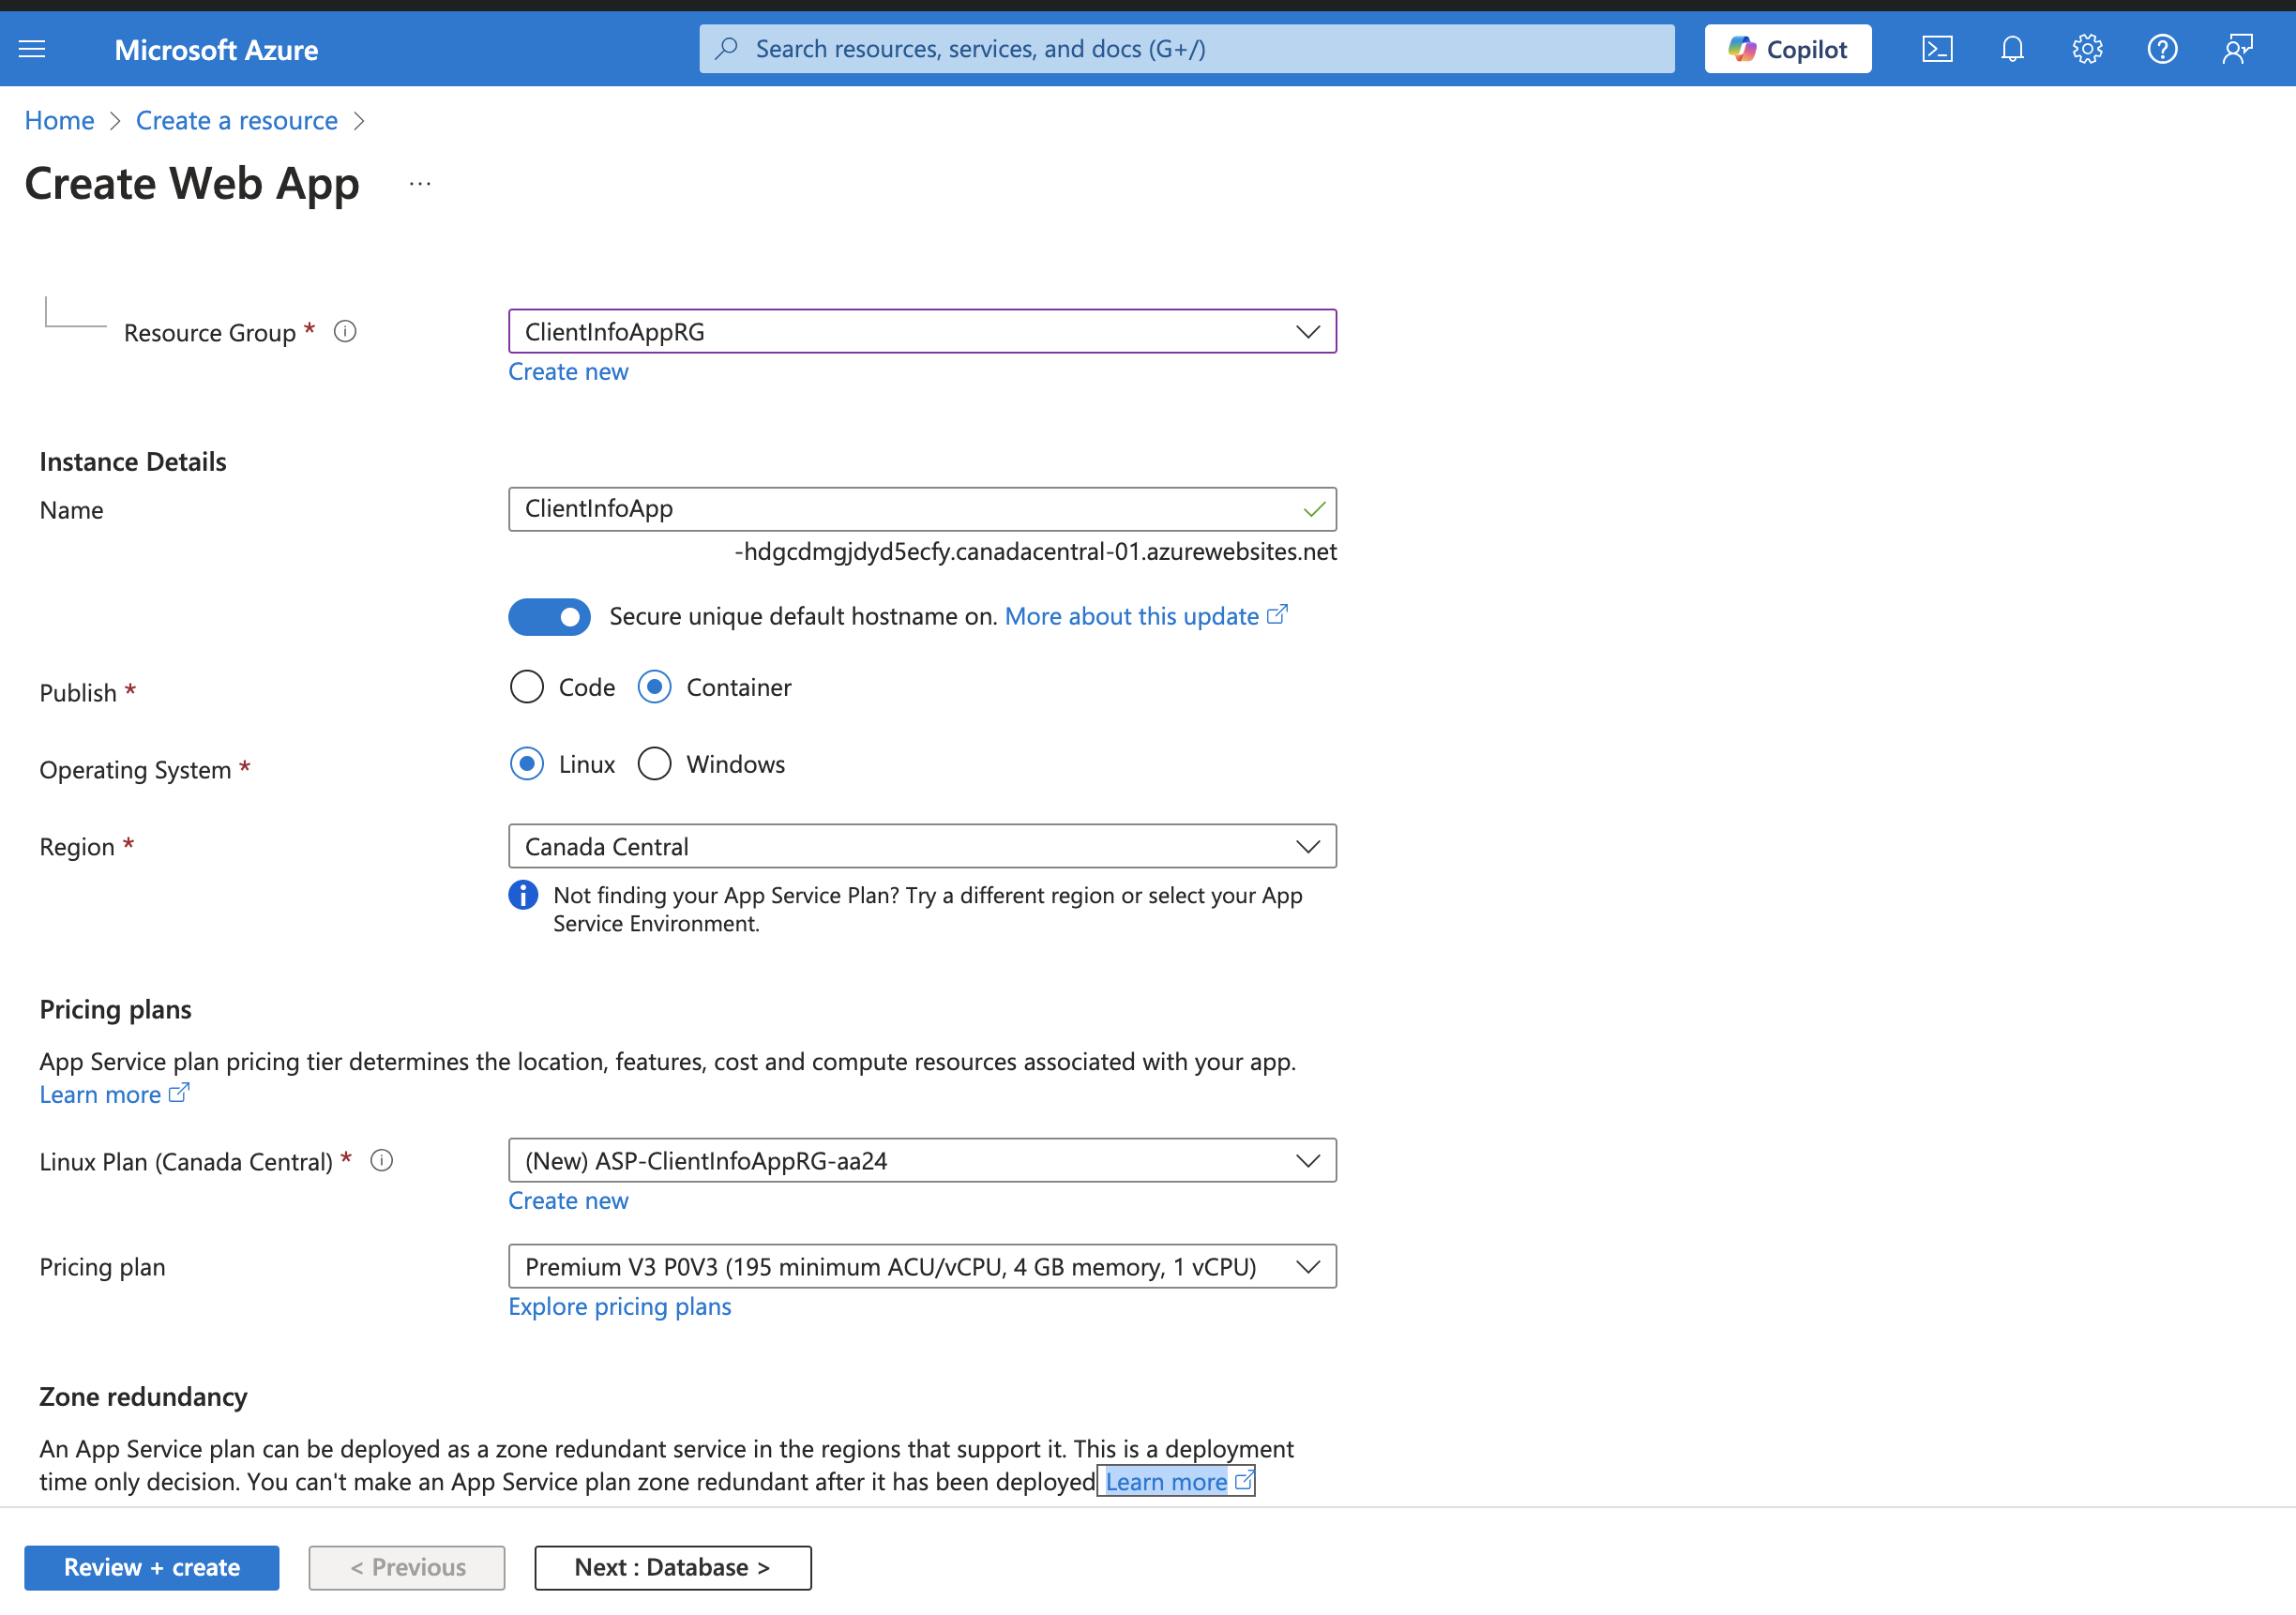
You can search for Web App if you don’t see it in the list there. Then click on the Create Web App option:
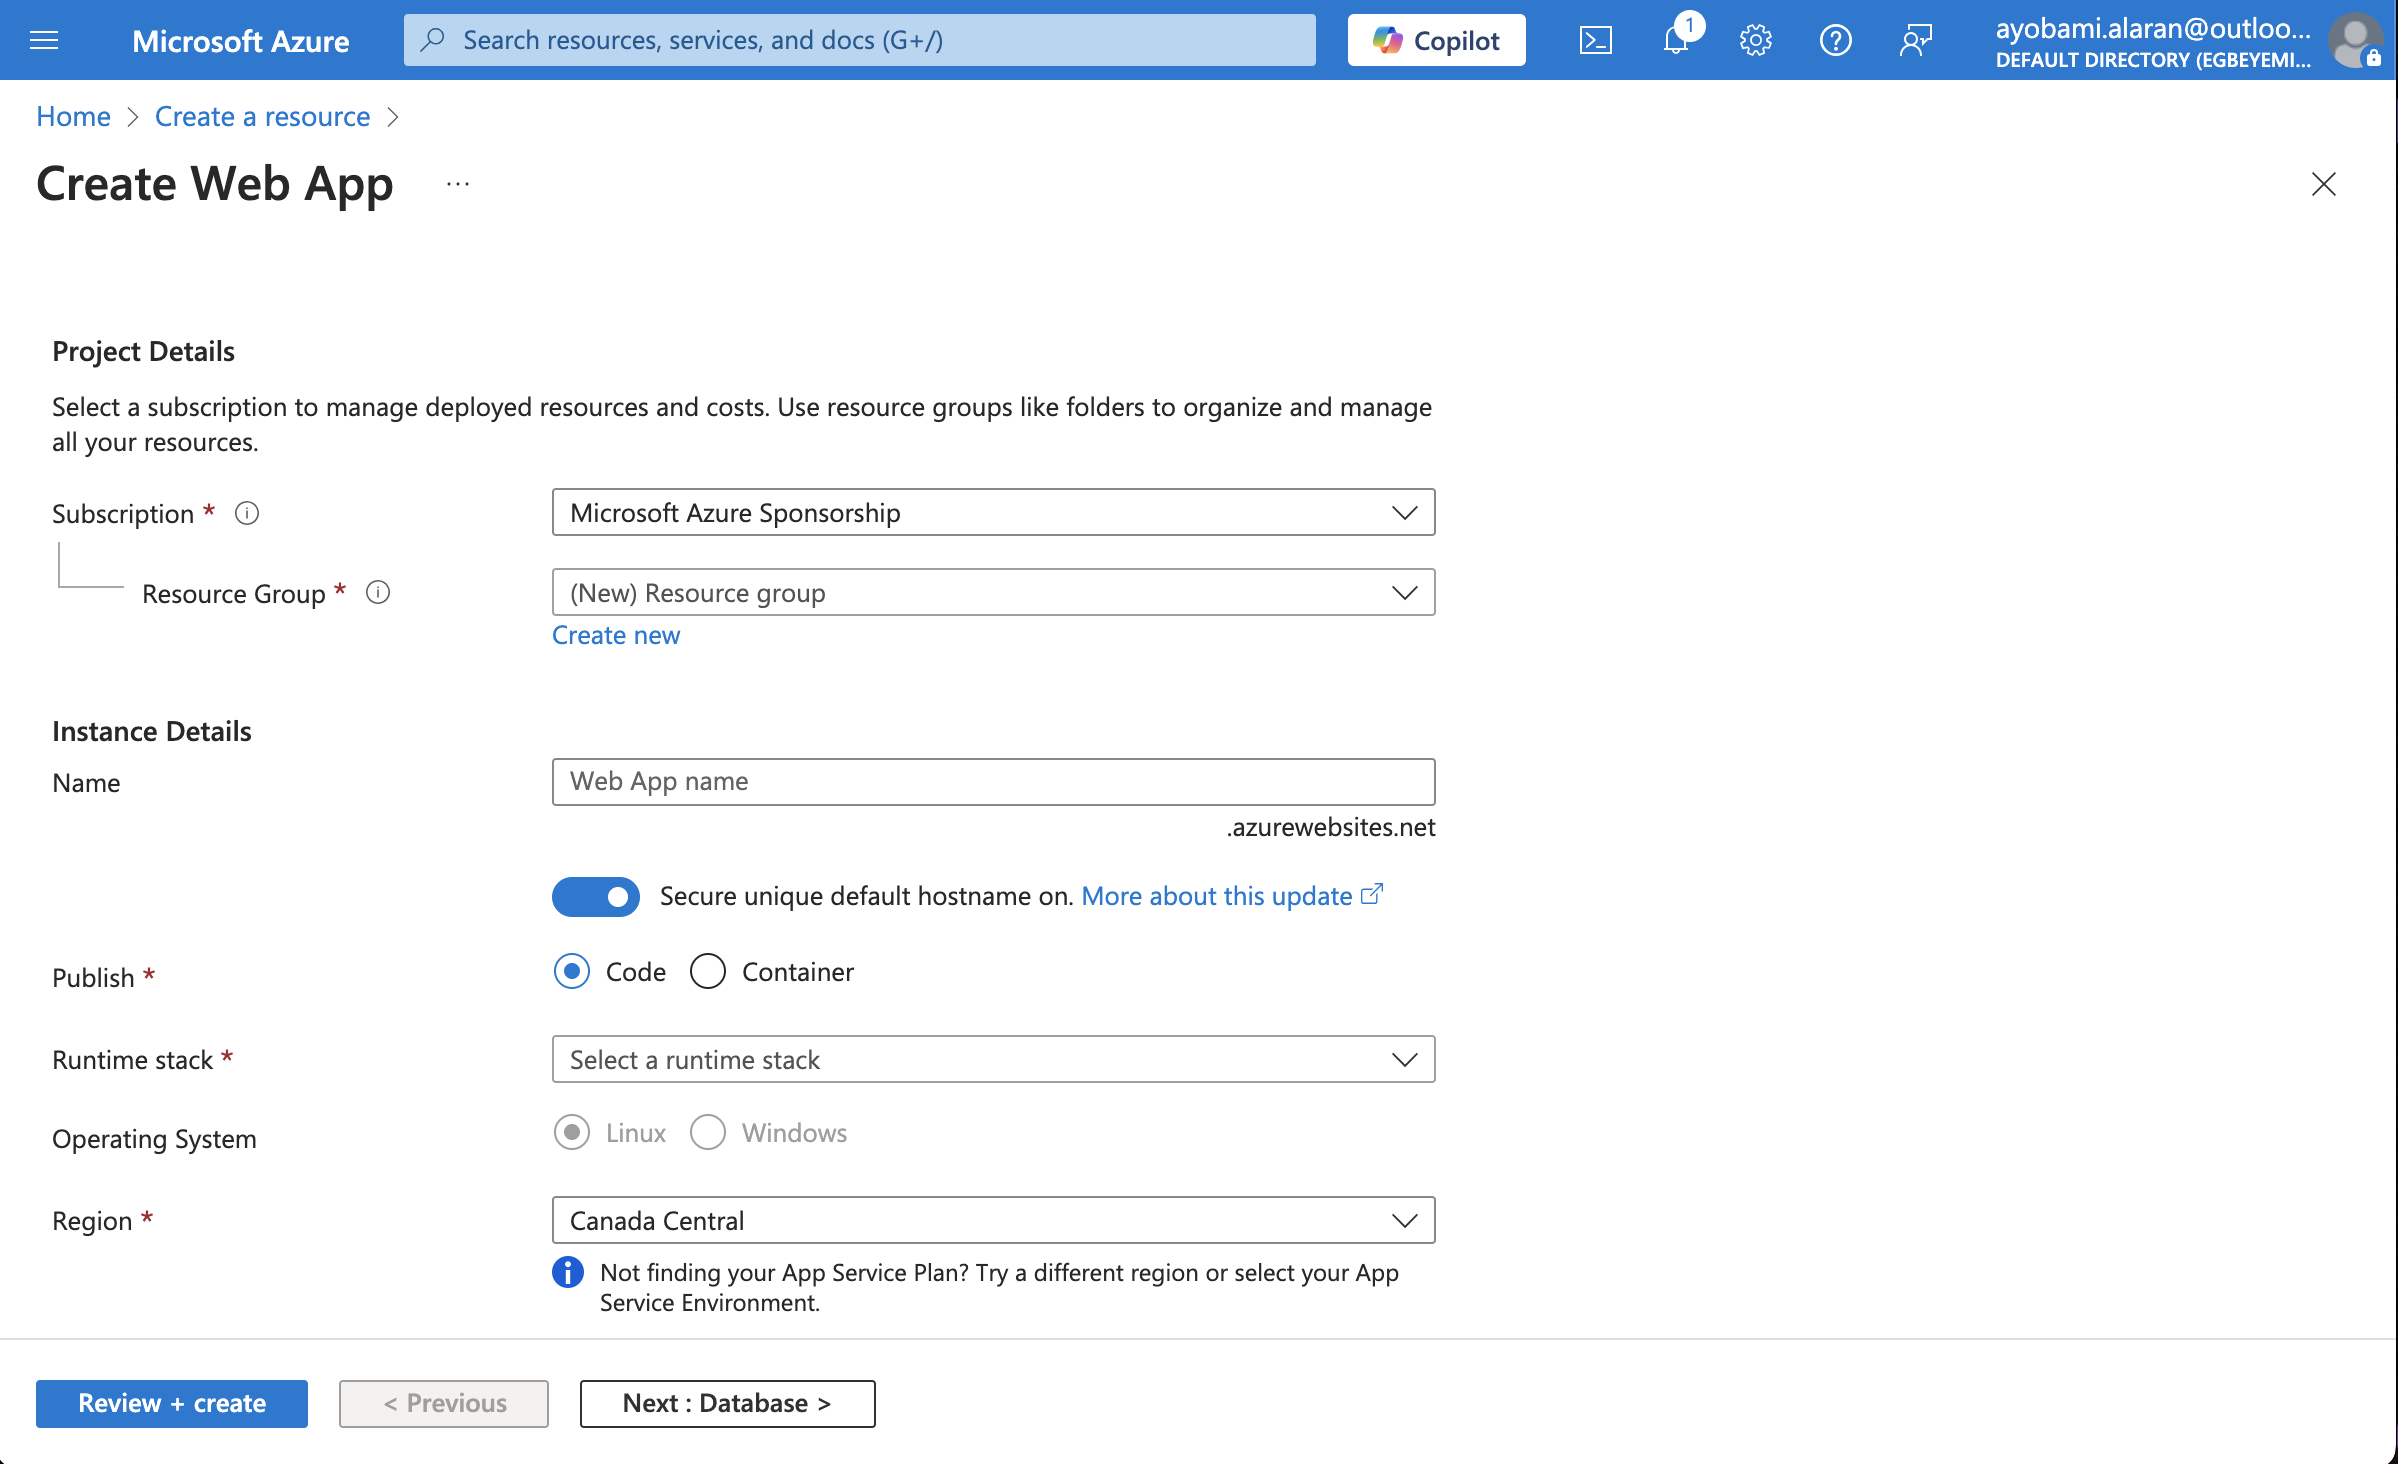
Here, select the resource group you created earlier, give the app a name, then select Container for the Publish option.
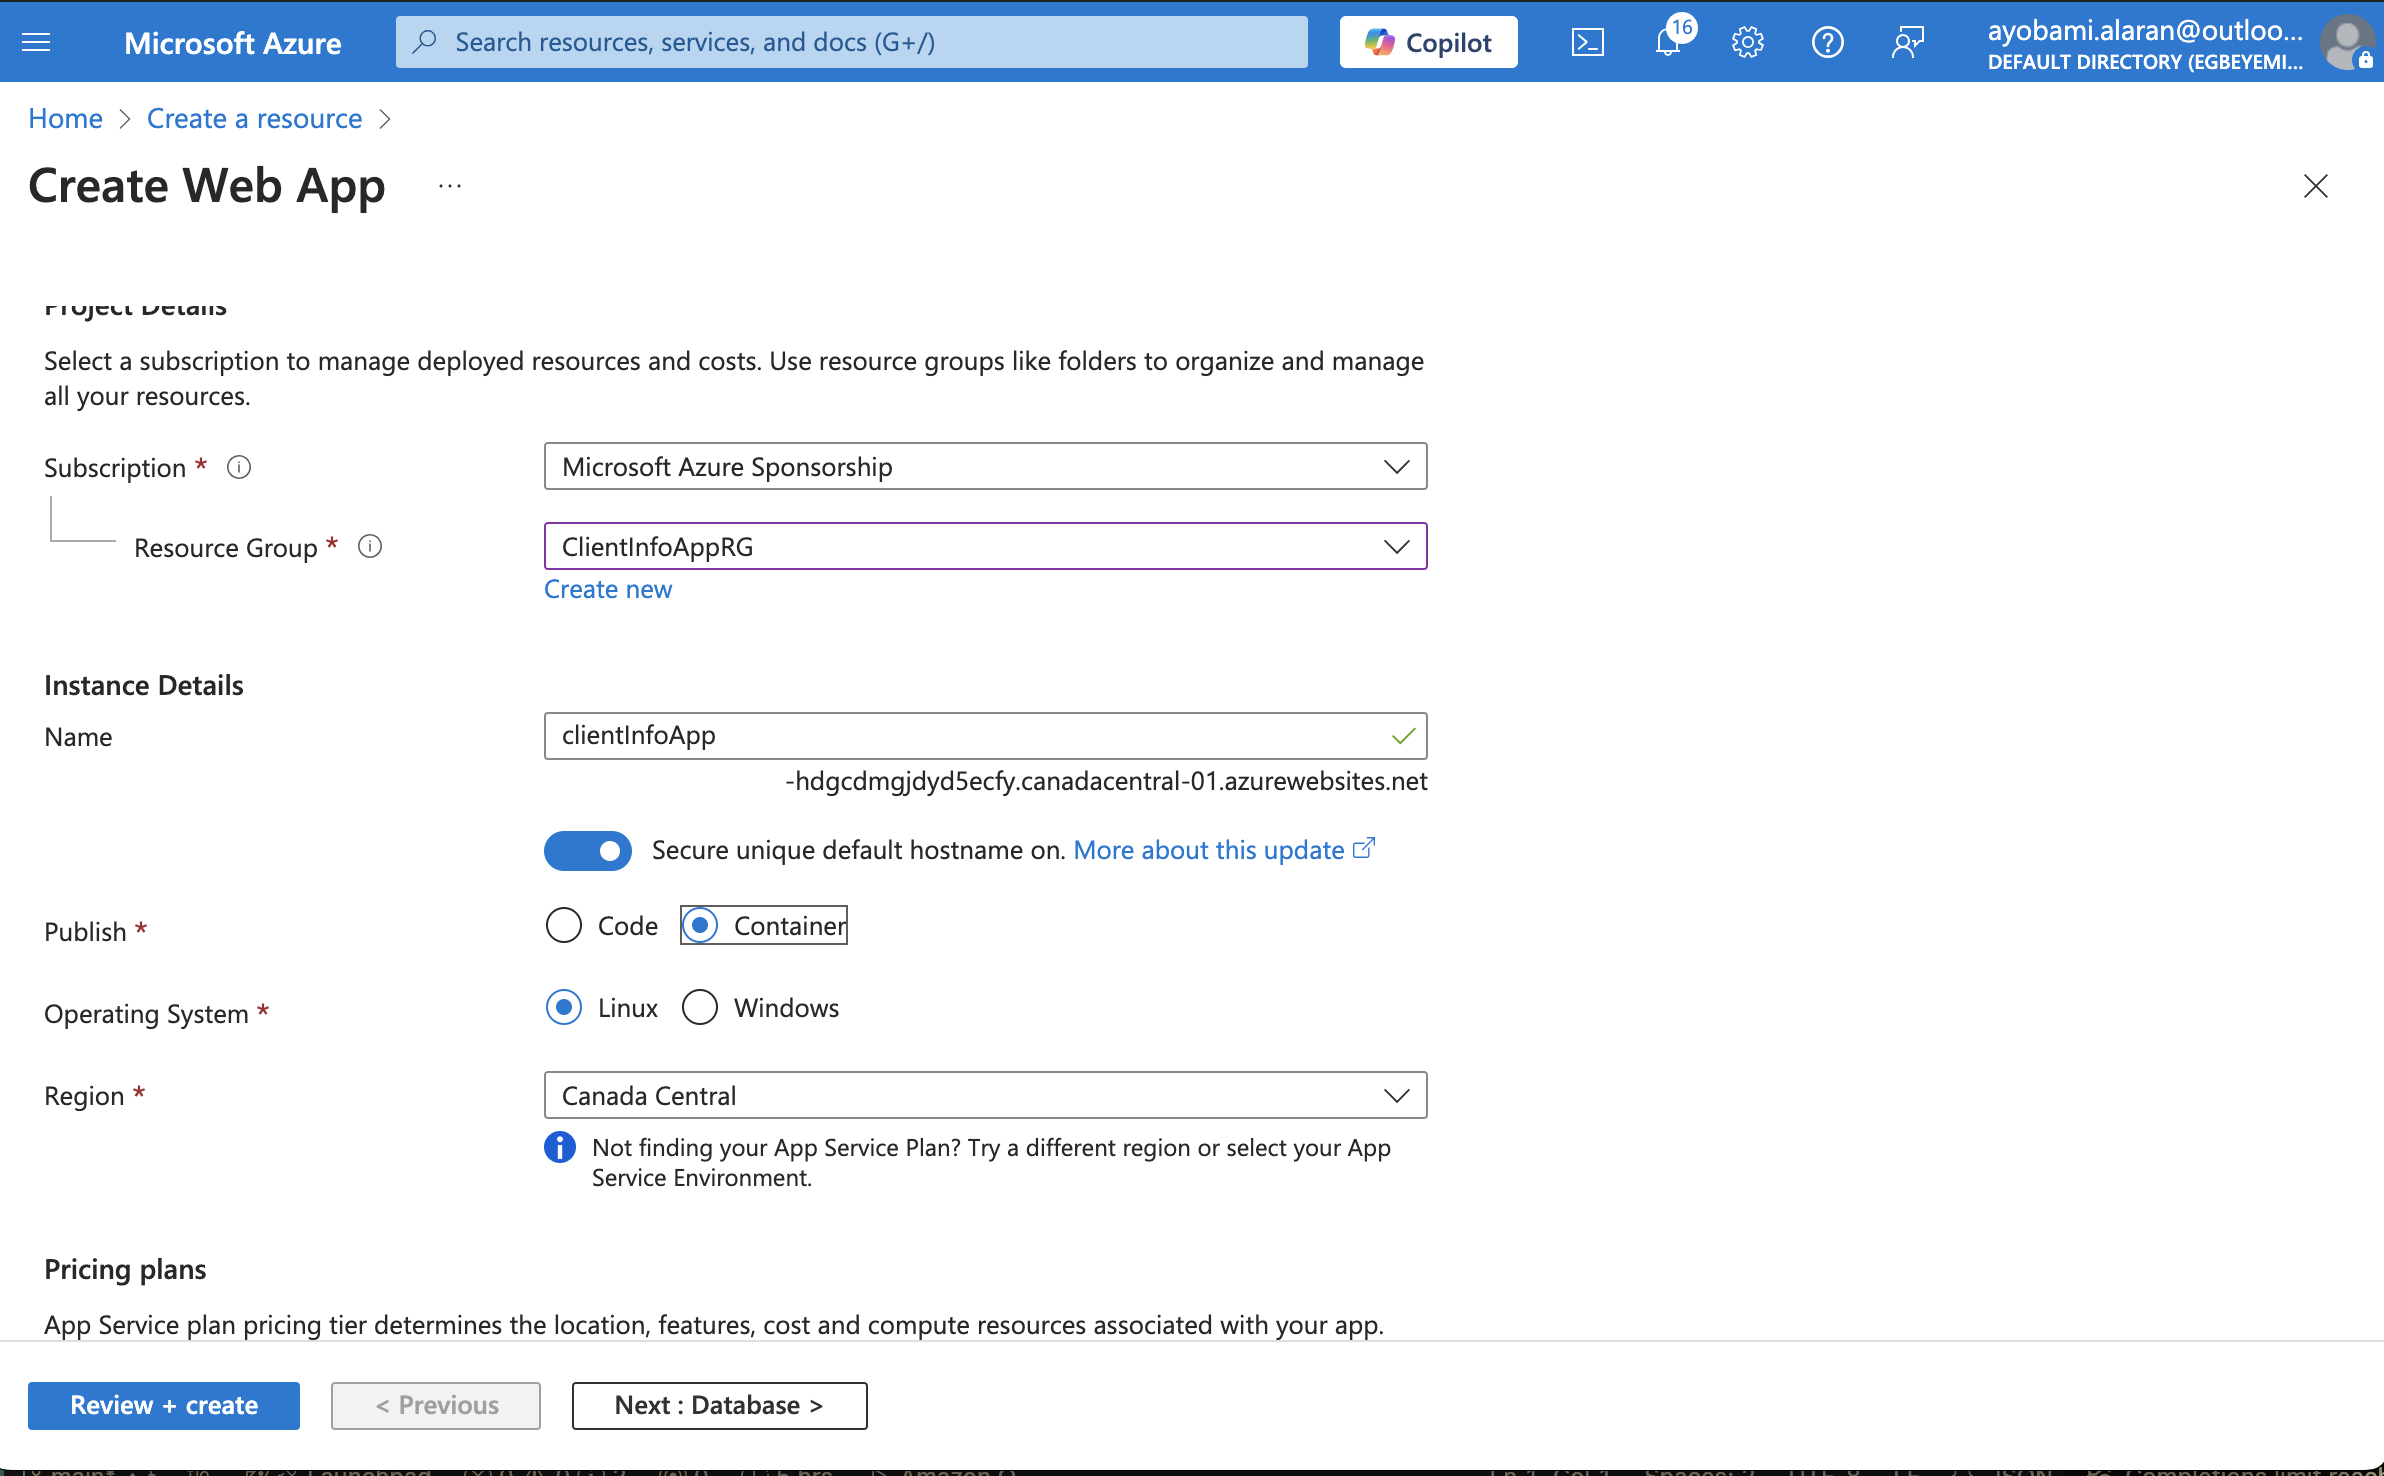
Before you click on Create, go back to your dev workspace (VS Code or whatever IDE you are using) to push your Docker image to Docker Hub so you can add it there before proceeding to the next steps.
But why do you need to push to Docker Hub? Well, first of all, for accessibility – so we can easily share it with others or have other services access it (which is what we need here).
Remember how I compared Docker Hub with Github earlier? Docker Hub helps you host your Docker image on the internet and make it available for others or for various services on the internet to access if you make it public. Otherwise it’s limited to only authorized services.
To push the Docker image to Docker Hub, you first need to tag the Docker image with your Docker Hub username. Go to Docker Docker Hub to register and get your username if you don’t have one.
Run the following:
docker tag client_info_webservice-client_info_app:latest ayobami6/client_info_webservice-client_info_app:latest
# this adds the latest tag to your docker image
This shows that you successfully tagged your image with the latest tag.

Before you actually push the image to Docker Hub, go ahead and login to it with the Docker CLI.
docker login # this will prompt for browser authetication, for the prompt and login your account with your usernam and password
Push the image to Docker Hub like this:
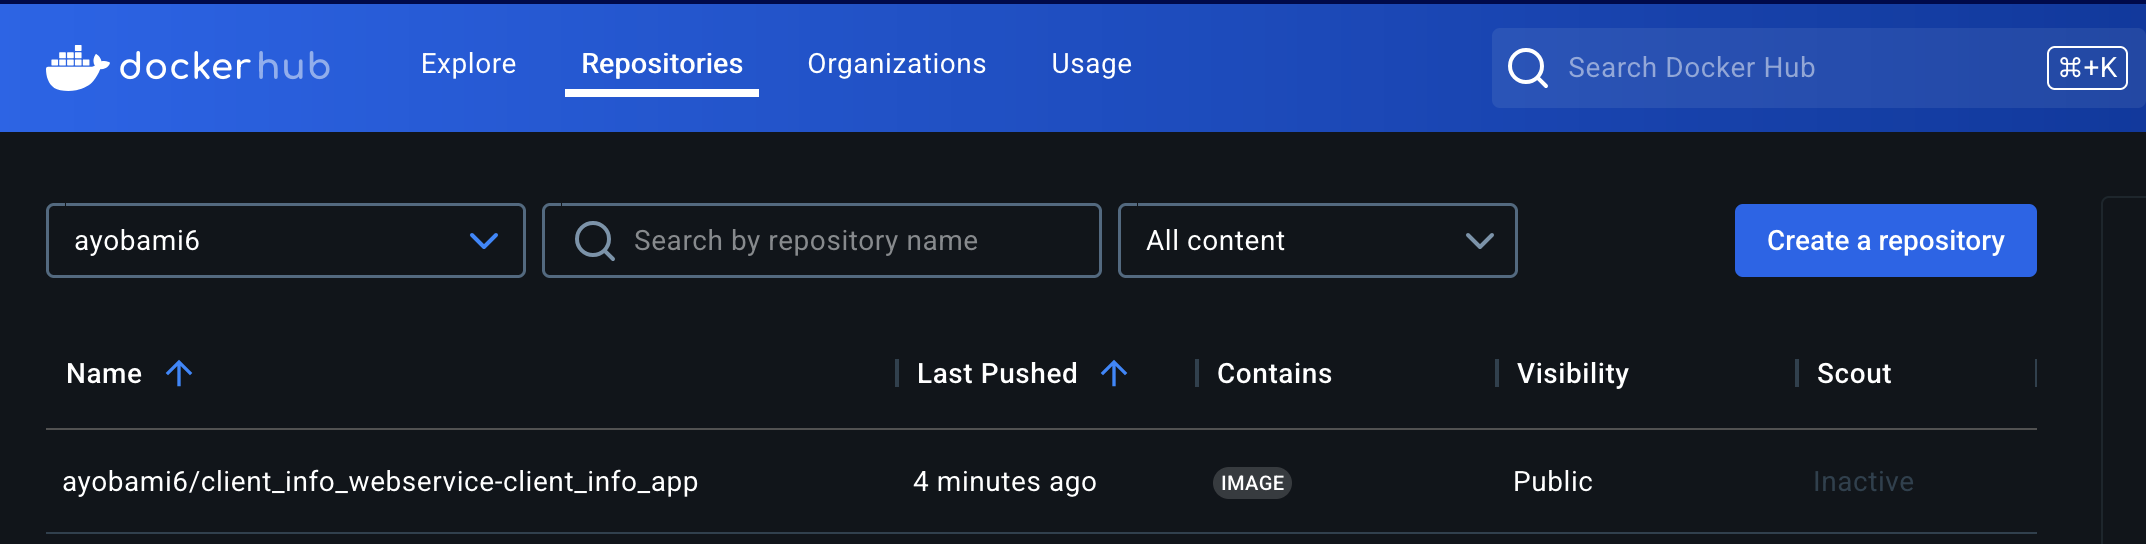
docker push ayobami6/client_info_webservice-client_info_app:latest

You should see something like the below once you enter the push command on Docker Hub.
Alright, now that you have the Docker image on Docker Hub, you can go ahead and deploy it using Microsoft Azure App Service.
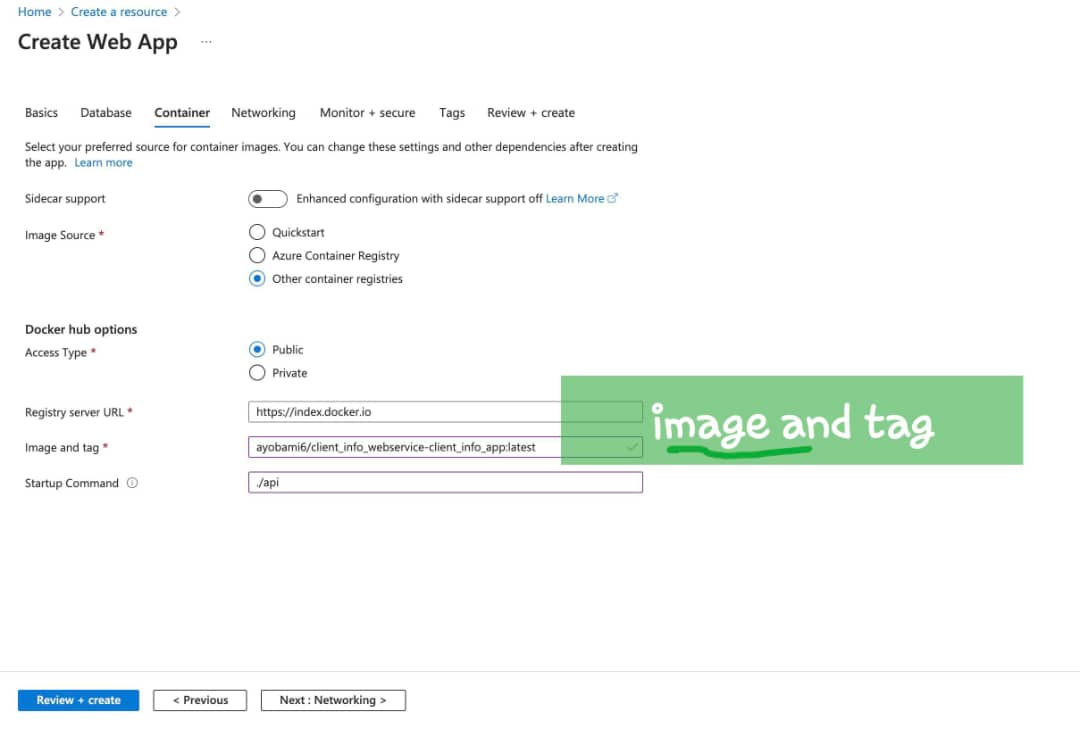
Click on the container on the top menu bar to configure the container settings.
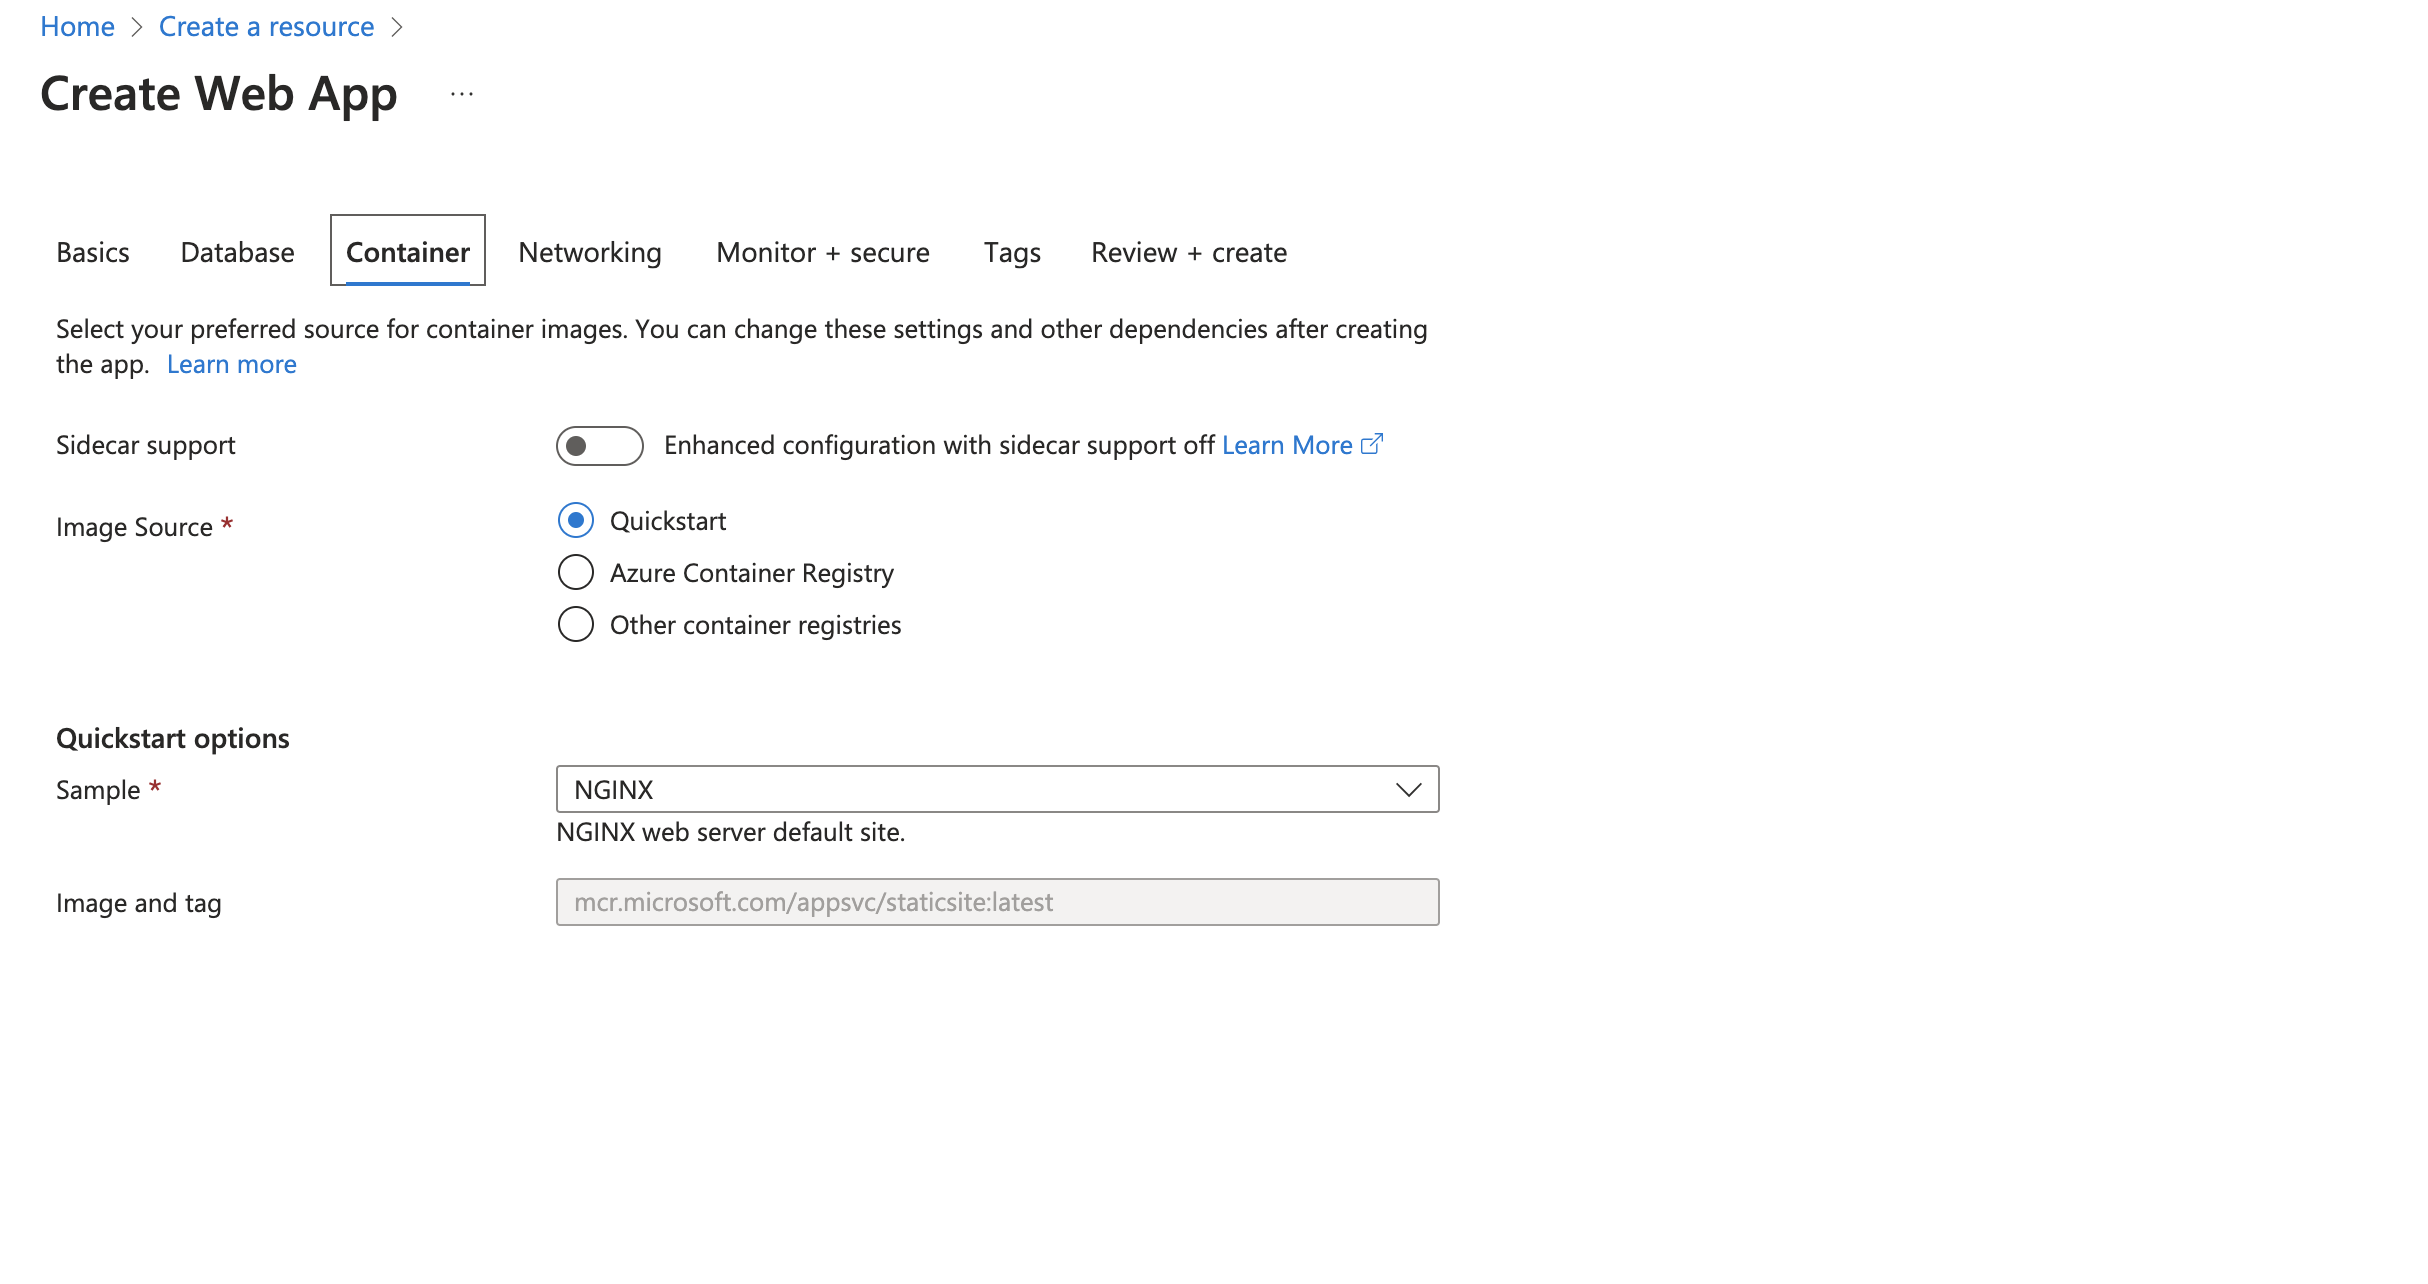
Here, select Other container registries.
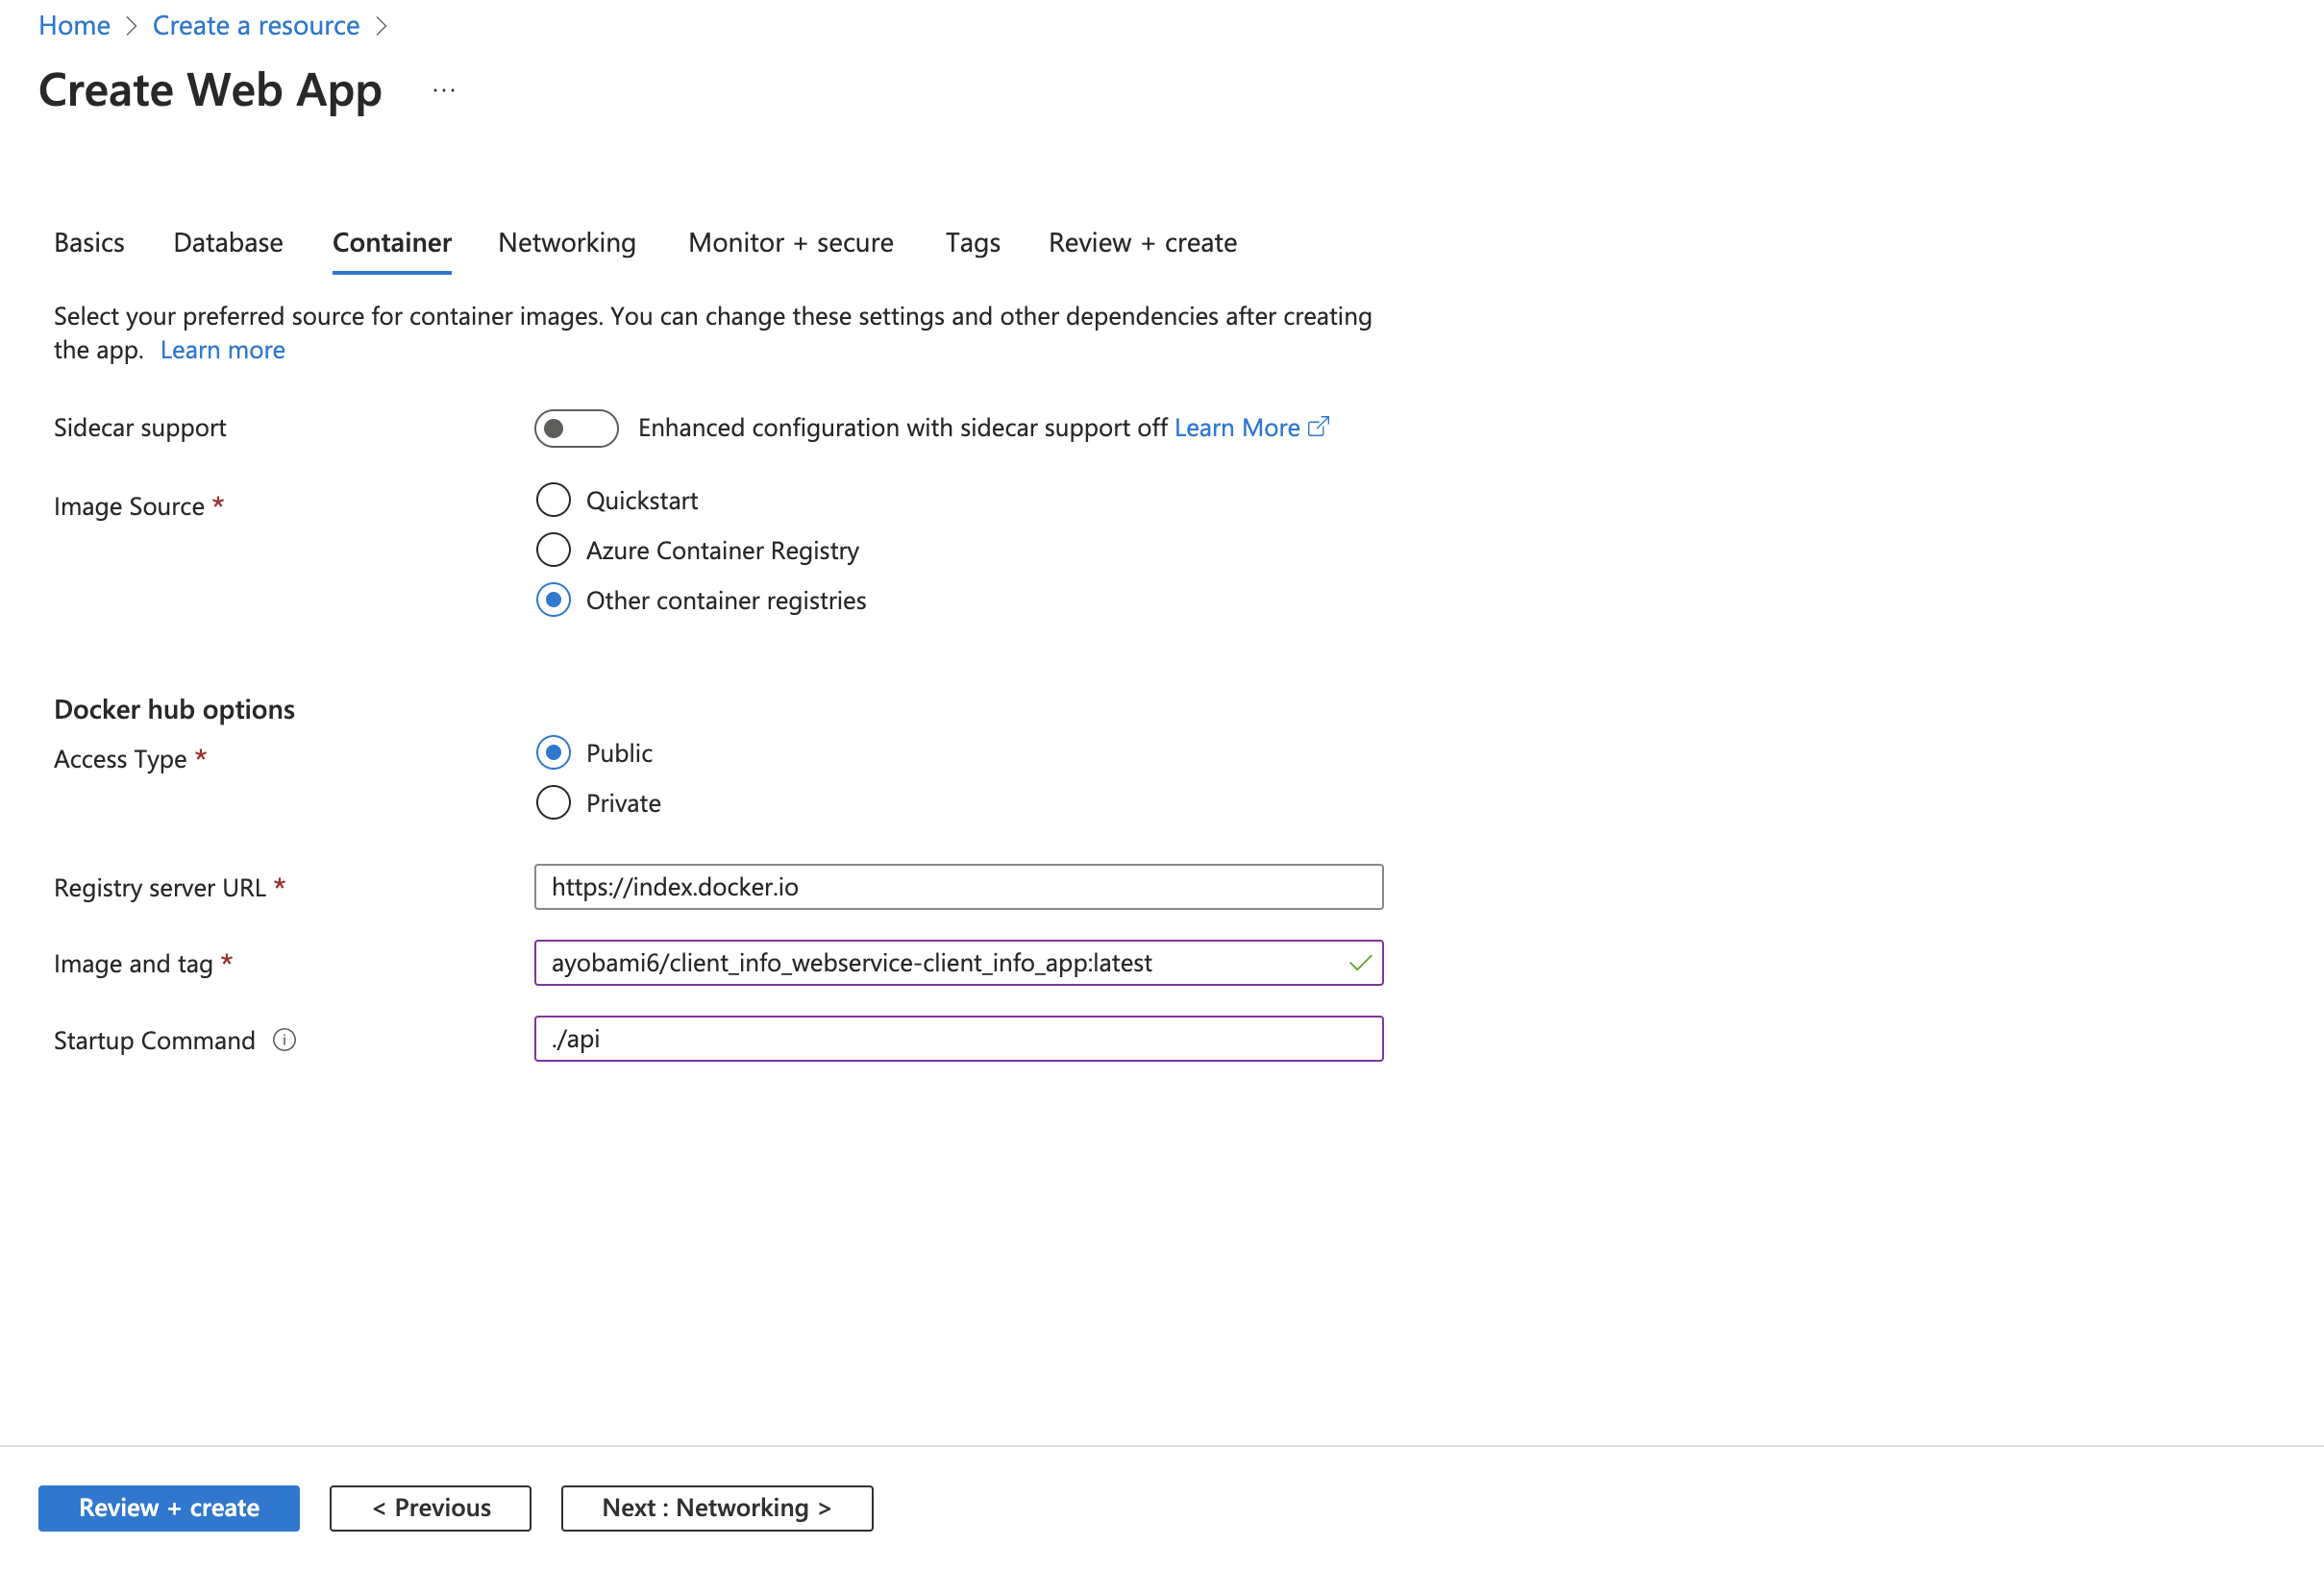
Select public, because your pushed image is public (meaning it’s publicly accessible over the internet).
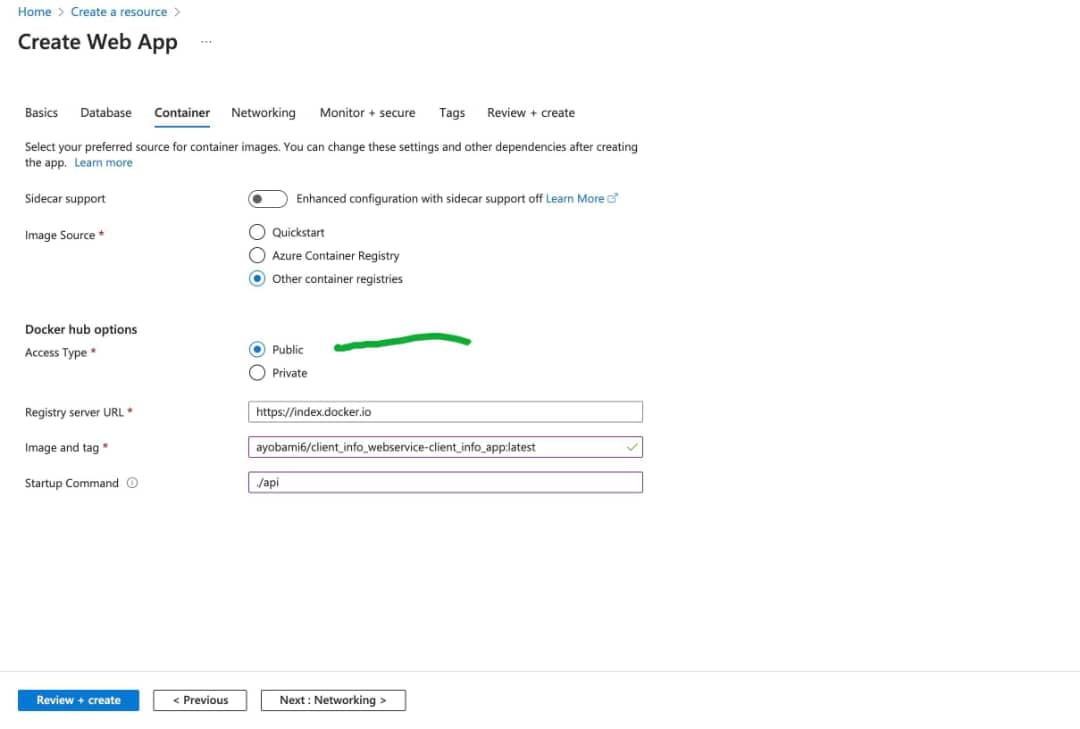
Add your Docker image and tag. You can get this when you run the command docker images.
λ MACs-MacBook-Pro ~ → docker images
REPOSITORY                                        TAG         IMAGE ID       CREATED         SIZE
ayobami6/client_info_webservice-client_info_app   latest      a14f2a5b3bd4   2 weeks ago     30.8MB
postgres                                          13-alpine   236985828131   4 weeks ago     383MB
glint_pm_frontend-nextjs                          latest      424233ceaa4b   4 weeks ago     1.72GB
flask_app-flask_app                               latest      ff6ecfc4ba5a   5 weeks ago     203MB
nginx                                             latest      124b44bfc9cc   7 weeks ago     279MB
encoredotdev/postgres                             15          58b55b0e1fc7   10 months ago   878MB
λ MACs-MacBook-Pro ~ →
Copy the repository name and tag – in my case I have ayobami6/client_info_webservice-client_info_app and tag latest → ayobami6/client_info_webservice-client_info_app:latest.
Then add your startup command. If you are not using Go for the development like I am, your startup command will be different – so just use the command you added to your Docker compose command key, like so command: "./api". Copy just the value (mine is ./api) don’t add the double quotes, and add it to the startup command.
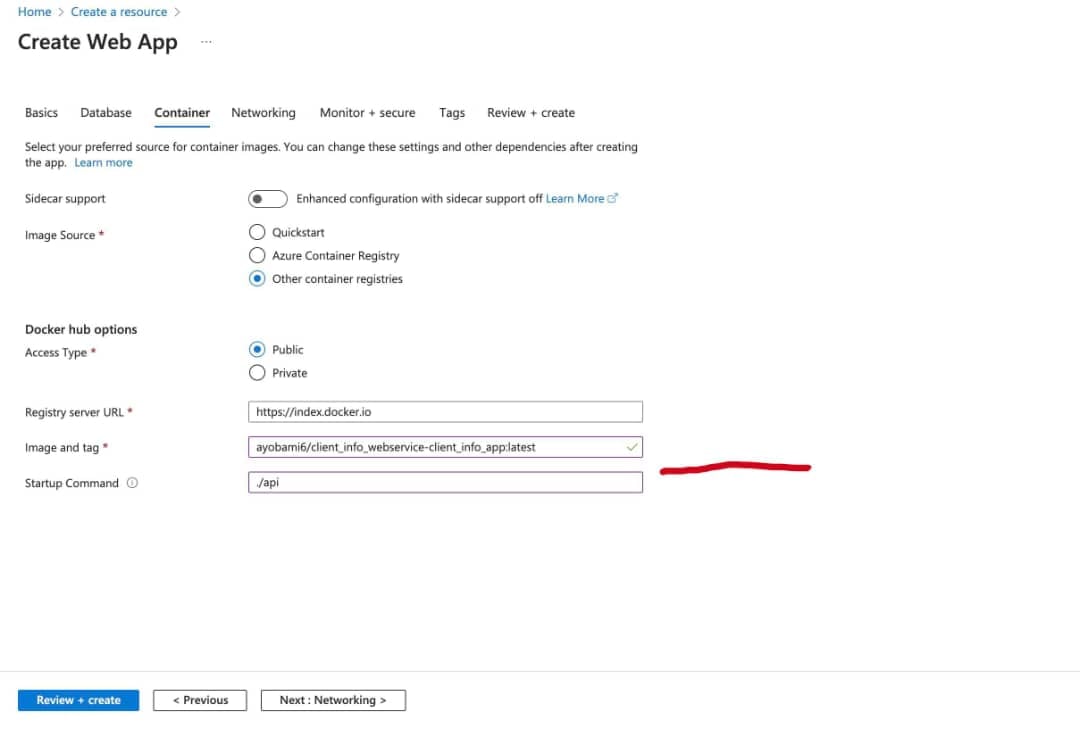
This start up command is the command that will start the application from the container and get the container running.
Click on review and create to create the service.
Once the deployment is complete you’ll be redirected here:
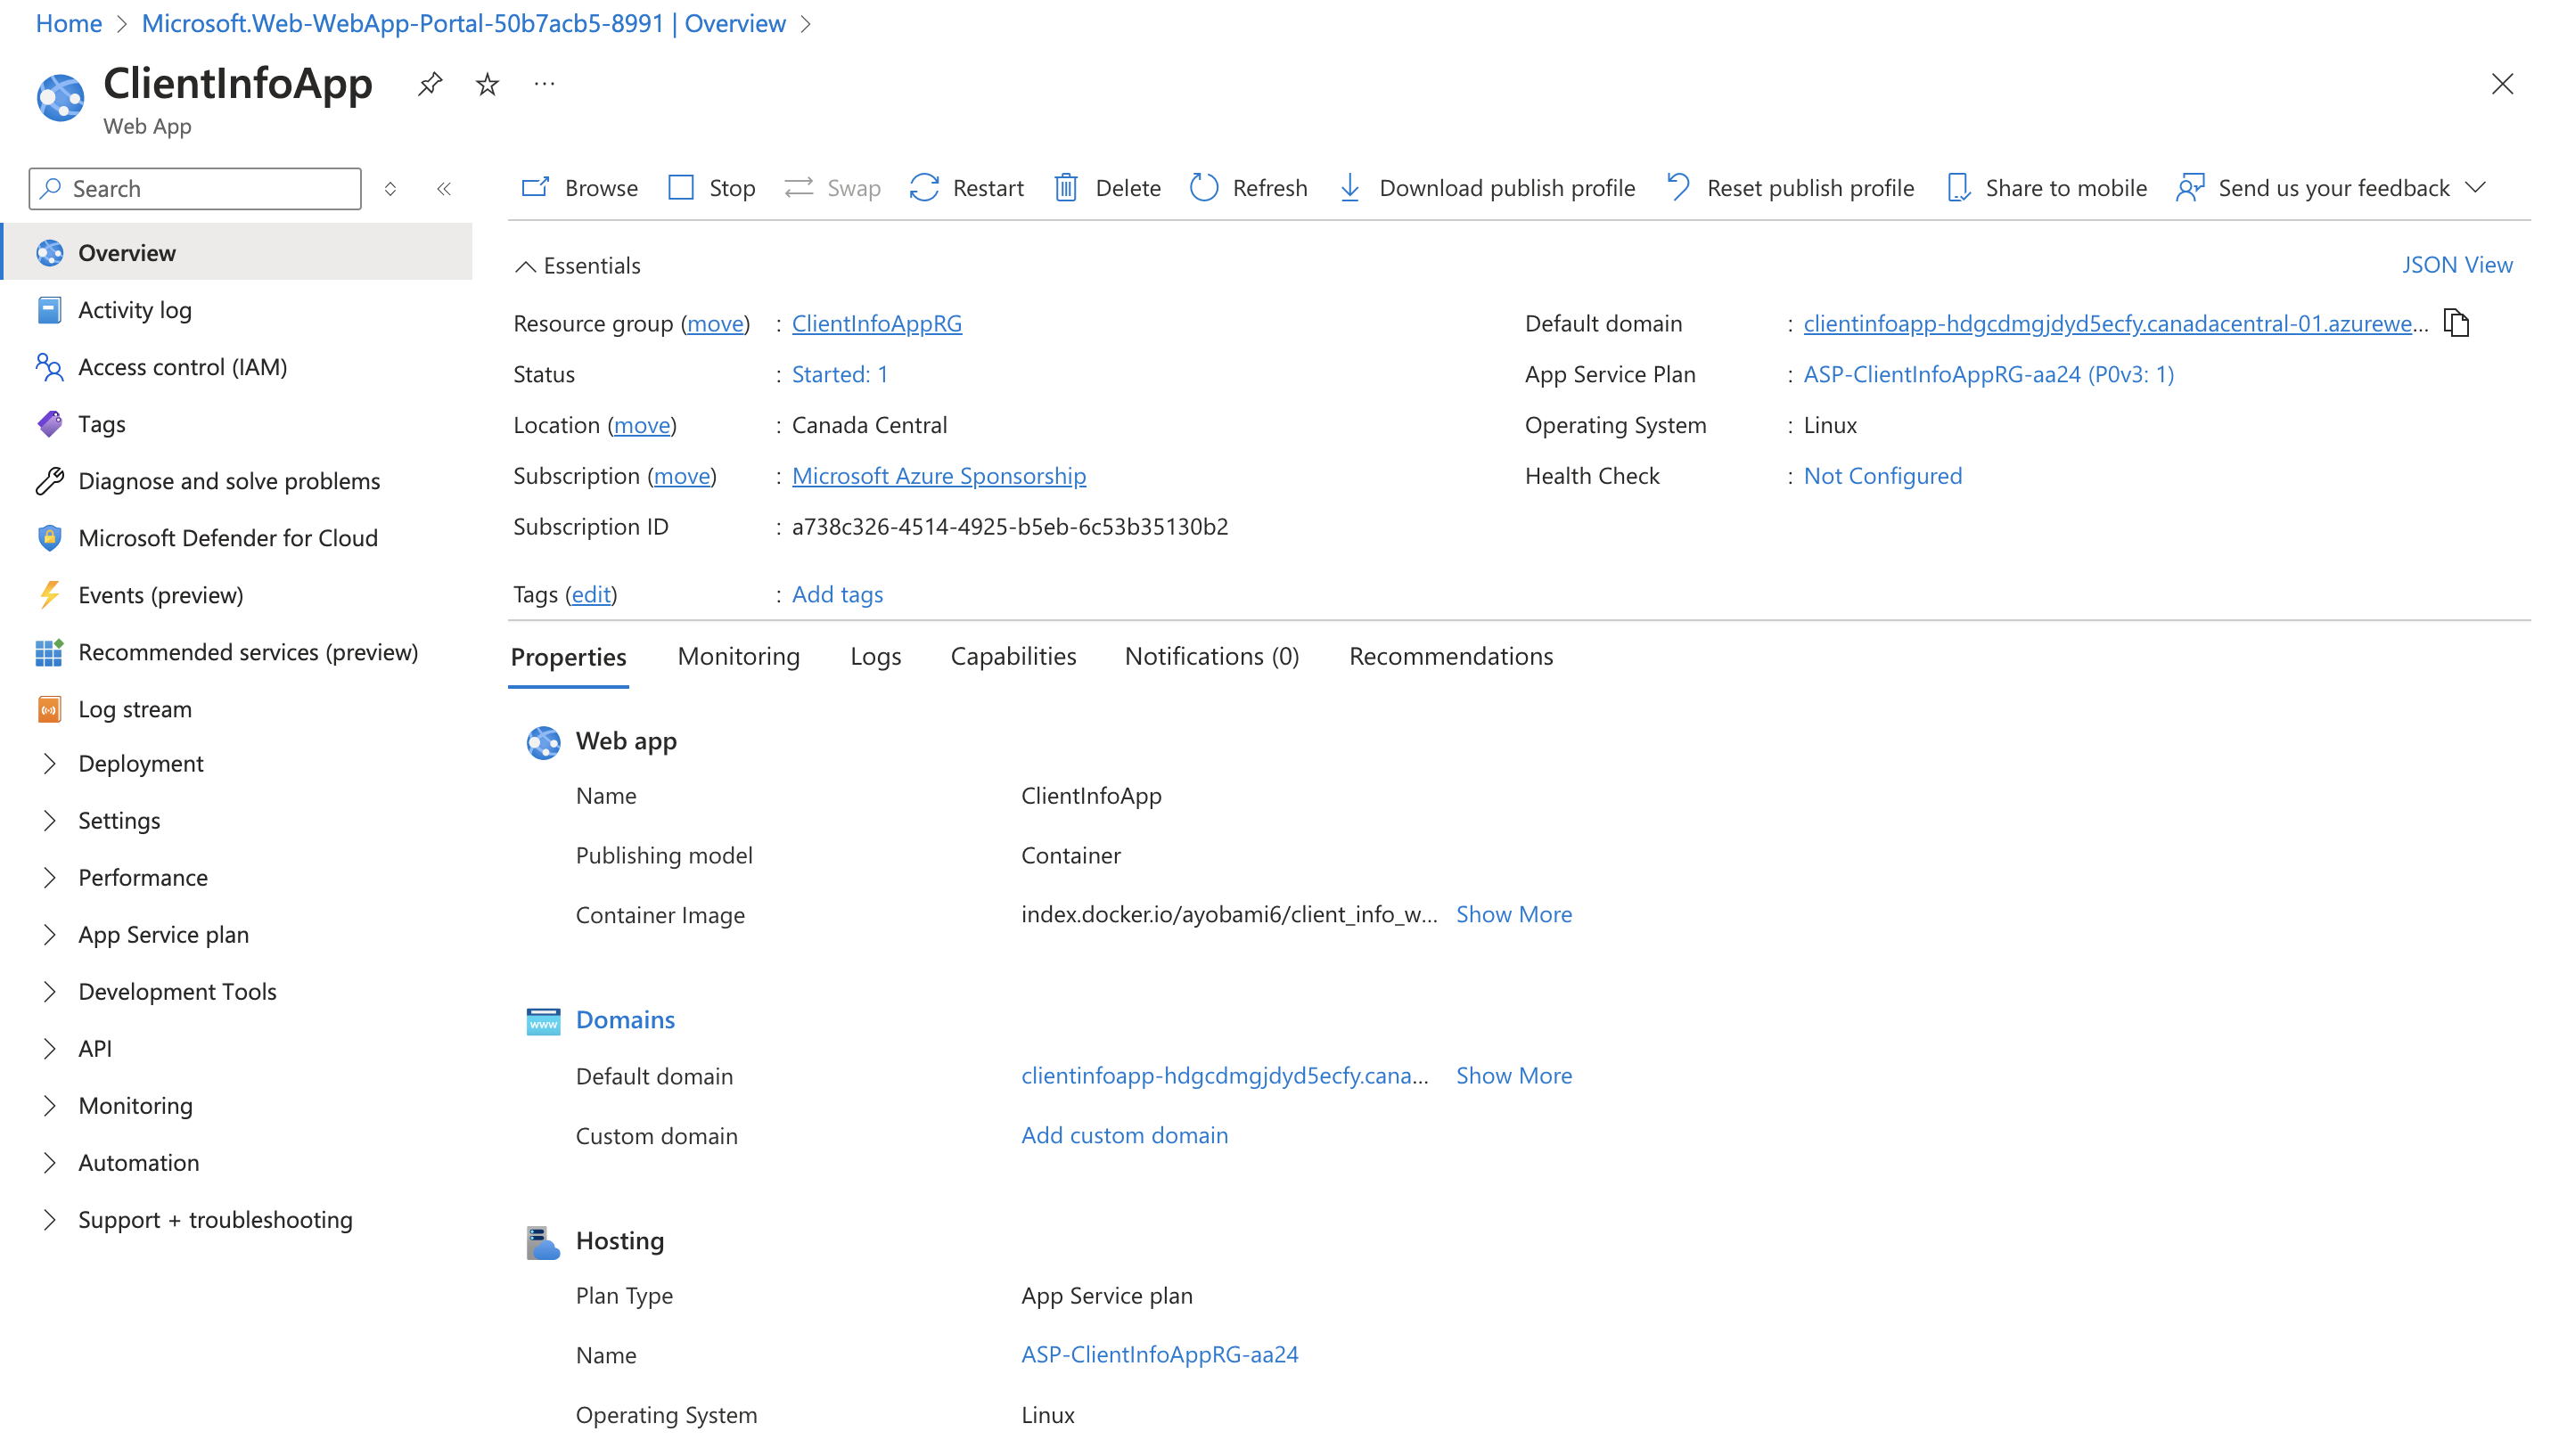
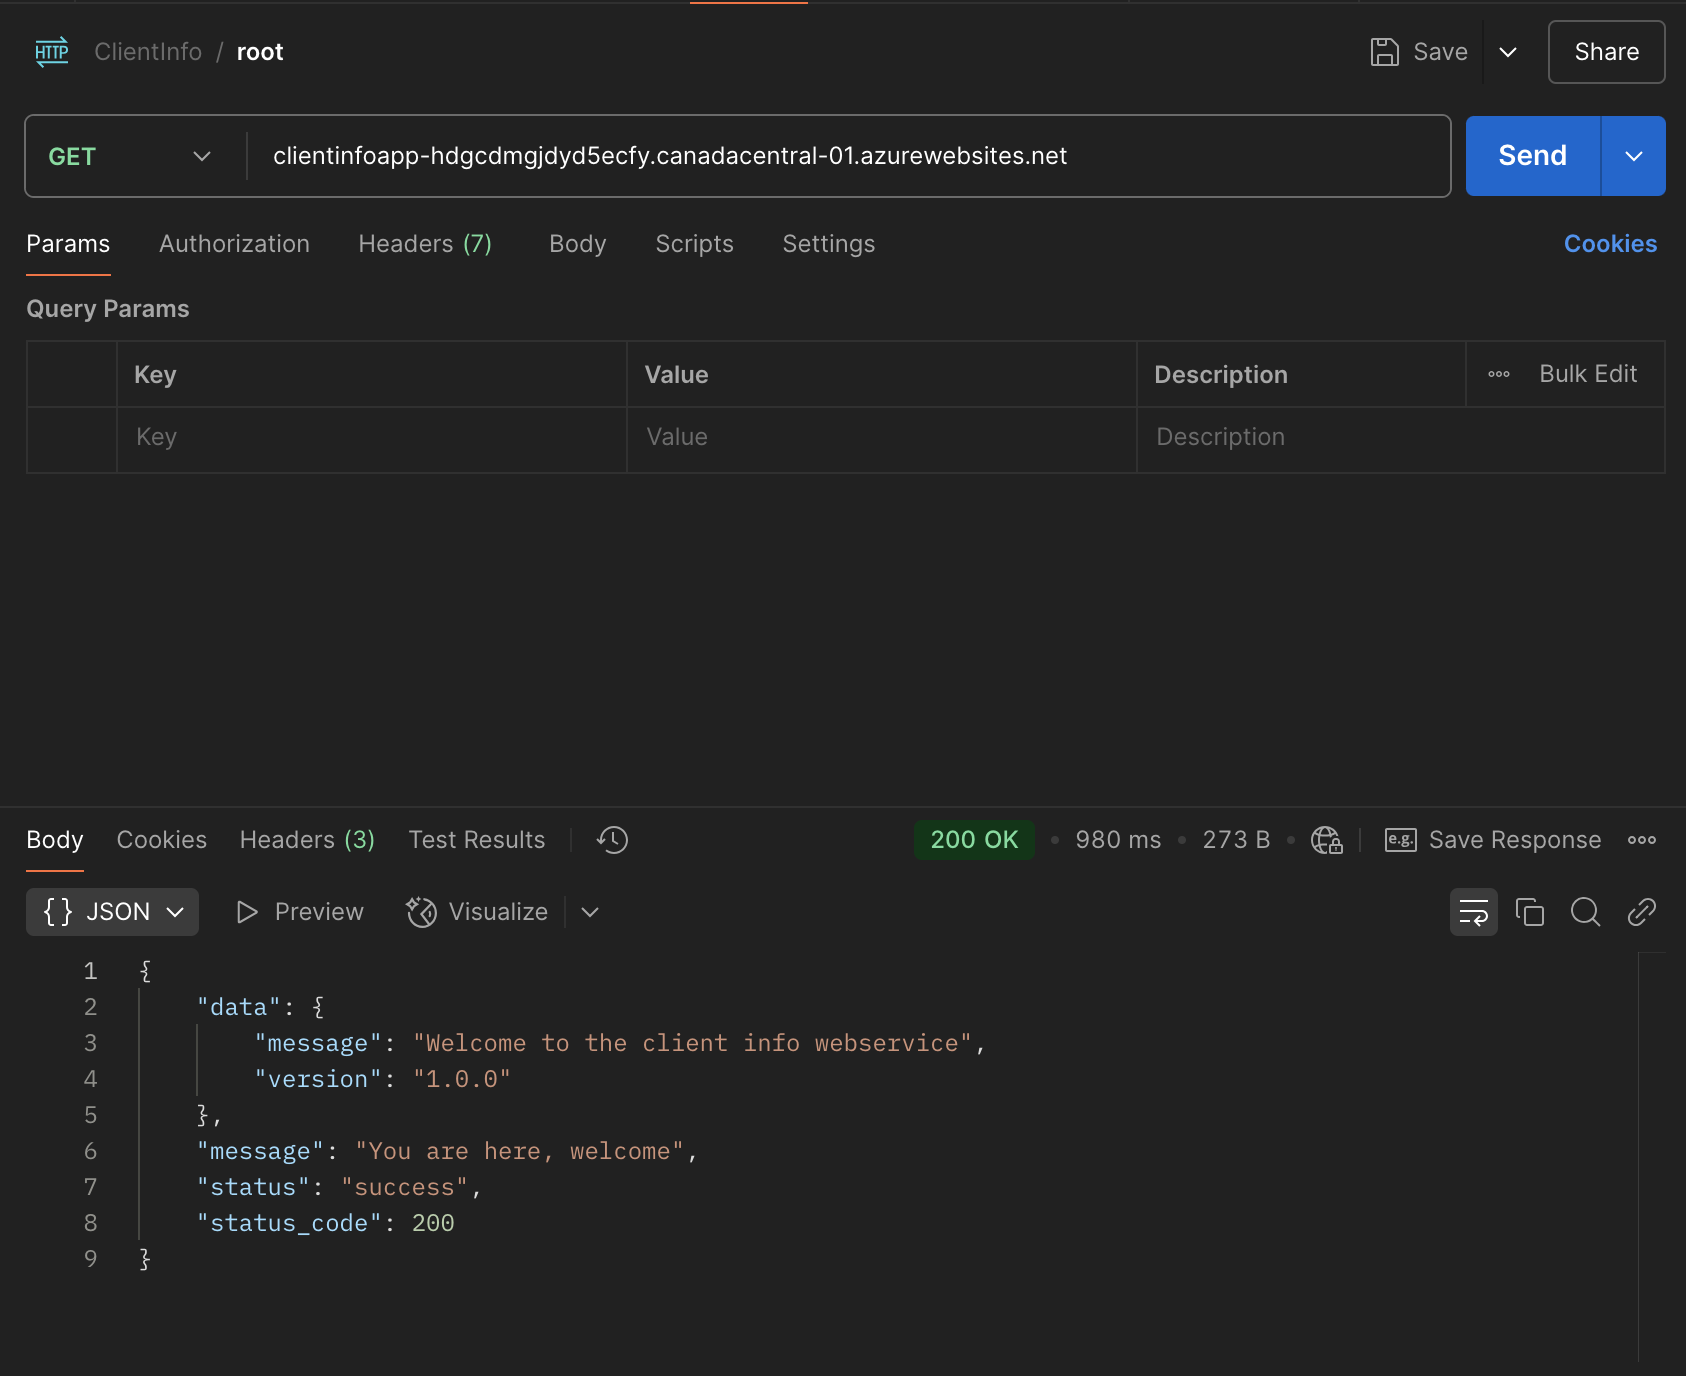
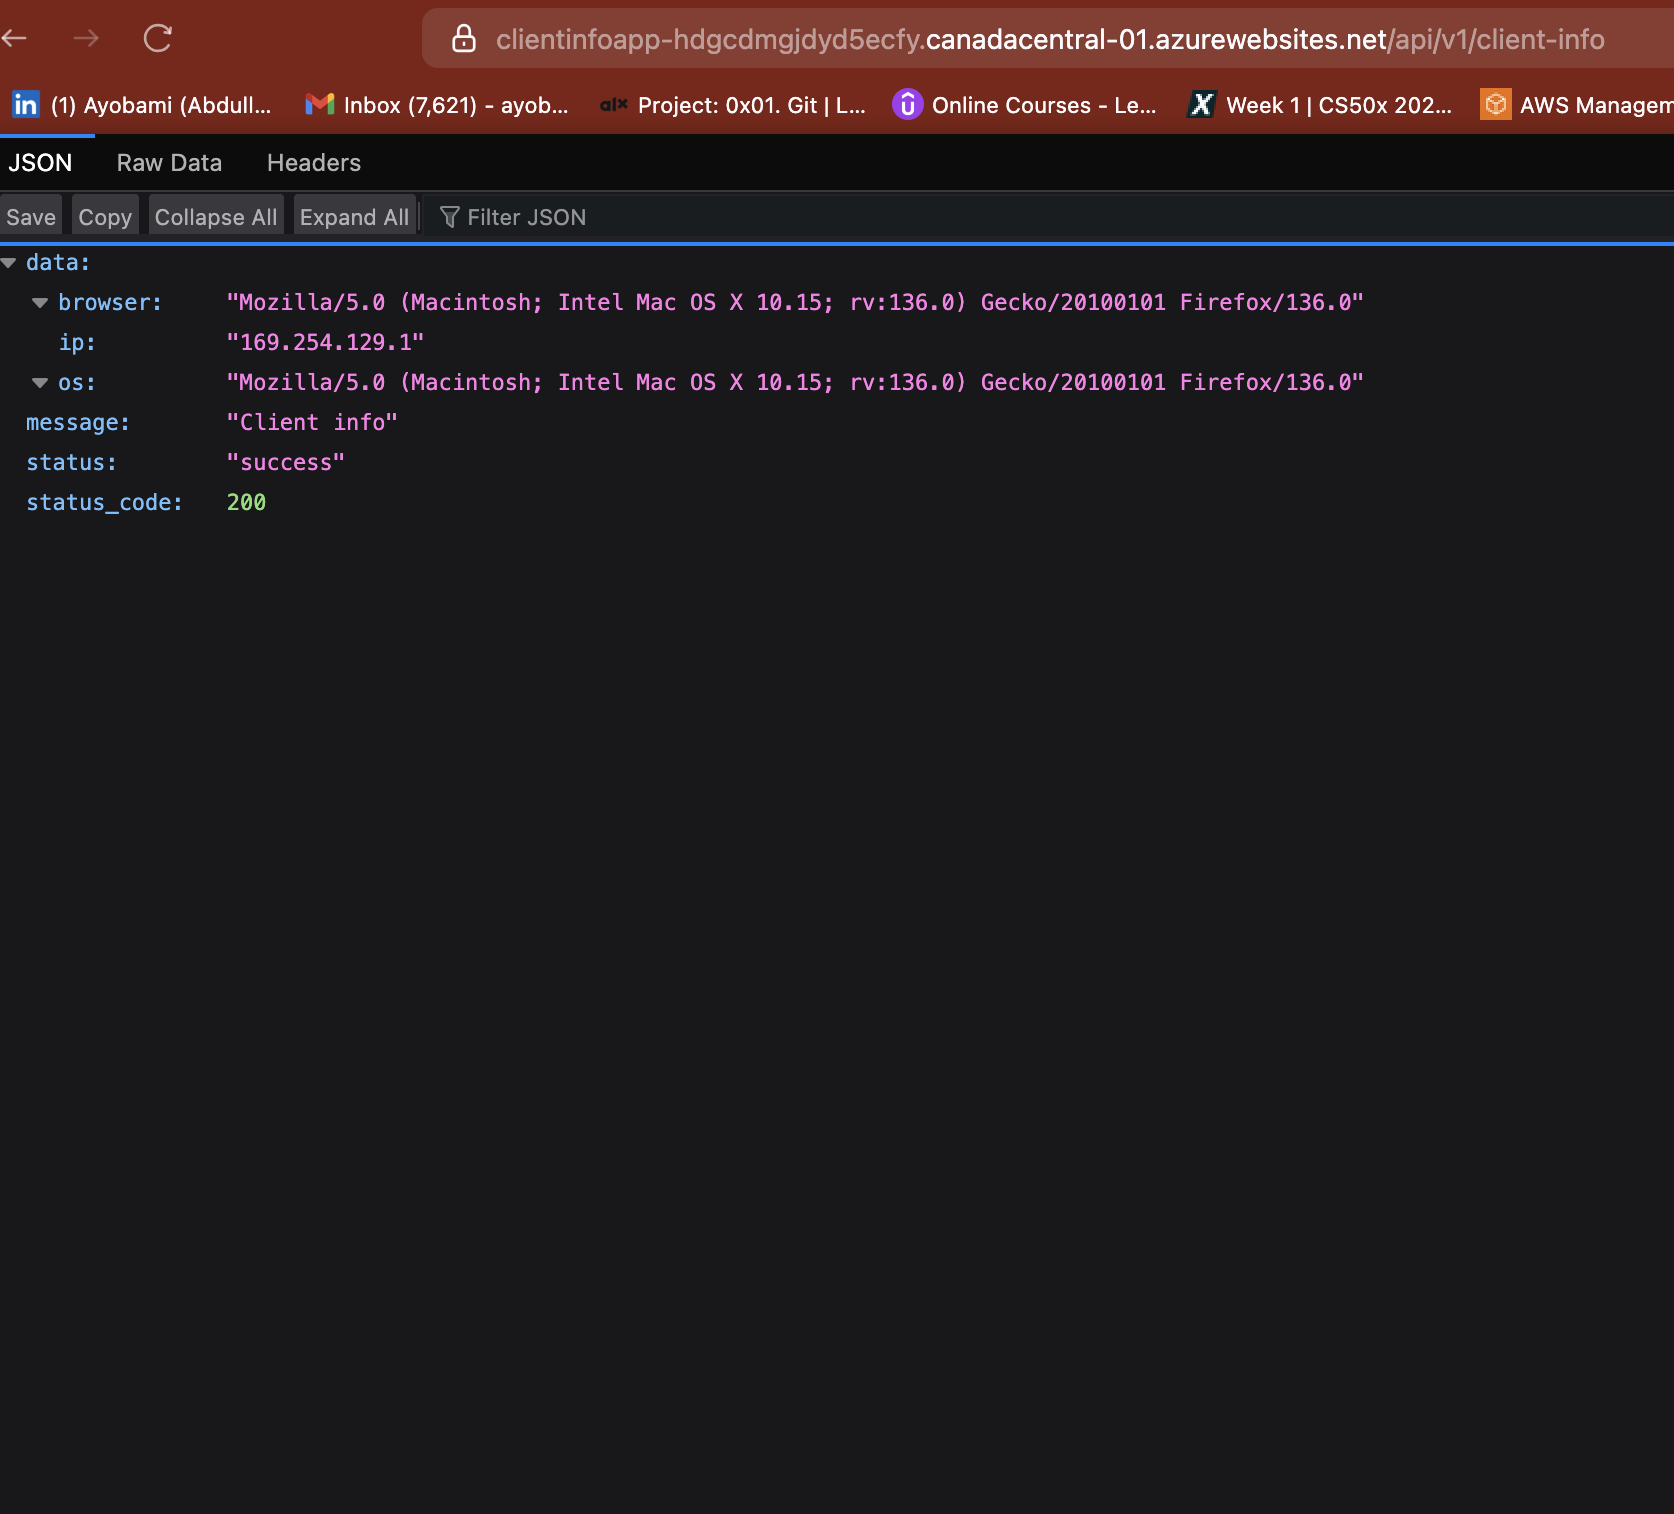
Congratulations! You’ve successfully deployed your web service to Azure App Service. You can visit your app using the default domain from the overview. Mine is here.
Conclusion
Deploying a RESTful web service on Microsoft Azure App Service is a powerful way to leverage cloud technology for scalable and efficient application hosting.
Understanding key terms like Docker, Docker Hub, and Azure Resource Groups will help you streamline the deployment process.
This guide walked you through creating a simple web service, building a Docker image, and deploying it on Azure. By following these steps, you can confidently deploy your applications, ensuring they are accessible and performant.
Thank you for following along, and I hope this tutorial has been insightful and helpful in your cloud deployment journey. If you found it useful, feel free to share it with others who might benefit from it. Happy coding and deploying!
Stay tuned for more insightful content, and let’s continue learning and growing together. Cheers to building smarter, more efficient solutions with Azure.
Source: freeCodeCamp Programming Tutorials: Python, JavaScript, Git & MoreÂ
