
Have you ever run into a situation where you want to test some local AI models, but your computer doesn’t have enough specs to run them? Or maybe you just don’t like bloating your computer with a ton of AI models?
You’re not alone in this. I’ve faced this exact issue, and I was able to solve it with the help of a spare VM. So the only thing you’ll need is a spare PC somewhere that you can access.
Here, I’m using Azure, but the process should be fairly simple for other cloud providers as well. Even if you have a homelab with your old PC or something that you can SSH into, the only thing you’ll have to change is the commands that deal with Azure. Everything else should work just fine.
And the best part? We will be doing everything inside a Docker container. So if you ever want to remove all the AI models, just remove the container, and you’re all set. Even your VM is not going to install anything locally, pure Docker! 👌
In this article, I will show you how to host local LLMs with Ollama in a Docker container on an Azure Virtual Machine.
What you will learn: 👀
How to use Ollama to run multiple LLMs on a single machine.
How to set up
ollamaandollama-webuicontainers withdocker-compose.How to create a VM on Azure and configure everything using the Azure CLI.
How to restrict Azure VM access to your public IP using Azure CLI.
By the end of the article, you will have a fully functional Azure VM capable of running all your chosen AI models (dependent on its specs, of course).
Table of Contents
How to Set Up the Environment
💁 You will mostly be writing Bash, so make sure that you know some basics of shell scripting before moving forward.
Create a folder to keep all your source code for the project:
mkdir run-local-ai-models-docker-azure
    && cd run-local-ai-models-docker-azure
mkdir azure scripts
Here, the azure directory will hold all the scripts required to work with the Azure VM, and the scripts directory will hold everything needed to set up the VM to run the LLMs.
Create a new .env file in the root of the project with the following environment variables. Make sure you change the size, name, location and the models as you like.
RESOURCE_GROUP="ollama-vm-rg"
LOCATION="eastus"
VM_NAME="ollama-vm"
VM_SIZE="Standard_D2s_v3"
USERNAME="<your-username>"

# This will be used as a backup when we can't fetch the IP
# from the 'api.ipify.org'
IP_ADDRESS="<your-ip-address>"

# Change it to whatever models you like.
OLLAMA_DEFAULT_MODEL="qwen2.5-coder:3b"

# Make sure to use "," when separating multiple models.
OLLAMA_ADDITIONAL_MODELS="deepseek-r1:1.5b,tinyllama:1.1b"

WEBUI_PORT=3000
OLLAMA_PORT=11434
And finally, you need to have Azure CLI installed. Follow the installation instructions shown here to install it locally on your machine.
Once, you have it installed, authenticate the CLI with your Azure account using the following command:
az login
Once you are logged in, the setup is complete, and you can start coding the project. 🎉
How to Set Up the Azure Virtual Machine
In this section, I’ll show you how to set up your Azure VM using the Azure CLI az. You’ll do everything from making a separate resource group to setting up the network to only allow access from your IP address, and finally, creating the VM.
When creating a new file for this section, make sure you do it in the azure directory.
Create a Resource Group
First, begin by creating a new resource group for your Virtual Machine. But what’s a resource group? Basically, a resource group is like a container that holds related resources, such as the VM, storage, NSGs and all. It helps organize these resources quickly, making it easier to deploy, update, and delete them all at once. In short, just think of it as a way to group related stuff together.
Create a new file called create-resource-group.sh and add the following lines of code:
#!/usr/bin/env bash
set -e

SCRIPT_DIR="$( cd "$( dirname "${BASH_SOURCE[0]}" )" && pwd )"
PROJECT_ROOT="$(dirname "$SCRIPT_DIR")"

source "$PROJECT_ROOT/.env"

echo "Creating resource group '$RESOURCE_GROUP' in location '$LOCATION'..."
az group create --name $RESOURCE_GROUP --location $LOCATION

echo "Resource group created successfully."
Notice the set -e command. By adding this, its telling the script to stop if any step causes an error. Without this, the script would keep running even if a step fails, which would lead to errors. Remember this command, as it is in all the scripts you’ll write.
Next, it sources the .env file to access the environment variables. After that, it runs the az command to create a resource group with the given name and location.
Now, run the following command:
bash create-resource-group.sh
To check if it worked, go to your Azure account and look under the Resource groups section for your new resource group.

If you see your resource group on the list, you’re good to go.
Create the Virtual Machine
Now that the resource group is created, you can now move forward to creating the virtual machine itself. This script is also going to be fairly similar to the earlier one.
Create a new file called create-vm.sh and add the following lines of code:
#!/usr/bin/env bash
set -e

SCRIPT_DIR="$( cd "$( dirname "${BASH_SOURCE[0]}" )" && pwd )"
PROJECT_ROOT="$(dirname "$SCRIPT_DIR")"

source "$PROJECT_ROOT/.env"

VM_EXISTS=$(az vm show --resource-group $RESOURCE_GROUP --name $VM_NAME --query "name" -o tsv 2>/dev/null || echo "")

if [ -n "$VM_EXISTS" ]; then
    echo "VM '$VM_NAME' already exists in resource group '$RESOURCE_GROUP'."
    echo "Please choose a different VM name or use the existing VM."
    exit 1
fi

echo "Creating VM '$VM_NAME'..."
az vm create
  --resource-group $RESOURCE_GROUP
  --name $VM_NAME
  --image Ubuntu2204
  --admin-username $USERNAME
  --generate-ssh-keys
  --size $VM_SIZE
  --public-ip-sku Standard

# The above command generates the ssh key as "id_rsa", if you already
# have a key called id_rsa in the ~/.ssh directory, make sure to name it to something else
ssh-add ~/.ssh/id_rsa

echo "VM created successfully."
First, it checks if a VM with the same name is already in the resource group. If it isn’t, then it creates a new VM there, providing details like size, image, username, and asking it to generate an SSH key which it will use to log in to the VM.
I chose Ubuntu because, in another section where you’ll set up Docker, I’ve used Debian steps. If you want to use a different distro, make sure to update that script, too.
Now, run the following command:
bash create-vm.sh
After running the command, under the VM section, you should see your newly created VM.
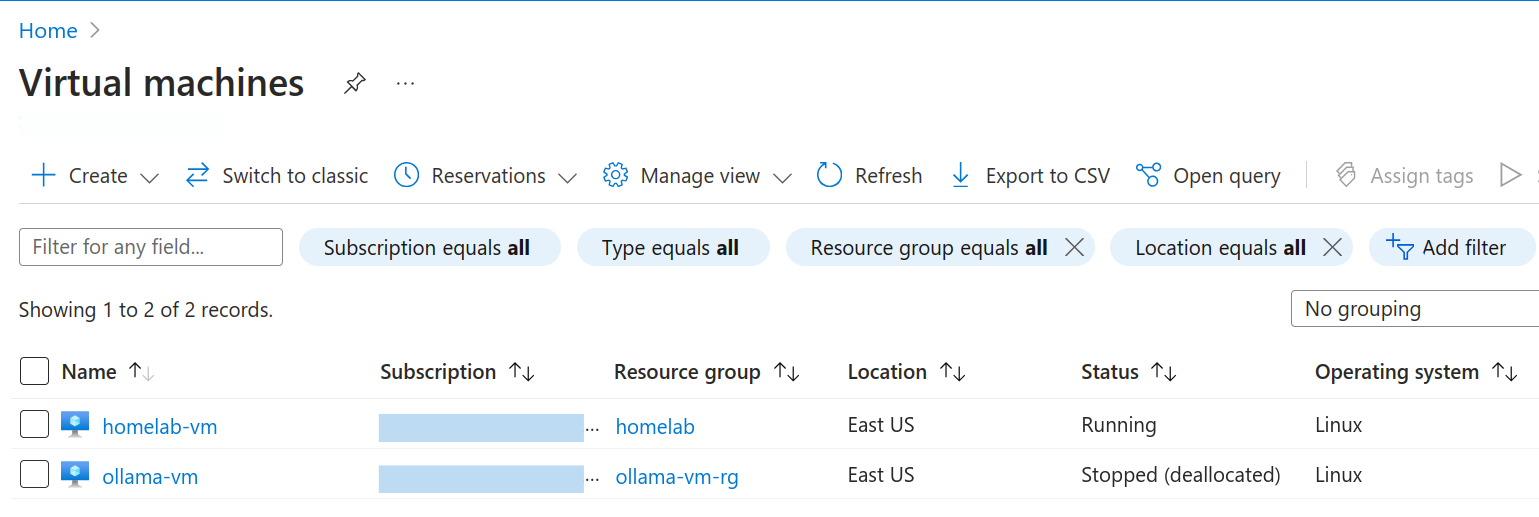
There you have it, the VM is up and running. You could manually go into the VM and set it up, but I will show you how to automate all of these steps as well, because we are devs, remember? 😉
Get the Virtual Machine Public IP
So, now that you have the VM created perfectly, it’s time to fetch the public IP of the VM so you can then use SSH to login.
Create a new file called get-vm-details.sh and add the following lines of code:
#!/usr/bin/env bash
set -e

SCRIPT_DIR="$( cd "$( dirname "${BASH_SOURCE[0]}" )" && pwd )"
PROJECT_ROOT="$(dirname "$SCRIPT_DIR")"

source "$PROJECT_ROOT/.env"

echo "Getting VM details..."

PUBLIC_IP=$(az vm show --resource-group $RESOURCE_GROUP --name $VM_NAME --show-details --query publicIps -o tsv)

if [ -z "$PUBLIC_IP" ]; then
    echo "Error: Could not retrieve public IP for VM '$VM_NAME'"
    exit 1
fi

echo "VM Public IP: $PUBLIC_IP"
echo "Ollama API endpoint: http://$PUBLIC_IP:$OLLAMA_PORT"
echo "Web UI: http://$PUBLIC_IP:$WEBUI_PORT"

echo "PUBLIC_IP=$PUBLIC_IP" > "$PROJECT_ROOT/.vm_details.env"

echo "VM details retrieved successfully."
All it is doing is sourcing the .env and then using the az command to fetch the public IP of the VM and store it in a separate file called .vm_details.env. This way, in other scripts, it doesn’t need to fetch the public IP repeatedly and can simply source the file to access it.
Now, run the following command:
bash get-vm-details.sh
Configure the VM Network to Allow Access Only from the User’s IP
Now that you have the VM working, there’s a slight security issue with it. If you check your VM network settings, you’ll see that there is no IP restriction. This means anyone can easily try to SSH into your VM.

Allowing access from any source IP address is definitely not a good idea. You need to configure this to allow access only from your public IP, and also need to configure the port for ollama and ollama-webui.
Create a new file called configure-network.sh and add the following lines of code:
#!/usr/bin/env bash
set -e

SCRIPT_DIR="$( cd "$( dirname "${BASH_SOURCE[0]}" )" && pwd )"
PROJECT_ROOT="$(dirname "$SCRIPT_DIR")"

source "$PROJECT_ROOT/.env"

echo "Configuring network security..."

# Get current public IP address with fallback to .env one.
echo "Retrieving current public IP address..."
IP_ADDRESS_CURRENT=$(curl -s https://api.ipify.org || echo "")
if [ -z "$IP_ADDRESS_CURRENT" ]; then
    echo "Warning: Could not retrieve IP from api.ipify.org, falling back to .env value"
    IP_ADDRESS_CURRENT=$IP_ADDRESS
fi

echo "Using IP address: $IP_ADDRESS_CURRENT"

NSG_NAME=$(az network nsg list --resource-group $RESOURCE_GROUP --query "[?contains(name, '${VM_NAME}')].name" -o tsv)
if [ -z "$NSG_NAME" ]; then
    echo "Error: Could not find NSG for VM '$VM_NAME'"
    exit 1
fi

create_or_update_nsg_rule() {
    local RULE_NAME=$1
    local PORT=$2
    local PRIORITY=$3

    RULE_EXISTS=$(az network nsg rule list --resource-group $RESOURCE_GROUP --nsg-name $NSG_NAME --query "[?name=='$RULE_NAME'].name" -o tsv)

    if [ -z "$RULE_EXISTS" ]; then
        echo "Creating new rule: $RULE_NAME for port $PORT..."
        az network nsg rule create --resource-group $RESOURCE_GROUP --nsg-name $NSG_NAME
            --name "$RULE_NAME"
            --protocol tcp --direction inbound --priority $PRIORITY
            --source-address-prefix $IP_ADDRESS_CURRENT --source-port-range "*"
            --destination-address-prefix "*" --destination-port-range $PORT
            --access allow
    else
        echo "Updating existing rule: $RULE_NAME with new IP address..."
        az network nsg rule update --resource-group $RESOURCE_GROUP --nsg-name $NSG_NAME
            --name "$RULE_NAME"
            --source-address-prefix $IP_ADDRESS_CURRENT
    fi
}

# Check if 'default-allow-ssh' exists
SSH_RULE_EXISTS=$(az network nsg rule list --resource-group $RESOURCE_GROUP --nsg-name $NSG_NAME --query "[?name=='default-allow-ssh'].name" -o tsv)
if [ -n "$SSH_RULE_EXISTS" ]; then
    echo "Updating existing SSH rule (default-allow-ssh) with restricted IP..."
    az network nsg rule update --resource-group $RESOURCE_GROUP --nsg-name $NSG_NAME
        --name "default-allow-ssh"
        --source-address-prefix $IP_ADDRESS_CURRENT
else
    # If no default SSH rule, create our own with a different priority
    create_or_update_nsg_rule "SSH_Restricted" 22 1010
fi

# Configure rules for Ollama and Web UI
echo "Opening ports for Ollama API and Web UI (restricted to your IP)..."

create_or_update_nsg_rule "Port_${OLLAMA_PORT}_Restricted" $OLLAMA_PORT 1001
create_or_update_nsg_rule "Port_${WEBUI_PORT}_Restricted" $WEBUI_PORT 1002

echo "Network security configured successfully."
echo "Note: If your IP address changes, you'll need to run this script again to update the rules."
Don’t be scared by this script. It might seem complex, but it’s actually pretty straightforward. The first thing it does is try to get the user’s IP address. It first attempts to fetch the user’s IP from a service called api.ipify.org (because public IPs can change frequently), which returns your current public IP. If there’s an error, it falls back to using the IP address stored in the .env file.
Next, it tries to get the VM’s NSG (Network Security Group) because it’s needed when creating a new NSG rule. If there’s an error, there’s no point in continuing with the script, so it exits with an error status.
There’s also a function called create_or_update_nsg_rule, which is used to create a new NSG rule if it doesn’t exist. If it does exist, it simply updates it to allow access only from the user’s IP address.
Finally, it creates or updates the SSH rule depending on whether it exists. It also sets up the rules for ollama and ollama-webui so you can access the exposed port on your local machine to test the models with ollama-webui.
Now, run the following command:
bash configure-network.sh
After running this command, you can view the changed network settings. There should be two new rules for port 11434 and 3000, and most importantly, you should see that the source IP is limited to your public IP.

Every configuration on the Azure side is now complete. All you need to do next is write a few more scripts to set up running AI models on your configured VM. ✌️
How to Set Up the VM for Running AI Models
Now that all the configuration on the Azure side is complete, in this section, I will show you how you can configure everything on the VM side, from installing Docker to setting up containers, and deploying those containers in the Azure VM you just created.
When creating a new file for this section, ensure you do it in the scripts directory, except for the docker-compose.yaml file.
Set Up the Virtual Machine
Okay, so now that you have a VM up and running with some network settings configured, let’s set this thing up to install and set up Docker and start the service.
Create a new file called setup-vm.sh and add the following lines of code:
#!/usr/bin/env bash
set -e

SCRIPT_DIR="$( cd "$( dirname "${BASH_SOURCE[0]}" )" && pwd )"
PROJECT_ROOT="$(dirname "$SCRIPT_DIR")"

source "$PROJECT_ROOT/.env"
source "$PROJECT_ROOT/.vm_details.env"

echo "Setting up VM with Docker and dependencies..."

ssh $USERNAME@$PUBLIC_IP << 'EOF'
  # Install Docker Engine
  echo "Installing Docker..."

  # From Docker documentation for debian based distros
  # Add Docker's official GPG key:
  sudo apt-get update
  sudo apt-get install ca-certificates curl
  sudo install -m 0755 -d /etc/apt/keyrings
  sudo curl -fsSL https://download.docker.com/linux/ubuntu/gpg -o /etc/apt/keyrings/docker.asc
  sudo chmod a+r /etc/apt/keyrings/docker.asc

  echo
    "deb [arch=$(dpkg --print-architecture) signed-by=/etc/apt/keyrings/docker.asc] https://download.docker.com/linux/ubuntu
    $(. /etc/os-release && echo "${UBUNTU_CODENAME:-$VERSION_CODENAME}") stable" |
    sudo tee /etc/apt/sources.list.d/docker.list > /dev/null
  sudo apt-get update

  sudo apt-get install -y docker-ce docker-ce-cli containerd.io docker-buildx-plugin docker-compose-plugin
  # End of docker debian installation instructions

  sudo usermod -aG docker $USER

  sudo apt-get install -y docker-compose

  sudo systemctl start docker.service

  sudo docker volume create ollama_data

  # Here we will place our docker-compose.yaml file
  mkdir -p ~/ollama-project
EOF

echo "VM setup completed successfully."
And as I said earlier, in this example, I’m using Ubuntu, so I’m following Debian instructions to install Docker. If you are using a different distro, make sure to change the docker setup commands. Then it simply creates a Docker volume because you will want to persist the container state and not lose it every single time.
Now, run the following command:
bash setup-vm.sh
If everything goes well, you should have the Docker engine installed on your machine. You can verify it with the following command:
ssh <YOUR_VM_USERNAME>@<YOUR_VM_PUBLIC_IP> << 'EOF'
    docker --version
EOF
Set Up Docker Compose
Create a new file called docker-compose.yaml at the root of the project – not inside the scripts directory this time – and add the following lines of code:
version: "3.9"
services:
  ollama:
    image: ollama/ollama:latest
    container_name: ollama
    ports:
      - "11434:11434"
    volumes:
      - ~/ollama_data:/root/.ollama
    environment:
      - OLLAMA_HOST=0.0.0.0
    restart: unless-stopped

  ollama-webui:
    image: ghcr.io/ollama-webui/ollama-webui:main
    container_name: ollama-webui
    ports:
      - "${WEBUI_PORT:-3000}:8080"
    environment:
      - OLLAMA_API_BASE_URL=http://ollama:11434/api
    depends_on:
      - ollama
    restart: unless-stopped
The Docker Compose file should be fairly straightforward to understand. It sets up two services, or rather two containers: ollama and ollama-webui. You need to expose the container port so that you can access it in the VM, whose port is already exposed during the VM network configuration, allowing you to access it on your local machine. Finally, it specifies the Docker volumes and a few environment variables, and that’s it.
For the ollama-webui container, it’s necessary for the ollama service to be up and running first, so it depends on the ollama container. After all, what’s the point of starting the UI if the service itself is not running, right?
Deploy the Containers
Now that Docker is installed on the VM, it’s time to copy the docker-compose.yaml file into the VM and start the containers.
Create a new file called deploy-containers.sh and add the following lines of code:
#!/usr/bin/env bash
set -e

SCRIPT_DIR="$( cd "$( dirname "${BASH_SOURCE[0]}" )" && pwd )"
PROJECT_ROOT="$(dirname "$SCRIPT_DIR")"

source "$PROJECT_ROOT/.env"
source "$PROJECT_ROOT/.vm_details.env"

echo "Deploying Docker containers to the VM..."

scp "$PROJECT_ROOT/docker-compose.yaml" $USERNAME@$PUBLIC_IP:~/ollama-project/

ssh $USERNAME@$PUBLIC_IP << 'EOF'
  cd ~/ollama-project
  export WEBUI_PORT=3000
  sudo docker-compose up -d
  echo "Docker containers started successfully."
EOF

echo "Deployment completed successfully."
echo "Web UI available at: http://$PUBLIC_IP:$WEBUI_PORT"
It’s pretty simple here as well. First, it copies the docker-compose file into the ~/ollama-project directory and then spins up the container in detached mode.
Now, the moment of truth. Run the following command, and if everything goes well, you should have two Docker containers running in your VM.
bash deploy-containers.sh
To see if it worked, run the following command to ssh into the VM and execute the docker ps command.
ssh <YOUR_VM_USERNAME>@<YOUR_VM_PUBLIC_IP> << 'EOF'
    docker ps
EOF
Along with some SSH output, you should see something like this, and if both containers’ statuses say Up, you’re all good.
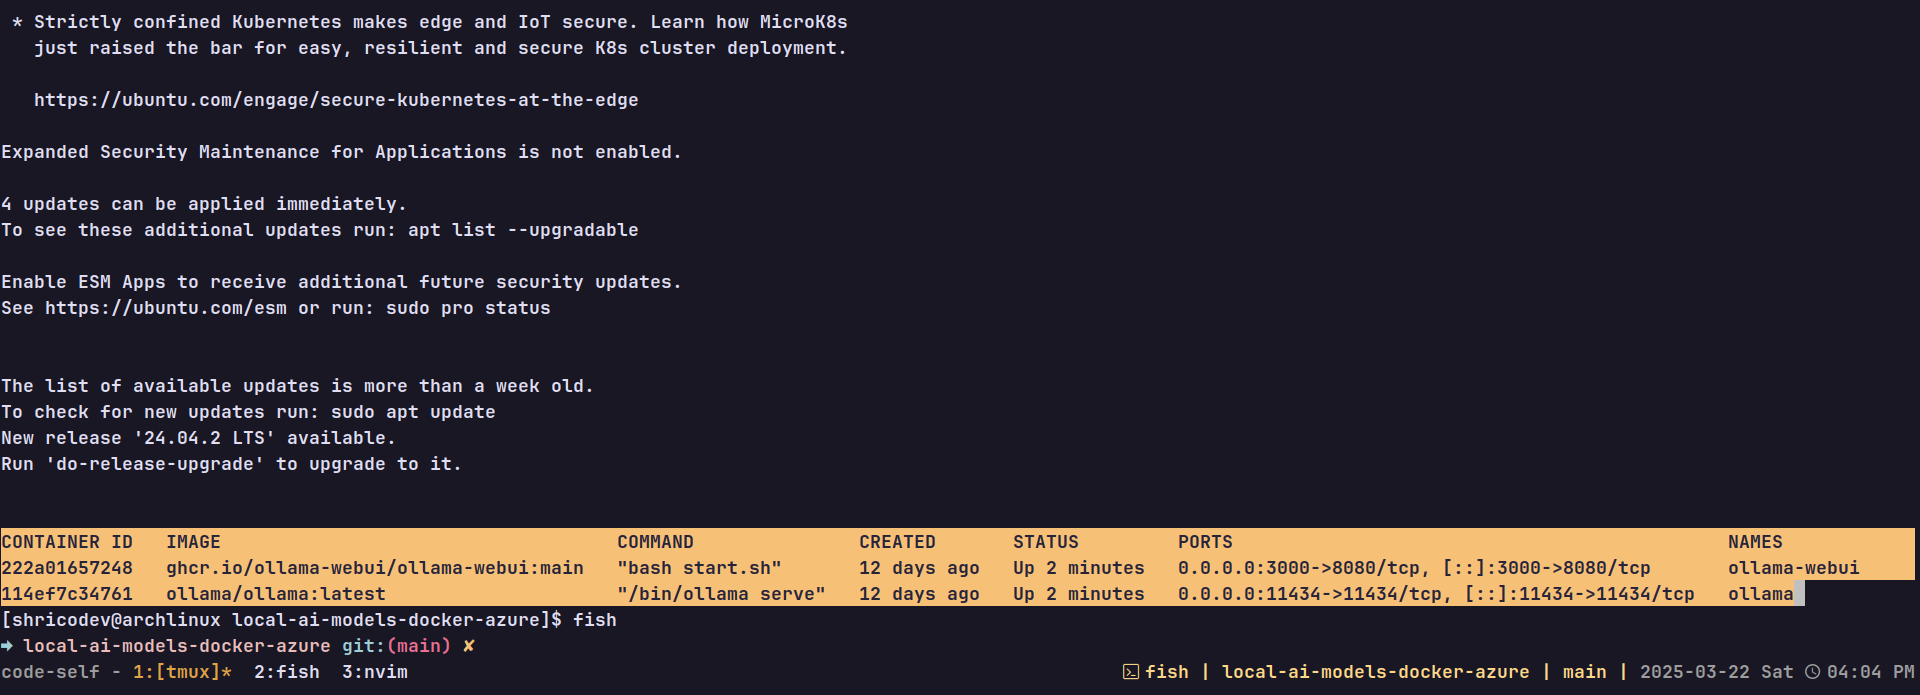
By now, you should be able to visit this URL (http://<VM_PUBLIC_IP>:3000) to view the Web UI running. But there are no AI models to chat with, so let’s fix that.

Run the LLMs Locally Inside the Docker Container
You’re almost there. All that is left is to install some models in Ollama. To install any model, all you need to do is ollama run <MODEL_NAME>. So, let’s do that inside a script that runs that command inside a Docker container, because remember you have Ollama running in a Docker container.
💡 GOOD TO KNOW: You can run any command inside a Docker container from outside using docker exec <CONTAINER_NAME> <COMMAND>. This is perfect for our situation because there’s no need to be inside the Docker container. You just need to run one command, and that’s all.
Create a new file called run-models.sh and add the following lines of code:
#!/usr/bin/env bash
set -e

SCRIPT_DIR="$( cd "$( dirname "${BASH_SOURCE[0]}" )" && pwd )"
PROJECT_ROOT="$(dirname "$SCRIPT_DIR")"

source "$PROJECT_ROOT/.env"
source "$PROJECT_ROOT/.vm_details.env"

if [ -n "$OLLAMA_DEFAULT_MODEL" ]; then
  echo "Running default model $OLLAMA_DEFAULT_MODEL..."
  ssh $USERNAME@$PUBLIC_IP << EOF
    sudo docker exec ollama ollama run $OLLAMA_DEFAULT_MODEL
EOF
  echo "Default model $OLLAMA_DEFAULT_MODEL run successfully."
fi

if [ -n "$OLLAMA_ADDITIONAL_MODELS" ]; then
  echo "additional models $OLLAMA_ADDITIONAL_MODELS..."
  IFS=',' read -ra MODELS <<< "$OLLAMA_ADDITIONAL_MODELS"

  for MODEL in "${MODELS[@]}"; do
    # trim whitespace
    MODEL=$(echo "$MODEL" | xargs)
    echo "Running additional model $MODEL..."
    ssh $USERNAME@$PUBLIC_IP << EOF
      sudo docker exec ollama ollama run $MODEL
EOF
    echo "Additional model $MODEL run successfully."
  done
fi

echo "All models have been processed successfully."
All this script does is first check if the default model is set up in the env with OLLAMA_DEFAULT_MODEL. If it is, the script runs it and also runs any other models separated by commas in the OLLAMA_ADDITIONAL_MODELS env variable.
Now, run the following command:
bash run-models.sh
If everything goes well and you see the final echo message, then hurray! 🎉 You’ve successfully set up running LLMs inside a Docker container in an Azure VM.
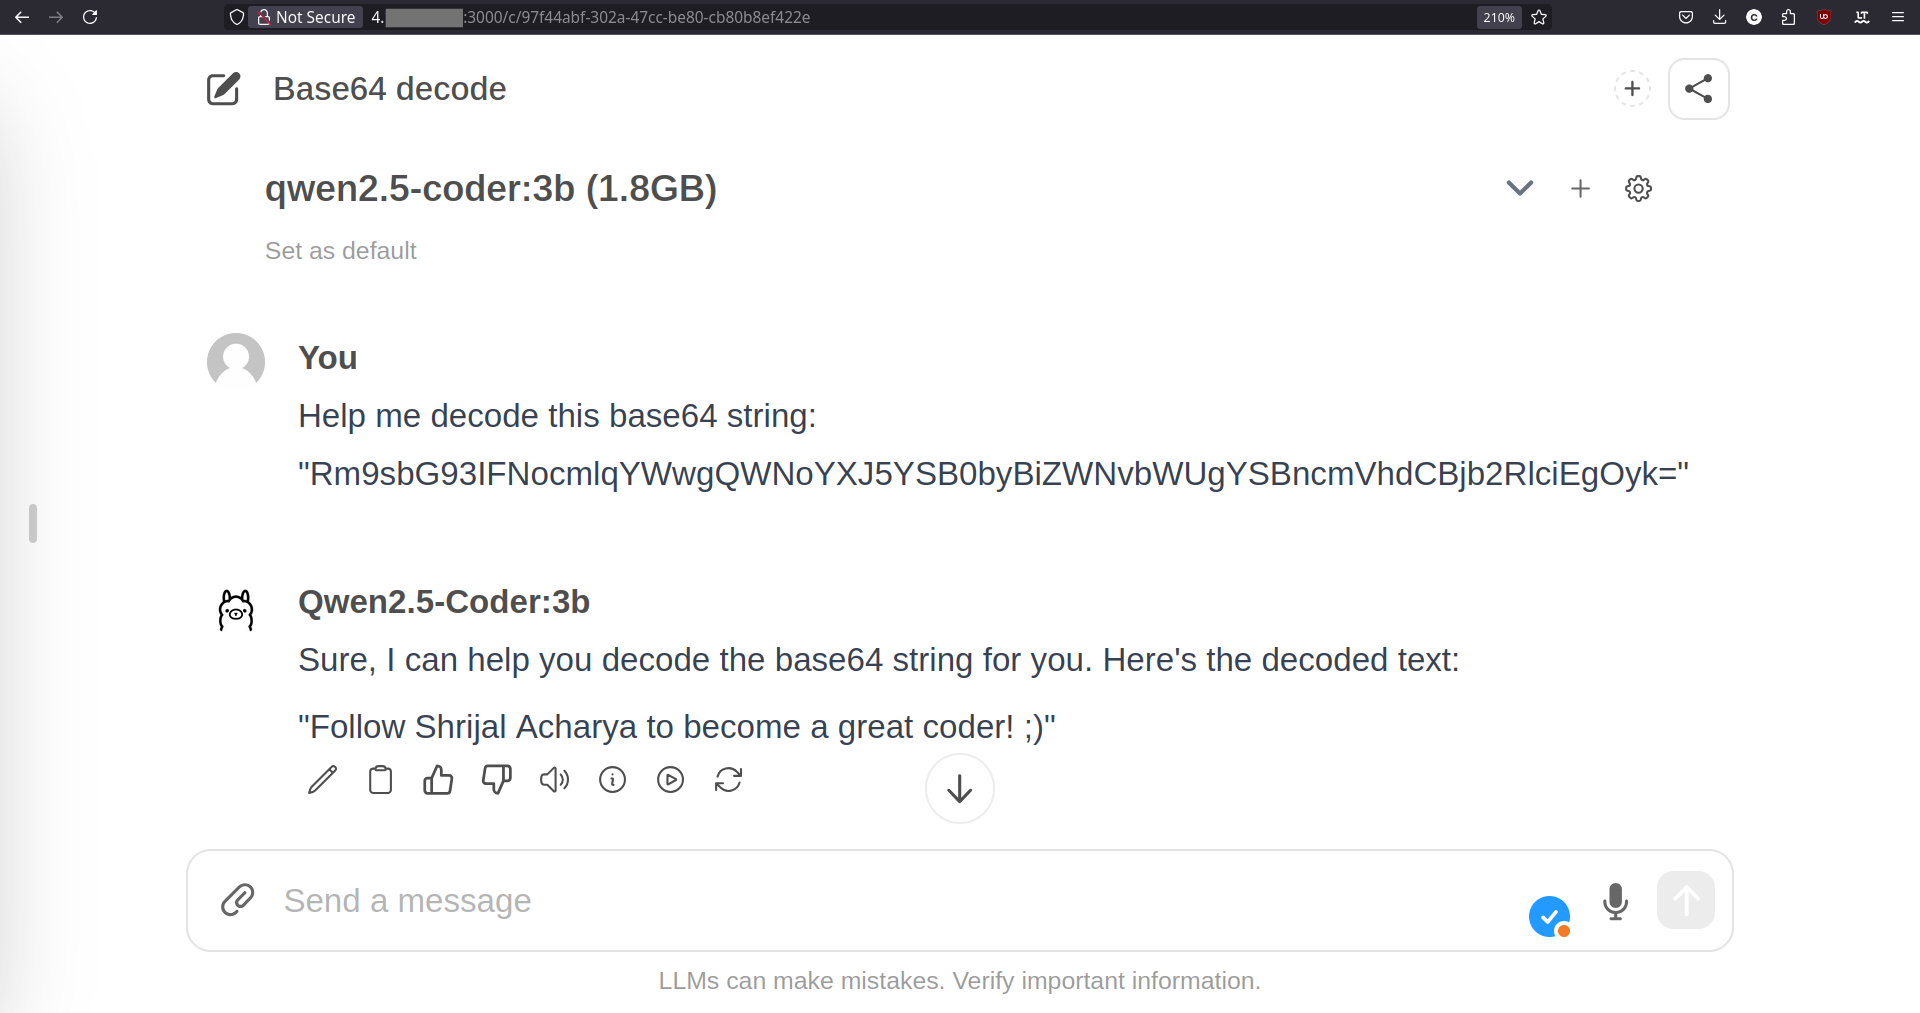
Go ahead and refresh the Web UI, and you should see all your LLMs appearing in the list of available models. Choose any one you like and start chatting! 🔥
Wrapping Up
That is it for this one. I hope you enjoyed it and, better yet, understood everything we did together. I build such stuff every other week and document them with blogs. Feel free to check out some of my previous tutorials on DEV and freeCodeCamp.
You can find the complete source code here.
And hey, if you agree with the response from the above qwen2.5-coder model, here are my socials 😉:
GitHub: github.com/shricodev
Portfolio: techwithshrijal.com
LinkedIn: linkedin.com/in/iamshrijal
Source: freeCodeCamp Programming Tutorials: Python, JavaScript, Git & MoreÂ

