


I’ve been coding for about a decade now. And over the years, I’ve tried my fair share of development tools—especially IDEs like Sublime Text, Atom, and even NetBeans back in my college days. But when VS Code came along, it completely changed the game for me. It’s lightweight, fast, and packed with features that just make life easier as a developer. It quickly became my favourite tool.
With all the recent advancements in AI, I wanted to build something that’s not just fun but also a meaningful learning experience. That’s how this project was born—a simple Replit-inspired clone for the web. It combines AI to generate code, lets you run React files, and displays the output seamlessly, just like Replit. On top of that, you can edit files and save your work in real-time, so nothing ever gets lost.
What we’ll cover:
Prerequisites & Tools
In this tutorial, we’ll build an AI-powered Replit clone—a web-based IDE. This IDE will enable you to generate React code files, edit them in a VSCode-like environment, preview the final output, and save the code in real time. It will also support CRUD operations on the generated files.
For this project, I’ll leverage some tools I’ve used in the past, including those from my SQL Query Data Extractor project. Below are the tools and technologies we’ll use:
Database
The database is the backbone of any application—it stores data and serves it as needed. For this project, I’ll use my all-time favourite, MongoDB Atlas.
I chose MongoDB Atlas because it integrates seamlessly with Next.js, and since it’s a cloud-based database, I don’t need to host it manually—making it a plug-and-play solution. Performing CRUD operations with MongoDB Atlas is straightforward and efficient.
Code Editor
The code editor is the core of this project, as it powers the IDE experience. For this, I’ll use the legendary Monaco Editor, the same editor that drives VSCode. Monaco Editor handles files effortlessly and supports a wide range of file types. In this project, it will allow users to view and edit code files.
Code Preview
Once we generate and edit code in the Monaco Editor, we’ll need a way to preview its output. For this, I’ll use CodeSandbox’s Sandpack, a free and powerful tool for live code previews.
Sandpack supports various frameworks and file types, whether you’re working with static HTML/CSS files or frameworks like React. It displays files and their real-time output seamlessly.
AI Agent
The AI Agent will be responsible for generating code using Natural Language Processing (NLP). Acting as a bridge between your ideas and the code, it will take user prompts and translate them into functional code files.
For this, I’ll use CopilotKit, my favourite free and open-source tool for AI-powered code generation. CopilotKit will take your ideas and create the corresponding code files based on your input.
AI Model
The AI Agent relies on an underlying AI model to process user inputs and generate code. For this project, I’ll use GroqAI, a flexible and reliable platform that supports various popular AI models. GroqAI’s versatility makes it perfect for this project’s requirements.
Next.js
To build a robust web application that combines both frontend and backend functionalities, I’ll use Next.js. It’s an excellent framework for creating scalable applications, offering server-side rendering and other powerful features that are ideal for this project.
Deployment
For deployment, you can choose any service. I prefer Vercel, as it integrates seamlessly with Next.js and is free for hobby projects.
By combining these tools, you’ll build a powerful, user-friendly application that effortlessly produces the code and provides a live preview like Replit does.
What We’ll Do Here
In this tutorial, you’ll follow these steps to build our app:
Step 1 – Set Up the Database:
Set up a database either locally or on the cloud. For seamless integration, use an online database tool that supports data access and extraction via REST APIs.
Step 2 – Obtain Cloud API Keys:
Retrieve the necessary API keys for your AI model to enable smooth and secure integration.
Step 3 – Build the Web Application:
Develop a web application and configure the backend to integrate CopilotKit. Ensure it’s properly set up for efficient functionality.
Step 4 – Train CopilotKit with Your Database:
Provide your database data to CopilotKit so it can understand and utilize the information for natural language processing.
Step 5 – Integrate the CopilotKit Chat Interface:
Embed the CopilotKit chat interface into your application and configure it to work seamlessly with your app’s workflow.
Step 6 – Test Locally:
Run the application on your local machine, thoroughly testing each feature to identify and resolve any issues.
Step 7 – Deploy the Application:
Once testing is complete and the app is working as expected, deploy it to a hosting platform for public use.
How Does the App Work?

This project is a fun experiment and a step toward my long-term goal of building something around code editors, particularly inspired by VSCode.
The real magic happens with CopilotKit. As soon as you input an idea into CopilotKit, it uses predefined system prompts that adapt to your project requirements. These prompts allow CopilotKit to interpret plain English instructions and transform them into meaningful outputs. In this tutorial, I’ll show you how to configure these system prompts effectively to maximize results.
For example, if you enter the idea “build a simple React app”, CopilotKit passes that idea to the integrated AI model. The AI model, working in coordination with CopilotKit’s system prompts, generates the necessary code files based on your input.
The generated files are then displayed in the File Explorer on the left side of the screen. You can easily browse through the files created by CopilotKit.
To preview the code, simply click on a file like App.js. The file’s code will load into the Monaco Editor on the left, while the Sandpack preview on the right will render a real-time output of the file.
You can now experiment with the files—tweak the code, change colours, fonts, or text, and even write your own logic, just like working with regular HTML, CSS, or React files. Any changes you make will be saved in real time to the database. So even if you accidentally close the project, your progress will be intact. Simply refresh the page, and your code will be right where you left it.
How to Set Up Your Tools
Now we’ll go through everything you need to set up the project.
Install Next.js and dependencies:
First, you’ll need to create a Next.js app. Go to the terminal and run the following command:
npx create-next-app@latest my-next-app
Replace my-next-app with your desired project name and use TypeScript.
Navigate to the project folder:
cd my-next-app
Start the development server:
npm run dev
Open your browser and navigate to http://localhost:3000 to see your Next.js app in action.
Install CopilotKit and dependencies
Navigate to the project’s root folder in the terminal and run the following command. This will install all the necessary dependencies for CopilotKit along with other essential packages, such as dotenv, groq-sdk, sandpack, Monaco Editor, Lucide React, Socket and Mongoose.
npm install @copilotkit/react-ui @copilotkit/react-core
npm install dotenv
npm install groq-sdk
npm install @codesandbox/sandpack-react
npm install @monaco-editor/react
npm install lucide-react
npm install mongoose
npm install socket.io
npm install socket.io-client
-
CopilotKit: This dependency handles all operations and configurations related to CopilotKit.
-
Dotenv: Used for managing environment variables, and keeping sensitive keys secure within the project.
-
GroqSDK: Facilitates access to various LLM models through a single API key.
-
CodeSandbox Sandpack (React): Provides the ability to display real-time previews of the code.
-
Monaco Editor: Powers the VSCode-like environment, enabling real-time code editing.
-
Lucide React: An icon library used to display icons for files and folders.
-
Mongoose: Manages MongoDB schemas for storing and retrieving data from the database.
-
socket.io: A very powerful tool for real-time data syncing between client and server.
-
socket.io client: Extra socket.io client package for data communication.
Set Up the LLM for Action:
This step is crucial for the project, as it involves setting up the LLM (Large Language Model) to convert natural language (plain English) queries into a React framework working code.
There are many LLMs available, each with its unique strengths. Some are free, while others are paid, making the selection process for this project a bit challenging.
After thorough experimentation, I chose the Groq Adapter because:
-
It integrates multiple LLMs into a single platform.
-
It offers access via a unified API key.
-
It’s fully compatible with CopilotKit.
How to Set Up Groq Cloud
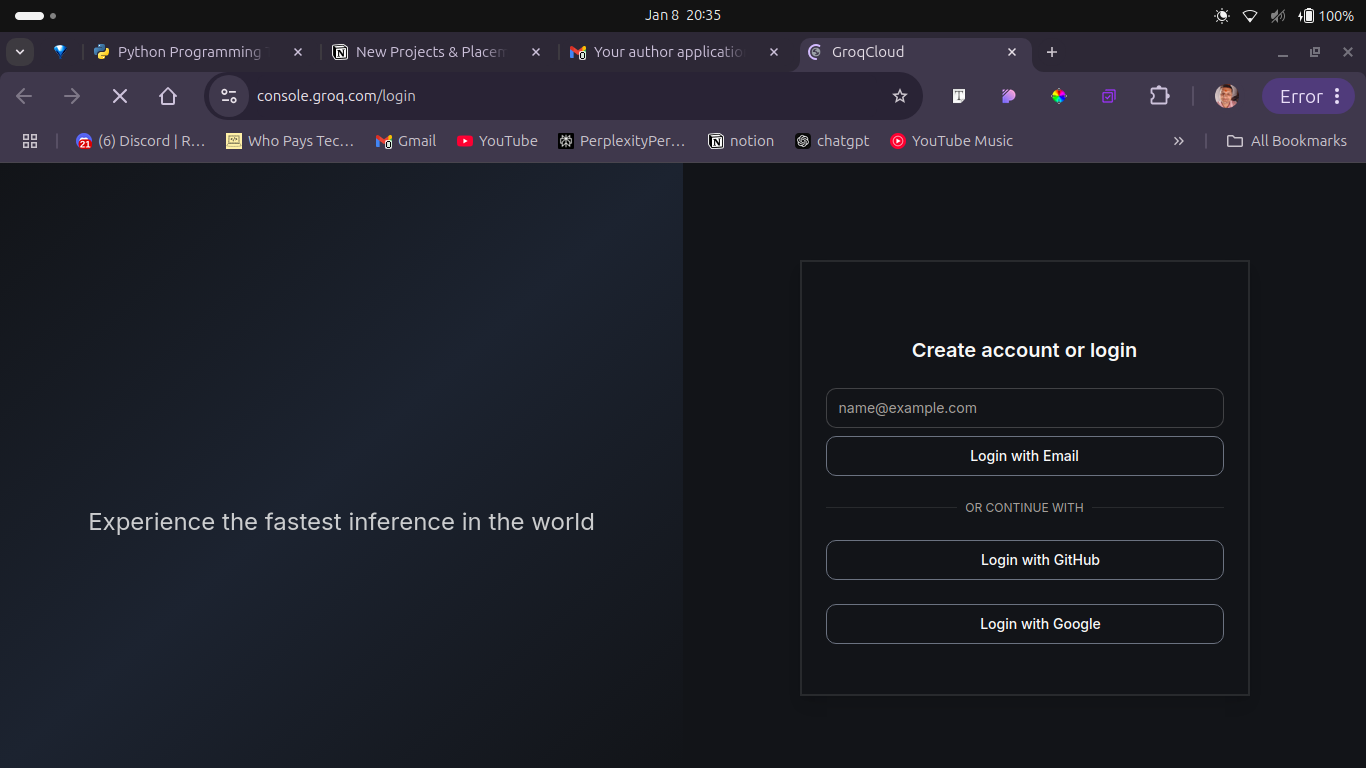
To get started with Groq Cloud, visit its website and either log in if you already have an account or create a new account if you’re new. Once logged in, navigate to the Groq Dashboard.
This is the homepage of Groq cloud:
Once logged in, a new page will open that’ll look like this:
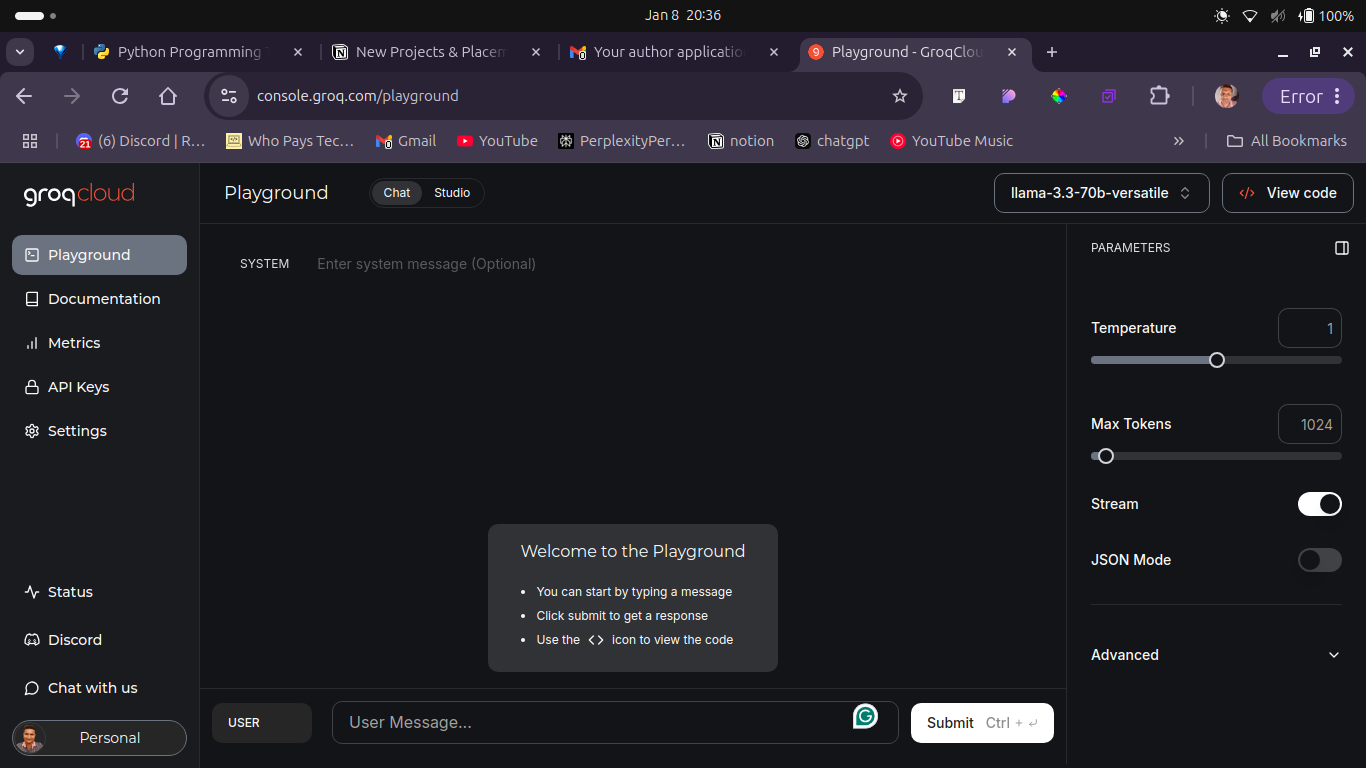
As you can see, the sidebar has an API Keys link. Click on it, and it will open a new page as shown in the image below. You can also select any LLM of your choice which is given at the top right before the view code option.

Here, click on the Create API Key button it will open a pop up like you see below. Just enter the name of your API key and click on Submit to create a new API key for you. Then copy this API key and paste it inside your .env file.
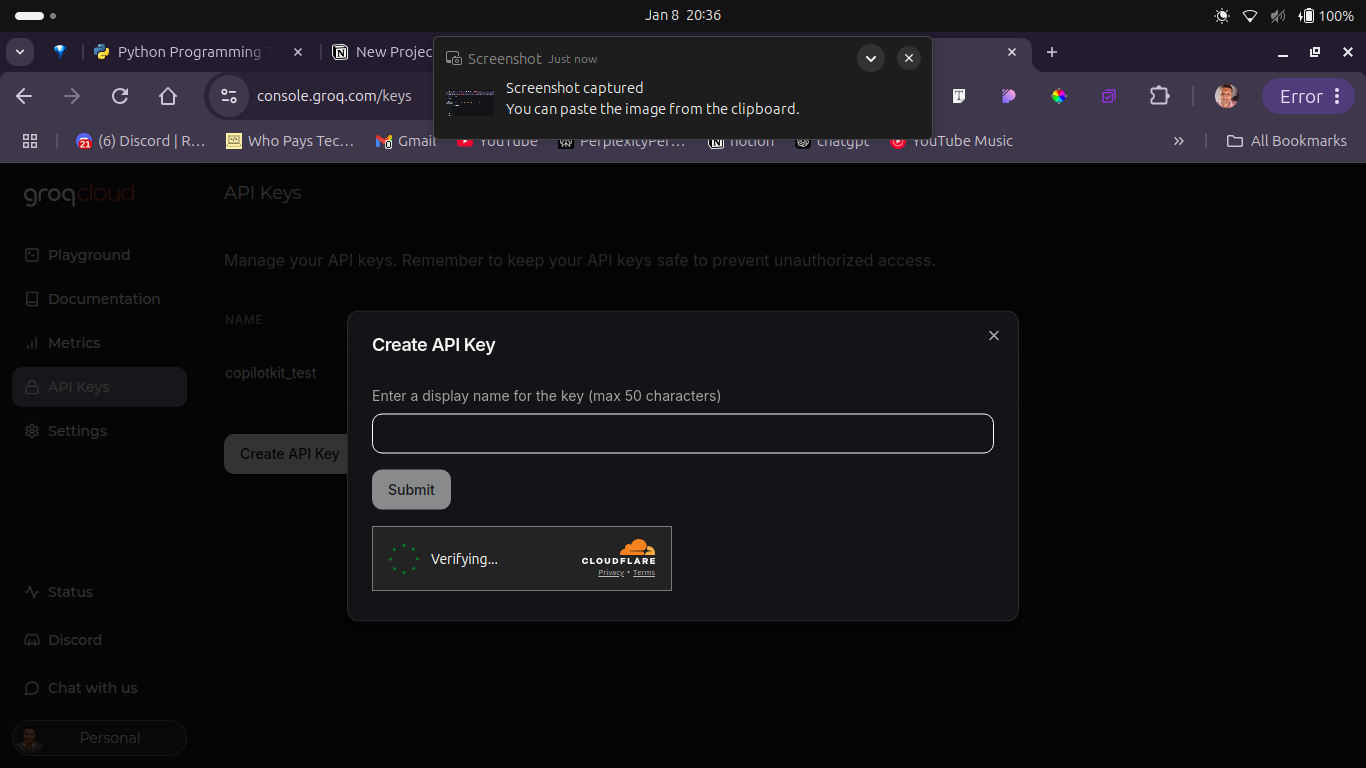
To enable seamless access to various LLMs on Groq Cloud, generate an API key by going to the Groq API Keys section. Create a new API key specifically for the LLM, ensuring that it is properly configured.
With the LLM set-up and all components ready, you are now prepared to build the project.
How to setup the database
Step 1: Create a MongoDB Atlas Account
-
Go to the MongoDB Atlas website.
-
Click on “Try Free” or “Sign Up”.
-
Fill in your details (name, email, password) to create an account.
-
Verify your email address by clicking the link sent to your inbox.

Step 2: Create a New Project
-
After logging in, you will be directed to the MongoDB Atlas dashboard.
-
Click on the “New Project” button. This will take you to the Create a Project page.

-
Fill in the Project name and click on the next button, and it will open a new page to show the project owner’s information.

-
Now click on the Create Project Button. This will take you to the main dashboard of the project where you will get the option to create the database.

-
Now Click on the Create Button to open a new page with details of deploying your cluster.
-
Choose a cloud provider (AWS, Google Cloud, or Azure) and a region closest to your location.
-
Select the “Free Tier” (free forever, but with limited resources) or a paid tier for larger projects.

-
Give your cluster a name (for example,
MyCluster). -
Click “Create Deployment”. It will take a few minutes for the cluster to be provisioned.
-
Then It will ask you to connect your cluster to the database through a service. You should see your username and password – keep this somewhere.

-
Here, you will have to make yourself a database user, so click on the Create Database user button.
-
It will take a few seconds to complete this process. Once it’s done, close the pop-up and return back to the dashboard.
-
On the dashboard page you can see Get Connection String button. Go on and click on it.

-
It will open a new popup containing your MongoDB atlas URI. Simply copy the string, put it into your
.envfile and use the password you created in step 14.
Example use case :
//.env file
MONGODB_URI='YOUR MONGODB URL'
Structure and Features of the App
The focus of this project is on simplicity and functionality, to replicate Replit’s core features like code editing and real-time previews. The idea is to create a straightforward web application that lets you:
-
Host three essential components: a File Explorer, the Monaco Editor, and a Sandbox.
-
Open files generated by CopilotKit in the Monaco Editor and perform CRUD operations on them.
-
See the real-time output of your code as you work.
-
Chat with the CopilotKit chatbot, which will be fully integrated into the front end.
The plan is to keep the implementation clean and practical while delivering a smooth coding experience.
Webpage Structure
Since we’ve already set up the Next.js app, the next step is to create a minimalistic webpage with the following components:
-
File Explorer: Displays the files generated by CopilotKit.
-
Monaco Editor: A versatile code editor that handles various file types and displays the content.
-
Sandbox: Shows the real-time output of the code.
-
CopilotKit Chatbot: Generates code files based on natural language prompts.
Key Features
-
Error Handling: Any failures, such as API or database issues, will be highlighted with red text for immediate visibility.
-
Data Presentation: Data is presented in two parts: first in the File Explorer for code files, and second in the Monaco Editor for viewing the content of those files.
-
CopilotKit Chatbot Integration: The chatbot will allow natural language interactions with the database. The blue-coloured ball on the page represents the CopilotKit chatbot, which serves as the key interface for interacting with the database.
-
Users can ask questions about the database using natural language.
-
The chatbot processes these queries, converts them into SQL, and fetches the results seamlessly.
-
The front end will look something like this: https://replit-mongodb.vercel.app/
How to Build the Back End
Before we start building the back end, you’ll need to put all important credentials into your .env file, which should look like this:
NEXT_PUBLIC_GROQ_CLOUD_API_KEY=<your-key-here>
MONGODB_URI=<your-mongodb-url>
These are environment variables used to configure sensitive or environment-specific settings in an application:
-
NEXT_PUBLIC_GROQ_CLOUD_API_KEY:-
This is a public API key for accessing the Groq Cloud API.
-
It is prefixed with
NEXT_PUBLIC_, which means it is exposed to the client-side code in a Next.js application. -
Replace
<your-key-here>with the actual API key provided by Groq Cloud.
-
-
MONGODB_URI:-
This is the connection string for a MongoDB database.
-
It includes the database URL, credentials, and other connection details.
-
Replace
<your-mongodb-url>with the actual MongoDB connection string.
-
How to Configure the CopilotKit Back End
Open your Next.js app in any code editor—I prefer VSCode—and go to the root folder, which looks like this:

Inside the app folder, make a new folder called api. Inside the API folder, make another folder called copilotkit. Then in there, make a new file called route.js and paste this code inside the file:
import {
  CopilotRuntime,
  GroqAdapter,
  copilotRuntimeNextJSAppRouterEndpoint,
} from "@copilotkit/runtime";

import Groq from "groq-sdk";

const groq = new Groq({ apiKey: process.env.NEXT_PUBLIC_GROQ_CLOUD_API_KEY });

const copilotKit = new CopilotRuntime({
  async onResponse({ message, context }) {
    try {
      // Extract any file operations from the message and process them
      const fileBlocks = message.content.split("---");
      if (fileBlocks.length > 0) {
        // Format the response to use processFiles action
        return {
          content: `@processFiles(response: \`${message.content}\`)`,
        };
      }
      return message;
    } catch (error) {
      console.error("Error in onResponse:", error);
      return message;
    }
  },
});

const serviceAdapter = new GroqAdapter({
  groq,
  model: "llama-3.3-70b-versatile",
  systemPrompt: `You are an AI-powered code generator integrated into a web-based IDE. Your task is to generate project files and code based on user commands.

When generating files, use this exact format:

FILE: filename.ext
CODE:
[code content here]

For multiple files, separate them with "---".

Example response:
I'll create a React component:

FILE: Button.jsx
CODE:
import React from 'react';

const Button = () => {
  return (
    <button className="btn">Click me</button>
  );
};

export default Button;

Important rules:
- Always include both FILE: and CODE: markers
- Use appropriate file extensions
- Generate complete, working code
- Maintain proper indentation
- Explain what you're creating before showing the files
- Make sure code is syntactically correct`,
});

export const POST = async (req) => {
  const { handleRequest } = copilotRuntimeNextJSAppRouterEndpoint({
    runtime: copilotKit,
    serviceAdapter,
    endpoint: "/api/copilotkit",
  });

  return handleRequest(req);
};
Here’s a detailed explanation of each part:
This code defines a CopilotKit Runtime integration with Next.js, designed to process requests for generating and managing code files in a web-based IDE environment. It connects to the Groq cloud service for additional functionalities and processes file-based outputs from AI-generated responses.
This code sets up a CopilotRuntime integration with Groq’s AI model to generate and process code files in response to user requests. Here’s a breakdown:
Key Components:
-
Groq Initialization:
-
The
GroqSDK is initialized using theNEXT_PUBLIC_GROQ_CLOUD_API_KEYenvironment variable. -
The model used is
llama-3.3-70b-versatile.
-
-
CopilotRuntime:
-
A
CopilotRuntimeinstance is created with a customonResponsehandler. -
The
onResponsefunction processes the AI’s response:-
Extracts file blocks (separated by
---) from the message. -
Formats the response to trigger a
processFilesaction if file blocks are detected.
-
-
-
GroqAdapter:
-
A
GroqAdapteris configured to interact with the Groq API. -
It includes a system prompt that instructs the AI to generate code files in a specific format:
-
Files are marked with
FILE:andCODE:. -
Multiple files are separated by
---. -
The AI is instructed to generate complete, syntactically correct code with proper explanations.
-
-
-
API Endpoint:
-
A
POSTthe endpoint is exposed using Next.js App Router. -
It uses
copilotRuntimeNextJSAppRouterEndpointto handle incoming requests, passing them to theCopilotRuntimeandGroqAdapter.
-
Example Usage
-
Request
-
A POST request to
/api/copilotkitmight look like this:curl -X POST http://localhost:3000/api/copilotkit -H "Content-Type: application/json" -d '{"command": "Create a React component for a button"}'
-
-
AI Response (Processed by
onResponse)-
AI might return this response:
  FILE: Button.jsx
  CODE:
  import React from 'react';

  const Button = () => {
    return <button>Click me</button>;
  };

  export default Button;
-
-
Response to Client
-
The API wraps the response into the formatted structure:
  {
    "content": "@processFiles(response: `FILE: Button.jsxnCODE:nimport React from 'react';nnconst Button = () => {n  return <button>Click me</button>;n};nnexport default Button;`)"
  }
-
Key Features
-
AI-Powered Code Generation with copilotkit popup:
-
The system generates complete project files based on user instructions.
-
Ensures proper formatting (for example,
FILE:andCODE:markers).
-
-
File Handling:
-
Splits multi-file responses into manageable blocks using
---. -
Supports actions like
@processFilesfor integration with the IDE.
-
-
Scalable API:
- Modular design with
CopilotRuntimeandGroqAdapterallows easy extension and customization.
- Modular design with
-
Error Handling:
-
Logs errors without interrupting the workflow.
-
Defaults to returning the unprocessed message on failure.
-
Making Routes for CRUD Operation
So far, we’ve covered how to integrate CopilotKit into the backend. Now, we need to handle file operations, so we’ll create another route to manage files with the database.
To develop the backend for file handling, I’ll create a new folder inside the API folder and name it files. Inside the files folder, I’ll create a simple route.js file. Here’s the code I’ll be using inside the file:
-
app/api/files/route.tsx -
  import { NextResponse } from "next/server";
  import mongoose from "mongoose";
  import { connectDB, File } from "@/app/lib/mongodb";

  // Type for the request body
  interface FileRequestBody {
    id?: string;
    name?: string;
    content?: string;
  }interface FileCreateRequest {
    name: string;
    content: string;
  }

  interface FileUpdateRequest {
    id: string;
    name?: string;
    content?: string;
  }

  // Fetch all files (GET /api/files)
  export async function GET(): Promise<Response> {
  try {
      await connectDB(); // Ensure DB connection
      const files = await File.find({});
      return NextResponse.json(files, { status: 200 });
    } catch (error) {
      return NextResponse.json(
        { error: "Failed to fetch files" },
        { status: 500 }
      );
    }
  }

  // Create a new file (POST /api/files)
  export async function POST(req: Request): Promise<Response> {
  try {
      await connectDB(); // Ensure DB connection is successful
      // Parse the request body
      const { name, content }: FileRequestBody = await req.json();
      if (!name || !content) {
        throw new Error("Missing required fields: name or content");
      }

      // Log the incoming data for debugging
      console.log("Creating file with data:", { name, content });

      // Create a new file in the database
      const newFile = new File({ name, content });
      await newFile.save();

      // Return the newly created file
      return NextResponse.json(newFile, { status: 201 });
    } catch (error: any) {
      // Log the error for debugging
      console.error("Error creating file:", error);

      return NextResponse.json(
        { error: "Failed to create file", message: error.message },
        { status: 400 }
      );
    }
  }

  // Update file content (PUT /api/files)
  export async function PUT(req: Request): Promise<Response> {
  try {
      await connectDB(); // Ensure DB connection
      const { id, name, content }: FileRequestBody = await req.json();

      // Validate ID format
      if (!id || !mongoose.Types.ObjectId.isValid(id)) {
        return NextResponse.json({ error: "Invalid file ID" }, { status: 400 });
      }

      // Update file name or content if provided
      const updatedFile = await File.findByIdAndUpdate(
        id,
        { ...(name && { name }), ...(content && { content }) },
        { new: true }
      );

      if (!updatedFile) {
        return NextResponse.json({ error: "File not found" }, { status: 404 });
      }

      return NextResponse.json(updatedFile, { status: 200 });
    } catch (error: any) {
      return NextResponse.json(
        { error: "Failed to update file" },
        { status: 400 }
      );
    }
  }

  // Delete a file (DELETE /api/files)
  export async function DELETE(req: Request): Promise<Response> {
  try {
      await connectDB(); // Ensure DB connection
      const { id }: FileRequestBody = await req.json();

      // Validate ID format
      if (!id || !mongoose.Types.ObjectId.isValid(id)) {
        return NextResponse.json({ error: "Invalid file ID" }, { status: 400 });
      }

      await File.findByIdAndDelete(id);
      return NextResponse.json(
        { message: "File deleted successfully" },
        { status: 200 }
      );
    } catch (error: any) {
      return NextResponse.json(
        { error: "Failed to delete file" },
        { status: 400 }
      );
    }
  }
Code explanation :
This code defines API routes for handling CRUD operations (Create, Read, Update, Delete) on a MongoDB collection called File in a Next.js application. Each route is connected to MongoDB using Mongoose and we used NextResponse to format the responses.
Code Breakdown
1. Imports
import { NextResponse } from "next/server";
import mongoose from "mongoose";
import connectDB from "@/app/lib/mongodb"; //we made this file
import File from "@/app/lib/models/File"; //we made this file
-
NextResponse: Used for creating HTTP responses in Next.js API routes. -
connectDB: Connects to the MongoDB database. -
File: A Mongoose model representing theFilecollection.
2. Fetch All Files (GET)
export async function GET() {
  await connectDB(); // Ensure DB connection
  try {
    const files = await File.find({}); // Fetch all files
    return NextResponse.json(files, { status: 200 }); // Return files in JSON format
  } catch (error) {
    return NextResponse.json(
      { error: "Failed to fetch files" },
      { status: 500 }
    );
  }
}
-
Purpose: Retrieves all documents in the
Filecollection. -
Flow:
-
Connects to MongoDB.
-
Uses
File.find({})to fetch all files. -
Returns the files with a
200status or an error with a500status.
-
3. Create a New File (POST)
export async function POST(req) {
  await connectDB(); // Ensure DB connection

  try {
    const { name, content } = await req.json(); // Parse the request body
    if (!name || !content) {
      throw new Error("Missing required fields: name or content");
    }

    const newFile = new File({ name, content }); // Create new file
    await newFile.save(); // Save to MongoDB

    return NextResponse.json(newFile, { status: 201 }); // Return the new file
  } catch (error) {
    return NextResponse.json(
      { error: "Failed to create file", message: error.message },
      { status: 400 }
    );
  }
}
-
Purpose: Creates a new document in the
Filecollection. -
Flow:
-
Parses the
nameandcontentfields from the request body. -
Validates the required fields.
-
Creates and save the file in MongoDB.
-
Returns the new file with a
201status or an error with a400status.
-
4. Update a File (PUT)
export async function PUT(req) {
  await connectDB(); // Ensure DB connection
  try {
    const { id, name, content } = await req.json();

    if (!mongoose.Types.ObjectId.isValid(id)) {
      return NextResponse.json({ error: "Invalid file ID" }, { status: 400 });
    }

    const updatedFile = await File.findByIdAndUpdate(
      id,
      { ...(name && { name }), ...(content && { content }) },
      { new: true }
    );

    if (!updatedFile) {
      return NextResponse.json({ error: "File not found" }, { status: 404 });
    }

    return NextResponse.json(updatedFile, { status: 200 });
  } catch (error) {
    return NextResponse.json(
      { error: "Failed to update file" },
      { status: 400 }
    );
  }
}
-
Purpose: Updates an existing document in the
Filecollection. -
Flow:
-
Parses the
id,name, andcontentfrom the request body. -
Validates the
idusing Mongoose’sObjectId. -
Updates the document using
File.findByIdAndUpdate()(updates only provided fields). -
Returns the updated document with a
200status, or an error with400or404.
-
5. Delete a File (DELETE)
export async function DELETE(req) {
  await connectDB(); // Ensure DB connection
  try {
    const { id } = await req.json();

    if (!mongoose.Types.ObjectId.isValid(id)) {
      return NextResponse.json({ error: "Invalid file ID" }, { status: 400 });
    }

    await File.findByIdAndDelete(id); // Delete the document
    return NextResponse.json(
      { message: "File deleted successfully" },
      { status: 200 }
    );
  } catch (error) {
    return NextResponse.json(
      { error: "Failed to delete file" },
      { status: 400 }
    );
  }
}
-
Purpose: Deletes a document from the
Filecollection. -
Flow:
-
Parses the
idfrom the request body. -
Validates the
idformat. -
Uses
File.findByIdAndDelete()to remove the document. -
Returns a success message with a
200status or an error with400.
-
Example API Requests: How to test API in local
-
GET All Files
curl -X GET http://localhost:3000/api/files -
Create a File (POST)
curl -X POST http://localhost:3000/api/files -H "Content-Type: application/json" -d '{"name": "example.txt", "content": "This is a test file"}' -
Update a File (PUT)
curl -X PUT http://localhost:3000/api/files -H "Content-Type: application/json" -d '{"id": "64ffab67c728f51234567890", "name": "updated.txt", "content": "Updated content"}' -
Delete a File (DELETE)
 curl -X DELETE http://localhost:3000/api/files
 -H "Content-Type: application/json"
 -d '{"id": "64ffab67c728f51234567890"}'
Creating MongoDB Schemas
Now, create a lib folder inside the app folder. This lib folder will handle essential database tasks, such as database schema and connectivity. Inside the lib folder, create another folder named models. Within this models folder, create a new file called File.js and paste the following code into it.
This version simplifies the instructions and improves clarity while maintaining the original meaning.
import mongoose, { Schema, Document, Model } from "mongoose";

// Define an interface for the file document
interface IFile extends Document {
  name: string;
  content: string;
  createdAt: Date;
  updatedAt: Date;
}

// Define the schema for the file model
const fileSchema = new Schema<IFile>(
  {
    _id: { type: Schema.Types.ObjectId, auto: true }, // MongoDB default _id
    name: { type: String, required: true }, // Removed unique constraint
    content: { type: String, required: true },
  },
  { timestamps: true } // Automatically adds createdAt & updatedAt
);

// Export the File model with type safety
const File: Model<IFile> =
  mongoose.models.File || mongoose.model<IFile>("File", fileSchema);

export default File;
Code Explanation
This code defines a Mongoose schema and model for a File collection in a MongoDB database. It specifies the structure and rules for documents in the collection.
This code defines a Mongoose schema and model for a File document in MongoDB. Here’s a brief explanation:
Key Components:
-
Interface (
IFile):-
Defines the structure of a
Filedocument with:-
name(string, required). -
content(string, required). -
createdAtandupdatedAt(automatically managed by Mongoose).
-
-
-
Schema (
fileSchema):-
Maps the
IFileinterface to a MongoDB schema. -
Includes:
-
_id: Auto-generated MongoDB ObjectId. -
nameandcontent: Required fields. -
timestamps: true: Automatically addscreatedAtandupdatedAtfields.
-
-
-
Model (
File):-
Creates or retrieves the Mongoose model for the
Filecollection. -
Ensures type safety using the
IFileinterface.
-
Connecting to database
Half of the work is done! Now, it’s time to connect our app to the database. To do this, I’ll create a new file inside the lib folder, where we previously created the database schema. I’ll name the file mongodb.tsx and paste the following code inside it:
import mongoose, { Schema, Model, Connection } from "mongoose";
import { IFile } from "../types";

// Define mongoose connection URI
const MONGODB_URI = process.env.MONGODB_URI;

if (!MONGODB_URI) {
  throw new Error(
    "Please define the MONGODB_URI environment variable inside .env.local"
  );
}

let cached: {
  conn: Connection | null;
  promise: Promise<Connection> | null;
} = { conn: null, promise: null };

export async function connectDB(): Promise<Connection> {
  if (cached.conn) {
    return cached.conn;
  }

  if (!cached.promise) {
    cached.promise = mongoose.connect(MONGODB_URI!).then((mongoose) => {
      return mongoose.connection;
    });
  }

  try {
    cached.conn = await cached.promise;
  } catch (e) {
    cached.promise = null;
    throw e;
  }

  return cached.conn;
}

// Define the schema for the file model
const fileSchema = new Schema<IFile>(
  {
    name: { type: String, required: true },
    content: { type: String, required: true },
  },
  {
    timestamps: true,
  }
);

// Export the File model with type safety
export const File = (mongoose.models.File ||
mongoose.model<IFile>("File", fileSchema)) as Model<IFile>;
Code Explanation
This code sets up a MongoDB connection using the mongoose library in a Node.js or Next.js application. It ensures that the database is connected efficiently and prevents redundant connections.
This code sets up a MongoDB connection and defines a Mongoose schema and model for a File document. Here’s a brief explanation:
Key Components:
-
MongoDB Connection:
-
Uses the
MONGODB_URIenvironment variable to connect to MongoDB. -
Implements a caching mechanism to reuse the connection and avoid multiple connections.
-
Throws an error if
MONGODB_URIis not defined.
-
-
Schema (
fileSchema):-
Defines the structure of a
Filedocument with:-
name(string, required). -
content(string, required).
-
-
Automatically adds
createdAtandupdatedAttimestamps.
-
-
Model (
File):-
Creates or retrieves the Mongoose model for the
Filecollection. -
Ensures type safety using the
IFileinterface.
-
Example Directory Structure:
/project
  /pages
    /api
      test.js
  /utils
    connectDB.js
  .env.local
Final Notes:
-
This code avoids multiple MongoDB connections by checking the
readyState. -
It’s reusable and modular, making it easy to maintain.
-
Always secure the
MONGODB_URIin-environment variables to avoid exposing sensitive credentials.
Ensuring type safety
Since we are using TypeScript, we will have to declare the file type files , socket and an index. To do so, create a new folder in root directory of the project and name it types and make three files socket.ts ,files.ts and index.ts inside the folder. Inside each file, paste the given code for their respective file.
//index.ts
export interface IFile {
  _id: string;
  name: string;
  content: string;
  createdAt?: Date;
  updatedAt?: Date;
}
//socket.ts
import { FileData } from '../types/file';

export interface ServerToClientEvents {
"new-file": (file: FileData) => void;
"delete-file": (fileId: string) => void;
"file-update": (data: { fileId: string; content: string }) => void;
}

export interface ClientToServerEvents {
"new-file": (file: FileData) => void;
"delete-file": (fileId: string) => void;
"file-update": (data: { fileId: string; content: string }) => void;
}
//file.ts
export interface FileData {
_id: string;
name: string;
content: string;
}
How to Build the Front End
For the front end, we’ll keep it simple, aiming for a UI that closely resembles Replit. The key components we need for this project are a File Explorer, Monaco Editor, and Sandbox component.
-
File Explorer: This component will display and manage the code files, positioned on the left side of the screen.
-
Monaco Editor: This component will allow users to view and edit the content of the code files.
-
Sandbox: This component will render the live preview of the content inside the code files.
To build these components, we won’t use any third-party UI libraries; instead, we’ll rely solely on TailwindCSS, which is pre-configured with Next.js.
Now, let’s build the components:
-
Open your VS Code.
-
Open the Next.js folder where you created your project.
Since I work without a
srcfolder, you’ll find only anappfolder. Inside theappfolder, create a new folder called components.
-
After creating the folder, your project structure should look something like this:
-
FileExplorer.js –This is our file explorer
-
ScreenOne.js- This is our Monaco editor
-
LivePreview.js- This is our sandbox component
Let’s see how I build these components and you can too,
FileExploer.tsx
The FileExplorer is a React component that displays a list of files fetched from a backend (MongoDB) and allows users to select, create, edit, and delete files. It uses React Hooks for state management and lifecycle effects, Tailwind CSS for styling, and lucide-react icons for UI actions.
import React, { useEffect, useState } from "react";
import { Plus, Trash2, Pencil } from "lucide-react";
import io, { Socket } from "socket.io-client";
import { FileData } from '../types/file';

interface FileExplorerProps {
files: FileData[];
onFileSelect: (file: FileData) => void;
currentFile: FileData | null;
}

const FileExplorer: React.FC<FileExplorerProps> = ({
files: initialFiles,
onFileSelect,
currentFile,
}) => {
const [files, setFiles] = useState<FileData[]>(initialFiles);
  const [socket, setSocket] = useState<Socket | null>(null);
  const [loading, setLoading] = useState<boolean>(true);
  const [error, setError] = useState<string | null>(null);
  const [newFileName, setNewFileName] = useState<string>("");
  const [editingFile, setEditingFile] = useState<string | null>(null);
  const [editedFileName, setEditedFileName] = useState<string>("");

  // Initialize socket connection
  useEffect(() => {
    const socketInstance = io("http://localhost:3000", {
      reconnection: true,
      reconnectionAttempts: 5,
      reconnectionDelay: 1000,
    });

    socketInstance.on("connect", () => {
      console.log("Connected to Socket.IO server");
    });

    socketInstance.on("connect_error", (error) => {
      console.error("Socket connection error:", error);
    });

    socketInstance.on("disconnect", () => {
      console.log("Disconnected from Socket.IO server");
    });

    setSocket(socketInstance);

    return () => {
      if (socketInstance) {
        socketInstance.disconnect();
      }
    };
  }, []);

  useEffect(() => {
    if (!socket) return;

    // Listen for real-time updates
    socket.on("new-file", (newFile: FileData) => {
      setFiles((prevFiles) => {
        if (!prevFiles.some((file) => file._id === newFile._id)) {
          return [...prevFiles, newFile];
        }
        return prevFiles;
      });
    });

    socket.on("delete-file", (fileId: string) => {
      setFiles((prevFiles) => prevFiles.filter((file) => file._id !== fileId));
    });

    socket.on("update-file", (updatedFile: FileData) => {
      setFiles((prevFiles) =>
        prevFiles.map((file) =>
          file._id === updatedFile._id
            ? { ...file, name: updatedFile.name }
            : file
        )
      );
    });

    return () => {
      socket.off("new-file");
      socket.off("delete-file");
      socket.off("update-file");
    };
  }, [socket]);

  // Fetch initial files
  const fetchFiles = async () => {
    try {
      const response = await fetch("/api/files");
      if (!response.ok) throw new Error("Failed to fetch files");
    const data: FileData[] = await response.json();
      setFiles(data);
    } catch (error) {
      console.error("Error fetching files:", error);
      setError("Failed to load files");
    } finally {
      setLoading(false);
    }
  };

  useEffect(() => {
    fetchFiles();
  }, []);

  // Create new file
  const createNewFile = async () => {
    if (!newFileName.trim()) return;
    try {
      const response = await fetch("/api/files", {
        method: "POST",
        headers: { "Content-Type": "application/json" },
        body: JSON.stringify({ name: newFileName }),
      });

      if (!response.ok) throw new Error("Failed to create file");

    const newFile: FileData = await response.json();
      socket?.emit("new-file", newFile);
      setNewFileName("");
    } catch (error) {
      console.error("Error creating file:", error);
    }
  };

  const handleDeleteFile = async (e: React.MouseEvent, id: string) => {
    e.stopPropagation();
    setFiles((prevFiles) => prevFiles.filter((file) => file._id !== id)); // Optimistic update

    try {
      const response = await fetch("/api/files", {
        method: "DELETE",
        headers: { "Content-Type": "application/json" },
        body: JSON.stringify({ id }),
      });

      if (!response.ok) throw new Error("Failed to delete file");

      socket?.emit("delete-file", id);
    } catch (error) {
      console.error("Error deleting file:", error);
      await fetchFiles(); // Revert state if API call fails
    }
  };

const handleEditStart = (e: React.MouseEvent, file: FileData) => {
    e.stopPropagation();
    setEditingFile(file._id);
    setEditedFileName(file.name);
  };

  const handleEditSave = async (
    e: React.FocusEvent | React.KeyboardEvent,
    id: string
  ) => {
    e.preventDefault();
    if (!editedFileName.trim()) return;

    const previousFiles = [...files];
    setFiles((prevFiles) =>
      prevFiles.map((file) =>
        file._id === id ? { ...file, name: editedFileName } : file
      )
    ); // Optimistic update

    try {
      const response = await fetch("/api/files", {
        method: "PUT",
        headers: { "Content-Type": "application/json" },
        body: JSON.stringify({ id, name: editedFileName }),
      });

      if (!response.ok) throw new Error("Failed to update file");

    const updatedFile: FileData = await response.json();
      socket?.emit("update-file", updatedFile);
      setEditingFile(null);
    } catch (error) {
      console.error("Error updating file:", error);
      setFiles(previousFiles); // Revert state if API call fails
    }
  };

  return (
    <div className="w-64 bg-gray-900 p-4 h-full text-white rounded-lg shadow-lg flex flex-col">
      <h2 className="text-lg font-semibold mb-4">Files</h2>

      {loading ? (
        <div className="text-gray-400 text-sm">Loading files...</div>
      ) : error ? (
        <div className="text-red-500 text-sm">{error}</div>
      ) : files.length === 0 ? (
        <div className="text-gray-400 text-sm">No files yet</div>
      ) : (
        <div className="space-y-2 overflow-y-auto flex-grow">
          {files.map((file) => (
            <div
              key={file._id}
              className={`cursor-pointer flex justify-between items-center p-2 rounded text-white transition-all duration-200 ${
                currentFile?._id === file._id
                  ? "bg-blue-600"
                  : "hover:bg-gray-700"
              }`}
              onClick={() => onFileSelect(file)}
            >
              {editingFile === file._id ? (
                <input
                  type="text"
                  value={editedFileName}
                onChange={(e: React.ChangeEvent<HTMLInputElement>) => setEditedFileName(e.target.value)}
                onBlur={(e: React.FocusEvent<HTMLInputElement>) => handleEditSave(e, file._id)}
                onKeyDown={(e: React.KeyboardEvent<HTMLInputElement>) =>
                e.key === "Enter" ? handleEditSave(e, file._id) : null
                }
                  autoFocus
                  className="bg-gray-800 text-white p-1 rounded outline-none w-32"
                />
              ) : (
                <span className="truncate flex-grow">📄 {file.name}</span>
              )}

              <div className="flex items-center gap-2">
                <button
                onClick={(e: React.MouseEvent) => handleEditStart(e, file)}
                  className="text-yellow-400 hover:text-yellow-600 p-1 rounded"
                >
                  <Pencil size={16} />
                </button>
                <button
                onClick={(e: React.MouseEvent) => handleDeleteFile(e, file._id)}
                  className="text-red-400 hover:text-red-600 p-1 rounded"
                >
                  <Trash2 size={16} />
                </button>
              </div>
            </div>
          ))}
        </div>
      )}


    </div>
  );
};

export default FileExplorer;
Code Explanation
Brief Explanation of the Code
The FileExplorer component is a React component designed to manage and display a list of files in real time. It uses Socket.IO for real-time updates, allowing users to add, delete, and edit files dynamically.
Key Features:
1. State Management
The component uses React’s useState Hook to manage the following states:
-
files: List of files displayed in the File Explorer. -
socket: The active Socket.IO connection. -
loading&error: Manage the state of file loading. -
newFileName,editingFile, andeditedFileName: Manage file creation and editing processes.
const [files, setFiles] = useState([]);
const [socket, setSocket] = useState(null);
const [loading, setLoading] = useState(true);
const [error, setError] = useState(null);
const [newFileName, setNewFileName] = useState("");
const [editingFile, setEditingFile] = useState(null);
const [editedFileName, setEditedFileName] = useState("");
2. Socket.IO Integration
-
Establishes a real-time connection to a Socket.IO server.
-
Listens for events like
new-file,delete-file, andupdate-fileto update the file list dynamically. -
Cleans up the socket connection when the component unmounts.
useEffect(() => {
  const socketInstance = io("http://localhost:3000", {
    reconnection: true,
    reconnectionAttempts: 5,
    reconnectionDelay: 1000,
  });

  socketInstance.on("connect", () => {
    console.log("Connected to Socket.IO server");
  });

  setSocket(socketInstance);

  return () => {
    if (socketInstance) socketInstance.disconnect();
  };
}, []);
3. Real-Time File Updates
Handles real-time events for creating, deleting, and updating files.
useEffect(() => {
  if (!socket) return;

  socket.on("new-file", (newFile) => {
    setFiles((prevFiles) =>
      prevFiles.some((file) => file._id === newFile._id)
        ? prevFiles
        : [...prevFiles, newFile]
    );
  });

  socket.on("delete-file", (fileId) => {
    setFiles((prevFiles) => prevFiles.filter((file) => file._id !== fileId));
  });

  socket.on("update-file", (updatedFile) => {
    setFiles((prevFiles) =>
      prevFiles.map((file) =>
        file._id === updatedFile._id
          ? { ...file, name: updatedFile.name }
          : file
      )
    );
  });

  return () => {
    socket.off("new-file");
    socket.off("delete-file");
    socket.off("update-file");
  };
}, [socket]);
4. CRUD Operations
-
Fetch Files: Retrieves the initial list of files from the server.
-
Create File: Sends a POST request to add a new file.
-
Delete File: Sends a DELETE request to remove a file and updates the UI optimistically.
-
Edit File: Sends a PUT request to update a file’s name and performs optimistic updates.
This code defines a FileExplorer React component that allows users to manage and interact with files in a file system.
Note: All the operations on the application get saved in real-time for the demo you can refresh the page to see the changes don’t get removed.
ScreenOne.tsx
The ScreenOne component is a code editor panel that dynamically displays and updates code for a selected file. It integrates the Monaco Editor to highlight syntax based on the file type (for example, JavaScript, HTML, CSS).
The component shows the selected file’s name, allows users to edit its content, and sends updates back to the database in real time. It also offers a clean, user-friendly interface with a dark theme and configurable editor options. This is ideal for coding environments like IDEs or code playgrounds.
import React, { useEffect, useState } from "react";
import { Editor } from "@monaco-editor/react";

interface File {
  name: string;
}

interface ScreenOneProps {
  selectedFile: File | null;
  code: string;
  onChange: (newCode: string | undefined) => void;
}

const ScreenOne: React.FC<ScreenOneProps> = ({ selectedFile, code, onChange }) => {
  const [language, setLanguage] = useState<string>("javascript");

  useEffect(() => {
    if (!selectedFile) return;
    setLanguage(getLanguageForFile(selectedFile.name));
  }, [selectedFile]);

  const getLanguageForFile = (filename: string): string => {
    const extension = filename.split(".").pop()?.toLowerCase();
    switch (extension) {
      case "js":
      case "jsx":
        return "javascript";
      case "html":
        return "html";
      case "css":
        return "css";
      case "json":
        return "json";
      default:
        return "plaintext";
    }
  };

  const handleCodeChange = (newCode: string | undefined): void => {
    onChange(newCode); // Call the onChange prop to update the code in LivePreview
  };

  return (
    <div className="flex-1 flex flex-col bg-[#2d2d2d] text-white p-6 rounded-lg shadow-md">
      <div className="flex items-center justify-between mb-4">
        <h2 className="text-2xl font-semibold">Code Editor</h2>
        <div className="text-sm text-gray-400">
          {selectedFile ? selectedFile.name : "No file selected"}
        </div>
      </div>
      <div className="flex-grow bg-gray-800 rounded-lg shadow-inner">
        <Editor
          height="calc(100vh - 160px)"
          language={language}
          value={code}
          onChange={handleCodeChange} // Update the code on change
          theme="vs-dark"
          options={{
            minimap: { enabled: false },
            lineNumbers: "on",
            wordWrap: "on",
            scrollBeyondLastLine: false,
          }}
        />
      </div>
    </div>
  );
};

export default ScreenOne;
Code Explanation
Explanation of the Code:
This React component, ScreenOne, represents a code editor screen where users can edit files in a specified programming language. The editor dynamically adjusts its syntax highlighting based on the selected file’s type. It uses the @monaco-editor/react library for the editor interface.
This code defines a ScreenOne React component, which is a code editor using the Monaco Editor (used in VS Code). Here’s a brief explanation:
Key Features:
-
Code Editor:
-
Uses the
@monaco-editor/reactlibrary to render a code editor. -
Supports syntax highlighting for various languages (for example, JavaScript, HTML, CSS, JSON).
-
-
Dynamic Language Detection:
-
Detects the programming language based on the selected file’s extension (for example,
.js→ JavaScript). -
Defaults to
plaintextfor unsupported file types.
-
-
Props:
-
selectedFile: The currently selected file (contains the file name). -
code: The current code content to display in the editor. -
onChange: A callback function to handle code changes.
-
-
UI:
-
Displays the file name and a title (“Code Editor”).
-
Styled with Tailwind CSS for a dark theme and rounded corners.
-
-
Editor Configuration:
-
Uses the
vs-darktheme. -
Disables the mini-map and enables line numbers and word wrap.
-
LivePreview.tsx
The LivePreview component dynamically generates a live code preview for either static projects (HTML, CSS, JS) or React-based projects. It detects the type of project, and sets up the required files (for example, index.html, App.js), and renders a real-time preview using CodeSandbox’s Sandpack. The preview adapts to the selected file and updates as the code changes, providing a seamless coding experience.
import React, { useEffect, useState } from "react";
import {
  SandpackProvider,
  SandpackLayout,
  SandpackCodeEditor,
  SandpackPreview,
  SandpackThemeProvider,
} from "@codesandbox/sandpack-react";

interface FileAccumulator {
[key: string]: { code: string };
}

interface File {
  name: string;
  content: string;
}

interface LivePreviewProps {
files: File[];
currentFile: File | null;
code: string;
onCodeChange?: (value: string | undefined) => void;
}
interface SandpackFile {
  code: string;
}

interface SandpackFiles {
  [key: string]: SandpackFile;
}

const LivePreview: React.FC<LivePreviewProps> = ({ files, currentFile, code }) => {
  const [sandboxFiles, setSandboxFiles] = useState<Record<string, { code: string }>>({});
  const [template, setTemplate] = useState<"vanilla" | "react">("vanilla"); // Default to static
  const [loading, setLoading] = useState<boolean>(true);

  useEffect(() => {
    if (!currentFile || !files) return;

    const newFiles: SandpackFiles = files.reduce((acc: FileAccumulator, file) => {
    acc[`/${file.name}`] = { code: file.content };
    return acc;
    }, {});

    // Check if the project is React-based
    const isReactProject = files.some(
      (file) =>
        file.name.endsWith(".jsx") ||
        (file.name.endsWith(".js") && file.content.includes("React"))
    );

    if (isReactProject) {
      setTemplate("react");

      // Ensure App.js exists
      if (!newFiles["/App.js"]) {
        newFiles["/App.js"] = {
          code: `
            import React from "react";
            function App() { return <h1>Hello, React!</h1>; }
            export default App;
          `,
        };
      }

      // Ensure index.js exists
      newFiles["/index.js"] = {
        code: `
          import React from "react";
          import ReactDOM from "react-dom/client";
          import App from "./App";

          const root = document.getElementById("root");
          if (root) {
            ReactDOM.createRoot(root).render(<App />);
          } else {
            console.error("Root element not found!");
          }
        `,
      };

      // Ensure index.html exists
      newFiles["/index.html"] = {
        code: `
          <!DOCTYPE html>
          <html lang="en">
          <head>
            <meta charset="UTF-8">
            <meta name="viewport" content="width=device-width, initial-scale=1.0">
            <title>React App</title>
          </head>
          <body>
            <div id="root"></div>
          </body>
          </html>
        `,
      };

      // Ensure package.json exists
      newFiles["/package.json"] = {
        code: JSON.stringify(
          {
            main: "/index.js",
            dependencies: {
              react: "18.2.0",
              "react-dom": "18.2.0",
            },
          },
          null,
          2
        ),
      };
    } else {
      setTemplate("vanilla");

      const htmlFile = files.find((f) => f.name.endsWith(".html"));
      if (htmlFile) {
        let htmlContent = htmlFile.content;

        // Inject CSS files
        files
          .filter((f) => f.name.endsWith(".css"))
          .forEach((cssFile) => {
            htmlContent = htmlContent.replace(
              "</head>",
              `<link rel="stylesheet" href="${cssFile.name}"></head>`
            );
          });

        // Inject JS files
        files
          .filter((f) => f.name.endsWith(".js"))
          .forEach((jsFile) => {
            htmlContent = htmlContent.replace(
              "</body>",
              `<script src="${jsFile.name}"></script></body>`
            );
          });

        newFiles["/index.html"] = { code: htmlContent };
      }
    }

    // Ensure the current file is included
    newFiles[`/${currentFile.name}`] = { code };
    setSandboxFiles(newFiles);
    setLoading(false);
  }, [files, currentFile, code]);

  return (
    <div className="flex-1 bg-white border-l border-gray-300">
      {loading ? (
        <div className="h-full flex items-center justify-center text-gray-500">
          Loading...
        </div>
      ) : currentFile ? (
        <SandpackProvider
        template={template}
        files={sandboxFiles}
        options={{ activeFile: `/${currentFile.name}` }}
        >
        <SandpackThemeProvider>
            <SandpackLayout>
            <SandpackCodeEditor showTabs={false}  />
            <SandpackPreview style={{ height: "600px", border: "none" }} />
            </SandpackLayout>
        </SandpackThemeProvider>
        </SandpackProvider>
      ) : (
        <div className="h-full flex items-center justify-center text-gray-500">
          Select a file to preview
        </div>
      )}
    </div>
  );
};

export default LivePreview;
Code Explanation
Explanation of the Code:
The LivePreview component provides a real-time live preview environment for static HTML/CSS/JS files or React-based projects. It uses the CodeSandbox Sandpack library to dynamically render code files in a browser-like preview window. The component automatically adjusts its behavior based on the file types and content to determine if the project is static or React-based.
This code defines a LivePreview React component that uses Sandpack (from CodeSandbox) to provide a live code editor and preview environment. Here’s a brief explanation:
Key Features:
-
Sandpack Integration:
-
Uses
@codesandbox/sandpack-reactto render a code editor and live preview. -
Supports both React and vanilla JavaScript/HTML/CSS projects.
-
-
Dynamic File Handling:
-
Converts a list of files (
filesprop) into a format compatible with Sandpack. -
Automatically detects if the project is React-based (e.g., contains
.jsxor React imports). -
Ensures necessary files (for example,
App.js,index.js,index.html,package.json) exist for React projects.
-
-
Template Switching:
- Sets the Sandpack template to
"react"for React projects or"vanilla"for static HTML/CSS/JS projects.
- Sets the Sandpack template to
-
Code Injection:
- For vanilla projects, injects linked CSS and JS files into the HTML file.
-
Loading State:
- Displays a loading message while processing files.
-
UI:
-
Shows a code editor and live preview side by side.
-
Displays a message if no file is selected.
-
Running sockets in the app
Now it is time to eat that big frog. As you know we are using sockets for real-time data communication so we need a server.tsx file in the root directory of the app (outside of the src folder) and paste this code:
import { createServer, IncomingMessage, ServerResponse } from "http";
import { parse, UrlWithParsedQuery } from "url";
import next from "next";
import { Server, Socket } from "socket.io";

const dev: boolean = process.env.NODE_ENV !== "production";
const app = next({ dev });
const handle = app.getRequestHandler();

app.prepare().then(() => {
  const httpServer = createServer((req: IncomingMessage, res: ServerResponse) => {
    const parsedUrl: UrlWithParsedQuery = parse(req.url || "", true);
    handle(req, res, parsedUrl);
  });

  // Determine the CORS origin dynamically
  const allowedOrigin: string = dev
    ? "http://localhost:3000" // Local development
    : "*"; // Vercel deployment

  // Initialize Socket.IO with dynamic CORS configuration
  const io = new Server(httpServer, {
    cors: {
      origin: allowedOrigin,
      methods: ["GET", "POST"],
      credentials: true,
    },
  });

  // Socket.IO event handlers
  io.on("connection", (socket: Socket) => {
    console.log("Client connected");

    // Handle new file creation
    socket.on("new-file", (newFile: { id: string; name: string; content: string }) => {
      console.log("New file created:", newFile);
      // Broadcast to all clients except sender
      socket.broadcast.emit("new-file", newFile);
    });

    // Handle file deletion
    socket.on("delete-file", (fileId: string) => {
      console.log("File deleted:", fileId);
      socket.broadcast.emit("delete-file", fileId);
    });

    // Handle file update
    socket.on("update-file", (updatedFile: { id: string; name: string; content: string }) => {
      console.log("File updated:", updatedFile);
      socket.broadcast.emit("update-file", updatedFile);
    });

    // Handle client disconnect
    socket.on("disconnect", () => {
      console.log("Client disconnected");
    });
  });

  // Start the server on the specified port
  const PORT: number | string = process.env.PORT || 3000;
  httpServer.listen(PORT, () => {
    console.log(`> Ready on ${dev ? "http://localhost:3000" : allowedOrigin}`);
  });
});
Code Explanation
This code sets up a Next.js server with Socket.IO for real-time communication. It:
-
Initializes a Next.js app and prepares it to handle HTTP requests.
-
Configures CORS dynamically for Socket.IO, allowing connections from
localhost:3000in development or all origins in production. -
Sets up Socket.IO to handle real-time events like:
-
New file creation
-
File deletion
-
File updates
-
Client disconnection
-
-
Broadcasts events to all connected clients except the sender.
-
Starts the server on a specified port (default: 3000).
It’s a basic real-time server for file management with Next.js and Socket.IO.
Clubbing all components together
To do this we will have to tweak the page.tsx. Just copy the given code and paste it into the page.js
"use client";
import React, { useState, useEffect } from "react";
import { useCopilotAction, useCopilotReadable } from "@copilotkit/react-core";
import { CopilotPopup } from "@copilotkit/react-ui";
import ScreenOne from "./components/ScreenOne";
import FileExplorer from "./components/FileExplorer";
import LivePreview from "./components/LivePreview";
import io, { Socket } from "socket.io-client";

interface File {
  _id: string;
  name: string;
  content: string;
}

function Page() {
  const [files, setFiles] = useState<File[]>([]);
  const [currentFile, setCurrentFile] = useState<File | null>(null);
  const [code, setCode] = useState<string>("// Select or create a file");
  const [socket, setSocket] = useState<Socket | null>(null);
  const [fileContents, setFileContents] = useState<Record<string, string>>({});

  // Initialize socket connection
  useEffect(() => {
    const socketInstance = io("http://localhost:3000", {
      reconnection: true,
      reconnectionAttempts: 5,
      reconnectionDelay: 1000,
    });

    socketInstance.on("connect", () => {
      console.log("Connected to Socket.IO server");
    });

    // Handle real-time file updates
    socketInstance.on(
      "file-update",
      ({ fileId, content }: { fileId: string; content: string }) => {
        setFileContents((prev) => ({
          ...prev,
          [fileId]: content,
        }));

        if (currentFile && currentFile._id === fileId) {
          setCode(content);
        }
      }
    );

    socketInstance.on("new-file", (newFile: File) => {
      setFiles((prev) => [...prev, newFile]);
      setFileContents((prev) => ({
        ...prev,
        [newFile._id]: newFile.content,
      }));
    });

    socketInstance.on("delete-file", (fileId: string) => {
      setFiles((prev) => prev.filter((file) => file._id !== fileId));
      setFileContents((prev) => {
        const updated = { ...prev };
        delete updated[fileId];
        return updated;
      });
    });

    setSocket(socketInstance);

    return () => {
      if (socketInstance) {
        socketInstance.disconnect();
      }
    };
  }, [currentFile]);

useCopilotReadable({
description: "Current state of the workspace",
value: {
    files: files.map((f) => f.name),
    currentFile: currentFile?.name,
    currentCode: code,
},
});

  const fetchFiles = async () => {
    try {
      const response = await fetch("/api/files");
      if (!response.ok) throw new Error("Failed to fetch files");
      const data: File[] = await response.json();

      // Store all file contents in state
      const contents: Record<string, string> = {};
      data.forEach((file) => {
        contents[file._id] = file.content;
      });

      setFiles(data);
      setFileContents(contents);
    } catch (error) {
      console.error("Error fetching files:", error);
    }
  };

  useEffect(() => {
    fetchFiles();
  }, []);

  const handleFileSelect = async (file: File) => {
    setCurrentFile(file);

    // Use cached content if available
    if (fileContents[file._id]) {
      setCode(fileContents[file._id]);
    } else {
      try {
        const response = await fetch(`/api/files/${file._id}`);
        if (!response.ok) throw new Error("Failed to fetch file content");
        const data = await response.json();

        setFileContents((prev) => ({
          ...prev,
          [file._id]: data.content,
        }));
        setCode(data.content);
      } catch (error) {
        console.error("Error fetching file content:", error);
      }
    }
  };

  const handleCodeChange = async (value: string | undefined) => {
    if (!currentFile || !value) return;

    // Update local state immediately
    setCode(value);
    setFileContents((prev) => ({
      ...prev,
      [currentFile._id]: value,
    }));

    try {
      // Emit the change to other clients
      if (socket) {
        socket.emit("file-update", {
          fileId: currentFile._id,
          content: value,
        });
      }

      // Save to backend
      await fetch("/api/files", {
        method: "PUT",
        headers: { "Content-Type": "application/json" },
        body: JSON.stringify({ id: currentFile._id, content: value }),
      });
    } catch (error) {
      console.error("Error updating file:", error);
    }
  };

  const processFiles = async ({ response }: { response: string }) => {
    try {
      const filePattern =
        /FILE:s*([w.-/]+)s*nCODE:s*([sS]*?)(?=nFILE:|$)/g;
      let match;
      const newFiles: File[] = [];

      while ((match = filePattern.exec(response)) !== null) {
        const fileName = match[1].trim();
        const fileContent = match[2].trim();

        if (fileName && fileContent) {
          const res = await fetch("/api/files", {
            method: "POST",
            headers: { "Content-Type": "application/json" },
            body: JSON.stringify({ name: fileName, content: fileContent }),
          });

          if (res.ok) {
            const savedFile: File = await res.json();
            newFiles.push(savedFile);

            // Update local state
            setFileContents((prev) => ({
              ...prev,
              [savedFile._id]: savedFile.content,
            }));

            // Emit new file to other clients
            if (socket) {
              socket.emit("new-file", savedFile);
            }
          }
        }
      }

      setFiles((prevFiles) => [...prevFiles, ...newFiles]);
      return `Files saved successfully: ${newFiles
        .map((f) => f.name)
        .join(", ")}`;
    } catch (error) {
      console.error("Error processing files:", error);
      return "Failed to save files.";
    }
  };

  useCopilotAction({
    name: "processFiles",
    description: "Processes AI-generated files and saves them to MongoDB",
    parameters: [{ name: "response", type: "string", required: true }],
    handler: processFiles,
  });

  return (
    <div className="h-screen flex bg-gray-100">
      <FileExplorer
        files={files}
        onFileSelect={handleFileSelect}
        currentFile={currentFile}
      />
      <div className="flex-1 flex flex-col p-4">
        <ScreenOne
          selectedFile={currentFile}
          code={code}
          onChange={handleCodeChange}
        />
      </div>
      <LivePreview
        files={files}
        currentFile={currentFile}
        code={code}
        onCodeChange={handleCodeChange}
      />
      <CopilotPopup
        instructions={`
    You are an AI-powered code generator. Use the following actions:

    1. @processFiles - To create new files, use this format:
    @processFiles(response: `
    FILE: filename.ext
    CODE:
    [file content]
    `)

    - Store new files in MongoDB using /api/files.
    - Then immediately fetch the files from database and show the files to FileExplorer
    - Correctly classify and separate different file types:
      - Static: HTML, CSS, JS
      - React: JSX, JS (React components)
    - For React projects:
      - Ensure the presence of index.js as the entry point.
      - Ensure there is a App.css file for styling
      - Ensure index.html contains a root <div id="root"></div>.
      - Separate components correctly (e.g., App.js, Header.jsx).
      - Include a package.json file with necessary React dependencies.
      - Ensure all React files follow ES6+ syntax and React best practices.

    2. @updateFile - To update existing files:
    @updateFile(filename: "file.ext", content: "new content")

    - Maintain compatibility with React environment.
    - Ensure any updated files do not break existing imports.
  `}
        labels={{
          title: "Project Assistant",
          initial: "What would you like to create?",
        }}
      />
    </div>
  );
}

export default Page;
Code explanation
-
State Management:
- Tracks files (
files), the currently selected file (currentFile), code in the selected file (code), real-time file contents (fileContents), and a socket connection (socket).
- Tracks files (
-
-
Establishes a connection to a server using
Socket.IO, and handling real-time file updates like file creation, updates, and deletions. -
Listens for events such as
file-update,new-file, anddelete-fileto update the UI and propagate changes across users.
-
-
Fetching Files:
-
On component mount, it fetches all files from an API and populates the state with the files and their contents.
-
Upon selecting a file, the content is either retrieved from the cached state or fetched from the server.
-
-
Code Changes:
- When code in the Monaco Editor is updated, the new content is saved locally and sent to the server and other connected clients via the socket.
-
File Processing by AI:
- When AI generates code, the
processFilesfunction parses the generated content, creates files on the backend, and updates the frontend. These files are stored in MongoDB and synchronized with the client via Socket.IO.
- When AI generates code, the
-
CopilotKit Integration:
-
Uses the
useCopilotActionhook to integrate AI-driven file generation and updating functionality. -
Provides instructions for creating and updating files via the
CopilotPopup. -
Always give detailed instructions to the
CopilotPopup.
-
-
UI Components:
-
The UI includes components like
FileExplorer,ScreenOne, andLivePreview, which displays files, allows editing, and provides a live preview of the code. -
The
CopilotPopupacts as an assistant to guide the AI in generating or updating files.
-
This setup creates a collaborative, real-time code editing environment with support for both static and React-based projects.
Configuring CopilotKit for the Whole App
This is going to be the last step of building the application. Navigate to the layout.tsx file and add this code:
import { CopilotKit } from "@copilotkit/react-core";
import "./globals.css";
import "@copilotkit/react-ui/styles.css";
import { ReactNode } from "react";

export const metadata = {
  title: "Replit Clone",
  description: "Copilotkit Replit Clone",
};

// Define props type for RootLayout
interface RootLayoutProps {
  children: ReactNode;
}

export default function RootLayout({ children }: RootLayoutProps) {
  return (
    <html lang="en">
      <body>
        <CopilotKit runtimeUrl="/api/copilotkit">{children}</CopilotKit>
      </body>
    </html>
  );
}
Here’s what’s going on in this code:
This code defines a RootLayout component, which serves as the root layout for a Next.js application. Here’s a brief explanation:
Key Features:
-
CopilotKit Integration:
-
Wraps the entire application with the
CopilotKitcomponent from@copilotkit/react-core. -
Configures the
runtimeUrlto/api/copilotkit, which is the endpoint for handling Copilot-related functionality.
-
-
Global Styles:
- Imports global CSS styles (
globals.css) and CopilotKit UI styles (@copilotkit/react-ui/styles.css).
- Imports global CSS styles (
-
Metadata:
- Sets metadata for the application (title:
"Replit Clone", description:"Copilotkit Replit Clone").
- Sets metadata for the application (title:
-
Layout Structure:
-
Uses the
htmlandbodytags to structure the document. -
Renders
children(the rest of the application) inside theCopilotKitwrapper.
-
Some Important Notes
Designing and deploying a database can vary depending on the tools and requirements. For this project, I’ve chosen the simplest and most accessible approach.
Why CopilotKit?
CopilotKit is a powerful tool that converts natural language processing (NLP) queries into actionable backend code that runs on meta LLM. If you have an alternative that serves a similar purpose, feel free to use it. It effectively bridges the gap between natural language input and technical execution, making it an ideal choice for projects like this.
Why GroqCloud?
I selected GroqCloud because it’s free and offers access to multiple large language models (LLMs) with a single API key. While alternatives like ChatGPT are available, they may require paid plans. GroqCloud’s versatility and affordability make it the perfect fit for this tutorial.
Security Best Practices
Never expose your credentials publicly. Always store sensitive information like API keys in an .env file to keep your project secure.
Future Enhancements
While this tutorial focuses on setting up and working with React files, CopilotKit has a much broader range of capabilities that I will explain in the upcoming blog posts.
I aim to build at least 15 AI products in 2025.
Support for static files is coming soon.
As promised in the previous tutorial, I’ve implemented the CopilotKit CRUD feature in this tutorial as well.
In my next tutorial, I will demonstrate how to build something more cool with CopilotKit to create a more dynamic and functional application.
Playing with the Replit Clone
You can explore the live project via the following link and ask the chatbot to build something in React. Live Project Link.
For a deeper understanding of the code, check out the GitHub repository here: GitHub Repository.
Also, here’s a screenshot showcasing its practical use. In this example, instead of manually creating project files, you can simply ask the CopilotKit chatbot to generate those files for you. You can then edit and play around with them.
For example, you can give the CopilotKit chatbot commands like: “Create a React app”.
Handling Errors
-
File Explorer Delays: Occasionally, due to database or Vercel deployment issues, files may be generated but not immediately visible in the File Explorer. In such cases, simply refresh the page, and the missing components will appear. This applies to all CRUD operations on files and their content as well.
-
Real-Time Saving: Any changes you make to files are saved to the database in real-time, ensuring that your work is never lost.
-
Command Errors: If the chatbot shows an error when processing your commands, simply retry the command until you receive a response.
-
Adding Extra Files:To add new files to the current project, simply ask the chatbot:
“Add a new file to the current project with the file name and extension.”For example: “Add a new file named
readme.mdin this project”
Video Demo
Conclusion
I hope you’ve enjoyed building this simple Replit AI clone. In this project, we used a MongoDB database, but the approach can easily be applied to other databases, as long as you can retrieve the data.
I plan to create many more projects involving AI and other cutting-edge tools. AI is truly a game-changer in the IT field, and I’m excited to share more insights and practical implementations of the latest technologies.
That’s all from my side. If you found this article helpful, feel free to share it and connect with me. I’m always open to new opportunities:
-
Follow me on X: Prankur’s Twitter
-
Connect with me on LinkedIn: Prankur’s LinkedIn
-
Follow me on Github: Prankur’s Github
-
View my Portfolio: Prankur’s Portfolio
Source: freeCodeCamp Programming Tutorials: Python, JavaScript, Git & MoreÂ
