If you want to practice and improve your web hosting skills, this tutorial is for you. With AWS EC2 and a little magic called user data scripts, you’ll be running a stunning website with a CSS template in no time. And the best part? You don’t need to manually install everything – the user data script does all the heavy lifting for you.
Before getting started with this guide, make sure you’ve read through my previous tutorial on AWS EC2. It covers the essentials of creating and configuring an EC2 instance. You’ll learn how to navigate the AWS Management Console, select the right instance type, configure security groups, and more.
This foundational knowledge will make sure you’re fully prepared to launch your website effortlessly with the help of user data scripts.
So, grab a coffee, and let’s dive into this fun and simple guide. By the end, you’ll be able to launch your own website without breaking a sweat.
Table of Contents
What We’ll Cover:
Today, we’re going to:
-
Launch an EC2 instance (Don’t worry, it’s easier than it sounds).
-
Use a user data script to automate setting up a web server.
-
Download a CSS template and host it on your instance.
You might be wondering: why a user data script? Imagine it as a to-do list for your EC2 instance. When the instance boots up, it runs through this list and sets everything up automatically. It’s like having a personal assistant that handles all the tedious setup tasks. Sounds good, right?
Step 1: Launch Your EC2 Instance
First things first, head over to your AWS Management Console. This is where all the magic happens.
Log in to AWS and head to the AWS Console. If you don’t already have an account, don’t worry, you can just sign up – it’s free for basic usage.
Now here are the steps you’ll follow to launch the instance:
-
In the console, type EC2 in the search bar and click on the EC2 service.
-
Click the big Launch Instance button.
-
Give your instance a cool name like “Webserver”.
-
Choose Your AMI: Select the Amazon Linux 2 AMI (free-tier eligible). It’s lightweight, fast, and perfect for our use case.
-
Instance Type: Go for the t2.micro (it’s free for most use cases, and we love free things, right?).
-
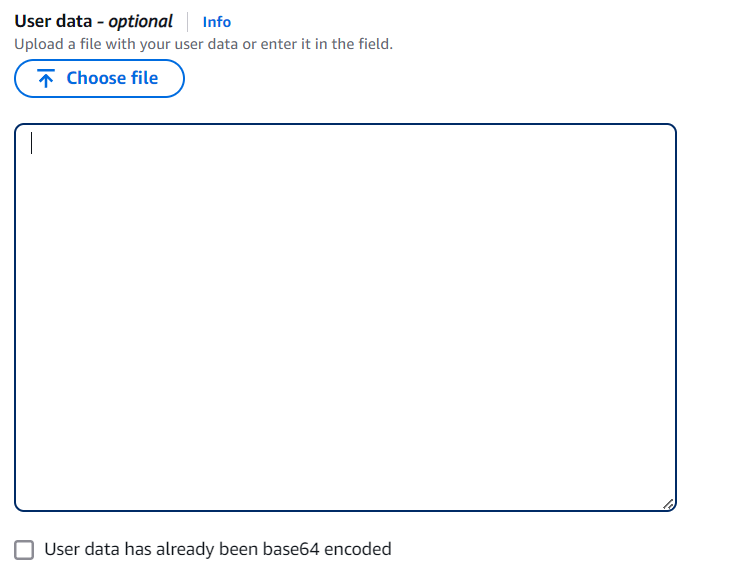
User Data Script: Now, this is where things get good. Scroll down to Advanced Details, and in the User Data field, paste in the following script. This script will handle everything from installing Apache to downloading and unzipping a fancy CSS template.
-

#!/bin/bash # Update the instance and install necessary packages yum update -y yum install -y httpd wget unzip # Start Apache and enable it to start on boot systemctl start httpd systemctl enable httpd # Navigate to the web root directory cd /var/www/html # Download a CSS template directly wget https://www.free-css.com/assets/files/free-css-templates/download/page284/built-better.zip # Unzip the template and move the files to the web root unzip built-better.zip -d /var/www/html/ mv /var/www/html/html/* /var/www/html/ # Clean up unnecessary files rm -r /var/www/html/html rm built-better.zip # Restart Apache to apply changes systemctl restart httpd- Configure Your Security Group: You want the world to be able to see your site, right? So, make sure to allow HTTP (port 80). This will let your website be accessible to anyone with the link.
- Launch Your Instance: After double-checking everything, click Launch. AWS will ask you to choose a key pair (which you’ll need if you want to SSH into your instance later). If you don’t have one, create a new key pair.
Boom! Your EC2 instance is launching. Grab a snack, it’ll be ready in a few minutes.
Step 2: Wait…The Script Did Everything Already?
Yes, that’s right! Thanks to the user data script, all the heavy lifting is done for you.
Here’s what just happened behind the scenes:
-
Apache Web Server was installed and started.
-
A CSS template called “Built Better†was downloaded directly into the server.
-
The template was unzipped and placed in the web directory.
All of this happened while you were sipping your coffee.
Step 3: Access Your Website
The exciting part is finally here! Let’s see your website in action.
-
Find Your Instance’s Public IP:
-
Head to your EC2 Dashboard, and you’ll see your running instance.
Copy the Public IPv4 Address.
-
-
Open Your Browser:
-
In the address bar, type:
http://your-public-ip(replaceyour-public-ipwith the one you just copied). -
Hit enter, and… Voilà ! Your website is live, looking all professional with the “Built Better†CSS template.
-
Wrapping Up
Let’s take a moment to appreciate what you’ve accomplished:
-
Launched an EC2 instance ✔ï¸
-
Automated the setup using a user data script ✔ï¸
-
Hosted a slick website using a CSS template ✔ï¸
You’ve just dipped your toes into the world of AWS and cloud hosting. It’s not as intimidating as it sounds, right? If you enjoyed this, keep exploring AWS – the possibilities are endless. Until next time, happy coding and hosting!
Want more?
Follow me on Twitter or connect on LinkedIn for more awesome cloud tips and tricks. I’m always sharing helpful content and would love to hear about your cloud journey!
You can follow me on
Source: freeCodeCamp Programming Tutorials: Python, JavaScript, Git & MoreÂ


