
Navigating between screens in Flutter is crucial for any app. And while the built-in Navigator API provides functionality, it can get complex for larger projects.
This is where go_router shines, offering a more declarative, URL-based, and feature-rich navigation system. This article delves deep into every detail of go_router, guiding you from setup to advanced features like redirection and nested routes.
go_router is a flexible and lightweight routing library for Flutter that simplifies the navigation process and provides a clean API for managing routes, passing parameters, and handling redirects. It’s designed to be easy to use while offering advanced features for more complex navigation requirements.
Navigation plays a crucial role in crafting seamless user experiences. While the built-in Navigator 2.0 offers versatility, it can become complex in larger projects. Here’s where go_router steps in and helps simplify the process significantly.
Table of Contents:
Prerequisites
To follow along with this article and build the example application, you’ll need:
Flutter SDK: Ensure you have Flutter installed and configured on your development machine. You can find installation instructions on the official Flutter website.
Basic Flutter knowledge: Familiarity with Flutter widgets, state management (even basic
setState), and general app development concepts will be helpful.Dart language basics: A good understanding of Dart syntax, classes, and functions is essential.
An IDE: Visual Studio Code or Android Studio with the Flutter and Dart plugins installed.
What We’ll Build
By the end of this article, we will have built a minimalistic shopping application that demonstrates the core functionalities of go_router. This application will have the following features:
A Product Listing screen displaying a grid of products.
A Product Details screen showing detailed information about a selected product.
A Product Purchase screen that confirms a product purchase.
Navigation between these screens using
go_router, including passing data via query and path parameters.Route Redirection and Exit Guards for enhanced navigation control.
Installation
To begin, add go_router to your pubspec.yaml file:
<span class="hljs-attr">dependencies:</span>
  <span class="hljs-attr">go_router:</span> <span class="hljs-string">^13.0.0</span>
This adds the go_router package as a dependency to your project, allowing you to use its functionalities.
Import it in your Dart files:
<span class="hljs-keyword">import</span> <span class="hljs-string">'package:go_router/go_router.dart'</span>;
This statement makes all the classes and functions provided by the go_router package available for use in your Dart file.
How to Define Routes
Create a list of GoRoute objects, each defining a route:
<span class="hljs-keyword">final</span> routes = [
  GoRoute(
    path: <span class="hljs-string">'/'</span>,
    builder: (context, state) => <span class="hljs-keyword">const</span> HomeScreen(),
  ),
  GoRoute(
    path: <span class="hljs-string">'/products/:id'</span>,
    builder: (context, state) => ProductDetailsScreen(productId: state.params[<span class="hljs-string">'id'</span>]!),
  ),
  <span class="hljs-comment">// ... more routes</span>
];
Here’s what’s going on in this code:
final routes = [...]: This declares a final list namedrouteswhich will hold all our route configurations.GoRoute(...): This is the core class for defining a route. EachGoRouteobject represents a distinct path in your application.path: '/': Thepathproperty defines the URL path for this route. In this case,/represents the root or home screen of the application.builder: (context, state) => const HomeScreen(): Thebuilderproperty is a function that returns the widget to be displayed when this route is active.contextprovides the build context, andstategives access to route-specific information like parameters. Here, it builds aHomeScreenwidget.path: '/products/:id': This route defines a dynamic path. The:idpart is a path parameter, meaning that whatever value is in that position in the URL will be captured as a parameter.builder: (context, state) => ProductDetailsScreen(productId: state.params['id']!): When this route is activated, it builds aProductDetailsScreen.state.params['id']!accesses the value of theidpath parameter. The!asserts thatidwill not be null.
How to Create the Router
Instantiate a GoRouter object, passing the routes and integrating it with your app’s MaterialApp:
MaterialApp.router(
  routeInformationParser: GoRouter.of(context).routeInformationParser,
  routerDelegate: GoRouter(routes: routes),
  <span class="hljs-comment">// ... other MaterialApp properties</span>
)
Here’s what’s going on in this code:
MaterialApp.router(...): This is a special constructor forMaterialAppthat integrates with a router delegate, likeGoRouter.routerConfig: router,orrouteInformationParser: GoRouter.of(context).routeInformationParser, routerDelegate: GoRouter(routes: routes),: These properties are crucial forgo_routerto manage navigation.routeInformationParser: Responsible for parsing the route information from the platform (for example, URL in a web browser) into a data structure that the router can understand.routerDelegate: Responsible for building and managing the navigation stack based on the parsed route information.
GoRouter(routes: routes): This creates an instance ofGoRouter, passing the list ofGoRouteobjects we defined earlier.
How to Navigate Between Screens
You can navigate programmatically using GoRouter.of(context).go():
GoRouter.of(context).go(<span class="hljs-string">'/products/123'</span>);
Here’s what this code is doing:
GoRouter.of(context): This static method retrieves the nearestGoRouterinstance from the widget tree..go('/products/123'): This method navigates to the specified URL path. This will replace the current route in the navigation stack.
You can also navigate using named routes like this:
GoRouter.of(context).goNamed(<span class="hljs-string">'productDetails'</span>, params: {<span class="hljs-string">'id'</span>: <span class="hljs-number">123</span>});
In this code:
.goNamed('productDetails', ...): This method navigates to a route identified by itsnameproperty (which needs to be defined in theGoRouteconfiguration).params: {'id': 123}: This map provides values for any path parameters defined in the named route.
How to Pass Parameters
In most real-world applications, we don’t just navigate between screens – we also need to pass information. For example:
From a product list to a product details page, you’ll want to pass the product’s ID.
From a checkout screen, you may need to pass the product description or price.
With go_router, you can pass parameters in two main ways:
Query Parameters: Added to the URL after a
?. Useful for optional data or filters (for example,/products?id=123).Path Parameters: Embedded directly in the route path. Best for required values (for example,
/products/123).
Let’s explore both.
1. Passing Query Parameters
Query parameters are flexible key-value pairs attached to the URL. These are typically used for non-essential or optional information, such as filters, search queries, or IDs.
Example: tapping a product card to open its details screen.
GestureDetector(
  onTap: () => context.goNamed(
    ProductDetailsScreen.routeName,
    queryParameters: {<span class="hljs-string">'id'</span>: product.id},
  ),
  child: SingleProduct(product: product),
);
What’s happening here?
context.goNamed(...): Navigates to a route using its name (defined in your routes config).queryParameters: {'id': product.id}: Appends the product ID to the URL like this:/product-details?id=abc123
On the destination screen, you retrieve the parameter like this:
GoRoute(
  path: ProductDetailsScreen.routeName,
  name: ProductDetailsScreen.routeName,
  builder: (context, state) {
    <span class="hljs-keyword">return</span> ProductDetailsScreen(
      productId: state.uri.queryParameters[<span class="hljs-string">'id'</span>] ?? <span class="hljs-string">""</span>,
    );
  },
)
state.uri.queryParameters['id']: Extracts theidvalue from the URL.?? "": Provides a default empty string if the parameter is missing.
Use query parameters when:
The parameter is optional.
You want to allow multiple parameters without changing the base route.
The data doesn’t fundamentally change the structure of the route.
2. Passing Path Parameters
Path parameters are part of the route itself and are usually required. Without them, the route doesn’t make sense.
Example: a purchase flow where the product description is required.
Navigate to the route:
context.goNamed(
  <span class="hljs-string">'pay-now'</span>,
  pathParameters: {
    <span class="hljs-string">'description'</span>: product.description,
  },
);
Define the route:
GoRoute(
  path: <span class="hljs-string">'product-purchase/:description'</span>,
  name: ProductPurchaseScreen.routeName,
  builder: (context, state) {
    <span class="hljs-keyword">return</span> ProductPurchaseScreen(
      description: state.pathParameters[<span class="hljs-string">'description'</span>]!,
    );
  },
)
What’s happening here?
path: 'product-purchase/:description': The:descriptionpart defines a dynamic segment.pathParameters: {'description': product.description}: Replaces:descriptionwith the actual value. The URL will look like:/product-purchase/AwesomeProductstate.pathParameters['description']!: Retrieves the parameter inside the screen.
Use path parameters when:
The value is required (for example, ID, username, slug).
The route should not exist without it.
Sub-routes and ShellRoute
As your app grows, you’ll need to organize routes in a hierarchy or keep persistent UI elements like a bottom navigation bar. go_router makes this possible with Sub-routes and ShellRoute.
1. Sub-routes
Sub-routes allow you to nest routes under a parent. This keeps related routes grouped together.
Example: Profile and its settings page.
GoRoute(
  path: <span class="hljs-string">'/profile'</span>,
  builder: (context, state) => ProfileScreen(),
  routes: [
    GoRoute(
      path: <span class="hljs-string">'settings'</span>,
      builder: (context, state) => SettingsScreen(),
    ),
  ],
),
/profile: OpensProfileScreen./profile/settings: OpensSettingsScreen.
Use sub-routes to keep related screens organized under one parent route.
2. ShellRoute
ShellRoute is used when you need a persistent UI wrapper (like a BottomNavigationBar or Drawer) that stays visible while switching between child routes.
Example: A bottom navigation layout.
ShellRoute(
  builder: (context, state, child) {
    <span class="hljs-keyword">return</span> MainScaffold(child: child); <span class="hljs-comment">// contains BottomNavigationBar</span>
  },
  routes: [
    GoRoute(
      path: <span class="hljs-string">'/home'</span>,
      builder: (context, state) => HomeScreen(),
    ),
    GoRoute(
      path: <span class="hljs-string">'/profile'</span>,
      builder: (context, state) => ProfileScreen(),
    ),
  ],
),
ShellRoute: Wraps a persistent widget (MainScaffold). child: Dynamically changes depending on which route is active.
Use ShellRoute when:
You need tabs or bottom navigation.
You want a layout to remain while only the inner content changes.
Redirection and Guards
In many apps, navigation isn’t just about moving between pages. It’s also about controlling who can access what and when. For example:
Redirecting a logged-out user to the login screen.
Preventing non-admins from entering admin routes.
go_router provides two main tools here: redirects and guards.
1. Redirection
A redirect automatically reroutes users if a condition is not met.
Example: redirecting old URLs or enforcing login.
GoRoute(
  path: <span class="hljs-string">'/old-path'</span>,
  redirect: (state) => <span class="hljs-string">'/new-path'</span>,
),

GoRoute(
  path: <span class="hljs-string">'/dashboard'</span>,
  builder: (context, state) => DashboardScreen(),
  redirect: (context, state) {
    <span class="hljs-keyword">final</span> isLoggedIn = AuthService.isLoggedIn();
    <span class="hljs-keyword">return</span> isLoggedIn ? <span class="hljs-keyword">null</span> : <span class="hljs-string">'/login'</span>;
  },
),
/old-path: Always redirects to/new-path./dashboard: Redirects to/loginif the user is not logged in.
2. Guards
Guards are like “checks” placed on routes. They decide if a user can access a route or not.
Example: restricting access to admins only.
GoRoute(
  path: <span class="hljs-string">'/admin'</span>,
  builder: (context, state) => AdminScreen(),
  redirect: (context, state) {
    <span class="hljs-keyword">final</span> isAdmin = AuthService.isAdmin();
    <span class="hljs-keyword">return</span> isAdmin ? <span class="hljs-keyword">null</span> : <span class="hljs-string">'/not-authorized'</span>;
  },
),
If isAdmin is true, the user can enter /admin. Otherwise, they’re redirected to /not-authorized.
Use redirects and guards for:
Authentication flows (login/logout).
Role-based access (admin vs user).
Handling deprecated or changed routes.
How to Set Up a Real Flutter Project Using Go Router
Before diving into GoRouter, let’s start by setting up a new Flutter project and organizing the codebase. The project structure includes the following folders and files:
go_router_project/
|-- lib/
|   |-- main.dart
|   |-- models/
|   |   |-- product.dart
|   |-- controller/
|   |   |-- product_controller.dart
|   |-- config/
|   |   |-- route_config.dart
|   |-- screens/
|   |   |-- product_details_screen.dart
|   |   |-- product_list_screen.dart
|   |   |-- product_purchase_screen.dart
|   |-- widgets/
|       |-- bottom_container.dart
|       |-- color_container.dart
|       |-- ratings.dart
|       |-- search_section.dart
|       |-- show_modal.dart
|       |-- single_product.dart
|-- pubspec.yaml
Now, open the pubspec.yaml file and add the following dependency:
<span class="hljs-attr">dependencies:</span>
  <span class="hljs-attr">go_router:</span> <span class="hljs-string">^13.0.0</span>
Save the file and run flutter pub get in the terminal to fetch the dependency.
We’ll be creating a minimalistic shopping app with just three pages.
Project Structure
1. main.dart:
Replace the code in lib/main.dart with this:
<span class="hljs-keyword">import</span> <span class="hljs-string">'package:flutter/material.dart'</span>;
<span class="hljs-keyword">import</span> <span class="hljs-string">'package:flutter/services.dart'</span>;
<span class="hljs-keyword">import</span> <span class="hljs-string">'go_router/config/route_config.dart'</span>;

<span class="hljs-keyword">void</span> main() {
  runApp(<span class="hljs-keyword">const</span> MyApp());
}

<span class="hljs-class"><span class="hljs-keyword">class</span> <span class="hljs-title">MyApp</span> <span class="hljs-keyword">extends</span> <span class="hljs-title">StatelessWidget</span> </span>{
  <span class="hljs-keyword">const</span> MyApp({<span class="hljs-keyword">super</span>.key});

  <span class="hljs-meta">@override</span>
  Widget build(BuildContext context) {
    SystemChrome.setSystemUIOverlayStyle(
      <span class="hljs-keyword">const</span> SystemUiOverlayStyle(
        statusBarColor: Colors.transparent,
        statusBarIconBrightness: Brightness.dark,
      ),
    );

    <span class="hljs-keyword">return</span> MaterialApp.router(
      title: <span class="hljs-string">'Flutter GoRouter'</span>,
      theme: ThemeData(
        colorScheme: ColorScheme.fromSeed(seedColor: Colors.brown),
        useMaterial3: <span class="hljs-keyword">true</span>,
      ),
      routerConfig: router, <span class="hljs-comment">// go router</span>
    );
  }
}
Here’s what’s going on in this code:
main(): The entry point of the Flutter application. It runs theMyAppwidget.SystemChrome.setSystemUIOverlayStyle(...): This configures the system UI overlay, specifically setting the status bar to be transparent and its icons to be dark.MaterialApp.router(...): This is the root widget of our application, configured withgo_router.title: 'Flutter GoRouter': Sets the title of the application.theme: ThemeData(...): Defines the visual theme for the application, using abrownseed color and Material 3 design.routerConfig: router: This is wherego_routeris integrated.routeris theGoRouterinstance defined inroute_config.dart.
2. Model
The model folder is where we define our data structures. A model is simply a Dart class that represents the shape of the data you’ll be working with in your app.
For example, in this project, Product is the model. It holds details such as id, name, imageUrl, description, price, and so on. Models don’t handle logic or UI, they’re just blueprints for data.
Think of models as the foundation. Whenever your app fetches, stores, or manipulates product information, it uses this Product model for consistency. We are going to create a model called product.dart
product.dart:
Add this code to lib/models/product.dart:
<span class="hljs-keyword">import</span> <span class="hljs-string">'package:flutter/foundation.dart'</span>;

<span class="hljs-class"><span class="hljs-keyword">class</span> <span class="hljs-title">Product</span> </span>{
  <span class="hljs-keyword">final</span> <span class="hljs-built_in">String</span> id;
  <span class="hljs-keyword">final</span> <span class="hljs-built_in">String</span> name;
  <span class="hljs-keyword">final</span> <span class="hljs-built_in">String</span> imageUrl;
  <span class="hljs-keyword">final</span> <span class="hljs-built_in">String</span> description;
  <span class="hljs-keyword">final</span> <span class="hljs-built_in">double</span> price;
  <span class="hljs-keyword">final</span> <span class="hljs-built_in">double</span> previousPrice;
  <span class="hljs-keyword">final</span> <span class="hljs-built_in">String</span> colors;

  Product({
    <span class="hljs-keyword">required</span> <span class="hljs-keyword">this</span>.id,
    <span class="hljs-keyword">required</span> <span class="hljs-keyword">this</span>.name,
    <span class="hljs-keyword">required</span> <span class="hljs-keyword">this</span>.imageUrl,
    <span class="hljs-keyword">required</span> <span class="hljs-keyword">this</span>.description,
    <span class="hljs-keyword">required</span> <span class="hljs-keyword">this</span>.previousPrice,
    <span class="hljs-keyword">required</span> <span class="hljs-keyword">this</span>.price,
    <span class="hljs-keyword">required</span> <span class="hljs-keyword">this</span>.colors,
  });

  <span class="hljs-keyword">factory</span> Product.initial() => Product(
        id: <span class="hljs-string">''</span>,
        name: <span class="hljs-string">''</span>,
        imageUrl: <span class="hljs-string">''</span>,
        description: <span class="hljs-string">''</span>,
        previousPrice: <span class="hljs-number">0.0</span>,
        price: <span class="hljs-number">0.0</span>,
        colors: <span class="hljs-string">''</span>,
      );
}
Productclass: This class defines the structure for a product, with properties likeid,name,imageUrl,description,price,previousPrice, andcolors.Product.initial(): A factory constructor to create an emptyProductobject, useful for initialization.
3. Controller
The controllers folder contains classes that manage business logic, how data flows in and out of your app. Controllers sit between your views (UI) and your models (data).
In this example, the ProductController is a simple in-memory data provider. It:
Stores a list of
Productobjects.Exposes a
findById()method so we can look up a product quickly.Provides access to the product list via the
productsgetter.
In larger apps, controllers often fetch data from APIs, handle caching, or manage app state. Here, it’s kept simple for learning purposes. We are going to create a product controller.
product_controller.dart:
Add this code to lib/controllers/product_controller.dart:
<span class="hljs-keyword">import</span> <span class="hljs-string">'../models/product.dart'</span>;

<span class="hljs-class"><span class="hljs-keyword">class</span> <span class="hljs-title">ProductController</span> </span>{
  Product findById(<span class="hljs-built_in">String?</span> id) {
    <span class="hljs-keyword">return</span> _products.firstWhere((product) => product.id == id);
  }

  <span class="hljs-built_in">List</span><Product> <span class="hljs-keyword">get</span> products => _products;

  <span class="hljs-keyword">final</span> <span class="hljs-built_in">List</span><Product> _products = [
    Product(
      id: <span class="hljs-string">'p7'</span>,
      name: <span class="hljs-string">'Leather BackPack'</span>,
      imageUrl:
          <span class="hljs-string">'https://images.unsplash.com/photo-1571689936114-b16146c9570a?ixlib=rb-1.2.1&ixid=MnwxMjA3fDB8MHxzZWFyY2h8NzR8fHByb2R1Y3R8ZW58MHx8MHx8&auto=format&fit=crop&w=800&q=60'</span>,
      description:
          <span class="hljs-string">'The stronger the better it is to load it with all that the eyes sees useful and needful too. BackPack is a all-fit leather strong bag for carrying anything the hands can store and it's literally worth any penny'</span>,
      price: <span class="hljs-number">30.9</span>,
      previousPrice: <span class="hljs-number">40.9</span>,
      colors: <span class="hljs-string">'red,grey,black,indigo,purple'</span>,
    ),
    Product(
      id: <span class="hljs-string">'p1'</span>,
      name: <span class="hljs-string">'Smart Watch'</span>,
      imageUrl:
          <span class="hljs-string">'https://images.unsplash.com/photo-1523275335684-37898b6baf30?ixlib=rb-1.2.1&ixid=MnwxMjA3fDB8MHxzZWFyY2h8Mnx8cHJvZHVjdHxlbnwwfHwwfHw%3D&auto=format&fit=crop&w=800&q=60'</span>,
      description: <span class="hljs-string">'A white smart watch with good features and more'</span>,
      price: <span class="hljs-number">29.99</span>,
      previousPrice: <span class="hljs-number">39.99</span>,
      colors: <span class="hljs-string">'red,grey,black,indigo,purple'</span>,
    ),
    Product(
      id: <span class="hljs-string">'p16'</span>,
      name: <span class="hljs-string">'PowerBook'</span>,
      imageUrl:
          <span class="hljs-string">'https://get.pxhere.com/photo/laptop-computer-macbook-mac-screen-water-board-keyboard-technology-air-mouse-photo-airport-aircraft-tablet-aviation-office-black-monitor-keys-graphic-hardware-image-pc-exhibition-multimedia-calculator-vector-water-cooling-floppy-disk-phased-out-desktop-computer-netbook-personal-computer-computer-monitor-electronic-device-computer-hardware-display-device-448748.jpg'</span>,
      description:
          <span class="hljs-string">'Awesome hardware, crappy keyboard and a hefty price. Buy now before a  one is released!'</span>,
      price: <span class="hljs-number">2299.99</span>,
      previousPrice: <span class="hljs-number">3299.99</span>,
      colors: <span class="hljs-string">'red,grey,black,indigo,purple'</span>,
    ),
    Product(
      id: <span class="hljs-string">'p2'</span>,
      name: <span class="hljs-string">'Red Sneakers'</span>,
      imageUrl:
          <span class="hljs-string">'https://images.unsplash.com/photo-1542291026-7eec264c27ff?ixlib=rb-1.2.1&ixid=MnwxMjA3fDB8MHxzZWFyY2h8MTB8fHByb2R1Y3R8ZW58MHx8MHx8&auto=format&fit=crop&w=800&q=60'</span>,
      description:
          <span class="hljs-string">'Perfect for your joggers and black T-shirts and more. The sneakers comes in different sizes and colors. You never know when that T-shirt needs some styles with the soft layers of a sneakers'</span>,
      price: <span class="hljs-number">199.99</span>,
      previousPrice: <span class="hljs-number">299.99</span>,
      colors: <span class="hljs-string">'yellow,grey,black,red,teal'</span>,
    ),
    Product(
      id: <span class="hljs-string">'p3'</span>,
      name: <span class="hljs-string">'Nikon Camera'</span>,
      imageUrl:
          <span class="hljs-string">'https://images.unsplash.com/photo-1564466809058-bf4114d55352?ixlib=rb-1.2.1&ixid=MnwxMjA3fDB8MHxzZWFyY2h8MjB8fHByb2R1Y3R8ZW58MHx8MHx8&auto=format&fit=crop&w=800&q=60'</span>,
      description:
          <span class="hljs-string">'You can only see clearer with your eyes but a camera saves the memory in it's eyes'</span>,
      price: <span class="hljs-number">89.9</span>,
      previousPrice: <span class="hljs-number">109.9</span>,
      colors: <span class="hljs-string">'red,grey,black,indigo,purple'</span>,
    ),
    Product(
      id: <span class="hljs-string">'p4'</span>,
      name: <span class="hljs-string">'HeadSets'</span>,
      imageUrl:
          <span class="hljs-string">'https://images.unsplash.com/photo-1583394838336-acd977736f90?ixlib=rb-1.2.1&ixid=MnwxMjA3fDB8MHxzZWFyY2h8MjJ8fHByb2R1Y3R8ZW58MHx8MHx8&auto=format&fit=crop&w=800&q=60'</span>,
      description:
          <span class="hljs-string">'The louder the sound, the better it feels inside with the body'</span>,
      price: <span class="hljs-number">120.1</span>,
      previousPrice: <span class="hljs-number">150.1</span>,
      colors: <span class="hljs-string">'red,grey,black,indigo,purple'</span>,
    ),
    Product(
      id: <span class="hljs-string">'p5'</span>,
      name: <span class="hljs-string">'Amazon SoundBox'</span>,
      imageUrl:
          <span class="hljs-string">'https://images.unsplash.com/photo-1543512214-318c7553f230?ixlib=rb-1.2.1&ixid=MnwxMjA3fDB8MHxzZWFyY2h8MjR8fHByb2R1Y3R8ZW58MHx8MHx8&auto=format&fit=crop&w=800&q=60'</span>,
      description:
          <span class="hljs-string">'Automated soundbox with voice recognition and more. What could be more better'</span>,
      price: <span class="hljs-number">78.19</span>,
      previousPrice: <span class="hljs-number">88.19</span>,
      colors: <span class="hljs-string">'red,grey,black,indigo,purple'</span>,
    ),
    Product(
      id: <span class="hljs-string">'p6'</span>,
      name: <span class="hljs-string">'Xbox 360 GamePads'</span>,
      imageUrl:
          <span class="hljs-string">'https://images.unsplash.com/photo-1600080972464-8e5f35f63d08?ixlib=rb-1.2.1&ixid=MnwxMjA3fDB8MHxzZWFyY2h8Mzd8fHByb2R1Y3R8ZW58MHx8MHx8&auto=format&fit=crop&w=800&q=60'</span>,
      description:
          <span class="hljs-string">'You never know when it is time to touch it better except the pads with xbox is there to assist'</span>,
      price: <span class="hljs-number">98.99</span>,
      previousPrice: <span class="hljs-number">108.99</span>,
      colors: <span class="hljs-string">'red,grey,black,indigo,purple'</span>,
    ),
  ];
}
ProductControllerclass: This class acts as a simple data source for our products.findById(String? id): A method to find a product by its ID from the_productslist.productsgetter: Provides access to the list of_products. iv._products: A private list ofProductobjects, pre-populated with sample product data.
4. Config
The config folder stores all the configuration and setup files for your app. In this project, it’s where we keep route_config.dart, which contains all the go_router setup and route definitions.
This is important because:
Routes can get complex as your app grows.
Having all navigation setup in one place keeps things clean and manageable.
Config files are also a great place to put things like app-wide constants, environment settings, or themes.
Think of config as the central wiring of your app. It’s not about data or logic, but about how the app is structured and tied together. We are going to create a route config here.
route_config.dart:
Add this code to lib/config/route_config.dart:
<span class="hljs-keyword">import</span> <span class="hljs-string">'package:flutter/material.dart'</span>;
<span class="hljs-keyword">import</span> <span class="hljs-string">'package:get_it_auto_router_go_router/go_router/controllers/product_controller.dart'</span>;
<span class="hljs-keyword">import</span> <span class="hljs-string">'package:go_router/go_router.dart'</span>;
<span class="hljs-keyword">import</span> <span class="hljs-string">'../models/product.dart'</span>;
<span class="hljs-keyword">import</span> <span class="hljs-string">'../screens/product_details_screen.dart'</span>;
<span class="hljs-keyword">import</span> <span class="hljs-string">'../screens/product_list_screen.dart'</span>;
<span class="hljs-keyword">import</span> <span class="hljs-string">'../screens/product_purchase_screen.dart'</span>;

<span class="hljs-comment">/// <span class="markdown">The route configuration.</span></span>
<span class="hljs-keyword">final</span> GoRouter router = GoRouter(
  routes: <RouteBase>[
    GoRoute(
      path: <span class="hljs-string">'/'</span>,
      builder: (BuildContext context, GoRouterState state) {
        <span class="hljs-keyword">return</span> <span class="hljs-keyword">const</span> ProductListScreen();
      },
      routes: <RouteBase>[
        GoRoute(
          path: ProductDetailsScreen.routeName,
          name: ProductDetailsScreen.routeName,
          builder: (BuildContext context, GoRouterState state) {
            <span class="hljs-keyword">return</span> ProductDetailsScreen(
              productId: state.uri.queryParameters[<span class="hljs-string">'id'</span>] ?? <span class="hljs-string">""</span>,
            );
          },
          routes: <RouteBase>[
            GoRoute(
              path: <span class="hljs-string">'product-purchase/:description'</span>,
              name: ProductPurchaseScreen.routeName,
              builder: (BuildContext context, GoRouterState state) {
                <span class="hljs-keyword">return</span> ProductPurchaseScreen(
                  productImage: state.uri.queryParameters[<span class="hljs-string">'img'</span>]!,
                  productPrice: state.uri.queryParameters[<span class="hljs-string">'price'</span>]!,
                  productName: state.uri.queryParameters[<span class="hljs-string">'name'</span>]!,
                  description: state.pathParameters[<span class="hljs-string">'description'</span>]!,
                );
              },
              onExit: (BuildContext context) <span class="hljs-keyword">async</span> {
                <span class="hljs-keyword">final</span> <span class="hljs-built_in">bool?</span> confirmed = <span class="hljs-keyword">await</span> showDialog<<span class="hljs-built_in">bool</span>>(
                  context: context,
                  builder: (_) {
                    <span class="hljs-keyword">return</span> AlertDialog(
                      content: <span class="hljs-keyword">const</span> Text(<span class="hljs-string">'Are you sure to leave this page?'</span>),
                      actions: <Widget>[
                        TextButton(
                          onPressed: () => Navigator.of(context).pop(<span class="hljs-keyword">false</span>),
                          child: <span class="hljs-keyword">const</span> Text(<span class="hljs-string">'Cancel'</span>),
                        ),
                        TextButton(
                          onPressed: () => Navigator.of(context).pop(<span class="hljs-keyword">true</span>),
                          child: <span class="hljs-keyword">const</span> Text(<span class="hljs-string">'Confirm'</span>),
                        ),
                      ],
                    );
                  },
                );
                <span class="hljs-keyword">return</span> confirmed ?? <span class="hljs-keyword">false</span>;
              },
            )
          ],
        )
      ],
    ),
  ],
);
Here’s what’s happening in this code:
final GoRouter router = GoRouter(...): This is the mainGoRouterinstance for our application.routes: <RouteBase>[...]: Defines the top-level routes.GoRoute(path: '/', builder: ...): The root route, leading toProductListScreen.Nested
GoRouteforProductDetailsScreen: This route is a child of the root.path: ProductDetailsScreen.routeName: Uses a static constant for the path.name: ProductDetailsScreen.routeName: Assigns a name to the route for easier navigation.builder: Builds theProductDetailsScreen, extractingproductIdfrom query parameters.v. Nested
GoRouteforProductPurchaseScreen: This route is a child ofProductDetailsScreen.path: 'product-purchase/:description': Defines a path with adescriptionpath parameter.name: ProductPurchaseScreen.routeName: Assigns a name for navigation.builder: Builds theProductPurchaseScreen, extractingproductImage,productPrice,productNamefrom query parameters anddescriptionfrom path parameters.onExit: (BuildContext context) async { ... }: This is anonExitguard that triggers a confirmation dialog when the user tries to leave theProductPurchaseScreen. If the user cancels, navigation is prevented.
5. Screens
Your screens are the UI pages the user interacts with. Each screen has a different role in the shopping flow:
ProductListScreen:
This is the entry screen of your app that shows all available products in a grid format.
Acts as a catalog/browse page.
Uses the
ProductControllerto fetch product data.Includes a search bar (
SearchSection) for filtering products.Navigates to the ProductDetailsScreen when a product is tapped.
ProductDetailsScreen:
This screen shows the full details of a selected product.
Displays product image, name, price, available colors, and description.
Allows the user to view a larger image modal by tapping the image.
Provides a “Buy Now” button at the bottom (via
bottomContainer).Uses path and query parameters in navigation to pass product data to the next screen.
ProductPurchaseScreen:
This is the final confirmation screen before purchasing.
Shows the selected product image, name, price, and description.
Confirms the user’s intent to purchase with a FloatingActionButton (currently just an icon).
Completes the navigation flow: List > Details > Purchase.
Alright, now let’s go through them one by one:
product_list_screen.dart:
Add this code to lib/screens/product_list_screen.dart:
<span class="hljs-keyword">import</span> <span class="hljs-string">'package:flutter/material.dart'</span>;
<span class="hljs-keyword">import</span> <span class="hljs-string">'package:get_it_auto_router_go_router/go_router/controllers/product_controller.dart'</span>;
<span class="hljs-keyword">import</span> <span class="hljs-string">'package:get_it_auto_router_go_router/go_router/screens/product_details_screen.dart'</span>;
<span class="hljs-keyword">import</span> <span class="hljs-string">'package:get_it_auto_router_go_router/go_router/widgets/search_section.dart'</span>;
<span class="hljs-keyword">import</span> <span class="hljs-string">'package:get_it_auto_router_go_router/go_router/widgets/single_product.dart'</span>;
<span class="hljs-keyword">import</span> <span class="hljs-string">'package:go_router/go_router.dart'</span>;

<span class="hljs-keyword">import</span> <span class="hljs-string">'../models/product.dart'</span>;

<span class="hljs-class"><span class="hljs-keyword">class</span> <span class="hljs-title">ProductListScreen</span> <span class="hljs-keyword">extends</span> <span class="hljs-title">StatelessWidget</span> </span>{
  <span class="hljs-keyword">const</span> ProductListScreen({<span class="hljs-keyword">super</span>.key});


  <span class="hljs-meta">@override</span>
  Widget build(BuildContext context) {
    ProductController productController = ProductController();
    TextEditingController searchController = TextEditingController();

    <span class="hljs-keyword">return</span> Scaffold(
      appBar: AppBar(
        title: <span class="hljs-keyword">const</span> Text(<span class="hljs-string">'Products'</span>),
        elevation: <span class="hljs-number">0</span>,
      ),
      body: Padding(
        padding: <span class="hljs-keyword">const</span> EdgeInsets.all(<span class="hljs-number">8.0</span>),
        child: Column(
          children: [
            SearchSection(
              searchController: searchController,
            ),
            <span class="hljs-keyword">const</span> SizedBox(height: <span class="hljs-number">10</span>),
            Expanded(
              child: GridView.builder(
                itemCount: productController.products.length,
                gridDelegate: <span class="hljs-keyword">const</span> SliverGridDelegateWithFixedCrossAxisCount(
                  crossAxisCount: <span class="hljs-number">2</span>,
                  mainAxisSpacing: <span class="hljs-number">10</span>,
                  crossAxisSpacing: <span class="hljs-number">10</span>,
                ),
                itemBuilder: (context, index) {
                  Product product = productController.products[index];

                  <span class="hljs-keyword">return</span> GestureDetector(
                    onTap: () => context.goNamed(
                      ProductDetailsScreen.routeName,
                      queryParameters: {<span class="hljs-string">'id'</span>: product.id},
                    ),
                    child: SingleProduct(product: product),
                  );
                },
              ),
            ),
          ],
        ),
      ),
    );
  }
}
Here’s what’s going on:
ProductListScreen: AStatelessWidgetthat displays a list of products.ProductController productController = ProductController(): Creates an instance of theProductControllerto access product data.AppBar: Displays the title “Products”.SearchSection: A custom widget for a search bar.ExpandedwithGridView.builder: Displays the products in a scrollable grid.GestureDetectoronTap: When a product is tapped, it navigates to theProductDetailsScreenusingcontext.goNamed, passing the product’sidas a query parameter.SingleProduct: A custom widget to display individual product information.
product_details_screen.dart:
Add this code to lib/screens/product_details_screen.dart:
<span class="hljs-keyword">import</span> <span class="hljs-string">'package:flutter/material.dart'</span>;
<span class="hljs-keyword">import</span> <span class="hljs-string">'package:flutter/services.dart'</span>;
<span class="hljs-keyword">import</span> <span class="hljs-string">'package:go_router/go_router.dart'</span>;
<span class="hljs-keyword">import</span> <span class="hljs-string">'../controllers/product_controller.dart'</span>;
<span class="hljs-keyword">import</span> <span class="hljs-string">'../models/product.dart'</span>;
<span class="hljs-keyword">import</span> <span class="hljs-string">'../widgets/bottom_container.dart'</span>;
<span class="hljs-keyword">import</span> <span class="hljs-string">'../widgets/color_container.dart'</span>;
<span class="hljs-keyword">import</span> <span class="hljs-string">'../widgets/ratings.dart'</span>;
<span class="hljs-keyword">import</span> <span class="hljs-string">'../widgets/show_modal.dart'</span>;

<span class="hljs-class"><span class="hljs-keyword">class</span> <span class="hljs-title">ProductDetailsScreen</span> <span class="hljs-keyword">extends</span> <span class="hljs-title">StatelessWidget</span> </span>{
  <span class="hljs-keyword">static</span> <span class="hljs-keyword">const</span> routeName = <span class="hljs-string">'product-details'</span>;
  <span class="hljs-keyword">final</span> <span class="hljs-built_in">String</span> productId;

  <span class="hljs-keyword">const</span> ProductDetailsScreen({
    <span class="hljs-keyword">super</span>.key,
    <span class="hljs-keyword">required</span> <span class="hljs-keyword">this</span>.productId,
  });

  <span class="hljs-meta">@override</span>
  Widget build(BuildContext context) {
    <span class="hljs-keyword">late</span> Color colored;

    <span class="hljs-comment">// get color</span>
    Color getColor(<span class="hljs-built_in">String</span> color) {
      <span class="hljs-keyword">switch</span> (color) {
        <span class="hljs-keyword">case</span> <span class="hljs-string">'red'</span>:
          colored = Colors.red;
          <span class="hljs-keyword">break</span>;
        <span class="hljs-keyword">case</span> <span class="hljs-string">'purple'</span>:
          colored = Colors.purple;
          <span class="hljs-keyword">break</span>;
        <span class="hljs-keyword">case</span> <span class="hljs-string">'grey'</span>:
          colored = Colors.grey;
          <span class="hljs-keyword">break</span>;
        <span class="hljs-keyword">case</span> <span class="hljs-string">'black'</span>:
          colored = Colors.black;
          <span class="hljs-keyword">break</span>;
        <span class="hljs-keyword">case</span> <span class="hljs-string">'orange'</span>:
          colored = Colors.orange;
          <span class="hljs-keyword">break</span>;
        <span class="hljs-keyword">case</span> <span class="hljs-string">'indigo'</span>:
          colored = Colors.indigo;
          <span class="hljs-keyword">break</span>;
        <span class="hljs-keyword">case</span> <span class="hljs-string">'yellow'</span>:
          colored = Colors.yellow;
          <span class="hljs-keyword">break</span>;
        <span class="hljs-keyword">case</span> <span class="hljs-string">'blue'</span>:
          colored = Colors.blue;
          <span class="hljs-keyword">break</span>;
        <span class="hljs-keyword">case</span> <span class="hljs-string">'brown'</span>:
          colored = Colors.brown;
          <span class="hljs-keyword">break</span>;
        <span class="hljs-keyword">case</span> <span class="hljs-string">'teal'</span>:
          colored = Colors.teal;
          <span class="hljs-keyword">break</span>;
        <span class="hljs-keyword">default</span>:
      }

      <span class="hljs-keyword">return</span> colored;
    }

    ProductController productController = ProductController();
    Product product = productController.findById(productId);

    <span class="hljs-built_in">List</span><<span class="hljs-built_in">String</span>> availableColors = product.colors.split(<span class="hljs-string">','</span>);

    <span class="hljs-comment">// pay now</span>
    <span class="hljs-keyword">void</span> payNow() {
      context.goNamed(
        <span class="hljs-string">'pay-now'</span>,
        pathParameters: <<span class="hljs-built_in">String</span>, <span class="hljs-built_in">String</span>>{
          <span class="hljs-string">'description'</span>: product.description,
        },
        queryParameters: <<span class="hljs-built_in">String</span>, <span class="hljs-built_in">String</span>>{
          <span class="hljs-string">'img'</span>: product.imageUrl.toString(),
          <span class="hljs-string">'price'</span>: product.price.toString(),
          <span class="hljs-string">'name'</span>: product.name.toString(),
        },
      );
    }

    <span class="hljs-keyword">return</span> Scaffold(
      extendBodyBehindAppBar: <span class="hljs-keyword">true</span>,
      appBar: AppBar(
        automaticallyImplyLeading: <span class="hljs-keyword">false</span>,
        backgroundColor: Colors.transparent,
        elevation: <span class="hljs-number">0</span>,
        systemOverlayStyle: <span class="hljs-keyword">const</span> SystemUiOverlayStyle(
          statusBarColor: Colors.transparent,
        ),
        leading: IconButton(
          icon: <span class="hljs-keyword">const</span> Icon(Icons.arrow_back),
          color: Colors.black,
          onPressed: () {
            Navigator.of(context).pop();
          },
        ),
      ),
      body: Column(
        children: [
          Expanded(
            flex: <span class="hljs-number">2</span>,
            child: GestureDetector(
              onTap: () => showImageModal(context, product),
              child: ClipRRect(
                borderRadius: <span class="hljs-keyword">const</span> BorderRadius.vertical(
                  top: Radius.zero,
                  bottom: Radius.circular(<span class="hljs-number">50</span>),
                ),
                child: Hero(
                  tag: product.id,
                  child: Image.network(
                    product.imageUrl,
                    fit: BoxFit.cover,
                    width: <span class="hljs-built_in">double</span>.infinity,
                  ),
                ),
              ),
            ),
          ),
          Expanded(
            flex: <span class="hljs-number">3</span>,
            child: Padding(
              padding: <span class="hljs-keyword">const</span> EdgeInsets.all(<span class="hljs-number">15.0</span>),
              child: Column(
                crossAxisAlignment: CrossAxisAlignment.stretch,
                children: [
                  Text(
                    product.name,
                    style: <span class="hljs-keyword">const</span> TextStyle(
                      fontSize: <span class="hljs-number">30</span>,
                    ),
                  ),
                  <span class="hljs-keyword">const</span> SizedBox(height: <span class="hljs-number">5</span>),
                  ratings(),
                  <span class="hljs-keyword">const</span> SizedBox(height: <span class="hljs-number">5</span>),
                  Row(
                    children: [
                      Text(
                        <span class="hljs-string">'$<span class="hljs-subst">${product.price.toString()}</span>'</span>,
                        style: <span class="hljs-keyword">const</span> TextStyle(
                          fontSize: <span class="hljs-number">20</span>,
                          fontWeight: FontWeight.bold,
                        ),
                      ),
                      <span class="hljs-keyword">const</span> SizedBox(width: <span class="hljs-number">3</span>),
                      Text(
                        <span class="hljs-string">'$<span class="hljs-subst">${product.previousPrice.toString()}</span>'</span>,
                        style: <span class="hljs-keyword">const</span> TextStyle(
                          fontSize: <span class="hljs-number">15</span>,
                          color: Colors.grey,
                          decoration: TextDecoration.lineThrough,
                        ),
                      ),
                    ],
                  ),
                  <span class="hljs-keyword">const</span> Column(
                    crossAxisAlignment: CrossAxisAlignment.end,
                    children: [
                      Text(
                        <span class="hljs-string">'Available in stocks'</span>,
                        style: TextStyle(
                          fontWeight: FontWeight.bold,
                        ),
                      ),
                      Text(
                        <span class="hljs-string">'Out of stocks'</span>,
                        style: TextStyle(
                          fontWeight: FontWeight.bold,
                          color: Colors.deepOrange,
                          decoration: TextDecoration.lineThrough,
                        ),
                      ),
                    ],
                  ),
                  <span class="hljs-keyword">const</span> SizedBox(height: <span class="hljs-number">10</span>),
                  <span class="hljs-keyword">const</span> Text(
                    <span class="hljs-string">'Colors Available'</span>,
                    style: TextStyle(
                      fontWeight: FontWeight.bold,
                      fontSize: <span class="hljs-number">15</span>,
                    ),
                  ),
                  <span class="hljs-keyword">const</span> SizedBox(height: <span class="hljs-number">10</span>),
                  Row(
                    mainAxisAlignment: MainAxisAlignment.spaceBetween,
                    children: [
                      <span class="hljs-keyword">for</span> (<span class="hljs-keyword">var</span> color <span class="hljs-keyword">in</span> availableColors)
                        buildContainer(
                          color,
                          getColor,
                        )
                    ],
                  ),
                  <span class="hljs-keyword">const</span> SizedBox(height: <span class="hljs-number">15</span>),
                  <span class="hljs-keyword">const</span> Text(
                    <span class="hljs-string">'About'</span>,
                    style: TextStyle(
                      fontWeight: FontWeight.bold,
                      fontSize: <span class="hljs-number">15</span>,
                    ),
                  ),
                  <span class="hljs-keyword">const</span> SizedBox(height: <span class="hljs-number">10</span>),
                  Text(
                    product.description,
                    textAlign: TextAlign.justify,
                  ),
                ],
              ),
            ),
          ),
        ],
      ),
      bottomSheet: bottomContainer(product, payNow),
    );
  }
}
That’s a lot – here’s what this code is doing:
ProductDetailsScreen: AStatelessWidgetthat displays the details of a single product.static const routeName = 'product-details': Defines a static constant for the route name, ensuring consistency.productId: This is a required parameter for the screen, passed during navigation.getColor(String color): A helper function to convert color names (strings) intoColorobjects.ProductController productController = ProductController(): Accesses product data.Product product = productController.findById(productId): Retrieves the specific product based on theproductIdreceived.payNow(): A function that navigates to theProductPurchaseScreenusingcontext.goNamed, passing product details as both path and query parameters.AppBar: Displays a back arrow to navigate back.Expandedfor product image: Displays the product image with aHeroanimation for smooth transitions.GestureDetectorallows tapping the image to show a modal.Expandedfor product details: Displays product name, ratings, prices, availability, available colors, and description.bottomSheet: bottomContainer(product, payNow): Attaches a custombottomContainerwidget to theScaffold, which includes the “Buy Now” button.
product_purchase_screen.dart:
Add this code to lib/screens/product_purchase_screen.dart:
<span class="hljs-keyword">import</span> <span class="hljs-string">'package:flutter/material.dart'</span>;

<span class="hljs-class"><span class="hljs-keyword">class</span> <span class="hljs-title">ProductPurchaseScreen</span> <span class="hljs-keyword">extends</span> <span class="hljs-title">StatelessWidget</span> </span>{
  <span class="hljs-keyword">const</span> ProductPurchaseScreen({
    <span class="hljs-keyword">super</span>.key,
    <span class="hljs-keyword">required</span> <span class="hljs-keyword">this</span>.productImage,
    <span class="hljs-keyword">required</span> <span class="hljs-keyword">this</span>.productName,
    <span class="hljs-keyword">required</span> <span class="hljs-keyword">this</span>.productPrice,
    <span class="hljs-keyword">required</span> <span class="hljs-keyword">this</span>.description,
  });

  <span class="hljs-keyword">static</span> <span class="hljs-keyword">const</span> routeName = <span class="hljs-string">'pay-now'</span>;

  <span class="hljs-keyword">final</span> <span class="hljs-built_in">String</span> productName;
  <span class="hljs-keyword">final</span> <span class="hljs-built_in">String</span> productPrice;
  <span class="hljs-keyword">final</span> <span class="hljs-built_in">String</span> productImage;
  <span class="hljs-keyword">final</span> <span class="hljs-built_in">String</span> description;

  <span class="hljs-meta">@override</span>
  Widget build(BuildContext context) {
    <span class="hljs-keyword">return</span> Scaffold(
      floatingActionButton: <span class="hljs-keyword">const</span> FloatingActionButton(
        onPressed: <span class="hljs-keyword">null</span>,
        child: Icon(
          Icons.check_circle,
        ),
      ),
      appBar: AppBar(
        title: <span class="hljs-keyword">const</span> Text(<span class="hljs-string">'Purchase Item'</span>),
      ),
      body: SingleChildScrollView(
        child: Center(
          child: Padding(
            padding: <span class="hljs-keyword">const</span> EdgeInsets.all(<span class="hljs-number">8.0</span>),
            child: Column(
              children: <Widget>[
                ClipRRect(
                  borderRadius: BorderRadius.circular(<span class="hljs-number">10</span>),
                  child: Image.network(productImage),
                ),
                <span class="hljs-keyword">const</span> SizedBox(height: <span class="hljs-number">10</span>),
                Row(
                  mainAxisAlignment: MainAxisAlignment.spaceBetween,
                  children: <Widget>[
                    Text(
                      productName,
                      style: <span class="hljs-keyword">const</span> TextStyle(
                        fontWeight: FontWeight.w800,
                        fontSize: <span class="hljs-number">18</span>,
                      ),
                    ),
                    Text(
                      <span class="hljs-string">'$<span class="hljs-subst">$productPrice</span>'</span>,
                      style: <span class="hljs-keyword">const</span> TextStyle(
                        fontWeight: FontWeight.w800,
                        fontSize: <span class="hljs-number">16</span>,
                        color: Colors.grey,
                      ),
                    )
                  ],
                ),
                <span class="hljs-keyword">const</span> SizedBox(height: <span class="hljs-number">10</span>),
                Text(
                  description,
                  style: <span class="hljs-keyword">const</span> TextStyle(
                    fontSize: <span class="hljs-number">16</span>,
                  ),
                ),
              ],
            ),
          ),
        ),
      ),
    );
  }
}
Here’s what’s going on:
ProductPurchaseScreen: AStatelessWidgetthat confirms the product purchase.static const routeName = 'pay-now': Defines the route name.productImage,productName,productPrice,description: These are required parameters received from the previous screen.FloatingActionButton: Displays a checkmark icon, thoughonPressedis currently null.AppBar: Displays the title “Purchase Item”.SingleChildScrollView: Makes the content scrollable.Image.network(productImage): Displays the product image received.Rowfor product name and price: Shows the product’s name and its price.Text(description): Displays the product’s description.
6. Widgets
Widgets are the reusable building blocks of your UI. Instead of duplicating UI code in multiple screens, you break them into widgets.
bottom_container.dart:
Add this code to lib/widgets/bottom_container.dart:
<span class="hljs-comment">// bottom container</span>
<span class="hljs-keyword">import</span> <span class="hljs-string">'package:flutter/material.dart'</span>;

<span class="hljs-keyword">import</span> <span class="hljs-string">'../models/product.dart'</span>;

Container bottomContainer(Product productDetails,<span class="hljs-built_in">Function</span> payNow) {
  <span class="hljs-keyword">return</span> Container(
    color: Colors.white,
    child: Padding(
      padding: <span class="hljs-keyword">const</span> EdgeInsets.symmetric(
        horizontal: <span class="hljs-number">18.0</span>,
        vertical: <span class="hljs-number">10</span>,
      ),
      child: Row(
        mainAxisAlignment: MainAxisAlignment.spaceBetween,
        children: [
          Column(
            mainAxisSize: MainAxisSize.min,
            crossAxisAlignment: CrossAxisAlignment.start,
            children: [
              <span class="hljs-keyword">const</span> Text(
                <span class="hljs-string">'Price'</span>,
                style: TextStyle(
                  color: Colors.grey,
                  fontWeight: FontWeight.w500,
                  fontSize: <span class="hljs-number">14</span>,
                ),
              ),
              <span class="hljs-keyword">const</span> SizedBox(height: <span class="hljs-number">5</span>),
              Text(
                <span class="hljs-string">'$<span class="hljs-subst">${productDetails.price}</span>'</span>,
                style: <span class="hljs-keyword">const</span> TextStyle(
                  color: Colors.brown,
                  fontWeight: FontWeight.w700,
                  fontSize: <span class="hljs-number">25</span>,
                ),
              )
            ],
          ),
          Wrap(
            crossAxisAlignment: WrapCrossAlignment.center,
            children: [
              Container(
                height: <span class="hljs-number">50</span>,
                width: <span class="hljs-number">80</span>,
                decoration: BoxDecoration(
                  color: Colors.brown.withOpacity(<span class="hljs-number">0.3</span>),
                  borderRadius: <span class="hljs-keyword">const</span> BorderRadius.only(
                    bottomLeft: Radius.circular(<span class="hljs-number">5</span>),
                    topLeft: Radius.circular(<span class="hljs-number">5</span>),
                  ),
                ),
                child: <span class="hljs-keyword">const</span> Center(
                  child: Wrap(
                    crossAxisAlignment: WrapCrossAlignment.center,
                    children: [
                      Icon(
                        Icons.shopping_cart_checkout,
                        color: Colors.white,
                      ),
                      SizedBox(width: <span class="hljs-number">15</span>),
                      Text(
                        <span class="hljs-string">'1'</span>,
                        style: TextStyle(
                          color: Colors.white,
                        ),
                      ),
                    ],
                  ),
                ),
              ),
              GestureDetector(
                onTap: () => payNow(),
                child: Container(
                  height: <span class="hljs-number">50</span>,
                  width: <span class="hljs-number">120</span>,
                  decoration: <span class="hljs-keyword">const</span> BoxDecoration(
                    color: Colors.brown,
                    borderRadius: BorderRadius.only(
                      bottomRight: Radius.circular(<span class="hljs-number">5</span>),
                      topRight: Radius.circular(<span class="hljs-number">5</span>),
                    ),
                  ),
                  child: <span class="hljs-keyword">const</span> Center(
                    child: Text(
                      <span class="hljs-string">'Buy Now'</span>,
                      style: TextStyle(
                        color: Colors.white,
                        fontWeight: FontWeight.w700,
                      ),
                    ),
                  ),
                ),
              )
            ],
          )
        ],
      ),
    ),
  );
}
In this code:
bottomContainer: A function that returns aContainerwidget for the bottom sheet. It displays the product price and a “Buy Now” button.GestureDetectoronTap: The “Buy Now” button triggers thepayNowfunction passed as an argument.
ratings.dart:
Add this code to lib/widgets/ratings.dart:
<span class="hljs-keyword">import</span> <span class="hljs-string">'package:flutter/material.dart'</span>;

Widget ratings() => <span class="hljs-keyword">const</span> Row(
      children: [
        Icon(Icons.star, color: Colors.deepOrange, size: <span class="hljs-number">15</span>),
        Icon(Icons.star, color: Colors.deepOrange, size: <span class="hljs-number">15</span>),
        Icon(Icons.star, color: Colors.deepOrange, size: <span class="hljs-number">15</span>),
        Icon(Icons.star, color: Colors.deepOrange, size: <span class="hljs-number">15</span>),
        Icon(Icons.star, color: Colors.deepOrange, size: <span class="hljs-number">15</span>),
        SizedBox(width: <span class="hljs-number">20</span>),
        Text(<span class="hljs-string">'(3400 Reviews)'</span>)
      ],
    );
ratings(): A simple widget that displays a row of five orange stars and a review count.
color_container.dart:
Add this code to lib/widgets/color_container.dart:
<span class="hljs-comment">// build container for color</span>
<span class="hljs-keyword">import</span> <span class="hljs-string">'package:flutter/cupertino.dart'</span>;

Widget buildContainer(<span class="hljs-built_in">String</span> color,<span class="hljs-built_in">Function</span> getColor) {
  <span class="hljs-keyword">return</span> Container(
    height: <span class="hljs-number">5</span>,
    width: <span class="hljs-number">40</span>,
    decoration: BoxDecoration(
      color: getColor(color),
      borderRadius: BorderRadius.circular(<span class="hljs-number">20</span>),
    ),
  );
}
Here’s what’s going on:
buildContainer: A function that creates a small, roundedContainerto represent an available product color. It takes the color name as a string and agetColorfunction to convert it to aColorobject.
search_section.dart:
Add this code to lib/widgets/search_section.dart:
<span class="hljs-keyword">import</span> <span class="hljs-string">'package:flutter/cupertino.dart'</span>;
<span class="hljs-keyword">import</span> <span class="hljs-string">'package:flutter/material.dart'</span>;

<span class="hljs-class"><span class="hljs-keyword">class</span> <span class="hljs-title">SearchSection</span> <span class="hljs-keyword">extends</span> <span class="hljs-title">StatelessWidget</span> </span>{
  <span class="hljs-keyword">const</span> SearchSection({
    <span class="hljs-keyword">super</span>.key,
    <span class="hljs-keyword">required</span> <span class="hljs-keyword">this</span>.searchController,
  });

  <span class="hljs-keyword">final</span> TextEditingController searchController;

  <span class="hljs-meta">@override</span>
  Widget build(BuildContext context) {
    <span class="hljs-keyword">return</span> TextField(
      controller: searchController,
      decoration: InputDecoration(
        prefixIcon: <span class="hljs-keyword">const</span> Icon(
          CupertinoIcons.search,
          color: Colors.black,
        ),
        hintText: <span class="hljs-string">'Enter search keyword'</span>,
        label: <span class="hljs-keyword">const</span> Text(
          <span class="hljs-string">'Search Here'</span>,
        ),
        fillColor: Colors.grey.withOpacity(<span class="hljs-number">0.1</span>),
        enabledBorder: OutlineInputBorder(
          borderRadius: BorderRadius.circular(<span class="hljs-number">10</span>),
        ),
        focusedBorder: OutlineInputBorder(
          borderRadius: BorderRadius.circular(<span class="hljs-number">10</span>),
        ),
      ),
    );
  }
}
In this code:
SearchSection: AStatelessWidgetthat displays a search input field.searchController: ATextEditingControllerto manage the text input.InputDecoration: Styles the text field with a search icon, hint text, label, and rounded borders.
show_modal.dart:
Add this code to lib/widgets/show_modal.dart:
<span class="hljs-comment">// show modal for image</span>
<span class="hljs-keyword">import</span> <span class="hljs-string">'package:flutter/material.dart'</span>;

<span class="hljs-keyword">import</span> <span class="hljs-string">'../models/product.dart'</span>;


<span class="hljs-keyword">void</span> showImageModal(BuildContext context,Product product) {
  showDialog(
    context: context,
    builder: (BuildContext context) {
      <span class="hljs-keyword">return</span> Dialog(
        insetPadding: <span class="hljs-keyword">const</span> EdgeInsets.all(<span class="hljs-number">12</span>),
        elevation: <span class="hljs-number">4</span>,
        shape: RoundedRectangleBorder(
          borderRadius: BorderRadius.circular(<span class="hljs-number">20</span>),
        ),
        child: Padding(
          padding: <span class="hljs-keyword">const</span> EdgeInsets.all(<span class="hljs-number">3.0</span>),
          child: Stack(children: [
            ClipRRect(
              borderRadius: BorderRadius.circular(<span class="hljs-number">20</span>),
              child: Image(
                width: <span class="hljs-built_in">double</span>.infinity,
                fit: BoxFit.cover,
                image: NetworkImage(product.imageUrl),
              ),
            ),
            Positioned(
              right: <span class="hljs-number">1</span>,
              child: Container(
                decoration: BoxDecoration(
                  borderRadius: BorderRadius.circular(<span class="hljs-number">10</span>),
                  color: Colors.grey.withOpacity(<span class="hljs-number">0.5</span>),
                ),
                child: Padding(
                  padding: <span class="hljs-keyword">const</span> EdgeInsets.all(<span class="hljs-number">8.0</span>),
                  child: Row(
                    children: [
                      Text(product.name),
                      <span class="hljs-keyword">const</span> SizedBox(width: <span class="hljs-number">5</span>),
                      Text(
                        <span class="hljs-string">'$<span class="hljs-subst">${product.price}</span>'</span>,
                        style: <span class="hljs-keyword">const</span> TextStyle(
                          fontWeight: FontWeight.bold,
                        ),
                      ),
                    ],
                  ),
                ),
              ),
            )
          ]),
        ),
      );
    },
  );
}
In this code:
showImageModal: A function that displays a dialog with a larger view of the product image and its name and price.Dialog: A material design dialog.StackwithPositioned: Used to overlay the product name and price on top of the image.
single_product.dart:
Add this code to lib/widgets/single_product.dart:
<span class="hljs-keyword">import</span> <span class="hljs-string">'package:flutter/material.dart'</span>;

<span class="hljs-keyword">import</span> <span class="hljs-string">'../models/product.dart'</span>;


<span class="hljs-class"><span class="hljs-keyword">class</span> <span class="hljs-title">SingleProduct</span> <span class="hljs-keyword">extends</span> <span class="hljs-title">StatelessWidget</span> </span>{
  <span class="hljs-keyword">const</span> SingleProduct({
    <span class="hljs-keyword">super</span>.key,
    <span class="hljs-keyword">required</span> <span class="hljs-keyword">this</span>.product,
  });

  <span class="hljs-keyword">final</span> Product product;

  <span class="hljs-meta">@override</span>
  Widget build(BuildContext context) {
    <span class="hljs-keyword">return</span> Container(
      decoration: BoxDecoration(
        color: Colors.grey.withOpacity(<span class="hljs-number">0.1</span>),
        borderRadius: BorderRadius.circular(<span class="hljs-number">10</span>),
      ),
      child: Column(
        children: [
          ClipRRect(
            borderRadius: <span class="hljs-keyword">const</span> BorderRadius.only(
              topRight: Radius.circular(<span class="hljs-number">10</span>),
              topLeft: Radius.circular(<span class="hljs-number">10</span>),
            ),
            child: Hero(
              tag: product.id,
              child: Image.network(
                product.imageUrl,
                height: <span class="hljs-number">120</span>,
                width: <span class="hljs-built_in">double</span>.infinity,
                fit: BoxFit.cover,
              ),
            ),
          ),
          <span class="hljs-keyword">const</span> SizedBox(height: <span class="hljs-number">10</span>),
          Text(
            product.name,
            maxLines: <span class="hljs-number">1</span>,
            overflow: TextOverflow.ellipsis,
            style: <span class="hljs-keyword">const</span> TextStyle(
              fontSize: <span class="hljs-number">18</span>,
              fontWeight: FontWeight.bold,
            ),
          ),
          <span class="hljs-keyword">const</span> SizedBox(height: <span class="hljs-number">10</span>),
          Padding(
            padding: <span class="hljs-keyword">const</span> EdgeInsets.symmetric(horizontal: <span class="hljs-number">8.0</span>),
            child: Row(
              mainAxisAlignment: MainAxisAlignment.spaceBetween,
              children: [
                Text(<span class="hljs-string">'$<span class="hljs-subst">${product.price}</span>'</span>),
                Text(
                  <span class="hljs-string">'$<span class="hljs-subst">${product.price}</span>'</span>,
                  style: <span class="hljs-keyword">const</span> TextStyle(
                    decoration: TextDecoration.lineThrough,
                  ),
                ),
              ],
            ),
          )
        ],
      ),
    );
  }
}
Here’s what’s happening:
SingleProduct: AStatelessWidgetthat displays a single product item in the grid.product: TheProductobject to be displayed.Container: Provides a background color and rounded borders.Heroanimation for image: Facilitates a smooth animation when transitioning to theProductDetailsScreen.Textfor product name: Displays the product name, truncated if too long.Rowfor prices: Shows the current price and the previous price with a strikethrough.
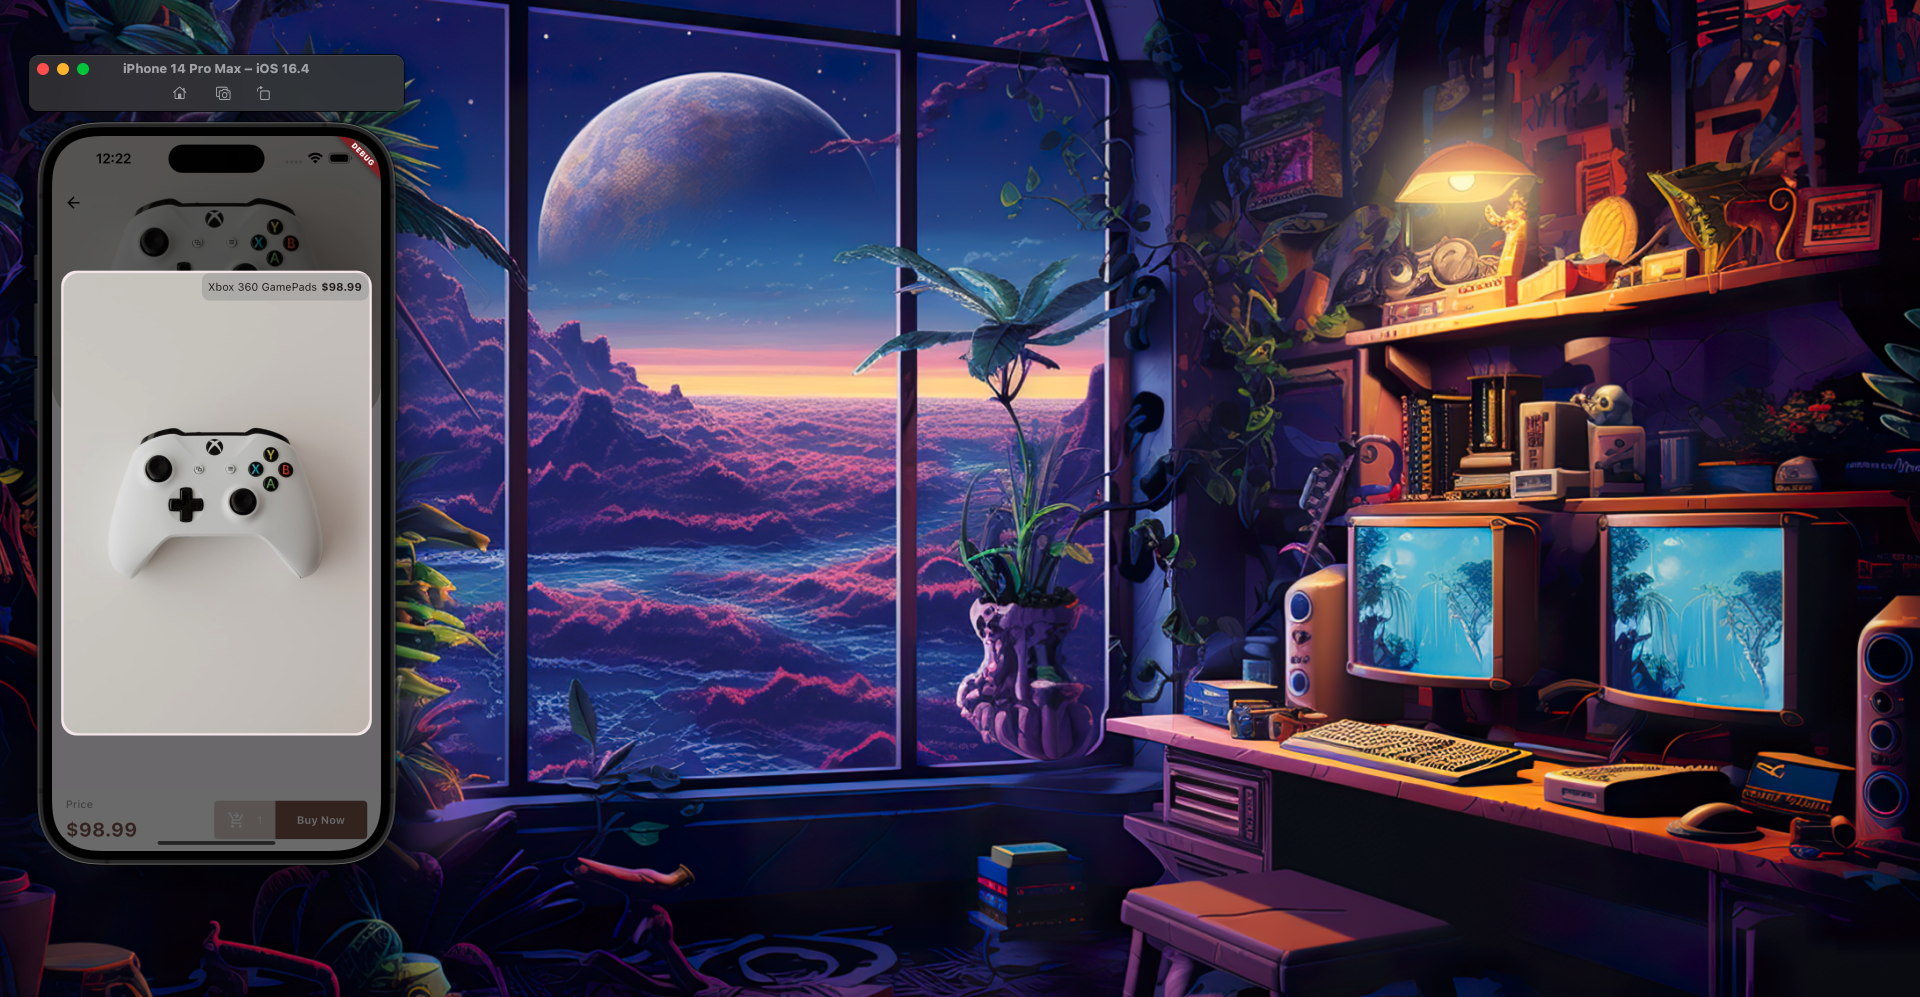
A Few Screenshots:


Conclusion
go_router is a powerful and flexible routing library for Flutter, offering a clean and intuitive API for navigation. Whether you’re building a simple app or a complex navigation structure, go_router provides the tools you need to create a seamless user experience.
By following this comprehensive guide, you should now be well-equipped to integrate and leverage go_router in your Flutter projects. The provided example of a minimalistic shopping app demonstrates practical application of its features.
References
For more advanced features and detailed code examples, refer to the official
go_routerdocumentationYou can also check out the
go_routerGitHub repository
Source: freeCodeCamp Programming Tutorials: Python, JavaScript, Git & MoreÂ

