
In this guide, you’ll build a full server-side rendered (SSR) authentication system using Astro, Supabase, and Cloudflare Turnstile to protect against bots.
By the end, you’ll have a fully functional authentication system with Astro actions, magic link authentication using Supabase, bot protection via Cloudflare Turnstile, protected routes and middleware, and secure session management.
Table of Contents
Prerequisites
This tutorial assumes you are familiar with:
Web development frameworks
Basic Backend-as-a-Service (BaaS) concepts
Understanding the Technologies
What is Astro?
Astro is a UI-agnostic web framework that renders server-first by default. It can be used with any UI framework, including Astro client components.
What are Astro Actions?
Astro actions allow you to write server-side functions that can be called without explicitly setting up API routes. They provide many useful utilities that simplify the process of running server logic and can be called from both client and server environments.
What is Supabase?
Supabase is an open-source Backend-as-a-Service that builds upon Postgres. It provides key features such as authentication, real-time capabilities, edge functions, storage, and more. Supabase offers both a hosted version for easy scaling and a self-hostable version for full control.
What is Cloudflare Turnstile?
Turnstile is Cloudflare’s replacement for CAPTCHAs, which are visual puzzles used to differentiate between genuine users and bots. Unlike traditional CAPTCHAs, which are visually clunky, annoying, and sometimes difficult to solve, Turnstile detects malicious activity without requiring users to solve puzzles, while providing a better user experience.
Understanding SSR Authentication
Server-side rendered (SSR) auth refers to handling authentication on the server using a cookie-based authentication method.
The flow works as follows:
The server creates a session and stores a session ID in a cookie sent to the client
The browser receives the cookie and automatically includes it in future requests
The server uses the cookie to determine if the user is authenticated
Since browsers cannot modify HTTP-only cookies and servers cannot access local storage, SSR authentication requires careful management to prevent security risks such as session hijacking and stale sessions.
SSR vs. SPA Authentication
Single-Page Applications (SPAs), like traditional React apps, handle authentication on the client side because they don’t have direct access to a server. SPAs typically use JWTs stored in local storage, cookies, or session storage, sending these tokens in HTTP headers when communicating with servers.
Why Protect Auth Forms?
Authentication protects sensitive resources from unauthorized access, making auth forms primary targets for bots and malicious actors. Taking extra precautions is important for maintaining security.
Part 1: How to Set Up the Backend
Set Up Supabase Backend
First, you’ll need a Supabase account. Create a project, then:
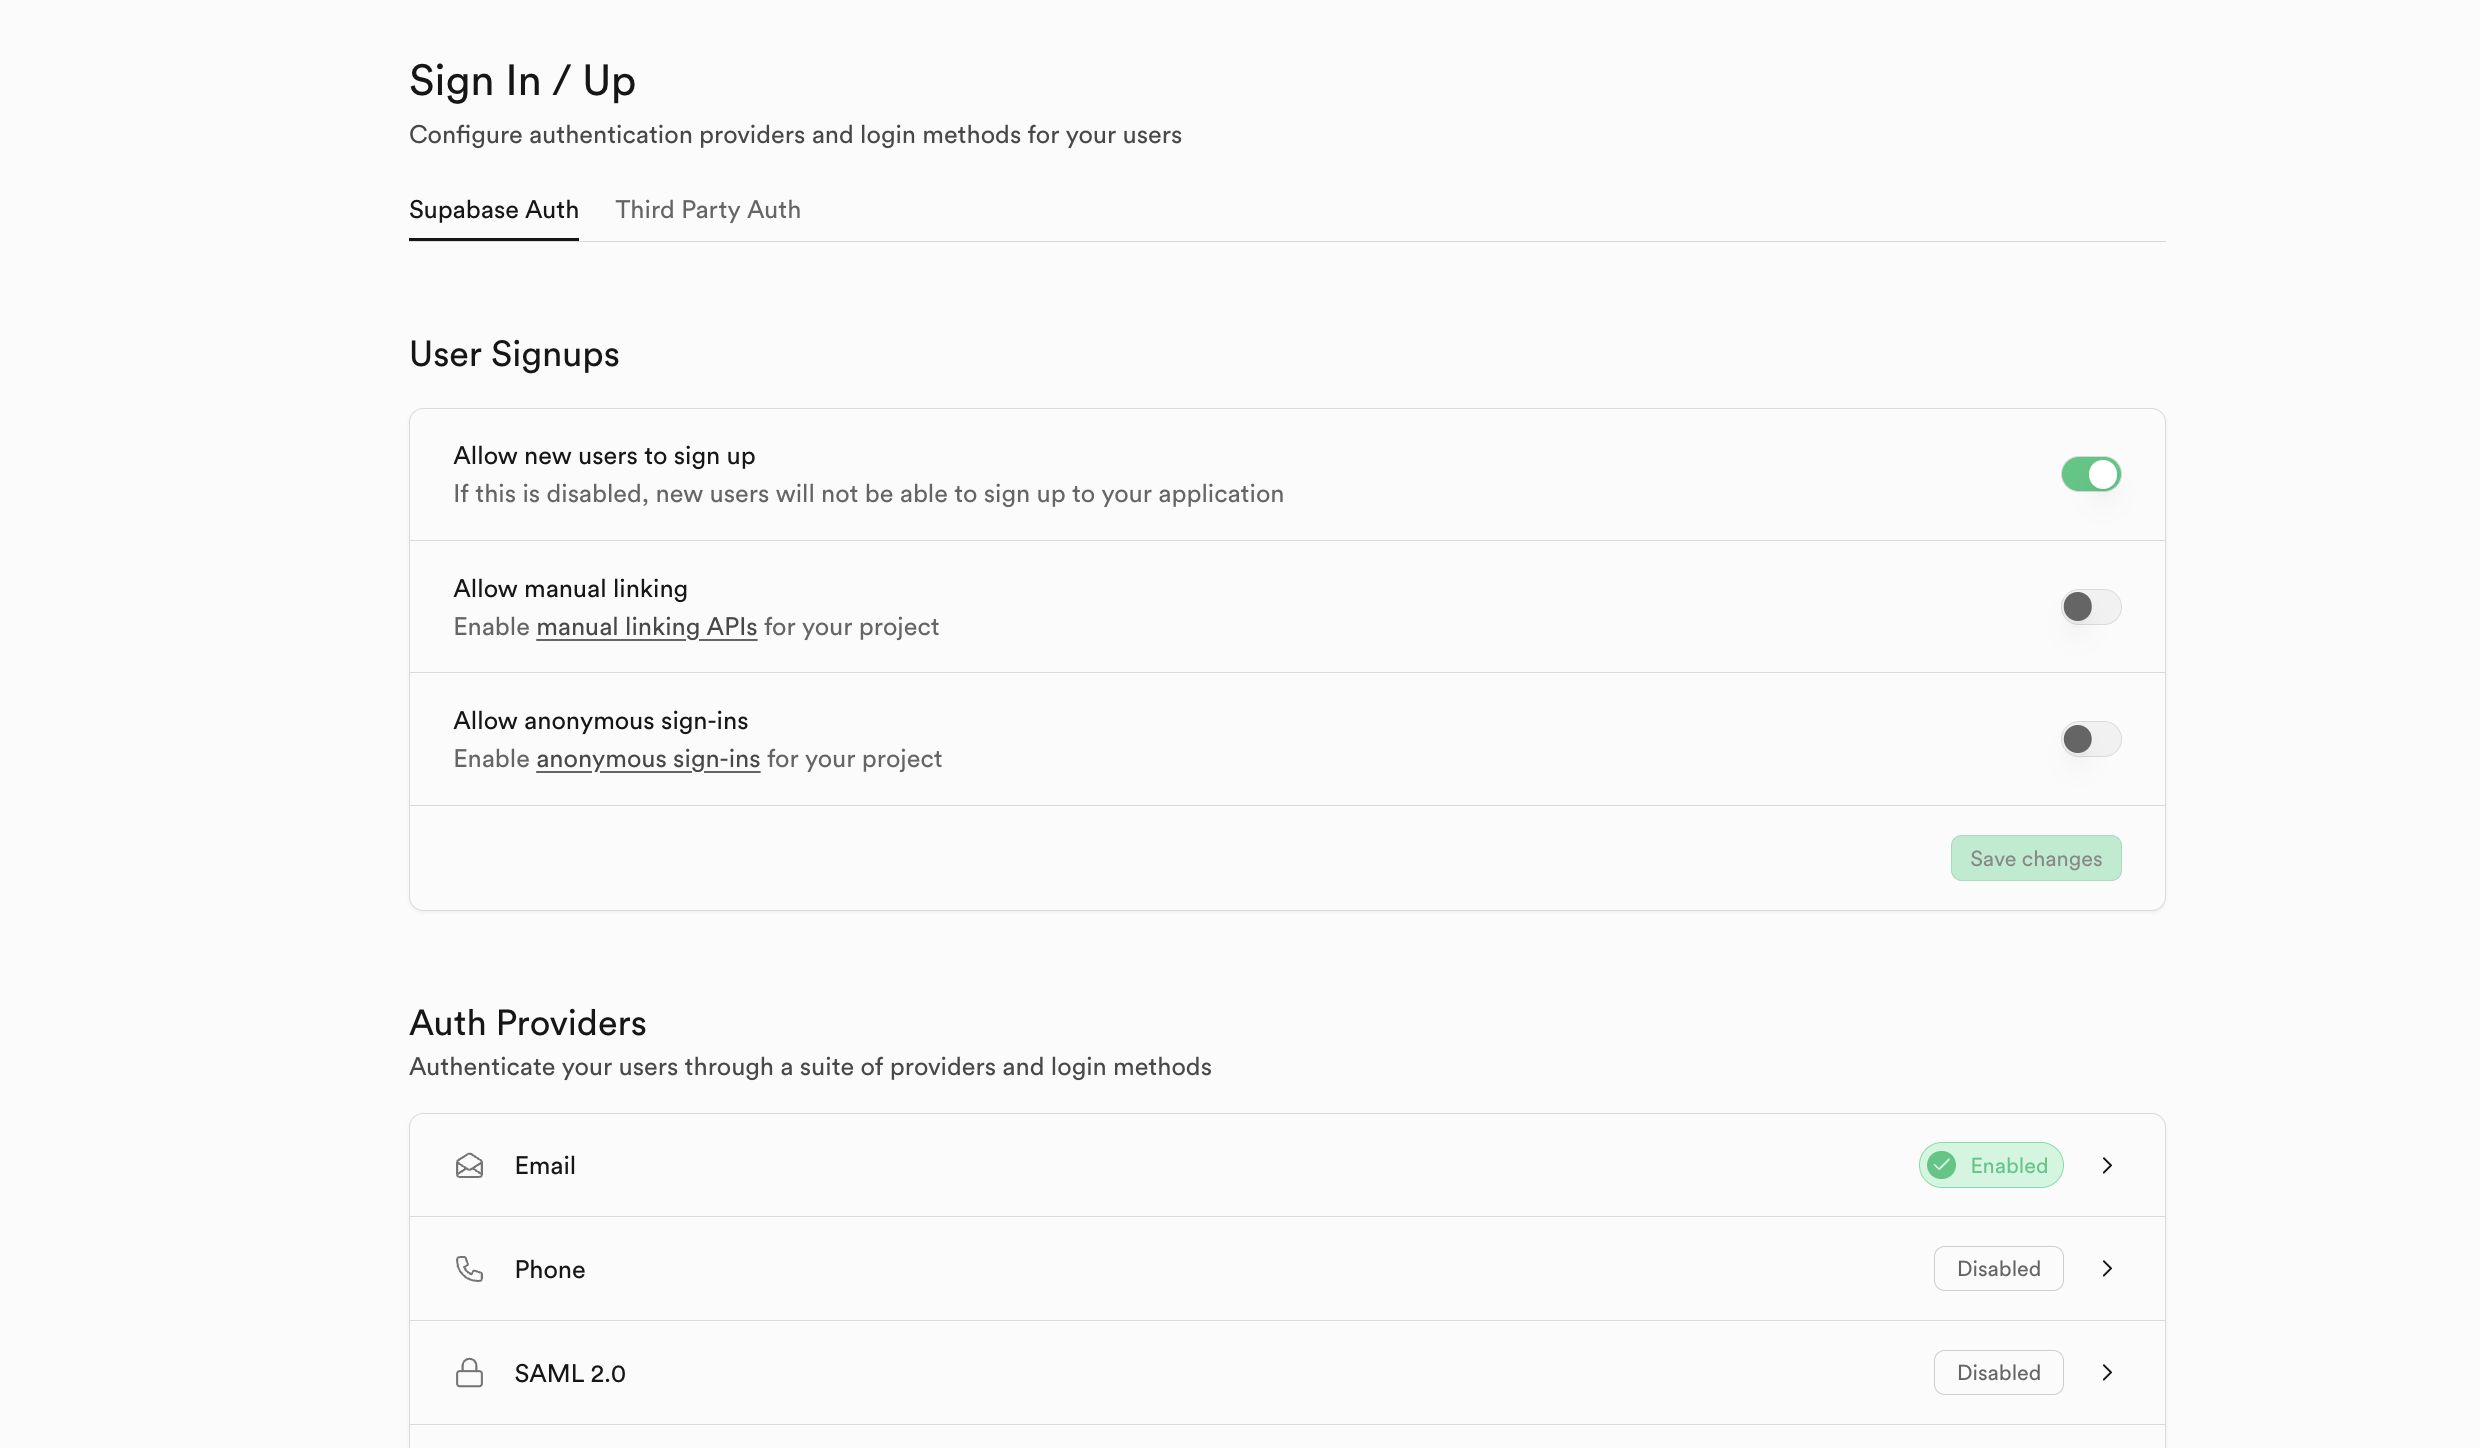
Go to the Authentication tab in the sidebar
Click the Sign In / Up tab under Configuration
Enable user sign-ups
Scroll down to Auth Providers and enable email (disable email confirmation for this tutorial)
Set Up Cloudflare Turnstile
Click the Turnstile tab in the sidebar
Click the “Add widget” button
Name your widget and add “localhost” as the hostname
Leave all other settings as default, and create the widget

After creating the widget, copy the secret key and add it to your Supabase dashboard:
Go back to Supabase Authentication settings
Navigate to the Auth Protection tab under Configuration
Turn on Captcha protection
Choose Cloudflare as the provider
Paste your secret key

Part 2: How to Set Up the Frontend
Create the Astro Project
Next, you will need to create an Astro project. Open your preferred IDE or Text editor’s integrated terminal and run the following command to scaffold an Astro project in a folder named “ssr-auth.” Feel free to use any name you like.
npm create astro@latest ssr-auth
Follow the provided prompts and choose a basic template to start with. When it’s done, change into the folder, then run npm install to install dependencies, followed by npm run dev to start the server, and your site will be available at localhost:4321.
Configure Astro for SSR
Set Astro to run in SSR mode by adding output: "server", to the defineConfig function found in the astro.config.mjs file at the root of the folder.
Next, add an adapter to create a server runtime. For this, use the Node.js adapter by running this command in a terminal: npx astro add node. This will add it and automatically make all relevant changes.
Finally, add Tailwind for styling. Run this command in a terminal window: npx astro add tailwind. Follow the prompts, and it will make any changes necessary.
At this stage, your astro.config.mjs should look like this:
// @ts-check
import { defineConfig } from "astro/config";
import node from "@astrojs/node";
import tailwindcss from "@tailwindcss/vite";

// https://astro.build/config
export default defineConfig({
  output: "server",
  adapter: node({
    mode: "standalone",
  }),
  vite: {
    plugins: [tailwindcss()],
  },
});
Install Supabase Dependencies
You can do this by running the following command:
npm install @supabase/supabase-js @supabase/ssr
Configure Environment Variables
Create a .env file in the project root and add the following. Remember to replace with your actual credentials:
SUPABASE_URL=<YOUR_URL>
SUPABASE_ANON_KEY=<YOUR_ANON_KEY>
TURNSTILE_SITE_KEY=<YOUR_TURNSTILE_SITE_KEY>
You can get the Supabase values from the dashboard:
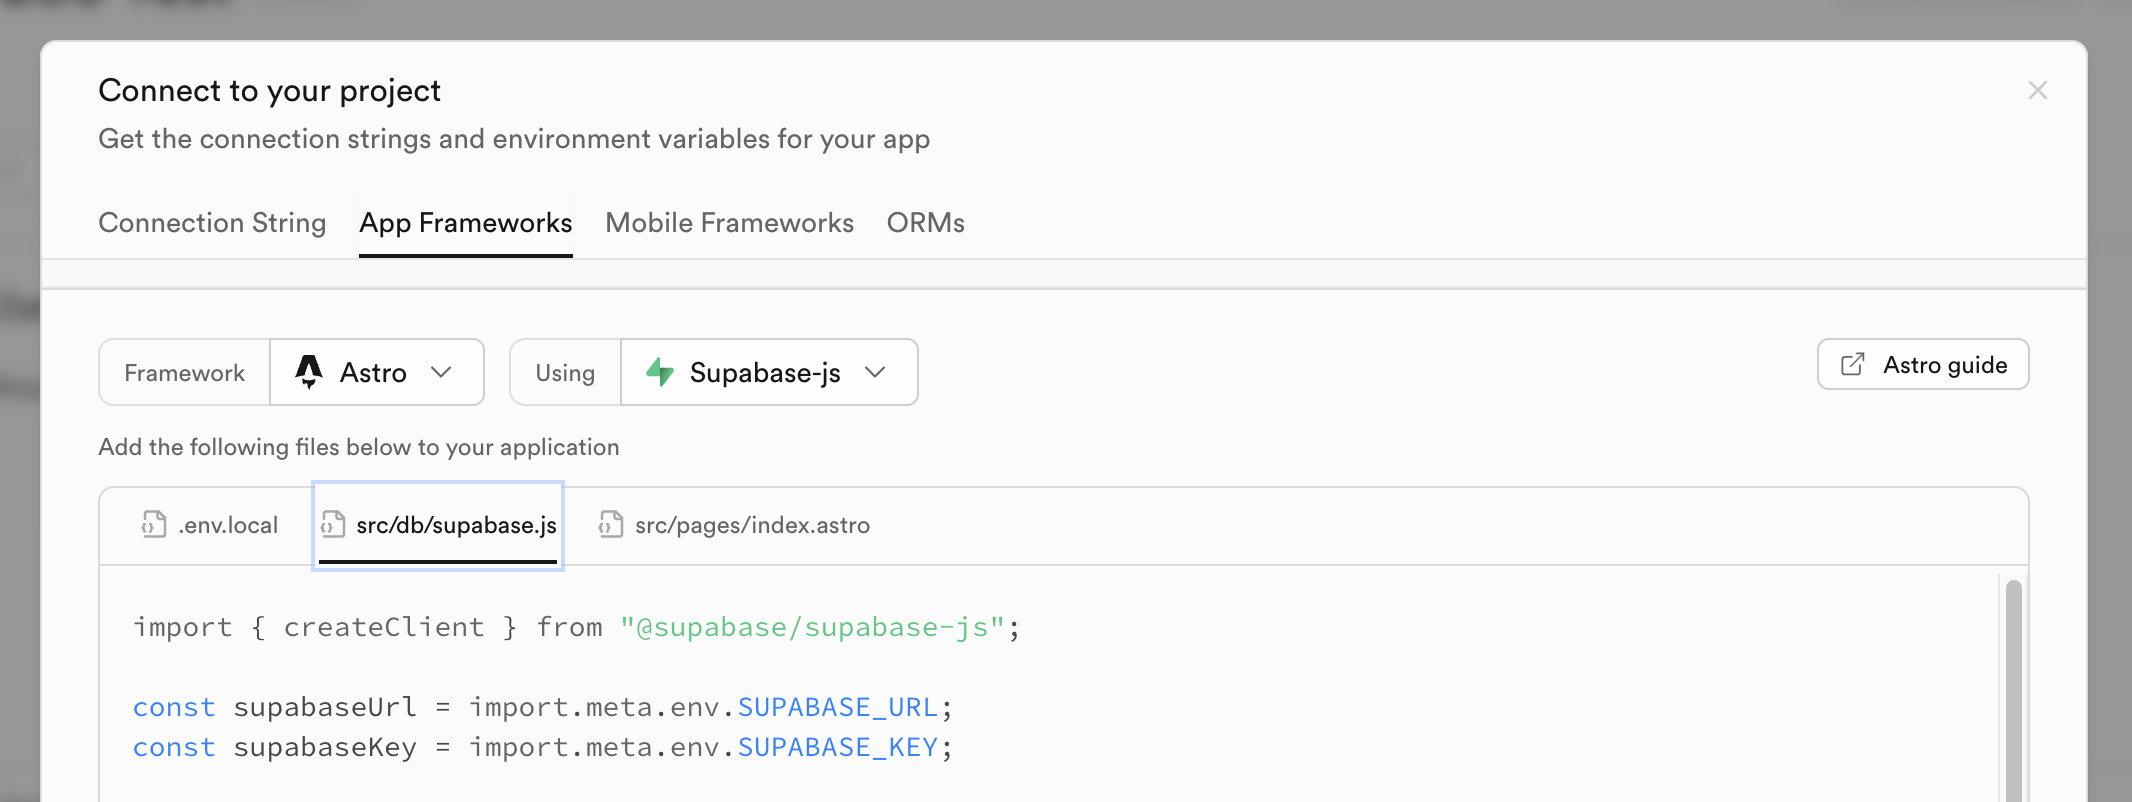
💡Note: In Astro, environment variables accessed on the client side must be prefixed with ‘PUBLIC’. But since we’re using Astro actions that run on the server, the prefix is not required.
Part 3: How to Set Up Supabase SSR
Create the Supabase Client
Create src/lib/supabase.ts:
import { createServerClient, parseCookieHeader } from "@supabase/ssr";
import type { AstroCookies } from "astro";

export function createClient({
    request,
    cookies,
}: {
    request: Request;
    cookies: AstroCookies;
}) {
    const cookieHeader = request.headers.get("Cookie") || "";

    return createServerClient(
        import.meta.env.SUPABASE_URL,
        import.meta.env.SUPABASE_ANON_KEY,
        {
            cookies: {
                getAll() {
                    const cookies = parseCookieHeader(cookieHeader);
                    return cookies.map(({ name, value }) => ({
                        name,
                        value: value ?? "",
                    }));
                },
                setAll(cookiesToSet) {
                    cookiesToSet.forEach(({ name, value, options }) =>
                        cookies.set(name, value, options)
                    );
                },
            },
        }
    );
}
This sets up Supabase to handle cookies in a server-rendered application and exports a function that takes the request and cookies object as input. The function is set up like this because Astro has three ways to access request and cookie information:
Through Astro’s global object, which is only available on Astro pages.
Through
AstroAPIContextobject, which is only available in Astro actions.Through
APIContextwhich is a subset of the global object and is available through API routes and middleware.
So the createClient function accepts the request and cookies objects separately to make it flexible and applicable in the various contexts in which it may be used.
Create Middleware for Route Protection
Next, create a middleware.ts file in the src folder and paste this into it:
import { defineMiddleware } from "astro:middleware";
import { createClient } from "./lib/supabase";

export const onRequest = defineMiddleware(async (context, next) => {
    const { pathname } = context.url;

    console.log("Middleware executing for path:", pathname);

    const supabase = createClient({
        request: context.request,
        cookies: context.cookies,
    });

    if (pathname === "/protected") {
        console.log("Checking auth for protected route");

        const { data } = await supabase.auth.getUser();

        // If no user, redirect to index
        if (!data.user) {
            return context.redirect("/");
        }
    }

    return next();
});
This middleware checks for an active user when accessing the protected route and redirects unauthenticated users to the index page.
Part 4: How to Build the User Interface
Update the Layout
First, update src/layouts/Layout.astro to include the Turnstile script. Add this just above the closing </head> tag:
<script
    src="https://challenges.cloudflare.com/turnstile/v0/api.js"
    async
    defer>
</script>
Create the Sign-In Page
Replace the contents of src/pages/index.astro:
---
import Layout from "../layouts/Layout.astro";
import { createClient } from "../lib/supabase";
import "../styles/global.css";

const supabase = createClient({
    request: Astro.request,
    cookies: Astro.cookies,
});

const { data } = await supabase.auth.getUser();

if (data.user) {
    return Astro.redirect("/protected");
}

const apiKey = import.meta.env.TURNSTILE_SITE_KEY;
---

<Layout>
    <section class="flex flex-col items-center justify-center m-30">
        <h1 class="text-4xl text-left font-bold mb-12">Sign In to Your Account</h1>
        <form id="signin-form" class="flex flex-col gap-2 w-1/2">
            <label for="email" class="">Enter your email</label>
            <input
                type="email"
                name="email"
                id="email"
                placeholder="youremail@example.com"
                class="border border-gray-500 rounded-md p-2"
                required
            />
            <div class="cf-turnstile" data-sitekey={apiKey}></div>
            <button
                type="submit"
                id="sign-in"
                class="bg-gray-600 hover:bg-gray-700 p-2 rounded-md text-white font-bold w-full cursor-pointer disabled:bg-gray-500 disabled:hover:bg-gray-500 disabled:cursor-not-allowed"
                >Sign In</button
            >
        </form>
    </section>
</Layout>
Here, the frontmatter creates a Supabase server client and then uses it to check if we have an active user. It redirects based on this information. This works because the front matter runs on the server side, and the project is set to server output.
The template displays a simple form with an email input. To complete it, add this below the closing </Layout> tag:
<script>
    import { actions } from "astro:actions";

    declare global {
        interface Window {
            turnstile?: {
                reset: () => void;
            };
        }
    }

    const signInForm = document.querySelector("#signin-form") as HTMLFormElement;
    const formSubmitBtn = document.getElementById("sign-in") as HTMLButtonElement;

    signInForm?.addEventListener("submit", async (e) => {
        e.preventDefault();
        formSubmitBtn.disabled = true;
        formSubmitBtn.textContent = "Signing in...";

        try {
            const turnstileToken = (
                document.querySelector(
                    "[name='cf-turnstile-response']"
                ) as HTMLInputElement
            )?.value;

            if (!turnstileToken) {
                throw new Error("verification_missing");
            }

            const formData = new FormData(signInForm);
            formData.append("captchaToken", turnstileToken);

            const results = await actions.signIn(formData);

            if (!results.data?.success) {
                if (results.data?.message?.includes("captcha protection")) {
                    alert("Verification failed. Please try again.");
                    if (window.turnstile) {
                        window.turnstile.reset();
                    }
                    formSubmitBtn.disabled = false;
                    formSubmitBtn.textContent = "Sign In";
                    return;
                } else {
                    alert("Oops! Could not sign in. Please try again");
                    formSubmitBtn.disabled = false;
                    formSubmitBtn.textContent = "Sign In";
                    return;
                }
            }

            formSubmitBtn.textContent = "Sign In";
            alert("Please check your email to sign in");
        } catch (error) {
            if (window.turnstile) {
                window.turnstile.reset();
            }
            formSubmitBtn.disabled = false;
            formSubmitBtn.textContent = "Sign In";
            console.log(error);
            alert("Something went wrong. Please try again");
        }
    });
</script>
This adds some vanilla JavaScript that calls the SignIn Upon form submission. This action provides user feedback through alerts and manages the button’s text and disabled state. This effectively adds client-side interactivity to the page.
Create the Protected Page
Create src/pages/protected.astro:
---
import Layout from "../layouts/Layout.astro";
import { createClient } from "../lib/supabase";
import "../styles/global.css";

const supabase = createClient({
    request: Astro.request,
    cookies: Astro.cookies,
});

const { data } = await supabase.auth.getUser();
---

<Layout>
    <section class="flex flex-col items-center justify-center m-30">
        <h1 class="text-4xl text-left font-bold mb-12">You are logged in!</h1>
        <p class="mb-6">Your user Id: {data.user?.id}</p>
        <button
            id="sign-out"
            class="bg-gray-600 hover:bg-gray-700 px-4 py-2 rounded-md text-white font-bold cursor-pointer disabled:bg-gray-500 disabled:hover:bg-gray-500 disabled:cursor-not-allowed"
            >Sign Out</button
        >
    </section>
</Layout>

<script>
    import { actions } from "astro:actions";
    const signOutBtn = document.getElementById("sign-out") as HTMLButtonElement;

    signOutBtn?.addEventListener("click", async (e) => {
        e.preventDefault();
        signOutBtn!.disabled = true;
        signOutBtn!.textContent = "Signing out...";

        try {
            const results = await actions.signOut();

            if (!results.data?.success) {
                signOutBtn!.disabled = false;
                signOutBtn!.textContent = "Sign Out";
                return alert("Oops! Could not sign Out. Please try again");
            }
            return window.location.reload();
        } catch (error) {
            signOutBtn.disabled = false;
            signOutBtn.textContent = "Sign Out";
            console.log(error);
            return alert("Something went wrong. Please try again");
        }
    });
</script>
This page retrieves the user data server-side in the front matter and displays it in the template, along with a sign-out button.
The JavaScript in the script tags handle calling the sign-out action, user feedback, and button state, as in the index.astro page.
Part 5: How to Set Up Astro Actions
Create the Authentication Actions
Finally, add an actions folder in the src folder and create an index.ts file to hold our logic. Paste the following into it:
import { defineAction, type ActionAPIContext } from "astro:actions";
import { z } from "astro:schema";
import { createClient } from "../lib/supabase";

const emailSignUp = async (
    {
        email,
        captchaToken,
    }: {
        email: string;
        captchaToken: string;
    },
    context: ActionAPIContext
) => {
    console.log("Sign up action");
    try {
        const supabase = createClient({
            request: context.request,
            cookies: context.cookies,
        });

        const { data, error } = await supabase.auth.signInWithOtp({
            email,
            options: {
                captchaToken,
                emailRedirectTo: "http://localhost:4321/api/exchange",
            },
        });

        if (error) {
            console.error("Sign up error", error);
            return {
                success: false,
                message: error.message,
            };
        } else {
            console.log("Sign up success", data);
            return {
                success: true,
                message: "Successfully logged in",
            };
        }
    } catch (err) {
        console.error("SignUp action other error", err);
        return {
            success: false,
            message: "Unexpected error",
        };
    }
};

export const server = {
    signIn: defineAction({
        accept: "form",
        input: z.object({
            email: z.string().email(),
            captchaToken: z.string(),
        }),
        handler: async (input, context) => {
            return emailSignUp(input, context);
        },
    }),
    signOut: defineAction({
        handler: async (_, context) => {
            const supabase = createClient({
                request: context.request,
                cookies: context.cookies,
            });
            const { error } = await supabase.auth.signOut();
            if (error) {
                console.error("Sign out error", error);
                return {
                    success: false,
                    message: error.message,
                };
            }
            return {
                success: true,
                message: "Successfully signed out",
            };
        },
    }),
};
This action handles both sign-in and sign-out methods. A Supabase server instance is created during the sign-in method, and the magic link method is used for sign-in. It passes a redirect URL, which we have yet to create, and handles any errors that may occur.
It also passes the token verification, allowing Supabase to perform verification on our behalf, eliminating the need to call Cloudflare’s verify APIs directly.
The sign-out method calls Supabase’s sign-out method and handles any potential errors.
The redirect URL refers to an API route that exchanges the code from the email Supabase sends for a session that Supabase handles.
Create the Code Exchange API Route
Create src/pages/api/exchange.ts:
import type { APIRoute } from "astro";
import { createClient } from "../../lib/supabase";

export const GET: APIRoute = async ({ request, cookies, redirect }) => {
    const url = new URL(request.url);
    const code = url.searchParams.get("code");

    if (!code) {
        return redirect("/");
    }

    const supabase = createClient({ request, cookies });
    const { error } = await supabase.auth.exchangeCodeForSession(code);

    if (error) {
        console.error("Error exchanging code for session:", error);
        return redirect("/404");
    }

    return redirect("/protected");
};
This grabs the code from the URL in the magic link sent, creates a server client, and calls the exchangeCodeForSession method with the code. It handles any error by redirecting to Astro’s built-in not-found page.
Otherwise, it will redirect to the protected page as Supabase handles the session implementation details.
Part 6: How to Test Your Application
Start your development server: npm run dev
Visit the provided localhost URL. You should see the sign-in page with the Turnstile widget:

If you try to access the /protected page, it will redirect you back to this view until you sign in. Now, sign in, and you should get an email with a link that will redirect you to the /protected page. This is what you should see:

And with that, you’ve successfully built a comprehensive auth system that leverages Astro actions, Supabase auth, and Cloudflare Turnstile’s bot protection. This setup provides a secure, user-friendly authentication experience while protecting your application from malicious actors.
Notes and Additional Resources
Useful Documentation
Complete Code Repository
The complete code for this project is available on GitHub:
Source: freeCodeCamp Programming Tutorials: Python, JavaScript, Git & MoreÂ

