
Modern banking faces dual challenges: delivering rapid loan processing while maintaining robust security against sophisticated fraud. Amazon Q Business provides AI-driven analysis of regulatory requirements and lending patterns. Additionally, you can now report fraud from the same interface with a custom plugin capability that can integrate with Amazon Connect. This fusion of technology transforms traditional lending by enabling faster processing times, faster fraud prevention, and a seamless user experience.
Amazon Q Business is a generative AI-powered assistant that can answer questions, provide summaries, generate content, and securely complete tasks based on data and information in your enterprise systems. Amazon Q Business provides plugins to interact with popular third-party applications, such as Jira, ServiceNow, Salesforce, PagerDuty, and more. Administrators can enable these plugins with a ready-to-use library of over 50 actions to their Amazon Q Business application. Where pre-built plugins are not available, Amazon Q Business provides capabilities to build custom plugins to integrate with your application. Plugins help streamline tasks and boost productivity by integrating external services into the Amazon Q Business chat interface.
Amazon Connect is an AI-powered application that provides one seamless experience for your contact center customers and users. It’s comprised of a full suite of features across communication channels. Amazon Connect Cases, a feature of Amazon Connect, allows your agents to track and manage customer issues that require multiple interactions, follow-up tasks, and teams in your contact center. Agents can document customer issues with the relevant case details, such as date/time opened, issue summary, customer information, and status, in a single unified view.
The solution integrates with Okta Identity Management Platform to provide robust authentication, authorization, and single sign-on (SSO) capabilities across applications. Okta can support enterprise federation clients like Active Directory, LDAP, or Ping.
For loan approval officers reviewing mortgage applications, the seamless integration of Amazon Q Business directly into their primary workflow transforms the user experience. Rather than context-switching between applications, officers can harness the capabilities of Amazon Q to conduct research, analyze data, and report potential fraud cases within their mortgage approval interface.
In this post, we demonstrate how to elevate business productivity by leveraging Amazon Q to provide insights that enable research, data analysis, and report potential fraud cases within Amazon Connect.
Solution overview
The following diagram illustrates the solution architecture.

The solution includes the following steps:
- Users in Okta are configured to be federated to AWS IAM Identity Center, and a unique ID (audience) is configured for an Amazon API Gateway
- When the user chooses to chat in the web application, the following flow is initiated:
- The Amazon Q Business application uses the client ID and client secret key to exchange the Okta-generated JSON Web Token (JWT) with IAM Identity Center. The token includes the AWS Security Token Service (AWS STS) context identity.
- A temporary token is issued to the application server to assume the role and access the Amazon Q Business API.
- The Amazon Q Business application fetches information from the Amazon Simple Storage Service (Amazon S3) data source to answer questions or generate summaries.
- The Amazon Q custom plugin uses an Open API schema to discover and understand the capabilities of the API Gateway API.
- A client secret is stored in AWS Secrets Manager and the information is provided to the plugin.
- The plugin assumes the AWS Identity and Access Management (IAM) role with the kms:decrypt action to access the secrets in Secret Manager.
- When a user wants to send a case, the custom plugin invokes the API hosted on API Gateway.
- API Gateway uses the same Okta user’s session and authorizes the access.
- API Gateway invokes AWS Lambda to create a case in Amazon Connect.
- Lambda hosted in Amazon Virtual Private Cloud (Amazon VPC) internally calls the Amazon Connect API using an Amazon Connect VPC interface endpoint powered by AWS PrivateLink.
- The contact center agents can also use Amazon Q in Connect to further assist the user.
Prerequisites
The following prerequisites need to be met before you can build the solution:
- Have a valid AWS account.
- Have an Amazon Q Business Pro subscription to create Amazon Q applications.
- Have the service-linked IAM role
AWSServiceRoleForQBusiness. If you don’t have one, create it with the amazonaws.com service name. - Have an IAM role in the account that will allow the AWS CloudFormation template to create new roles and add policies. If you have administrator access to the account, no action is required.
- Enable logging in AWS CloudTrail for operational and risk auditing.
Okta prerequisites:
- Have an Okta developer account and setup an application and API. If you do not have an Okta, please see the following instructions.
Set up an application and API in Okta
Complete the following steps to set up an application and API in Okta:
- Log in to the Okta console.
- Provide credentials and choose Login.
- Choose Continue with Google.
- You might need to set up multi-factor authentication following the instructions on the page.
- Log in using the authentication code.
- In the navigation pane, choose Applications and choose Create App Integration.

- Select OIDC – OpenID for Sign-in method and Web Application for Application type, then choose Next.

- For App integration name, enter a name (for example,
myConnectApp). - Select Authorization Code and Refresh Token for Grant type.
- Select Skip group assignment for now for Control Access.
- Choose Save to create an application.
- Take note of the client ID and secret.
Add Authentication server and metadata
- In the navigation pane, choose Security, then choose API.
- Choose Add Authorization Server, provide the necessary details, and choose Save.

- Take note of the Audience value and choose Metadata URI.
Audience is provided as an input to the CloudFormation template later in the section.

The response will provide the metadata.
- From the response, take note of the following:
issuerauthorization_endpointtoken_endpoint
- Under Scopes, choose Add Scope, provide the name write/tasks, and choose Create.

- On the Access Policies tab, choose Add Policy.
- Provide a name and description.
- Select The following clients and choose the application by entering my in the text box and choosing the application created earlier.
- Choose Create Policy to add a policy.

- Choose Add Rule to add a rule and select only Authorization Code for Grant type is.
- For Scopes requested, select The following scopes, then enter write in the text box and select the write/tasks
- Adjust Access token lifetime is and Refresh token lifetime is to minutes.
- Add but will expire if not used every as 5 minutes.
- Choose Create rule to create the rule.

Add users
- In the navigation pane, choose Directory and choose People.
- Choose Add person.

- Complete the fields:
- First name
- Last name
- Username (use the same as the primary email)
- Primary email
- Select Send user activation email now.
- Choose Save to save the user.

- You will receive an email. Choose the link in the email to activate the user.
- Choose Groups, then choose Add group to add the group.
- Provide a name and optional description.
- Refresh the page and choose the newly created group.
- Choose Assign people to assign users.
- Add the newly created user by choosing the plus sign next to the user.

- Under Applications, select the application name created earlier.
- On the Assignments tab, choose Assign to People.

- Select the user and choose Assign.
- Choose Done to complete the assignment.

Set up Okta as an identity source in IAM Identity Center
Complete the following steps to set up Okta as an identity source:
- Enable an IAM Identity Center instance.
- Configure SAML and SCIM with Okta and IAM Identity Center.
- On the IAM Identity Center console, navigate to the instance.
- Under Settings, copy the value Instance ARN. You will need it when you run the CloudFormation template.
Deploy resources using AWS CloudFormation
In this step, we use a CloudFormation template to deploy a Lambda function, configure the REST API, and create identities. Complete the following steps:
- Open the AWS CloudFormation console in the
us-east-1AWS Region. - Choose Create stack.
- Download the CloudFormation template and upload it in the Specify template
- Choose Next.
- For Stack name, enter a name (for example,
QIntegrationWithConnect). - In the Parameters section, provide values for the following:
- Audience
- AuthorizationUrl
- ClientId
- ClientSecret
- IdcInstanceArn
- Issuer
- TokenUrl

- Choose Next.
- Keep the other values as default and select I acknowledge that AWS CloudFormation might create IAM resources in the Capabilities.
- Select I acknowledge that AWS CloudFormation might require the following capability: CAPABILITY_AUTO_EXPAND in the Capabilities.
- Choose Submit to create the CloudFormation stack.
- After the successful deployment of the stack, on the Outputs tab, note the value for
ALBDNSName.
The CloudFormation template does not deploy certificates for Application Load Balancer. We strongly recommend creating a secure listener for the Application Load Balancer and deploying at least one certificate.
Assign user to Amazon Q Application
- On the Amazon Q Business console, navigate to the application named qbusiness-connect-case.
- Under User Access, choose Manage user access.
- On the user tab, choose Add groups and users and search for the user you created in Okta and propagated in IAM Identity Center.
- Choose Assign and Done.

- Choose Confirm to confirm the subscription.
- Copy the link for Deployed URL.

- Create a callback URL:
<Deployed URL>/oauth/callback.
We recommend that you enable a budget policy notification to prevent unwanted billing.
Configure login credentials for the web application
Complete the following steps to configure login credentials for the web application:
- Navigate to the Okta developer login.
- Under Applications, choose the web application
myConnectAppcreated earlier. - Choose Edit in the General Settings
- Enter the callback URL for Sign-in redirect URIs.
- Choose Save.

Sync the knowledge base
Complete the following steps to sync your knowledge base:
- On the Amazon S3 console, choose Buckets in the navigation pane.
- Search for
AmazonQDataSourceBucketand choose the bucket. - Download the sample AnyBank regulations document.
- Upload the PDF file to the S3 bucket.
- On the Amazon Q Business console, navigate to the Amazon Q Business application.
- In the Data sources section, select the data source.
- Choose Sync now to sync the data source.

Embed the web application
Complete the following steps to embed the web application:
- On the Amazon Q Business console, under Enhancements, choose Amazon Q embedded.
- Choose Add allowed website.
- For Enter website URL, enter
http://<ALBDNSName>.
Test the solution
Complete the following steps to test the solution:
- Copy the
ALBDNSNamevalue from the outputs section of the CloudFormation stack and open it in a browser.
You will see an AnyBank website.

- Choose Chat with us and the Okta sign-in page will pop up.
- Provide the sign-in details.

- Upon verification, close the browser tab.
- Navigate to the Amazon Q Business application in the chat window.
- In the chat window, enter “What are the Fraud Detection and Prevention Measures?”
Amazon Q Business will provide the answers from the knowledge base.
Next, let’s assume that you detected a fraud and want to create a case.
- Choose the plugin CreateCase and ask the question, “Can you create a case reporting fraud?”

Amazon Q Business generates the title of the case based on the question.

- Choose Submit.
- If Amazon Q Business asks you to authorize your access, choose Authorize.

The CreateCase plugin will create a case in Amazon Connect
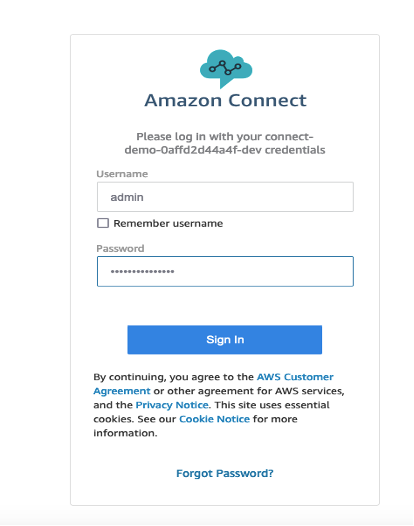
- Navigate to Amazon Connect and open the access URL in a browser.
- Provide the user name admin and get the password from visiting the parameter store in AWS Systems Manager.
- Choose Agent Workspace.

You can see the case that was created by Amazon Q Business using the custom plugin.

Clean up
To avoid incurring future charges, delete the resources that you created and clean up your account:
- Empty the contents of the S3 buckets you created as part of the CloudFormation stack.
- Delete the CloudFormation stack you created as part of this post.
- Disable the application from IAM Identity Center.
Conclusion
As businesses navigate the ever-changing corporate environment, the combination of Amazon Q Business and Amazon Connect emerges as a transformative approach to optimizing employee assistance and operational effectiveness. Harnessing the capabilities of AI-powered assistants and advanced contact center tools, organizations can empower their teams to access data, initiate support requests, and collaborate cohesively through a unified solution. This post showcased a banking portal, but this can be used for other industrial sectors or organizational verticals.
Stay up to date with the latest advancements in generative AI and start building on AWS. If you’re seeking assistance on how to begin, check out the Generative AI Innovation Center.
About the Authors
 Sujatha Dantuluri is a seasoned Senior Solutions Architect in the US federal civilian team at AWS, with over two decades of experience supporting commercial and federal government clients. Her expertise lies in architecting mission-critical solutions and working closely with customers to ensure their success. Sujatha is an accomplished public speaker, frequently sharing her insights and knowledge at industry events and conferences. She has contributed to IEEE standards and is passionate about empowering others through her engaging presentations and thought-provoking ideas.
 Dr Anil Giri is a Solutions Architect at Amazon Web Services. He works with enterprise software and SaaS customers to help them build generative AI applications and implement serverless architectures on AWS. His focus is on guiding clients to create innovative, scalable solutions using cutting-edge cloud technologies.
Source: Read MoreÂ

