


In React Router version 6, nesting routes is a straightforward way to render multiple components within the same layout based on the URL path. This feature is especially useful for applications where you want to display different sections of content without navigating away from the current page. It’s ideal for scenarios like forums, blogs, or dashboards, where users can explore different levels of content while maintaining the same overall page structure.
Step 1: Basic Routing
React app using react-router-dom. It defines three routes: the Home component for the root URL (/), the Posts component for /posts, and the About component for /about. The <Router> component wraps around the routes to enable navigation, and the <Routes> component handles the matching of URLs to the respective components.
app.js
import { BrowserRouter as Router, Routes, Route } from "react-router-dom";
import About from './components/about.js';
import Posts from './components/posts.js';
import Home from './components/home.js';
import './App.css';

function App() {
  return (
    <div className="App">
        <Router>
           <Routes>
                <Route path='/' element={<Home />} />
                <Route path='/posts' element={<Posts />} >
                <Route path='/about' element={<About />} />
            </Routes>
        </Router>
    </div>
  );
}

export default App;
In the app above, the routes defined are:
- “/”
- “/posts”
- “/about”
Notice that in React Router 6, you don’t need to prefix paths with a forward slash (“/”) in the path props. For instance, instead of writing “/about”, you just use “about”. The leading slash is automatically implied.
Step 2: Nested Routing
http://localhost:3000/posts/
Setting up nested routes is straightforward! Here’s how you can do it:
app.js
import { BrowserRouter as Router, Routes, Route } from "react-router-dom";
import About from './components/about.js';
import Posts from './components/posts.js';
import Home from './components/home.js';
import NewPostCreate from './components/newpostcreate.js';
import SinglePost from './components/singlepost';
import './App.css';

function App() {
  return (
    <div className="App">
        <Router>
           <Routes>
                <Route path='/' element={<Home />} />
                <Route path='posts' element={<Posts />} >
                       <Route path='newpostcreate' element={<NewPostCreate />} /> {/* Nested route for creating a post */}
                       <Route path=':postId' element={<SinglePost />} /> {/* Nested route for viewing a single post */}
                </Route>
                <Route path='about' element={<About />} />
            </Routes>
        </Router>
    </div>
  );
}

export default App;
Within a <Route> component, you can place additional <Route> components to define nested routes. Here’s how the structure would look:
- “/”
- “/about”
- “/posts”
- “/posts/newpostcreate”
- “/posts/123”
With this setup, nested routes can share data and render in a hierarchical manner. Now, we can explore how these nested routes pass information between each other and ensure proper display within their nested contexts.
Step 3: Nesting routes with <Outlet/>
http://localhost:3000/posts/newpostcreate
When you visit http://localhost:3000/posts/newpostcreate, you’ll see both the parent and child components. This happens because of nested routes—you can display multiple components under a single route.
However, if the < NewPostCreate/> component doesn’t show up, it’s because the parent <Posts /> component needs to include an <Outlet />. The <Outlet /> is a React Router feature used to render child components within a parent component.
For example, your Posts component might look like this:
posts.js
import { Outlet } from "react-router-dom";
import React from 'react';

export default function Posts() {
  const [currentUser] = React.useState("Faizan Ali")

    return (
        <div>
            <h1>List of posts go here!</h1>
            <Outlet context={[currentUser]}/>
        </div>
    )
}
The <Outlet /> component in React Router works similarly to props.children in regular React. It acts as a placeholder for displaying nested child routes within the main route.
You may be curious about how to transfer data from a parent route to its child route. In React Router 6, the <Outlet /> component has a built-in context prop. This context is essentially a React context provider, and it allows you to pass an array of states or values to the child components rendered inside the outlet.
newpostcreate.js
import { useOutletContext } from "react-router-dom";
import React from 'react';

export default function NewPostCreate() {
  const [currentUser] = useOutletContext()

    return (
        <div>
            <h1>Welcome {currentUser}, write a new post!</h1>
         <form/>
        </div>
    )
}
The <Outlet /> component in React Router works similarly to props.children in regular React. It functions as a placeholder that allows nested child routes to be displayed within the parent route.
You may be wondering how to transfer data from a parent route to a child route. In React Router 6, the <Outlet /> component has a built-in context prop. This context is essentially a React context provider, and it allows you to pass an array of states or values to the child components rendered inside the outlet.
Output:
http://localhost:3000/posts/

http://localhost:3000/posts/NewPostCreate

To use <Outlet /> with context:
- The parent must import Outlet.
- The parent component needs to include the <Outlet /> with a context, such as [state], when rendering.
- The child must import useOutletContext.
- The child must destructure the array with useOutletContext(). Order matters in this case, unlike with props and object destructuring, where the order doesn’t affect the outcome.
Now, on to the next nested route, :postId.
Step 4: Nested Routes and useParams
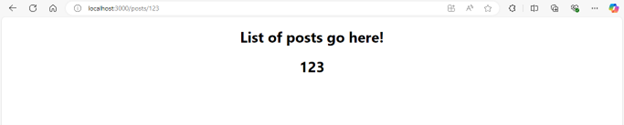
http://localhost:3000/posts/123
singlepost.js
import { useParams } from "react-router-dom"

function SinglePost() {

    let params = useParams()

    return <h1>{params.postId}</h1>
}
export default SinglePost;
- To display a specific post at /posts/123, we define a route with a dynamic parameter, represented by the colon: in the path:<Route path=’:postId’ element={<SinglePost />} />
- Next, use useParams inside the component to retrieve the route parameters:let params = useParams();
- Now, you can access the post ID (like 123 or any other value passed in the URL) by referencing params.postId within your component.
Output:
http://localhost:3000/posts/123
In conclusion, React Router 6 simplifies nesting routes, enabling efficient hierarchical navigation. Using components like <Outlet /> and useParams, developers can create dynamic, interactive applications with ease, while sharing data between parent and child routes. This makes it an excellent choice for building complex, seamless user experiences.
Source: Read MoreÂ
