Programming is the one area where AI is being used extensively. Most editors allow you to add AI agents like chatGPT, Microsoft’s Copilot etc.
There are also several open source large language models specifically centered around coding like CodeGemma.
And then we have a new player entering the scene and everyone talking about it.
This new player is OpenCoder, an open-source Code LLM available in 1.5B and 8B models.
Since OpenCoder is getting popular, I decided to quickly test it out as a local AI assistent to help me code in VS Code.
With my experience here, you’ll also be able to integrate OpenCoder (or any other LLM) into VS Code with the help of CodeGPT extension and enjoy the perks of a local AI assistant.
Step 1: Install VS Code (if you don’t have it already)
First, ensure that Visual Studio Code is installed on your system. If not, follow these steps to get it set up:
- Download VS Code for Ubuntu here.
- Once downloaded, open your terminal and install it by running:
sudo dpkg -i ./<downloaded-file>.debAfter installation, launch VS Code from your applications menu or by typing code in the terminal.
Step 2: Install the CodeGPT Extension
CodeGPT is a powerful tool that I’ve found invaluable for boosting productivity and simplifying coding workflows.
As an extension for VS Code, it integrates seamlessly, providing instant code suggestions, completions, and debugging insights right where I need them.
Here’s how to set it up:
- Open VS Code.
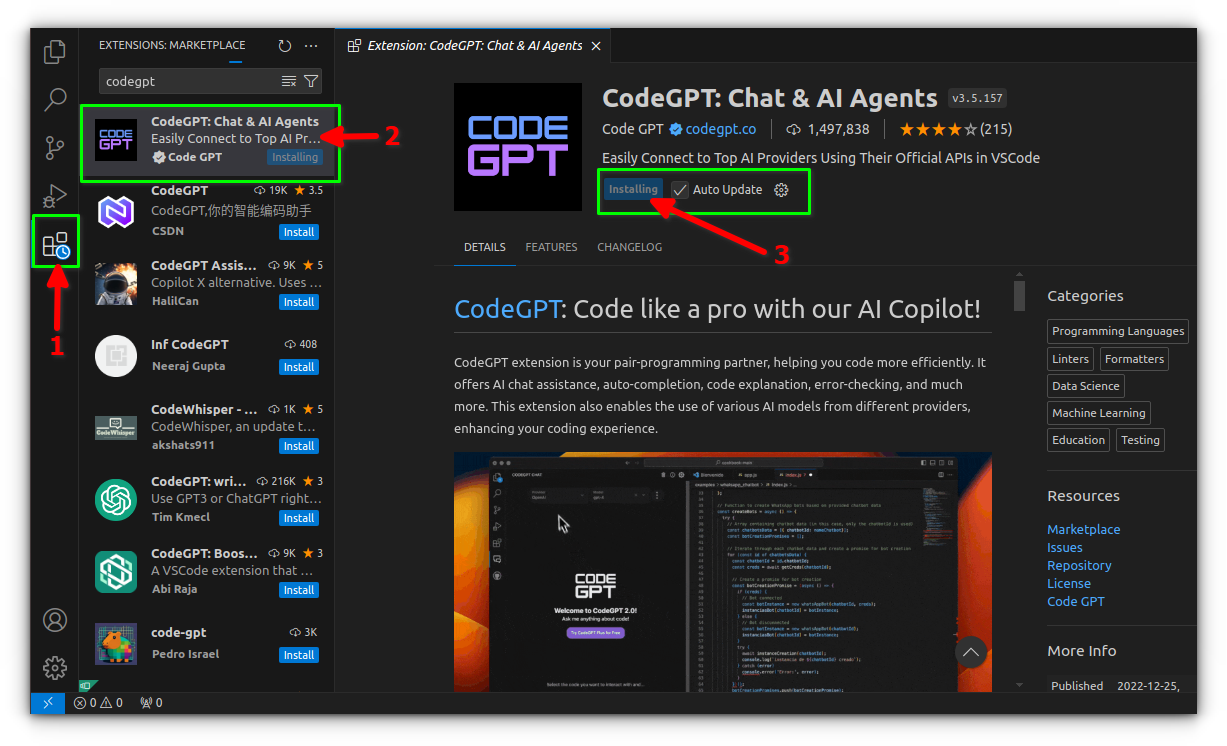
- Click on the Extensions icon in the sidebar.
- Search for “CodeGPT†in the Extensions Marketplace.
- Select the extension and click “Install.â€
After installation, the extension should appear in the sidebar for easy access.
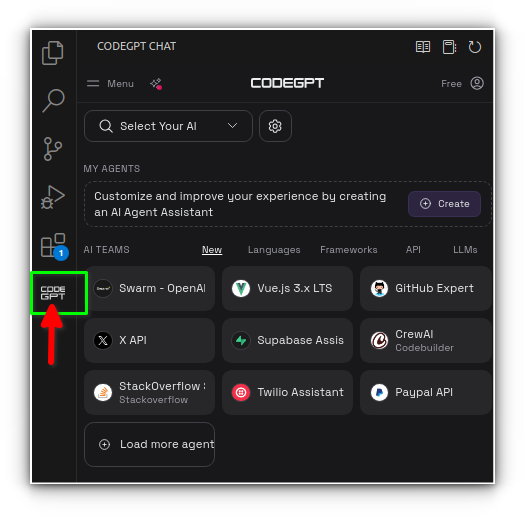
This extension serves as the interface between your VS Code environment and OpenCoder, allowing you to request code suggestions, completions, and more.
Step 3: Install Ollama
Ollama is an essential tool for managing and deploying language models locally. It simplifies the process of downloading and running models locally, making it a crucial component for this setup.
Ollama provides an official installation script. Run the command below to install Ollama:
curl -fsSL https://ollama.com/install.sh | shOnce the installation process completes, open a web browser and enter:
localhost:11434It should show the message, “Ollama is running”.
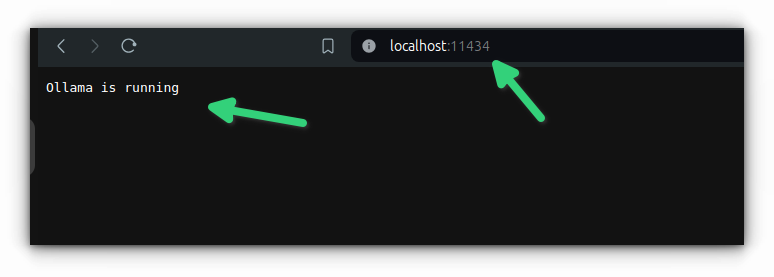
We have also covered Ollama installation steps in detail, in case you need that.

Step 4: Download Opencoder model with Ollama
With CodeGPT and Ollama installed, you’re ready to download the Opencoder model:
In the terminal window, type:
ollama run opencoderThis may take a few minutes, depending on your internet speed and hardware specifications.
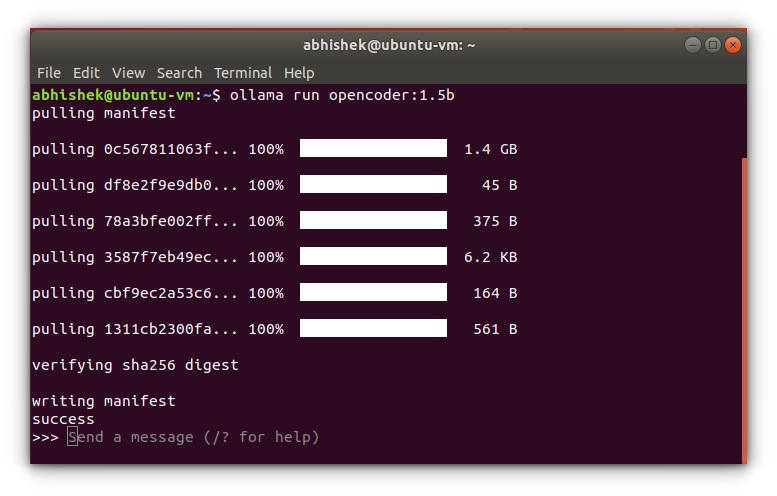
Once complete, the model is now ready for use within CodeGPT.
Step 5: Run your Copilot AI with opencoder
Open a code file or project in VS Code (I’m using an empty docker-compose.yml file).
In the CodeGPT panel, ensure Ollama is selected as your active provider.
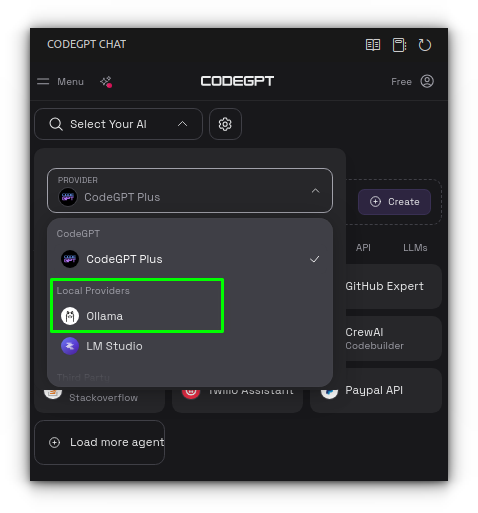
Next, it’ll ask you to select the model. I’ve downloaded both version of Opencoder with 1.5B & 8B parameters but I’ll be using the former:
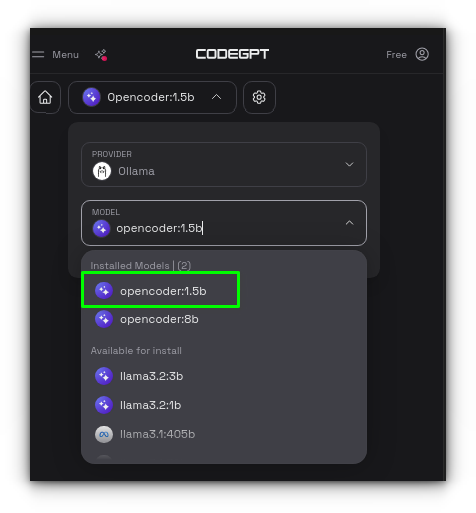
Start engaging with the model by typing your queries or use it for code completions, suggestions, or any coding help you need:
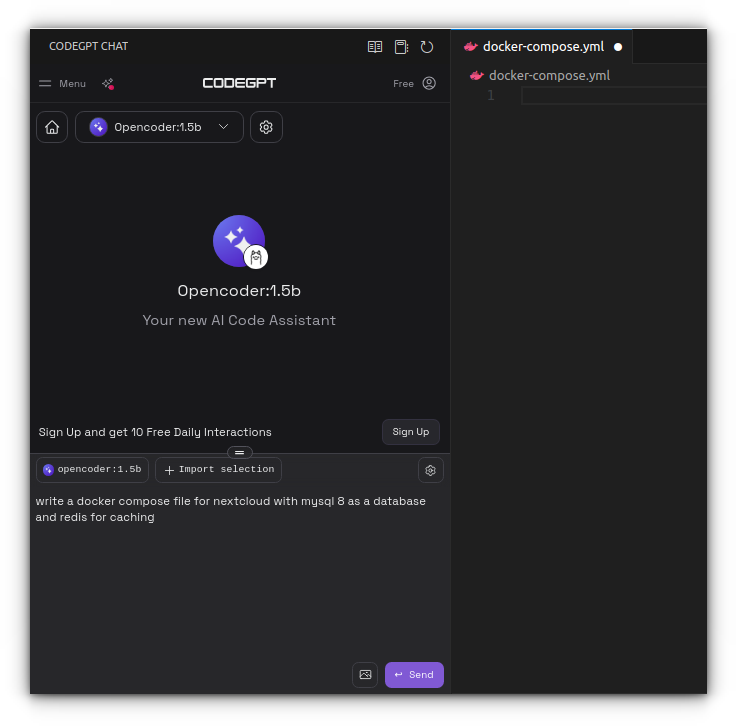
Here’s a quick video of me interacting with the OpenCoder model inside VS Code using the CodeGPT extension.
Conclusion
After testing OpenCoder with Ollama on my Ubuntu VM setup, I found that while the performance wasn’t as snappy as cloud-based AI services like ChatGPT, it was certainly functional for most coding tasks.
The responsiveness can vary, especially on modest hardware, so performance is a bit subjective depending on your setup and expectations.
However, if data privacy and local processing are priorities, this approach still offers a solid alternative.
For developers handling sensitive code who want an AI copilot without relying on cloud services, Ollama and CodeGPT in VS Code is a worthwhile setup, balancing privacy and accessibility right on your desktop.
Source: Read More
