With the growing trend of client-side ML and privacy-preserving applications, the debate around the “best†image background removal method is heating up. Determining the best method involves examining criteria such as speed, cost, privacy, and ease of use. With Transformers.js, we can now build image background removal tools that meet all these criteria in real time without relying on a remote server.

This tutorial isn’t just about building a tool; it’s about learning key concepts in machine learning integration in frontend applications. You will gain exposure to machine learning technologies like Transformers.js and WebGPU, which are crucial for advanced image processing.
Prerequisites
Before moving forward with this tutorial, you should have:
- Knowledge of JavaScript
- Experience building Vue.js applications; we’ll be using Vue 3 for this project
- Node.js v21 installed
- An understanding of how WebGPU and TensorFlow.js work is beneficial but not required
Why build your background removal tool when there are so many available on the web?
There are indeed many background removal tools available online, but building your own tool offers several benefits for developers:
- Many existing background removal tools are standalone web services, meaning developers can’t easily integrate them into their applications. By building this tool, developers can tailor the functionality to their specific needs, whether it’s for product images, avatars, or other creative use cases
- Most developers prefer or require a tool that processes images locally in the browser for privacy reasons, especially in industries like healthcare where data sensitivity is paramount
- Cost-effectiveness for large-scale use: Third-party services often come with subscription fees or usage limits. Building an in-house tool can be more cost-efficient over time, especially for companies needing high volumes of image processing
What is Transformers.js and why use it?
Transformers.js is a JavaScript library for running Transformer-based machine learning models entirely in the browser, allowing powerful image processing without needing server-side infrastructure.
Our project will consist of the following features:
- Drag-and-drop or file upload: Users can drag and drop images or click to select files from their computer
- Background removal: We’ll use Hugging Face’s Transformers.js library with WebGPU to perform background removal on images using the MODNet model
- Download processed images: Users can download individual processed images or download all processed images as a ZIP file
- Batch support: Users can perform background removal on multiple images simultaneously
Setting up our project
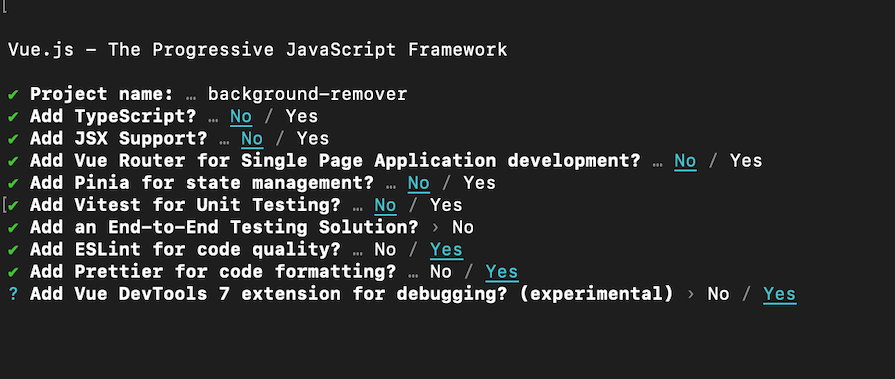
Create a new Vue.js project using create-vue to scaffold a Vite-based project:
npm create vue@latest
Configure the project as follows:

Now run:
cd background-remover
npm install
npm run format
npm run dev
This will create a Vue.js project in the background-remover directory, with Vite as the build tool.
You’ll need to install the following dependencies:
@huggingface/transformers: Provides access to pre-trained models from Hugging Facejszipandfile-saver: These will help us generate ZIP files and allow users to download them
Run the following commands to install these dependencies:
npm install @huggingface/transformers jszip file-saver
Layout structure
We’ll create a structure for the layout of the project user interface as follows:
//App.vue
<template>
  <div class="min-h-screen bg-gray-100 text-gray-900 p-8">
    <div class="max-w-4xl mx-auto">
      <h1 class="text-4xl font-bold mb-2 text-center text-blue-700">
        In-browser Background Remover Tool
      </h1>
      <h2 class="text-lg font-semibold mb-2 text-center text-gray-600">
        Remove background and download files in real time without relying on a
        remote server, powered by
        <a
          class="underline text-blue-500"
          target="_blank"
          href="https://vuejs.org/"
          >Vue.js</a
        >
        and
        <a
          class="underline text-blue-500"
          target="_blank"
          href="https://github.com/xenova/transformers.js"
          >Transformers.js</a
        >
        with WebGPU support
      </h2>
      <!-- File upload -->
      <!-- Action buttons -->
      <!-- Processed Images -->
    </div>
  </div>
</template>
Handling file uploads
Next, we’ll create a drag-and-drop zone where users can drop images or click to select them via a file input.
Replace the “File upload†comment with the following:
<div
  class="p-8 mb-8 border-2 border-dashed rounded-lg text-center cursor-pointer transition-colors duration-300 ease-in-out"
  :class="{
    'border-green-500 bg-green-100': isDragAccept,
    'border-red-500 bg-red-100': isDragReject,
    'border-blue-500 bg-blue-100': isDragActive,
    'border-gray-400 hover:border-blue-500 hover:bg-gray-200':
      !isDragActive,
  }"
  @dragover.prevent="onDragOver"
  @dragleave="onDragLeave"
  @drop="onDrop"
  @click="triggerFileInput"
>
  <input
    type="file"
    class="hidden"
    ref="fileInput"
    @change="handleFiles"
    accept="image/*"
    multiple
  />
  <p class="text-lg mb-2">
    {{
      isDragActive
        ? 'Drop the images here...'
        : 'Drag and drop some images here'
    }}
  </p>
  <p class="text-sm text-gray-500">or click to select files</p>
</div>- The
@dragover.prevent="onDragOver"event handler prevents the default behavior when a file is dragged over the area, allowing it to be dropped @dragleave="onDragLeave"triggers theonDragLeavemethod when the dragged item leaves the drop area- The
@drop="onDrop"event handler calls theonDropmethod when an item is dropped in the area @click="triggerFileInput"triggers thetriggerFileInputmethod, opening the file input dialog when the user clicks on the area
Create the onDragLeave, triggerFileInput, handleFiles, and onDragOver methods used in the template as follows:
<script setup>
import { ref, onMounted } from 'vue'
const images = ref([])

const isDragActive = ref(false)
const isDragAccept = ref(false)
const isDragReject = ref(false)

const fileInput = ref(null)

const handleFiles = event => {
  const files = event.target.files
  addImages(files)
}

const addImages = files => {
  for (const file of files) {
    images.value.push(URL.createObjectURL(file))
  }
}

const onDragOver = event => {
  event.preventDefault()
  isDragActive.value = true
}

const onDragLeave = () => {
  isDragActive.value = false
}

const onDrop = event => {
  event.preventDefault()
  const files = event.dataTransfer.files
  addImages(files)
  isDragActive.value = false
}

const triggerFileInput = () => {
  fileInput.value.click()
}
</script>
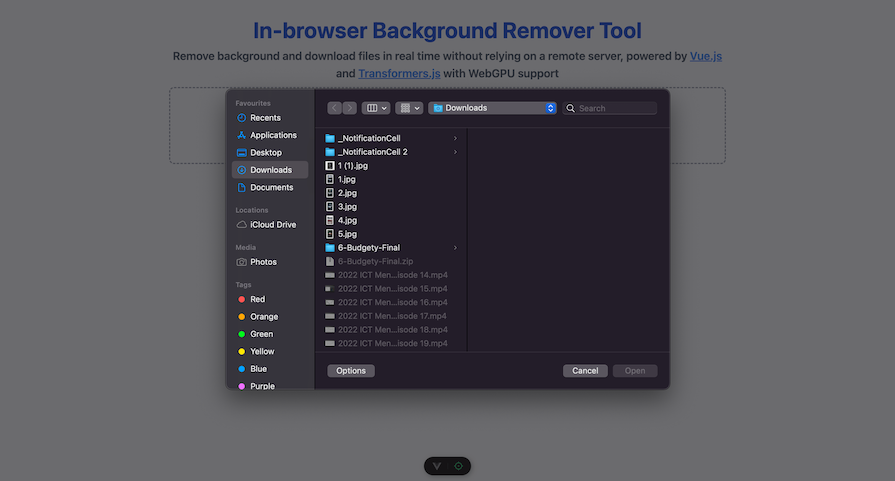
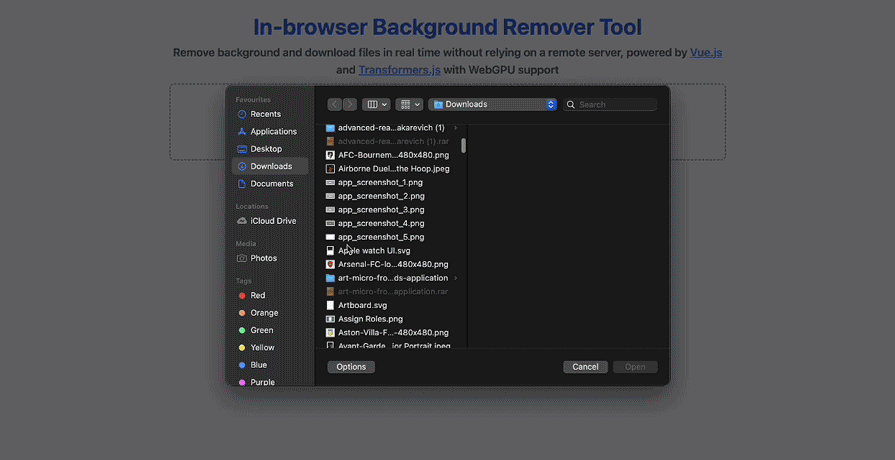
This logic handles file uploads via both drag-and-drop and traditional file input. The addImages method takes a list of files, generates a temporary URL for each one using URL.createObjectURL(file), and pushes these URLs into the reactive images array.
This makes them available for rendering in the template. The onDrop method is triggered when files are dropped into the drop area. It retrieves the files from event.dataTransfer.files, passes them to addImages, and sets isDragActive to false to indicate that the drag operation is over:

Processing images using MODNet
We’ll create action buttons for processing images, downloading them as a ZIP file, and clearing all images.
Replace the <!-- Action buttons -->Â comment with the following:
<div class="flex flex-col items-center gap-4 mb-8">
  <button
    @click="processImages"
    :disabled="isProcessing || images.length === 0"
    class="px-6 py-3 bg-blue-600 text-white rounded-md hover:bg-blue-700 focus:outline-none focus:ring-2 focus:ring-blue-500 focus:ring-offset-2 focus:ring-offset-gray-100 disabled:bg-gray-400 disabled:cursor-not-allowed transition-colors duration-200 text-lg font-semibold"
  >
    {{ isProcessing ? 'Processing...' : 'Process' }}
  </button>

  <div class="flex gap-4">
    <button
      @click="downloadAsZip"
      :disabled="!isDownloadReady"
      class="px-3 py-1 bg-green-600 text-white rounded-md hover:bg-green-700 focus:outline-none focus:ring-2 focus:ring-green-500 focus:ring-offset-2 focus:ring-offset-gray-100 disabled:bg-gray-400 disabled:cursor-not-allowed transition-colors duration-200 text-sm"
    >
      Download as ZIP
    </button>
    <button
      @click="clearAll"
      class="px-3 py-1 bg-red-600 text-white rounded-md hover:bg-red-700 focus:outline-none focus:ring-2 focus:ring-red-500 focus:ring-offset-2 focus:ring-offset-gray-100 transition-colors duration-200 text-sm"
    >
      Clear All
    </button>
  </div>
</div>
In this code:
@click="processImages"triggers theprocessImagesmethod when the button is clicked, processing the uploaded images@click="downloadAsZip"triggers thedownloadAsZipmethod, allowing users to download the images as a ZIP file.@click="clearAll"triggers theclearAllmethod, which clears all uploaded images from the state
Create the clearAll and processImages methods used in the template as follows:
<script setup>
const processedImages = ref([])
const isProcessing = ref(false)
const isDownloadReady = ref(false)

const clearAll = () => {
  images.value = []
  processedImages.value = []
  isDownloadReady.value = false
}
</script>
The clearAll method simply resets the processedImages, isProcessing, and isDownloadReady state to their default values.
In the processImages method, we’ll run predictions on images to extract the background mask with AutoModel and generate a new image canvas with updated transparency. Set the isProcessing state to true to indicate that image processing is underway. Then clear the processedImages array, ensuring no old images remain before starting a new process:
const processImages = async () => {
  isProcessing.value = true;
  processedImages.value = [];
};
Next, reference the modelRef to process the pixel data, and produce a segmentation mask. Also, reference the processorRef to pre-process the image (e.g., resizing, normalizing) before passing it to the model.
const processImages = async () => {
  ...
  const model = modelRef.value
  const processor = processorRef.value
}
Next, loop through the images previously uploaded by the user, which are stored as URLs. Convert each image URL into a RawImage object, a format compatible with the processing steps. Then, process the images and pass their pixel data to the machine learning model:
const processImages = async () => {
  ...
  for (const image of images.value) {
    const img = await RawImage.fromURL(image);
    const { pixel_values } = await processor(img);
    const { output } = await model({ input: pixel_values });
  }
};
The model returns an output object, which contains a segmentation mask in tensor format. This mask is used to identify specific regions of the image, such as foreground and background.
Mask generation
To generate a mask, we’ll scale the model’s output by 255 and convert it to an 8-bit unsigned integer format, which is ideal for image rendering. Next, we’ll convert the model’s output tensor into a RawImage object and resize the mask to match the original image’s dimensions:
const processImages = async () => {
  ...
  for (const image of images.value) {
    ...
    const maskData = (
      await RawImage.fromTensor(output[0].mul(255).to('uint8')).resize(
        img.width,
        img.height,
      )
    ).data
  }
}
Canvas manipulation
Now that the mask is generated, we need to create a new HTML <canvas> element with the same width and height as the original image. Then, we draw the original image onto the canvas, using the img.toCanvas() method to convert the RawImage back into a format that can be drawn:
const processImages = async () => {
  ...
  for (const image of images.value) {
    ...
    const canvas = document.createElement('canvas')
    canvas.width = img.width
    canvas.height = img.height
    const ctx = canvas.getContext('2d')
    ctx.drawImage(img.toCanvas(), 0, 0)
  }
}
Applying the mask to the canvas
Now, we need to retrieve the pixel data from the image drawn on the canvas. Then, we loop through the maskData, apply the mask to the image, and update the canvas with the modified pixel data to create the mask’s transparency effect:
const processImages = async () => {
  ...
  for (const image of images.value) {
    ...
    const pixelData = ctx.getImageData(0, 0, img.width, img.height)
    for (let i = 0; i < maskData.length; ++i) {
      pixelData.data[4 * i + 3] = maskData[i]
    }
    ctx.putImageData(pixelData, 0, 0)
  }
}
The getImageData() function returns an array of RGBA values (Red, Green, Blue, Alpha) for each pixel in the image. The 4 * i + 3 refers to the alpha channel (transparency) of the pixel in the pixelData array.
The processed image can now be saved by converting the modified canvas into an image format and storing the data URL in the processedImages array:
const processImages = async () => {
  ...
  for (const image of images.value) {
    ...
    processedImages.value.push(canvas.toDataURL('image/png'))
  }
}
The processed image is now ready to be displayed or downloaded.
Now, set isProcessing to false to indicate that the processing is finished. Then, set isDownloadReady to true, enabling the option to download the processed images as a ZIP file:
const processImages = async () => {
  ...
  isProcessing.value = false
  isDownloadReady.value = true
}
Rendering the processed images
We’ll display the processed images with their background removed in the browser. Replace the <!-- Processed Images --> comment with the following:
<div class="grid grid-cols-2 md:grid-cols-3 lg:grid-cols-4 gap-6">
  <div v-for="(src, index) in images" :key="index" class="relative group">
    <img
      :src="processedImages[index] || src"
      :alt="'Image ' + (index + 1)"
      class="rounded-lg object-cover w-full h-48"
    />
    <div
      v-if="processedImages[index]"
      class="absolute inset-0 bg-black bg-opacity-70 opacity-0 group-hover:opacity-100 transition-opacity duration-300 rounded-lg flex items-center justify-center"
    >
      <button
        @click="copyToClipboard(processedImages[index] || src)"
        class="mx-2 px-3 py-1 bg-white text-gray-900 rounded-md hover:bg-gray-200 transition-colors duration-200 text-sm"
      >
        Copy
      </button>
      <button
        @click="downloadImage(processedImages[index] || src)"
        class="mx-2 px-3 py-1 bg-white text-gray-900 rounded-md hover:bg-gray-200 transition-colors duration-200 text-sm"
      >
        Download
      </button>
    </div>
    <button
      @click="removeImage(index)"
      class="absolute top-2 right-2 bg-black bg-opacity-50 text-white w-6 h-6 rounded-full flex items-center justify-center opacity-0 group-hover:opacity-100 transition-opacity duration-300 hover:bg-opacity-70"
    >
      ✕
    </button>
  </div>
</div>
Create the copyToClipboard and removeImage methods used in the template as follows:
<script setup>
...
const copyToClipboard = async url => {
  const response = await fetch(url)
  const blob = await response.blob()
  const clipboardItem = new ClipboardItem({ [blob.type]: blob })
  await navigator.clipboard.write([clipboardItem])
  console.log('Image copied to clipboard')
}
</script>
The copyToClipboard function fetches an image from a given URL, converts it to a blob, and copies it to the system clipboard:
const removeImage = index => {
  images.value.splice(index, 1)
  processedImages.value.splice(index, 1)
}
The removeImage function removes both the original image and its processed counterpart from their respective arrays.
Downloading processed images
This section will focus on using JSZip to bundle processed images into a ZIP file, and FileSaver to trigger downloads in the browser.
Download the individual image:
const downloadImage = url => {
  const a = document.createElement('a')
  a.href = url
  a.download = 'image.png'
  a.click()
}
The downloadImage function triggers the browser’s download functionality, allowing the user to download the image directly without having to visit the image URL.
Download multiple images as ZIP:
Create a function that allows the user to download all the images (processed or original) as a single ZIP file:
const downloadAsZip = async () => {
  const zip = new JSZip()
  const promises = images.value.map(
    (image, i) =>
      new Promise(resolve => {
        const canvas = document.createElement('canvas')
        const ctx = canvas.getContext('2d')
        const img = new Image()
        img.src = processedImages.value[i] || image
        img.onload = () => {
          canvas.width = img.width
          canvas.height = img.height
          ctx.drawImage(img, 0, 0)
          canvas.toBlob(blob => {
            if (blob) {
              zip.file(`image-${i + 1}.png`, blob)
            }
            resolve(null)
          }, 'image/png')
        }
      }),
  )
  await Promise.all(promises)
  const content = await zip.generateAsync({ type: 'blob' })
  saveAs(content, 'images.zip')
}
The downloadAsZip function uses the JSZip library to create a ZIP file. It goes through each image by creating a canvas, drawing the image, and converting it into a PNG blob. Each image blob is then added to the ZIP file. Once all images are processed, the ZIP archive is generated and automatically downloaded using the saveAs function.
Error handling and real-time feedback
We will handle errors such as when WebGPU is unsupported or any other issue occurs:
onMounted(async () => {
  try {
    if (!navigator.gpu) {
      throw new Error('WebGPU is not supported in this browser.')
    }
    const model_id = 'Xenova/modnet'
    env.backends.onnx.wasm.proxy = false
    modelRef.value = await AutoModel.from_pretrained(model_id, {
      device: 'webgpu',
    })
    processorRef.value = await AutoProcessor.from_pretrained(model_id)
  } catch (error) {
    console.error(error)
  }
})
This onMounted Hook first checks if the browser supports WebGPU. If supported, it loads a pre-trained machine learning model (Xenova/modnet) along with its processor, configuring the ONNX runtime environment for optimal WebGPU performance. If WebGPU is not available, or there’s an issue during model loading, the error is caught and logged.
Here is what our final build looks like:

You can get the code for the final build here.
Conclusion
In this tutorial, we explored how to build a real-time image background removal tool using Vue.js and Transformers.js, leveraging WebGPU for fast client-side processing. We learned how to implement key features such as file uploads, image preprocessing, and background removal powered by the MODNet model — showcasing how to seamlessly integrate machine learning into frontend applications. Additionally, we explored ways to improve user experience through real-time feedback, error handling, and the option to download processed images using JSZip.
The post Building a background remover with Vue and Transformers.js appeared first on LogRocket Blog.
Source: Read More


