In our connected world, APIs are important for many applications. They allow simple websites and complex systems to work well. To make sure our applications are strong and reliable, we need to test these APIs properly, including services like OpenCage. This ensures they function correctly. This is where Bruno comes in! Whether you want to test a simple REST API or a complex geocoding API for happy geocoding, Bruno has the tools you need. It even has a directory for managing your API needs, along with a Bruno tutorial to guide you step-by-step in setting up and executing tests. This makes Bruno an accessible, powerful solution for ensuring your APIs are always reliable and effective.
Key Highlights
- Bruno is a strong tool for API testing. It makes designing, fixing, and handling API requests easier.
- This open-source tool has a simple interface. It helps both new and experienced testers to get started quickly.
- With Bruno, you can write test scripts using JavaScript. You can also use environment variables to handle different testing cases well.
- The tool helps you move from other tools like Postman and Insomnia easily. This makes it simple for current users to switch.
- Bruno also makes API testing easy within CI/CD pipelines. You can connect it with platforms like GitHub Actions for automatic testing jobs.
Understanding the Basics of API Testing with Bruno
Before we talk about how to use Bruno, let’s go over the basics of API testing. API testing helps us see how an API functions and how secure it is. We do this by examining its endpoints and looking at the responses.
Bruno makes things simple. It is a full platform that lets you create, send, and check API requests easily. This helps you test different parts of your API without any trouble. It is a handy tool for developers and quality assurance workers.
What is API Testing and Its Importance?
API testing is when we send requests to an API endpoint and check the answers we get back. This shows us if it functions as it should. This type of testing is different from UI testing, which looks at the user interface. API testing focuses on the main logic and how data flows in the application.
API testing is important in software development. It helps find bugs early. This builds trust in the data shared between systems. It also speeds up the development process. A strong set of API tests keeps your application reliable. This way, users have a better experience.
API testing is very important in today’s methods, like microservices. In this way of working, applications rely on several connected services. These services communicate with each other through APIs. It is vital to test these connections to ensure the system works well and stays stable.
Overview of Bruno for API Testing
Bruno is a free and open-source tool for API testing. It works well, especially when you compare it to well-known tools like Postman. You can use it on your desktop if you are using Windows, macOS, or Linux. The interface is simple to use, making it easy for anyone to handle complex API testing tasks.
With Bruno, you can create and organize API requests into groups. This helps you see your tests clearly. You can use different methods to make requests, like GET, POST, PUT, and DELETE. Each request allows you to control its headers and parameters. You can also change the request body for better testing.
Bruno is special because it focuses on making API testing easy on Mac. You can do more than just send requests. You can also check the response body, status codes, and headers of the API client. Bruno even has a save button for requests and collections. With this feature, you won’t lose your work. You can focus on building and adjusting your test suites without any hassle.
Getting Started with Bruno: A Beginner’s Guide
Starting your API testing journey with Bruno is easy. This guide is great for beginners. It will help you install Bruno and set up your first API test. You will also learn the basics of testing in a professional way.
When you follow these simple steps, you can use Bruno’s power. You can improve your development work by adding good API testing. This will help make sure your applications are high quality and reliable.
Prerequisites for Using Bruno in API Testing
Before you use Bruno, you should have a few things prepared. This will help ensure your testing goes smoothly.
- Project Folder: It is smart to make a project folder just for your API testing. This keeps your tests tidy and makes it easier to work with others if you are in a team. So, make a new folder on your computer to keep your Bruno tests.
- Node.js and npm: Bruno needs Node.js and npm (Node Package Manager) to work. Check that these are installed on your computer. You can download the latest versions from the official Node.js website.
- Bruno CLI (Command Line Interface): Bruno has a friendly interface, but knowing the Bruno CLI can help you automate your tests. This is useful if you want to connect it to CI/CD pipelines. To install the Bruno CLI, type this npm command: npm install @usebruno/cli –save-dev.
Step 1: Install Bruno
- Download Bruno from its official site (bruno.io) or GitHub repository, depending on your OS.
- Follow the installation prompts to set up the tool on your computer.
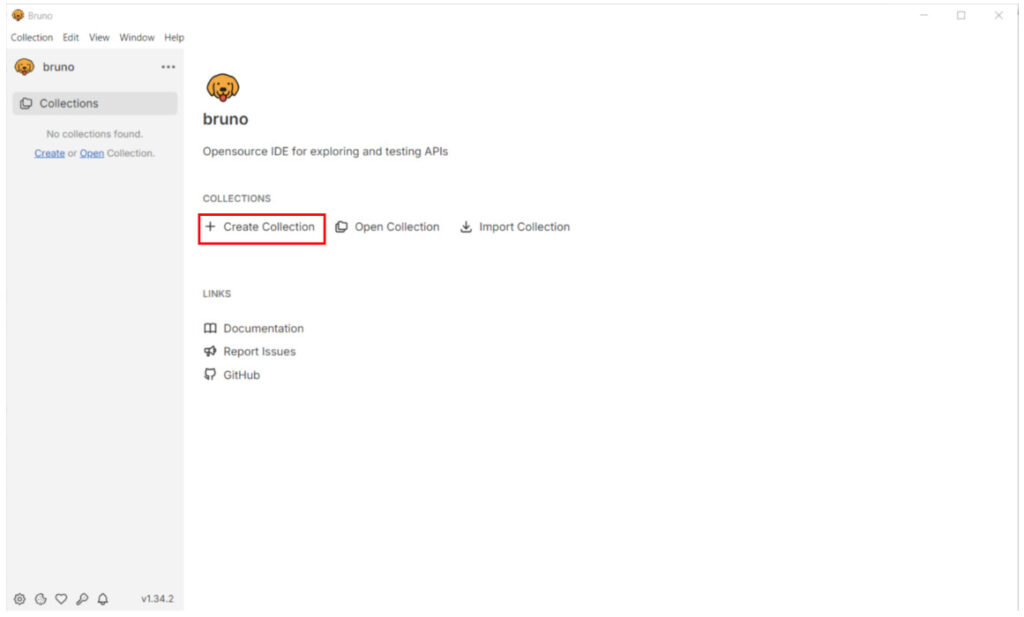
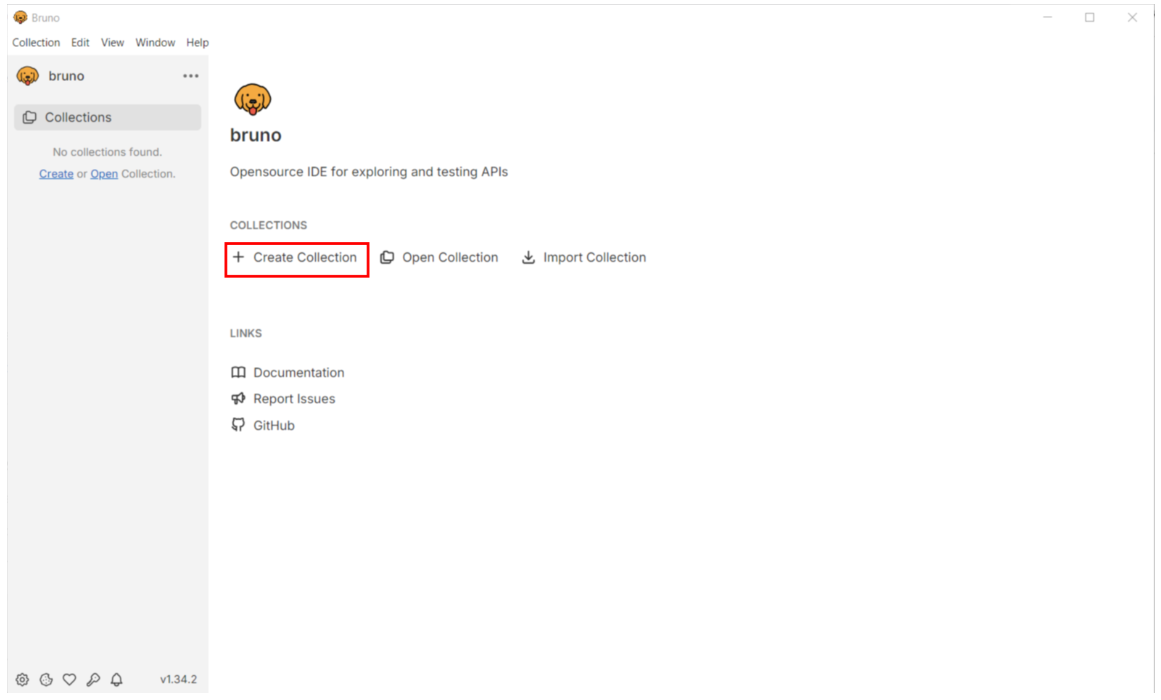
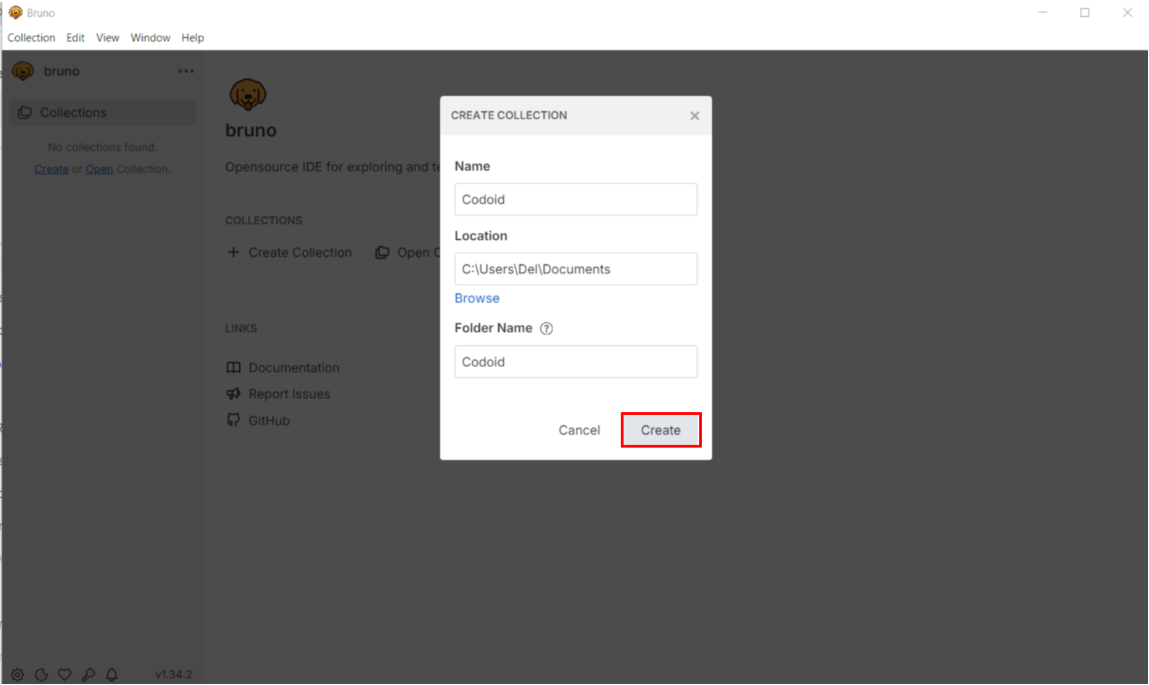
Step 2: Set Up an API Collection
- In your collection, create an API collection. Collections are groupings of related API requests.
- Name your collection based on the API endpoints or service (e.g., “User Authentication APIâ€).
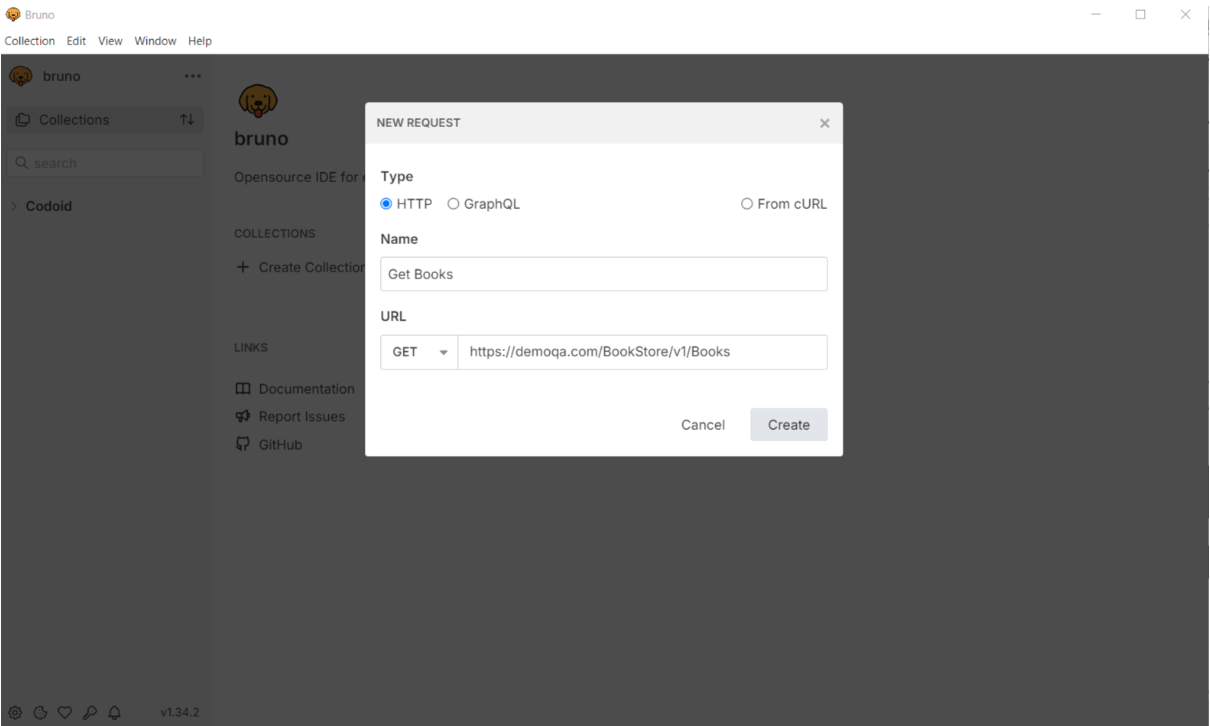
Step 4: Add an API Request
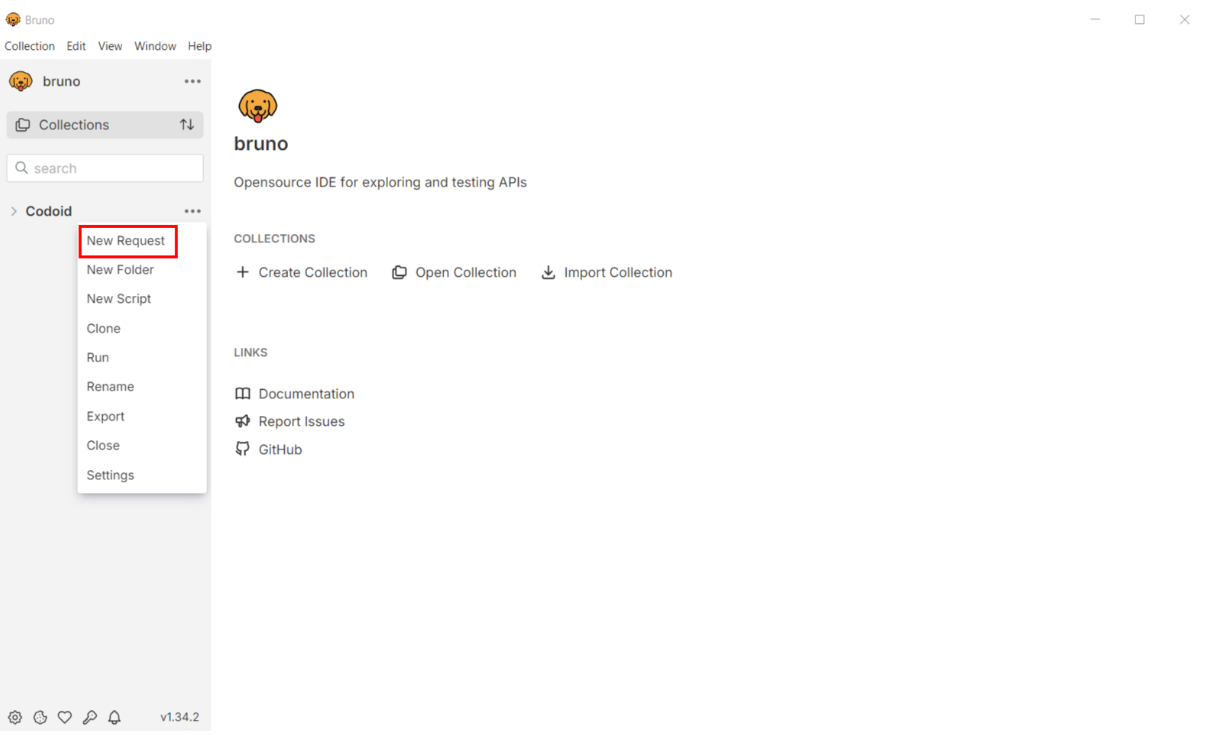
- Inside the collection, click to add a new request.
- Choose the HTTP method (e.g., GET, POST, PUT, DELETE) based on the API endpoint you’re working with.
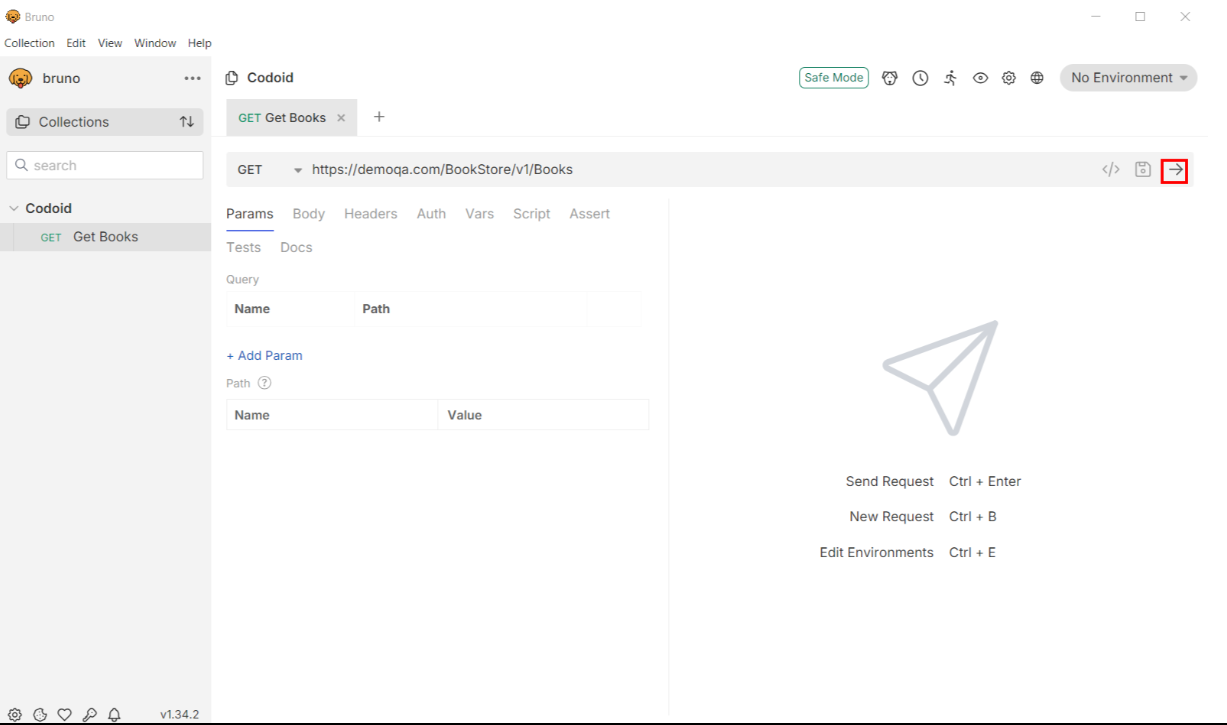
- Enter the API endpoint URL. If your API requires parameters or query strings, you can add them here.
Step 5: Configure Request Headers
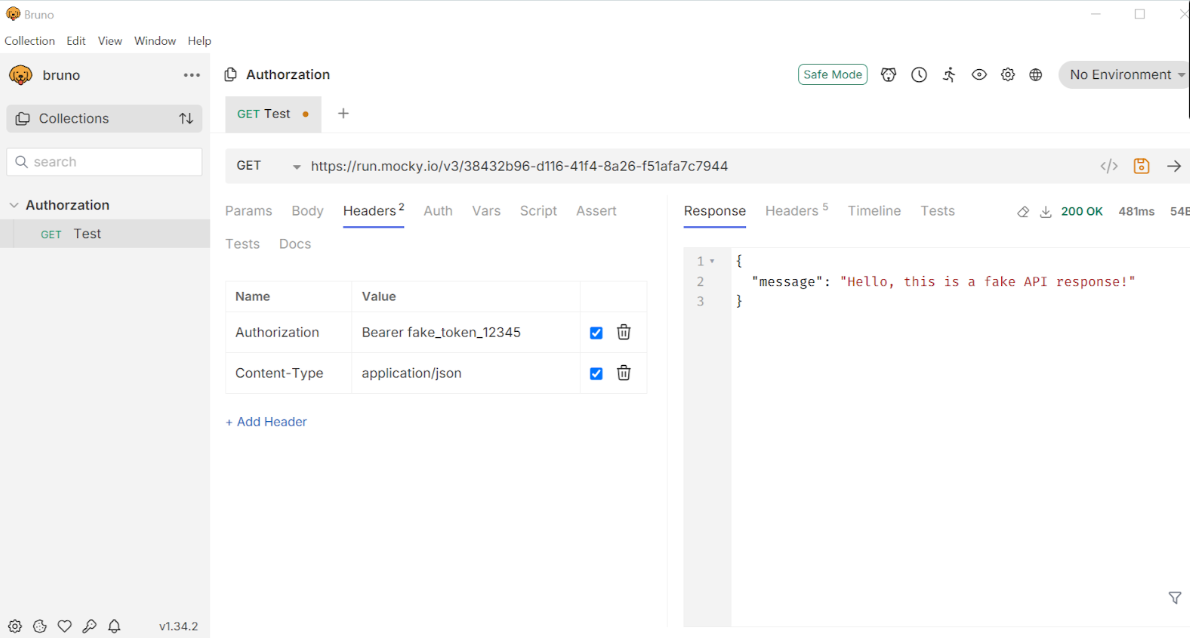
- In the request section, configure any necessary headers (e.g., Content-Type, Authorization, etc.).
- Bruno allows you to enter headers in YAML, so you can structure it like:
headers:
Authorization: Bearer your_token_here
Content-Type: application/json
Step 6: Add Request Body (for POST, PUT requests)
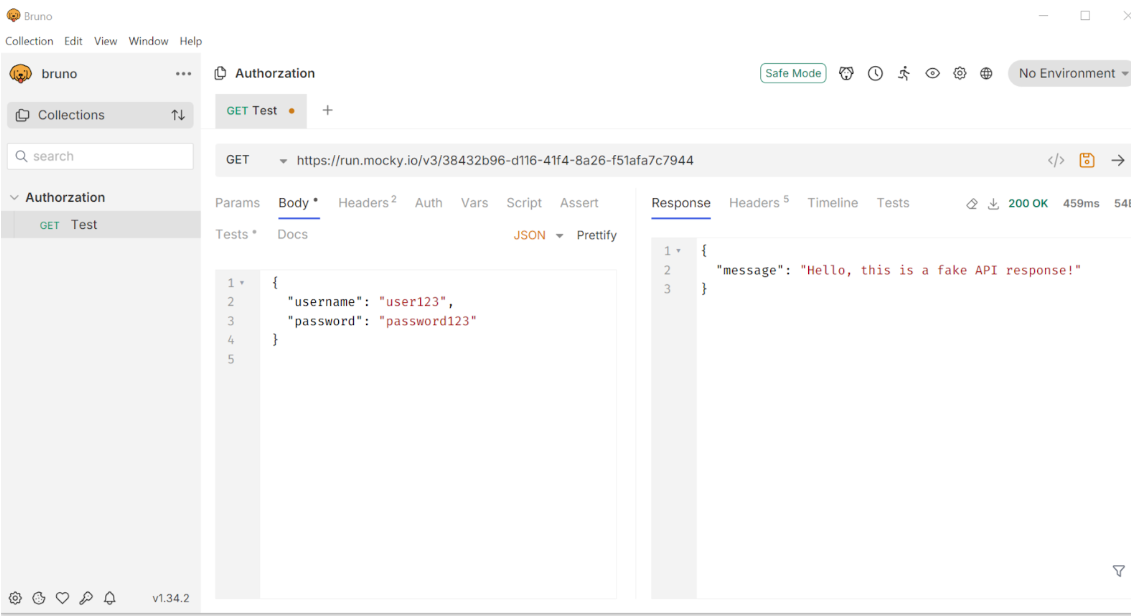
- If you’re making a request that requires a body (such as POST), enter it in JSON or YAML format.
- Example JSON body:
{
“usernameâ€: “user123â€,
“passwordâ€: “password123â€
}
Step 7: Run the Request
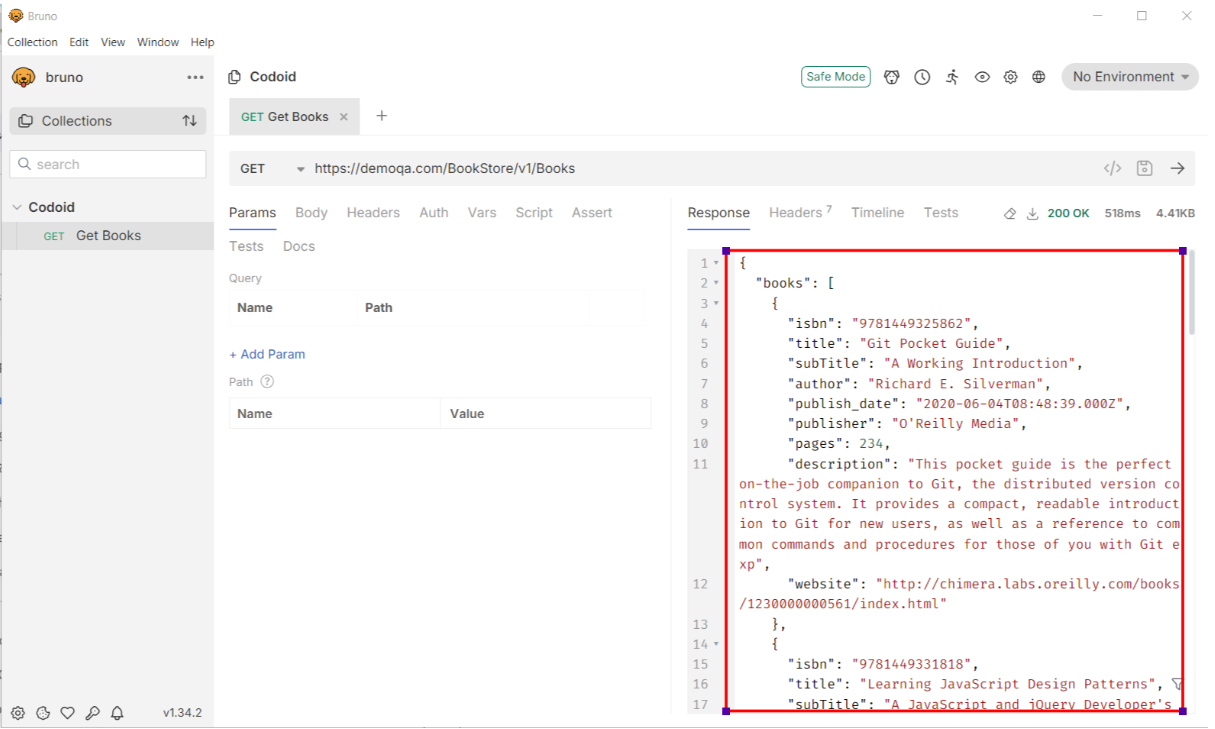
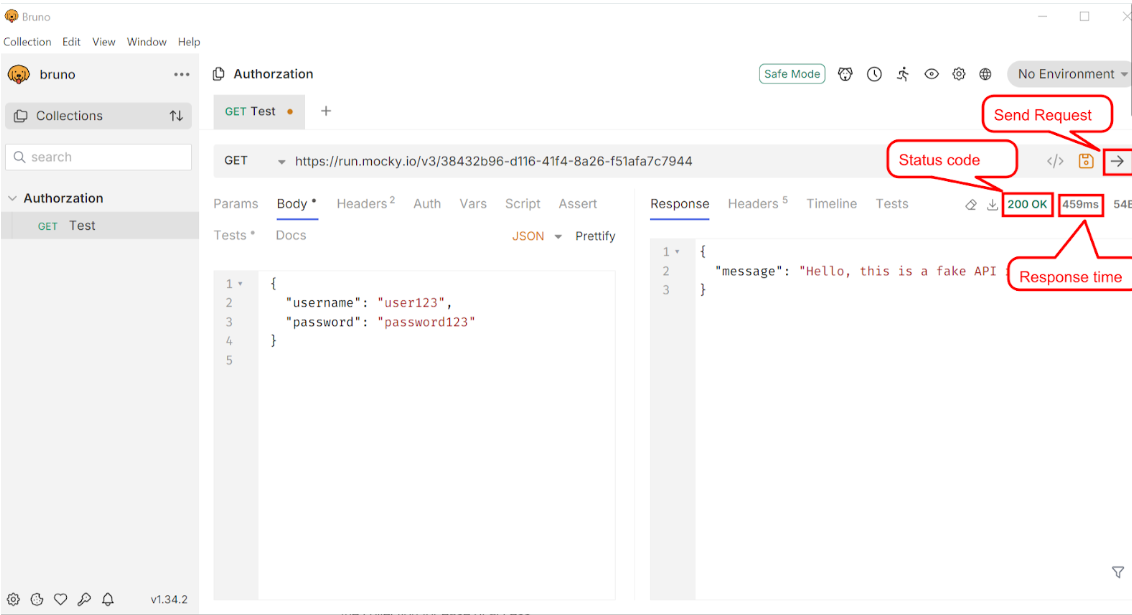
- Once everything is set up, click Send to execute the request.
- Bruno will show the response from the server, including status codes, headers, and the response body.
Step 8: View and Analyze the Response
- Review the server’s response to ensure it matches your expectations (e.g., status code 200 OK for a successful GET request).
- Check response times, headers, and body to verify the API’s behavior.
Step 9: Save and Organize Requests
- Save requests in the collection for reuse. Organize requests by grouping them logically within the collection for ease of access.
Step 10: Add Tests (Optional)
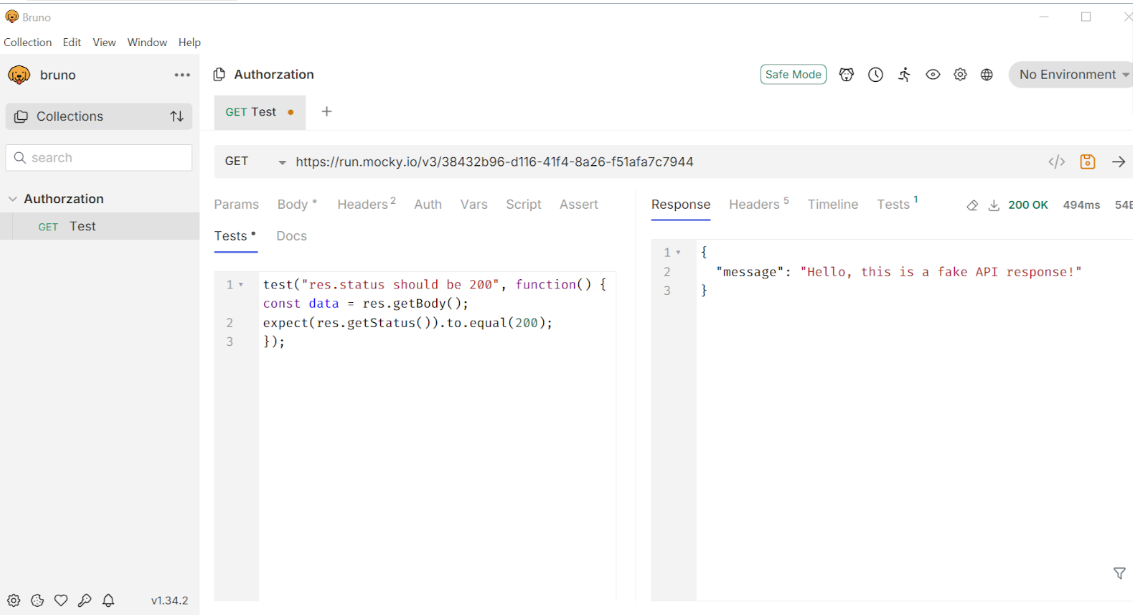
- Bruno allows you to write test scripts to validate responses automatically.
- Add assertions to ensure responses meet certain criteria (e.g., status code is 200, response contains a specific field).
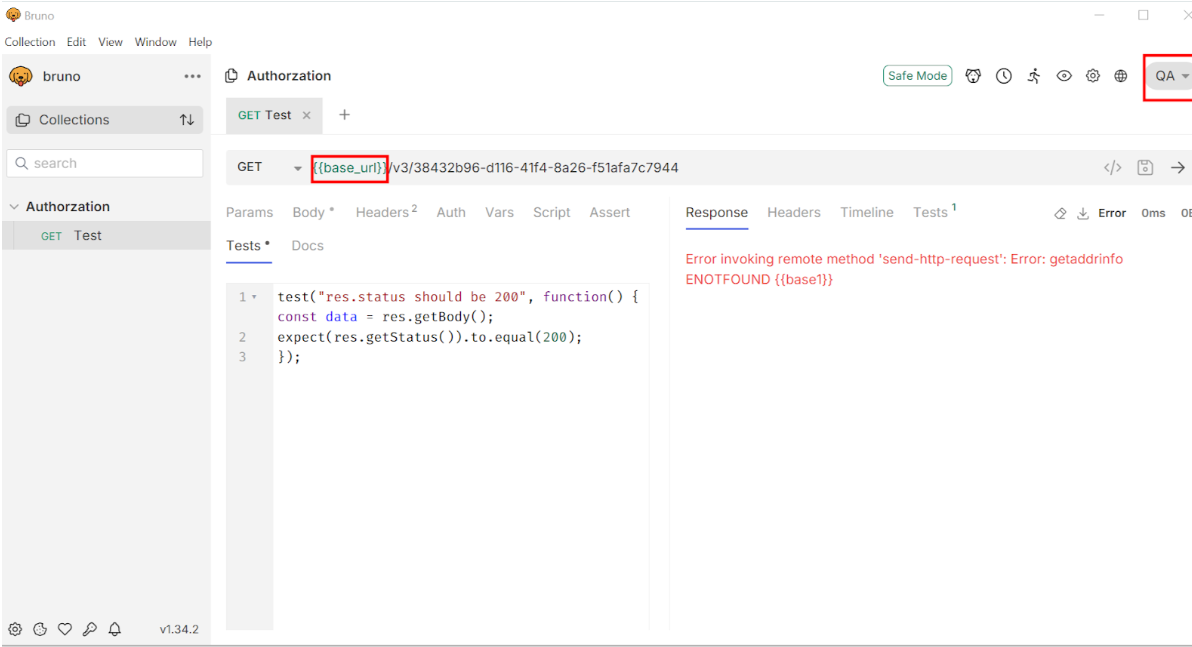
Step 11: Environment Variables (Optional)
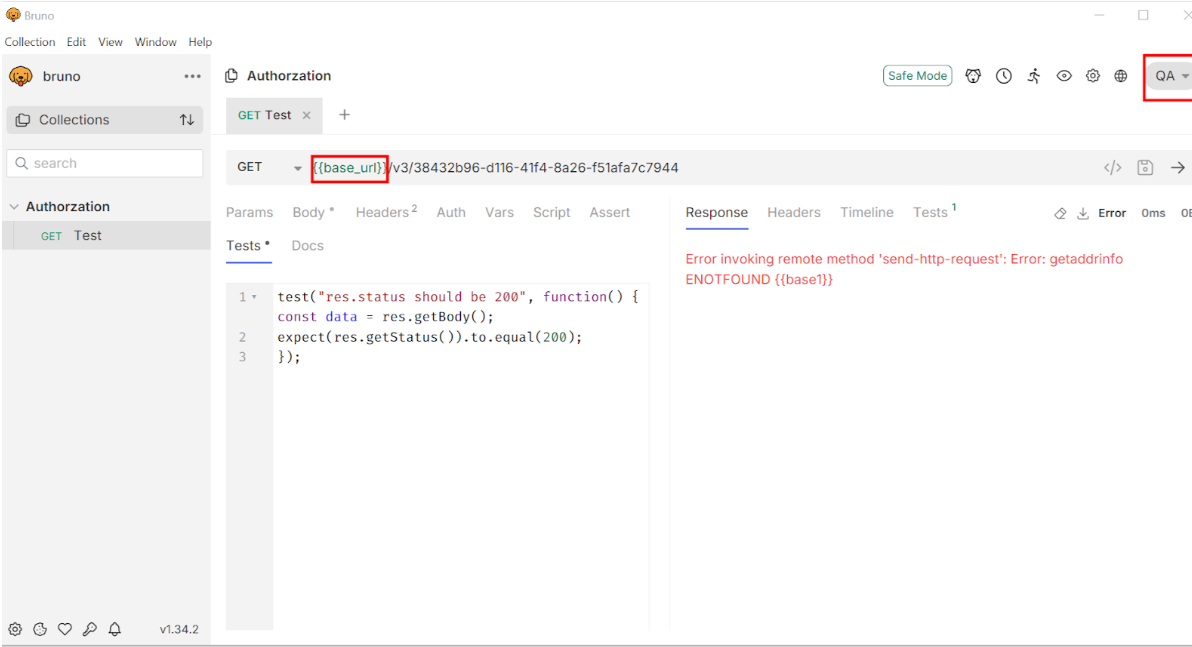
- Set up environment variables to manage variables like API keys, tokens, and URLs. This makes it easy to switch between environments (e.g., development, staging, production).
- Bruno uses YAML for environment configurations, which you can structure as:
base_url: “https://api.example.comâ€
token: “your_access_tokenâ€
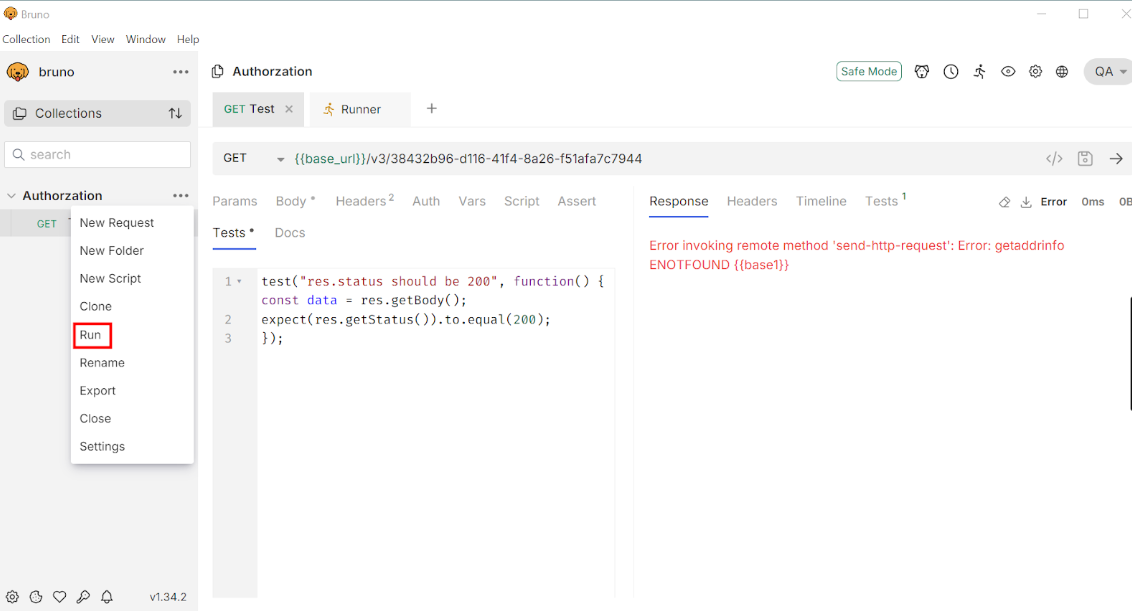
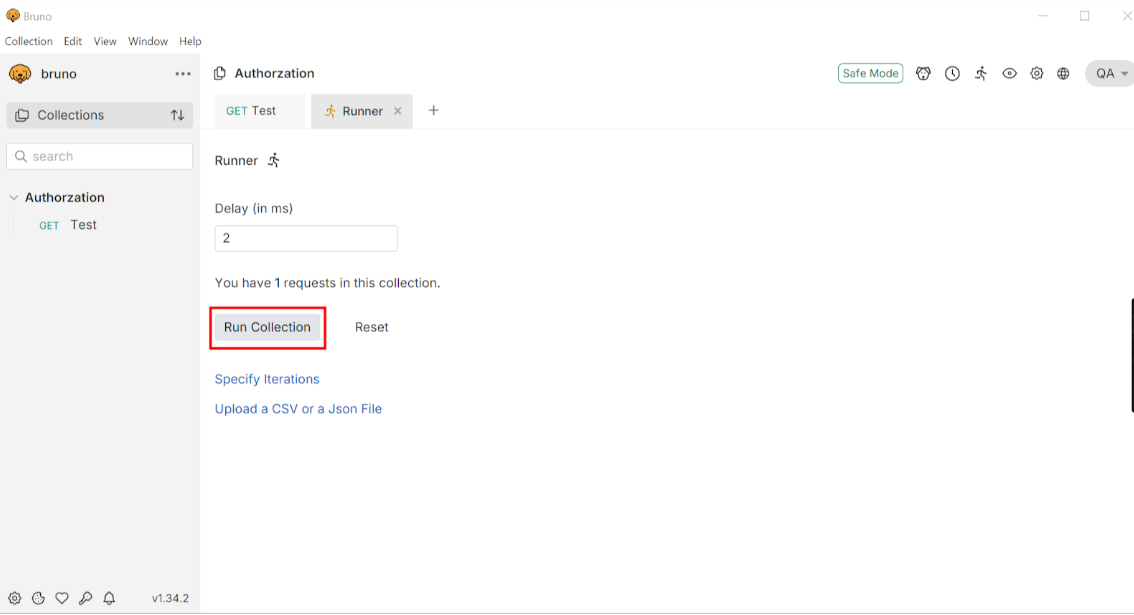
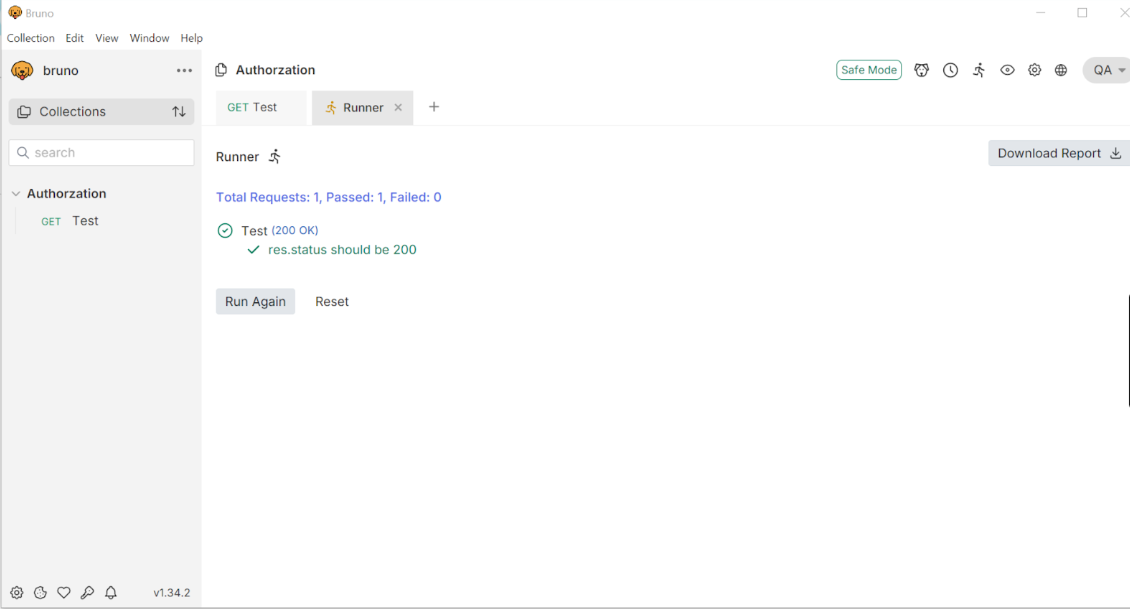
Step 12: Run Collection Tests (Optional)
- For testing multiple endpoints in a sequence, run the entire collection. This helps with integration testing or verifying multiple API workflows.
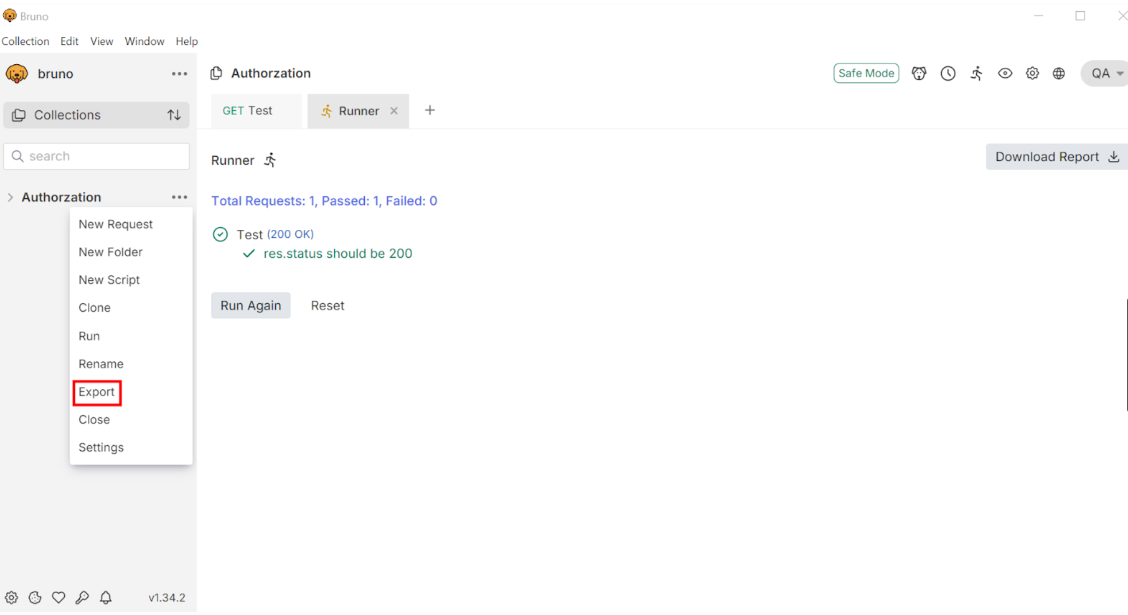
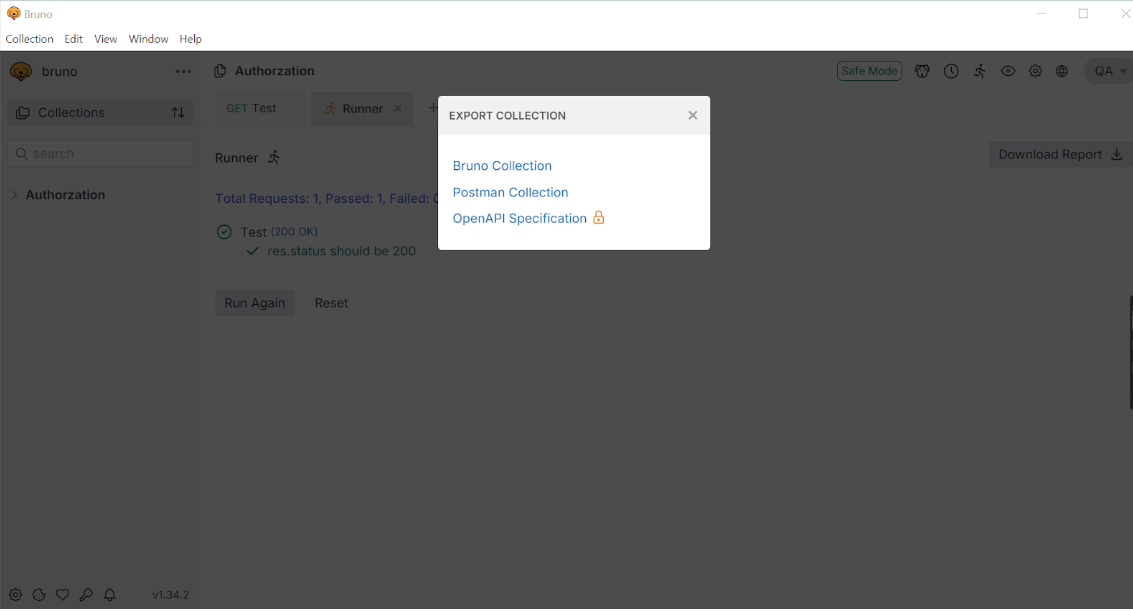
Step 13: Export and Share Collections
- Export collections or share them with team members. This is useful for collaborative testing and documentation.
Step 14: Review Logs and Debugging
- Check Bruno’s logs for detailed information about each request. This helps debug issues or refine requests if the API isn’t behaving as expected.
Conclusion
In conclusion, learning API testing with Bruno can make testing easier. If you understand the basics and start using Bruno, it can change your testing approach. Bruno has a simple design and several features that set it apart from other tools. Whether you are new or experienced, Bruno makes API testing easy to use. You can see how Bruno works well with CI/CD pipelines and different API requests. Boost your testing with Bruno, the tool that simplifies your API testing tasks.
Frequently Asked Questions
-
What Makes Bruno Different from Other API Testing Tools?
Bruno operates completely offline. This is different from cloud-based options. By doing this, it keeps your data safe without using outside servers. You can import files from Postman and Insomnia. However, Bruno does not support cloud syncing. This is why it is a secure choice for projects that need extra protection.
-
How Do I Migrate My Existing Postman Tests to Bruno?
Bruno helps you move your data easily. You can import collections from Postman and Insomnia right away. Just go to the Import Collection feature and select your Postman or Insomnia file. Bruno handles the API request scripts to make the process smooth.
-
Can Bruno Be Integrated with CI/CD Pipelines?
Bruno is great at CI/CD workflows. You can use its command-line interface easily. Just type the bru run command in your pipeline scripts. This will help you start testing and include complete API testing in your automated tasks.
-
What Types of API Requests Can Bruno Handle?
Bruno supports several types of API requests. These are GET, POST, PUT, DELETE, PATCH, and more. This flexibility makes Bruno useful for testing RESTful APIs, GraphQL, and other types of API structures.
-
Where Can I Find More Resources on Using Bruno for API Testing?
For more information, tutorials, and community help, visit the official Bruno documentation on their website. You can also check out the Bruno repository on GitHub. These resources provide useful insights and tips to get the best from Bruno.
The post Comprehensive Bruno Tutorial for API Testing appeared first on Codoid.
Source: Read More


